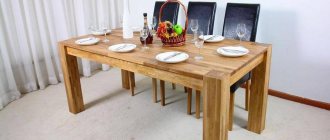
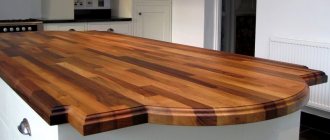
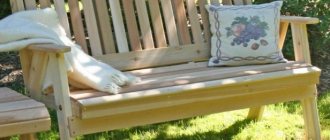
Wood has always been considered one of the best materials in construction. Our ancestors have always used it and it still occupies a leading position among environmentally friendly materials. However, high-quality and dry wood may not always be available. In addition, it has a number of negative characteristics, such as susceptibility to rotting, instability to moisture and biological influence. For those who love this natural material, there is a good alternative - decorative wood plaster.
Plastering has always been considered the simplest finishing option. But decorative plaster with an imitation of a wooden surface is original and will save money. What are its features and how to do all the work correctly with your own hands?
Types and applications
Plaster that imitates wood differs in application technique, composition, texture, color range, etc. The material can be structural and textured.
Structural plaster allows you to create an aesthetic pattern with delicate tints of color. Ceramic or synthetic granules, crushed stone and rolled stone chips, shell particles, natural and synthetic fibers, and metal dust are used as modeling ingredients.
Structural components play the role of reinforcing elements in the composition, because give the mass greater strength, relief, and durability. The applied plaster creates the effect of expanding the space.
Based on the type of binder base, structural putty is divided into the following subtypes:
- mineral
- cement or lime;
- silicate
— based on liquid glass;
- acrylic
— with the addition of latex;
- silicone
- with polymers in the composition.
Structural plaster is used for interior or facade decoration. The advantages of the material include the ability to correct defects on the surface, undemanding quality of the base, good thermal insulation characteristics, and ease of application. Using the mixture you can create relief and texture. When using a type of plaster, it is important to take into account the large weight of the finishing material (up to 4.5 kg per 1 m²).
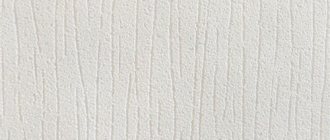
Textured plaster has a coarse structure.
The following are used as fillers:
- mica;
- cotton fibers;
- small stones or stone chips;
- linen;
- granite or marble granules;
- wood.
Textured plaster is used for interior and facade decoration and can be applied to surfaces made of different materials (in addition to plasterboard). The advantage of the composition is its dense application to the base, the ability to correct unevenness and defects on the walls. The finishing mixture is used at a temperature not lower than +7°C. Work is carried out only in dry weather, because... at high humidity, the applied composition will be damaged by mold.
This type of wood plaster is characterized by strength, wear resistance, durability, resistance to temperature changes, mechanical damage, mold, and mildew. The textured construction mixture is affordable and can be used for finishing in rooms with high levels of air humidity.
However, it is necessary to take into account the step-by-step technology of applying the composition. You can add colors to the mixture or apply paint to the putty after completing the work. The type of finishing is optimal for decorating rooms in rustic, classic, country, etc. styles.
Imitation of wood using polymer clay
The texture of the clay resembles plasticine in appearance. Thanks to the variety of shades and reasonable price, it is gaining popularity as a universal finishing material. Sold in small rectangular pieces. The advantage of the method is the ability to obtain the desired structure without the use of coloring compounds.
Sequencing
The order of working with clay is as follows:
- First you need to take several types of material and cut the same piece from each.
- Each piece is kneaded and a sausage is formed from it.
- Next, the sausages are divided into several slices and mixed together.
- Several different pieces (4-5 pieces) are connected together and balls of a uniform shade are obtained.
- The balls are rolled into thin slices and placed in a pack.
- The edges of the resulting stack are cut off and cut into two parts.
- The two halves are placed on top of each other and rolled. This procedure must be done several times.
- The resulting layer is cut into strips 3 mm thick and connected to each other.
- The strips are laid out with the cuts facing up and rolled out until the required imitation is obtained.
What's so good about this finish?
The advantages of decorative plaster material are as follows:
- low cost compared to wood finishing;
- durability;
- wear resistance;
- resistance to high air humidity;
- no shrinkage;
- resistance to temperature changes;
- fire resistance;
- wide range of shades;
- various application methods;
- possibility of restoration of damaged areas;
- environmental friendliness of the composition;
- ease of application;
- resistance to sunlight and precipitation;
- versatility of use for exterior and interior decoration.
Advice from the experts
Beginners are not always able to create a professional and attractive decorative layer of plaster. The reasons are reluctance to follow manufacturers' recommendations, take into account the unique properties of a particular composition, impatience and carelessness.
The following expert tips will help you avoid basic mistakes:
- Proper storage of material. If you place the plaster in a cold, damp place, it will quickly deteriorate. The frozen mixture is very difficult to apply.
- During storage, avoid drafts and high temperatures. The plaster will lose its ductility and strength.
- Use only high-quality tools and clean containers, rollers, and brushes. Otherwise, foreign particles will get into the general composition and become fixed on the surface.
- Strict adherence to the manufacturer's instructions. Be sure to observe proportions when diluting, drying time, and additional nuances of use. A competent approach will affect the quality of processing and extend the service life of the finished surface.
- Before applying the plaster layer, you should do several test paints. This will determine the accuracy of the shade, application conditions and drying time.
- After finishing the work, the new plaster layer can be washed with various detergents and plain water.
AdviceIf a high-quality mixture was purchased, then cleaning will not harm the layer in any way.
- Use colors from the same manufacturer as the plaster. There is a possibility of damaging the base material with dangerous dyes.
Decorative plaster is a modern and beautiful material that exists in several varieties. It is difficult to apply, but patience and a competent approach will turn the work into an exciting process. Taking recommendations and advice into account will affect the quality, strength, durability and attractiveness of the final result.
Main and auxiliary tools
The main tools for applying the mixture are:
- trowel;
- construction mixer;
- spatulas of different shapes and sizes;
- masking tape;
- rubber rollers;
- brushes of different shapes;
- building level;
- mixing containers;
- rulers;
- perforator;
- sponge;
- a ladle for transferring the solution to the panel;
- rule;
- ironer;
- clean cloth.
To imitate various wooden bases, you will additionally need a choice of spatulas with a serrated edge, a rubber stamp, a stiff brush, a decorative roller for wood, a silicone stamp to imitate wooden boards, a fluted brush, a palette knife, etc.
The list of tools may vary depending on the design solution, type of base, wall panel materials, and technology for applying the composition.
How to make decorative plaster “like wood” with your own hands
The technology for applying decorative plaster is actually simple. In order to ensure a long service life of the surface with protection, the construction process must be done at a temperature of plus thirty, humidity should be no more than 80%.
Before applying the plaster mixture, the surface must be carefully treated with primer. It will improve adhesion and reduce the absorption methods of the initial method mixture. The primer should be applied only with wide brushes; decorative wood-look plaster is applied only after the initial layer has dried, after about 3 hours.
Applying decorative plaster at home:
- The solution is mixed with a certain amount of water, which is prescribed in the instructions, the mixture is well kneaded to a suitable consistency;
- The lubricant is applied in a thin layer;
- The layer is leveled with smooth floats so that the thickness of the plaster layer is 4 millimeters.
Any person who has started a home renovation can use plaster for a wood-look façade, provided, of course, that he is willing to try and do quality work. Such a construction process will not cost a large sum; sometimes it is easier to study and practice individually in order to learn how to create comfort in an apartment, make it look luxurious and surprise your family.
Materials used and preparation for application
For work you will need a primer, plaster selected in accordance with the interior design, a painting composition, etc. To strengthen unstable foundations, a metal reinforcing mesh is required. The coating can be secured with a transparent or translucent varnish. When creating the effect of an aged surface, craquelure varnish may be required.
Before applying the plaster mixture, the base should be prepared for high-quality and durable adhesion of the finishing mixture to the surface. You will need to clean old wallpaper, dyes, varnish and remove fasteners. Hard-to-reach areas are cleaned with a spatula. Cracks, holes and crevices are filled with a primer; after drying, the surface must be vacuumed. The walls are primed in 2 layers. It is optimal to use a deep penetration primer. Each layer is thoroughly dried before applying the next.
Textured mixture
Making a textured surface is more difficult, since you will have to skillfully use the tool. Compensation for this is the original and beautiful drawings, which in some cases are even better than the bark beetle. To apply the textured mixture, a perfectly prepared surface is required. Then the facade decor will look harmonious.
To summarize, we can draw certain conclusions. For example, structural plaster is easy to apply even for a beginner, however, it has too fine a relief. The textured mixture is more difficult to apply and requires practice, but the surface has a deep relief and it looks beautiful.
As for the plaster mixture itself, the following options are used for the work: cement-sand, cement-limestone, based on gypsum, acrylic or silicone. Creating a bark effect is best achieved by using ready-made plaster mixtures with a coarse-grained fraction. If you are a beginner worker, then it is better to buy acrylic or silicone mixtures. They are more flexible than their analogues, so forming a pattern is much easier. And they dry faster.
Technology and application methods
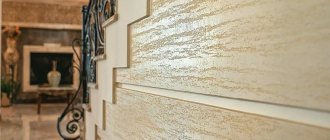
Decorative plaster “wood” includes solid components, with the help of which, after rubbing the finishing layer, grooves are formed, similar to tree cuts. The packaging indicates the shade, application method and final result.
The following coatings can be made using plaster:
- tree bark effect;
- “bark beetle” effect;
- cross cuts;
- laying boards;
- wooden panel, etc.
The techniques for applying plaster using a stamp, a stiff brush, a shaped spatula, a silicone matrix, etc. differ.
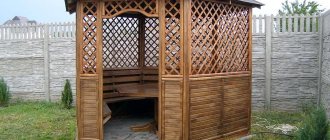
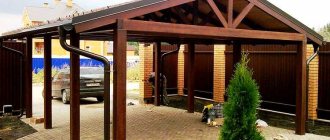
Bark of tree
Imitation of the surface of tree bark is used for finishing loggias, gazebos, building facades, and fences. This material is durable, easy and quick to apply. The dry finishing mixture will need to be diluted with water, the mixture is applied to the prepared base using a trowel, the layer should be even, up to 2-3 mm thick.
Then, with a roller dipped in water, a relief pattern is made under the tree bark. After the surface has dried for 20-30 minutes, the plaster is moistened with a spray bottle and the protrusions are smoothed out. The work is carried out with a spatula, imitation bark cracks are left between the smooth areas. After smoothing, wipe the surface with a damp cloth. It will take 24 hours for the treated surface to dry. Then small defects are removed with a spatula.
Finally, a finishing layer of wax or non-woven glue mixed with acrylic varnish is applied in a ratio of 1:0.5. You can add color to the adhesive mixture. The finishing compound is applied with a trowel, the surface is smoothed, imperfections are removed with a damp sponge and the surface is smoothed with a trowel again. To create contrasting transitions, you can apply a little dye of a different shade using a sponge.
Application of the die
An imitation of a wood surface can be created by applying plaster with a rubberized stamp.
The work is performed in the following sequence:
- A layer of building mixture 2-2.5 mm thick is applied to the wall.
- Then the stamp is passed over the applied material, making vertical and horizontal movements. The tool must be easily rocked from one edge to another to create a natural wood pattern.
- After drying, the panel is sanded with fine-grained sandpaper.
- The plastered surface is painted and covered with a layer of wax or clear varnish.
Application of the brush
Finishing with plaster using a stiff brush allows you to create a textured pattern. The tool is drawn along the main direction of the lines imitating wood. Movements should be light, and any remaining plaster mortar should be regularly removed from the bristles. The dried coating is slightly adjusted with a spatula to eliminate protrusions and irregularities. Finally, the surface can be treated with wax or translucent varnish.
Using a shaped spatula
A shaped spatula with a serrated blade allows you to imitate a cut on wood. First, a base layer of plaster is applied, then a spatula is passed over the dried material with sinuous movements, turning the working tool. You can emphasize the engraving on the surface by applying special wax or translucent varnish. To age the surface, special varnishing materials can be used.
How to make a wood-look spatula with your own hands
To treat small areas with a spatula, you can use devices made of plastic or other improvised means.
To make a tool from a lid, you will need to draw the contours of a spatula on the plastic and cut out 3 parts with a construction knife or sharp scissors:
- wide
, on which large notches are formed using a stationery knife;
- average
with small teeth;
- narrow
, the working edge of which is left smooth.
Using a sharp knife, you can make notches on ready-made plastic spatulas.
Application of silicone matrix
Manufacturers offer special silicone matrices for reproducing the texture of wood using the imprint technique. Using a matrix tape and a roller, you can imitate boards; short versions are used to imprint bark. The finishing is used to decorate facades, loggias, living rooms, and hallways in office premises.
The work is carried out in compliance with the following stages:
- After applying the plaster, a matrix tape moistened with water is applied to the surface.
- The strip is pressed with a roller to obtain a high-quality print.
- Using a wooden stick and other tools, grooves are created along the tape that imitate joints between wooden boards.
- Then the matrix is carefully removed and the steps are repeated in other areas.
- The seams between the imitation boards are smoothed with a narrow, hard brush dipped in water.
- After drying, the coating is treated with fine-grained sheets of sandpaper.
Making wooden panels
Plaster can be used to create wooden panels. The interior element allows you to diversify monochrome interiors. Thanks to volumetric plaster, it is possible to sculpt patterns based on the finishing material. Using the mixture, you can reproduce landscapes, complex geometric and floral patterns on panels.
The image on the panel is durable, resistant to temperature changes and mechanical damage. Using the material, you can create original design solutions and correct surface unevenness. The panels are performed indoors, because the composition is not used for facade finishing.
The typesetting panel is created using masking tape 0.5 cm wide. Before finishing, the wall is outlined and tapes are glued to the surface. Then the solution is applied to the surface in a layer of up to 0.5 cm.
Areas with imitation boards are given the necessary wooden texture using a brush, stamp or shaped spatula. After the layer of plaster has dried, the tape is removed, the edges of the panel are trimmed and smoothed using a semi-dry brush.
Performing the “bark beetle” effect
Decorative wood plaster can be created with a “bark beetle” effect. A structural composition is applied to the surface with a trowel. The coating is dried and floated to create a bark beetle pattern. Uneven protrusions need to be smoothed with a trowel or spatula. After the finish has dried, the surface is cleaned with sheets of sandpaper.
Bark beetle plaster is used for interior and exterior decoration. However, the material is not used for surface restoration. The advantage of this coating is the low weight of the mixture due to the mineral chips in the composition. The type of plaster is environmentally friendly and durable. Manufacturers offer finishing options in different colors.
Necessary tools (trowel, brushes, trowel, rubber rollers)
Plastering the surface is carried out in three stages:
- Leveling the wall.
- Applying a decorative layer.
- Creating a drawing.
Each process requires its own set of tools.
Surface preparation:
- containers for preparing cement mortar;
- hammer drill with mixer attachment;
- bucket for pouring mortar;
- rule for leveling the rough layer;
- a small spatula to remove residual mortar;
- trowel for finishing leveling.
Applying plaster:
- container for preparing decorative composition;
- construction mixer and hammer drill with attachment;
- wide spatula;
- smoothing iron;
- plastering and grouting trowel.
Creating patterns:
- plastic grater to create a “bark beetle” effect;
- rubber rollers with a pattern;
- ready-made stamps for imprinting a design.
Attention
The list of tools can be modified in accordance with the technology for laying a particular type of plaster.
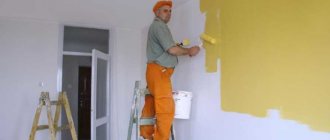
Coloring
To emphasize the imitation of wood texture, the applied plaster composition is coated with a translucent paint and varnish.
The dye is prepared according to the following recipe:
- a little primer is poured into the container;
- A water-based color is added to the composition (several shades can be combined);
- a standard white water-based dye is introduced into the mass;
- add powdered wallpaper glue.
The solution is thoroughly mixed after incorporating each component. Painting is done with a wide brush, the remaining composition is removed with a rubber spatula.
To enhance the emphasis of the wood grain and obtain a more saturated tone, experts recommend applying another 2-3 layers of dye of different shades.
For subsequent layers, use a mixture of color and water-based paint without glue or primer. To give wood-imitation plaster a light glossy shine, a pearlescent composition is added to the mixture. Each layer of dye is dried. Excess composition is removed with a rubber spatula.
Technology for modeling wood texture on plaster
Before modeling the texture of wood on plaster, you need to wait half an hour until the surface of the mixture dries. You need to prepare your tools in advance, maybe a spatula, to display the pattern of natural wood on the relief.
After the plaster has dried, you need to apply the solution to the matrix in the ratio specified in the requirements for the mixture, and distribute the lubricant evenly over the surface of the wall. Carefully roll over the layer with a rubber roller to imprint the wood pattern. From time to time the matrix needs to be changed sides, this is done in order to create a realistic look of the wood pattern, thus the pattern does not repeat itself, but changes the structure.
After the façade plaster has dried, sharp edges are removed using paper. You need to thoroughly clean the surface from any imperfections and dust; this action is done before impregnating the colored solution, which will add volume to the pattern on the wall. The colored solution is applied only after three days, after all the plaster has dried. The mixture must be applied with a brush; painting occurs in a double layer with a break of a day between applications.
Wood surface imitation technique
They work by mentally dividing the surface into small sections: the solution hardens quickly, and so that it does not have time to set, the wall is treated in parts.
- The finished plaster is applied using a metal spatula or trowel, and the thickness of the layer is evened out with it.
- Brush over a smooth surface with a clothes brush; the bristles will leave tiny grooves imitating wood fibers. Movements should be light, do not put pressure on the brush. The direction of the grooves can be strictly vertical or with slight bends. During the process, the solution will stick to the bristles; you need to wash it off with water, otherwise the stuck mass will leave large damage the next time it comes into contact with the wall.
- Next, using a wide plastic spatula, give the surface the structure of wood: move the tools from top to bottom, leaving smooth wavy lines. Using a small spatula without notches, placing it at a slight angle to the wall, draw knots in a circular motion. When the relief is created, lightly smooth the surface with a wide metal spatula without pressure and move on to the next section.
- After the entire wall is covered with plaster, leave it until completely dry. Then it is rubbed with sandpaper to remove excess solution and smooth out roughness.
The video below shows the entire process.
Important nuances
Decorative plaster will be able to compete in durability with natural wood and even last longer; it will perfectly cope with aesthetic functions, saving time and money.
Well-protected plastered surfaces indoors with an optimal microclimate are able to maintain their attractive appearance and good performance characteristics for as long as possible. By treating the canvas with a special varnish, or treating the surfaces with other high-quality materials, you can be sure that the original decor will last for decades. Considering the low cost of finishing materials, you can update the interior and experiment much more often than once every decade.
The Remonstr online store offers a large assortment of paints and plaster with a “wood look” effect from reliable and trusted manufacturers: • VGT fine-textured paint; • DALI Veniziano plaster; • textured plaster DALI.
To work with the canvas at different stages, you can use washable paints from manufacturers VGT, Tikkurila, Alpina, Tex, Prestige. The approximate price for 1m2 is about 150 rubles. The managers of the Remonstr online store are always happy to help you in choosing materials, as well as make calculations and advise on other issues of interest.
Spatulas
You may find a variety of spatulas useful: from the simplest and smallest to the largest and most sophisticated, for example, try rubber spatulas. Spatulas can be of different hardness and design. It’s difficult to say what exactly will be useful to you, since it all depends on personal convenience and the desired effect. To create a wooden effect, so-called Japanese spatulas are well suited.