The reliability and durability of the entire building depends on the quality of the foundation. Construction of a house on screw piles can be carried out on unstable soils, in a flooded area, on a site with difficult terrain, in seismically active areas.
This technology is one of the most cost-effective. It is quite easy to install screw piles with your own hands. From this article you can glean information on how to properly install screw piles so that the building will serve for many years without repair.
What are screw piles
Screw piles are made in the form of a metal pipe with a tip and screw blades at the bottom. Can be used on difficult soils. They are not suitable for installation on stony and rocky soils, as they will not be able to penetrate a very hard layer when drilling.
The lifespan of a house depends on the correct installation of piles
The dimensions of the supports depend on the mass of the raw materials from which the house will be built and the load-bearing load of building materials, people and objects in the house.
In addition, the calculation takes into account the average mass of the snow layer that may be on the roof in winter.
The service life of the entire building will depend on the correct installation of the pile-screw foundation.
Screwing screw piles is beyond the power of one person; auxiliary workers will be needed to complete the work.
Which ones are best suited for private construction?
The choice of a specific brand and size of trunks is, first of all, made based on the type and characteristics of the soil.
After determining the most suitable variety (single or multi-bladed, length, tip type), the trunk diameter is selected. The calculation is made based on the bearing capacity of the support.
For private houses, trunks of relatively small diameter are usually used:
- VS-57.
- VS-76.
- VS-89.
- VS-108.
Large diameters require significant effort when immersing, so they are practically not used for private housing construction.
Where to begin
To determine the type of soil, it is necessary to remove the soil from deep layers.
Before deciding to build a house on stilts, you need to study the condition of the soil and determine the level of groundwater. Such information can be obtained from geodetic, construction organizations or from neighbors who are or have carried out construction.
To independently determine which soil layers lie beneath the construction site, test drilling is carried out. In several places on the site, wells are dug, 1.5 m deeper than the length of the pile. Particles of soil present inside the well remain on the drill blades.
If a flooded area is detected, you need to position the piles for the screw foundation so as to bypass it.
Scope of application
The main provisions and requirements for the design and conditions of use of pile foundations are regulated by SP 24.13330.2011 and SP 50–102–2003. In accordance with these regulatory documents, foundations are designed based on engineering surveys. The main areas of application (the basis for the arrangement) are considered to be the presence of soils on the building site with weak bearing capacity. Such soils include:
- Loams.
- Peat bogs.
- Sandstone.
- Quicksands.
- Heaving, vegetative, loess-like soils.
- Other types of soil with unstable or weak structural connections.
The following factors are also considered the basis for the use of pile foundations:
- High level of hepatitis B.
- Swampy area.
- Seasonal flooding of the area during floods.
- Seismic activity in the development region.
- Significant difference in height between the surface of the site.
In addition, the foundation for a building on stilts is organized in cases where the construction of other types of foundations is irrational from an economic point of view. For example, a large volume of excavation work for the construction of a monolithic or slab foundation.
Another area of application for pile foundations is the construction of prefabricated buildings, since the speed of their arrangement allows maintaining a high pace of construction.
Obstacles to installation
Large stones in the soil mean that the place is not suitable for driving piles.
Installation of pile-screw foundations is carried out using a hydraulic apparatus or manually.
Do-it-yourself installation of screw piles is done by screwing in the support like a self-tapping screw.
Obstacles to installing a pile-screw foundation may include:
- the presence of large cobblestones (more than 5 cm in diameter) or debris in the soil;
- occurrence of concrete structures from old buildings in the ground;
- the root system of trees will significantly complicate the screwing of piles;
Manual installation technology involves using a long lever to screw in screw piles. If there is a building, fence, pole or tree close to the installation site of the foundation supports, the lever cannot be rotated 360 degrees. This will serve as an obstacle to constructing a foundation on screw piles.
Types of pile foundations
The classification of pile foundations includes many positions.
They differ in the following characteristics:
- Method of action (hanging and pile-racks).
- Barrel type (monolithic and shell)
- Material (wooden, metal, reinforced concrete)
- Immersion method (driving, bored or screw).
NOTE!
In private housing construction, the most common are bored and pile-screw options, which allow working in densely built-up areas without causing damage to surrounding buildings.
Determining the length of the pile
On stable soils, it is enough to screw in the piles to a length of 2.5 m.
The length of the supports used to construct a screw foundation will depend on the soil, the depth of its freezing and the level of the grillage.
If there is stable soil on the site, it will be enough to install supports 2.5 m long. On complex terrain with differences in height, structural elements of various lengths will be needed, depending on the height of the terrain.
On unstable soil, the support should be of such length that it reaches stable, compact soil. Its location is determined by test drilling.
You need to screw in the screw structure to the depth where sand and clay lie. Stable soil will ensure that the load-bearing element is firmly anchored in the soil. The presence of a dense fraction is determined by the particles remaining on the blades.
After this, the depth of the formation is measured. Lower a pebble into the well on a rope until it touches the bottom. Make a mark on the string, lift it and measure the length.
In seismically active areas, the length of the well must be at least 4 m. Supports are purchased half a meter longer than the design ones. It is better to cut off the excess later than during the drilling process it turns out that the length of the pile is not enough.
Support design
The support of the designated type is a steel pipe, one part of which is equipped with a spiral blade and a sharp tip. This design allows the installation process to dispense with the use of special equipment to drive the pile into the ground.
Structural elements
The screw support consists of the following elements:
The barrel is a steel profile with a round cross-section.- The tip is the lower part of the pile body, which, due to its pointed shape, more easily overcomes soil resistance.
- The blade is a spiral fragment, the configuration of which is determined at the design stage.
Thanks to the presence of a screw fragment, the metal rod is screwed into the ground. At the same time, the soil is further compacted, increasing the bearing capacity of the soil. In the future, the spiral blades will interfere with the forces that push the support outward.
What are the differences between homemade products and factory ones?
The manufacturing process of screw piles is regulated by regulatory documents . In particular, GOST 8732 specifies the requirements for the quality of steel for such supports.
Factory-built products that meet the standards vary in size, configuration, and performance characteristics.
Homemade piles may not have the necessary strength and reliability, so during installation the blades may become deformed or come off.
Pipes made of insufficiently strong steel do not provide the required load-bearing capacity, and a weak waterproofing coating will inevitably lead to premature destruction of the metal by corrosion processes.
Choosing the right diameter
The diameters of piles produced in production and their purposes are indicated in the table:
| № | Diameter | Purpose |
| 1 | 5.7 cm | Suitable for installing chain-link fences. |
| 2 | 7.6 cm | They are used as supports for concrete fences, small utility buildings, and country houses. |
| 3 | 8.9 cm | Suitable for the construction of one-story houses. One such pile can withstand a load of 3 to 5 tons. |
| 4 | 10,8 | They are used in the construction of two-story houses made of light building materials. A support of this diameter can withstand a load of 5 to 7 tons. |
Recommendations from the pros!
Accessories for a bath Do-it-yourself gazebo Concrete fence Do-it-yourself potbelly stove Do-it-yourself veranda Screw foundation Do-it-yourself country toilet Decorative brick Stone fence Pouring a foundation How to make a fence Wicket from corrugated sheets Do-it-yourself fireplace Brick fence Do-it-yourself flower beds Forged gates Do-it-yourself porch Pool for a bathhouse Chicken coop do it yourself DIY staircase Metal gates Installation of lining Installation of polycarbonate Pump for a summer house Arrangement of a garage Fences for flower beds Do-it-yourself blind area Steam room in a bathhouse Railings for stairs Do-it-yourself cellar Painting walls Press with your own hands Grilles on windows Rolling gates Do-it-yourself barn Alarm system for a summer residence Benches for a summer residence Fence posts Floor screed Solid fuel boilers DIY greenhouse Fence installation House insulation Attic insulation Foundation insulation
Calculation of the mass of the house
Calculate the total weight of all construction and finishing materials that will be used during construction. The estimated maximum weight of furniture, household items, and people who will be in the house are taken into account. Calculate the mass of the bathtub or pool, taking into account that the tank will be filled with water.
Take into account the load of the snow layer that may lie on the roof in winter. This indicator is calculated on the map depending on the region:
Calculation of the number of piles
The number of supports that will be needed for the foundation will depend on the project and the load-bearing load of the house.
Regulatory requirements:
| № | Material of construction and other factors | Distance between supports |
| 1 | Frame and wooden houses | No more than 3 m |
| 2 | House made of foam blocks, gas blocks and other lightweight materials | No more than 2 m |
When carrying out construction in a climate zone with strong winds, the distance between supports is reduced to 2.5 m.
The number of piles is calculated by the formula: add up all possible loads, and divide the resulting value by the load-bearing load of one pile.
Video description
How to prepare concrete and how to pour piles under the foundation with your own hands is shown in the video:
After the concrete hardens, caps are welded onto the piles - metal platforms on which the grillage will be attached. There are two ways to do this.
- Weld triangular gussets to the end of the pipe on four sides, and secure the pads to them by welding.
- Make heads from scraps of pipe of larger diameter, put them on the ends of the piles and weld them in a circle.
Overhead heads with a platform drilled for fasteners Source svai-kirov.ru
Rules for placing piles
Piles are placed in the corners of the future structure and in the center of the supporting structures
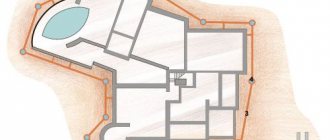
. Before installing the piles, you need to mark their location on the site. To do this, they initially draw on paper a plan for the placement of supports, guided by the design documentation.
The house plan is divided into rectangles, and the size of each plot is calculated. A pile is placed at each corner of the rectangle and in the center of all supporting structures.
After the location of the supports in areas with the maximum load-bearing load has been determined, the remaining distance between the elements is divided into equal segments. Depending on the estimated number of supports, they are evenly distributed around the perimeter. For more information about the layout, watch this video:
If the project provides for columns or a fireplace, there must be a support under them.
Video description
The following video shows in detail the screw manufacturing process:
The finished blade is welded to the end of the pile, trying to ensure that the plane of the screw is perpendicular to the trunk. Apply a suture on both sides, without gaps. The strength of the entire structure depends on its reliability.
Final processing
After completing the welding work, remove scale from the seams and grind them thoroughly. Then the entire product is cleaned of rust, degreased and an anti-corrosion coating is applied. This can be a high-quality metal primer or ship paint. They should be applied in at least two layers, allowing each to dry before applying the next.
Paint will protect metal products from corrosion Source i.ytimg.com
Do-it-yourself pile installation
To drive the piles, you will need several pairs of working hands.
In small areas, installing a pile foundation using special equipment is unprofitable; it is much more profitable to drive the piles with your own hands.
To do this, you will need a device consisting of a piece of pipe. It should be slightly larger in diameter than the cross-section of the screwed-in support. This pipe must have holes for connecting to the screw structure with bolts and two eyes for installing levers.
You can screw in one support yourself within an hour, depending on the type of soil in the area. You can twist load-bearing elements up to 400 cm in length using the strength of several assistants. Two people will screw in the screw structure, and one should ensure that the vertical plane is maintained using a magnetic level. For detailed instructions, watch this video:
Tools
You will need devices for tightening screw piles:
- thick-walled pipes with a diameter of 5 cm and a length of 250 cm will be used as levers;
- tape measure, magnetic level;
- shovel, crowbar, sledgehammer, hammer;
- chalk or marker;
- wooden pegs or reinforcement rods;
- grinder for cutting piles to height after completion of foundation installation.
Installation technology
Monitor the vertical level of the pile after each turn.
To learn how to install screw piles, you need to study the installation technology. The work is carried out using a twisting device made by hand.
The question often arises of how to tighten screw piles with your own hands so that they do not deviate from the vertical level.
To do this, you yourself need to strictly control the actions of your assistants and the compliance of the screwed-in element with the vertical plane after each 360-degree turn.
After preparing and marking the area, the supports are treated with anti-corrosion compounds. According to the technology, screw piles are first installed in the corners.
Rules for installing piles:
- A drill is used to make a hole for mounting screw piles, smaller in width than the diameter of the support. The depth should be 30% of the pile size.
- A device is made for screwing screw piles. You need to place a metal element in the prepared hole. A crowbar is installed on the screw piles, inserting it into the technological hole from above. Pipes are placed on the edges of the crowbar, allowing the length of the lever to be extended to 2.5 m. The longer the lever, the easier it will be to screw the support into the soil.
- Two people take the levers and tighten the piles by hand. The third holds it in a vertical position and controls after each rotation that the support is immersed strictly at the vertical level.
- If the structure cannot be screwed in and loosens the soil, it is loaded. To do this, either two people hang on the levers, or one sits on top. When the screwed-in element rests against a solid object and it is impossible to move it further, leave it as is, and cut off the excess length.
- The upper parts are cut horizontally using a laser, bubble level or rangefinder. The technology for installing screw piles involves shortening the length by 100 mm. In some cases, the supports for a screw foundation are shortened by a greater distance.
- To impart strength and protect against destruction under the influence of moisture, hollow structures are filled with concrete.
- If necessary, a wooden or concrete grillage is built, which serves to uniformly transfer the load from the house to the piles.
When building a house on a pile-screw foundation, you must strictly adhere to the technology of installing screw piles.
Grillage strapping
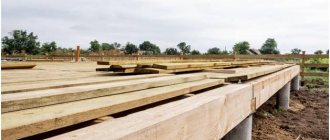
A grillage is a strapping belt that connects individual supports into a single system. It is needed to bear the weight of walls or other structural elements of the house and distribute the load evenly across the entire pile field.
There are different methods for installing a grillage, depending on the material of manufacture.:
Wood
A wooden beam with a minimum thickness of 150:150 mm is used. As an option, you can use packs of boards 50 mm thick and 200 mm wide, connected into a single package measuring 150: 200 mm. High-quality dry lumber of grade 1 or 2 is used.
The surface of the wood is coated with an antiseptic and fire-retardant composition (currently there is an impregnation that performs both functions). The connection of the beams is made halfway across the tree and only above the head of the pile.
Joints located in the span are not allowed. A double layer of roofing material (waterproofing) is laid between the metal and wood in all places. The installation is carried out so that the pile is located exactly along the longitudinal axis of the beam.
Metal
Various types of rolled metal are used:
- Channel.
- I-beam
- Rectangular pipe.
When using a channel, no heads are needed, although their presence is required for a pipe or I-beam. For the channel, special embedded parts are used, installed in the pipe when pouring concrete.
It becomes possible to do without waterproofing between the heads and the trim, but between the metal and the wall it is used in any case . The parts are connected by welding with mandatory reinforcement with bolts.
With increased strength of the metal grillage, a large metal structural element appears that requires maintenance - periodic painting with protective compounds.
Reinforced concrete
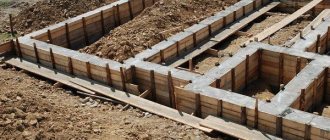
This is the most labor-intensive and time-consuming option for creating a grillage, but also the most durable and reliable, not subject to corrosion or rotting. To create it, it is necessary to make formwork installed on top of the heads.
A reinforcement cage is placed inside, after which they begin pouring concrete.
The inside of the formwork is covered with a layer of roofing felt or polyethylene to prevent moisture leaks. Sometimes the grillage is poured below the level of the caps, welding the reinforcement cage directly to the trunks. Most often this is done at a sufficient height at ground level.
In such cases, horizontal trimming is carried out after the concrete has hardened (28 days), and the filling of the trunks is carried out after trimming.
