Assembling a door frame is a responsible task, the quality of which determines the strength of the entire structure and the maximum load that the doors can withstand. Many people wonder: how to assemble a door frame: do-it-yourself assembly and installation, is it possible without experience and without contacting specialists. The answer is simple: yes, it is possible if you consistently apply the tips and steps to properly assemble and install the box.
Initially, it may mistakenly seem that assembling the box is a fairly simple task, but this is a mistaken opinion. Of course, some errors in calculations when assembling the box can be hidden with platbands, but this will have a detrimental effect on the service life of the entire structure. It should be remembered that the slightest miscalculations, small gaps and cracks can negatively affect the service life of the entire structure, while correcting the error after all the work has been completed is no longer acceptable and you will have to re-dismantle it and purchase new materials. Before you begin installing the box, you should study all the steps in detail and follow the advice of experts. With this article, installing the box yourself will become easier and better.
Preparatory stage
In order for the assembly of the door frame of the wall to be carried out with high quality, it is necessary to carry out all the preparatory work correctly. This stage includes taking correct and complete measurements, choosing the type of door, taking into account the characteristics of the room (kitchen, bathroom or bedroom). Also, you should think in advance about the required type of box; it can be a U-shaped box (without a threshold) or a closed rectangle (with a threshold). In this article we will look at the most common type and installation option for a swing door frame. A sliding door will require a radically different design, the same applies to installing an accordion door, which may not require a frame at all.
Measuring the opening
Measuring the doorway to install the frame and door may initially seem standard and easy. But even in this matter, it should be clearly understood that the installation of the door frame of the opening will be problem-free, provided that all measurements are taken correctly. Before you start measuring, you should know that measurements of all quantities (depth, height, width) are carried out at several points. This is due to the fact that perfectly symmetrical and even doorways are extremely rare; differences can reach several centimeters. For correct measurements, you should adhere to the following rules:
- The opening height is measured at three points, the smallest value being taken as the basis;
- The opening width must be measured at 3-4 points, recording the smallest value;
- The depth of the opening should be measured at six points (three on each side), recording the largest value.
Of course, all measurements should be made only after the old door frame has been dismantled and the opening has been completely cleaned. You should approach the issue of measuring the opening responsibly, because it may be difficult to install the door frame in the future. All elements of the box will fit each other perfectly only if the correct measurements are taken.
Choosing the right box size
Before you figure out how to assemble the door frame, you should write down all the measurements of the opening. With this data, you can already contact construction stores to purchase a box. Of course, before ordering the frame itself, you should already know what type of door will be installed: classic swing, sliding compartment or accordion. For a swing door you will need a reinforced classic frame, which should be selected precisely according to the recorded measurements of the opening. Now manufacturers of door frames for swing doors use several standard sizes, the main differences are in the width of the wood (the height and width of the opening is adjusted by cutting) and in the type of material (wood, PVC or MDF). Also, if there is a workshop in the city, you can order a frame with the exact dimensions of the opening - this will greatly facilitate the process of preparing for direct installation, because you will not have to adjust the height and length of the frame to fit the door leaf of the structure and the dimensions of the wall, as well as cut the joints.
How to change the canvas?
Often during repairs, only replacement of the door leaf is required. The procedure is much simpler than installing an interior door from scratch.
- The old fabric is removed from the hinges. Awnings usually consist of two detachable halves. To remove the interior sash, it is enough to pry it open from below with a pry bar. If the axial rod is inserted from above in the hinges, the canvas will not be removed. First, a screwdriver is inserted under the head of the rod, then it is knocked out of the socket with hammer blows. Dismantling begins from the bottom loop. After removing the rods, the sash can be easily removed.
- Two canvases are compared in size, laid on top of each other. If the new fold is larger than the old one, mark the boundaries with a pencil. Excess sections are cut off with a hand-held circular saw. The cuts are adjusted with a plane and processed with a grinder.
- The door leaf, adjusted to size, is equipped with hinges, a lock, and a handle.
- Hanging on the hinges occurs in the reverse order.
If the new canvas has been adjusted, the cut points need to be masked. The paint material is selected to be similar in color or the entire canvas is completely repainted.
Door frame assembly
To install the door frame, you will need to initially assemble it correctly. Having all the necessary tools and material for the box, you should start with the correct drawing and marks for cutting. In advance, you will need to not only cut and assemble the entire structure of the box, but also accurately mark and calculate the locations for the hinges. Door hinges can be either mortise (you need to make indentations with a chisel) or overhead. To calculate and install the hinges, it is necessary to measure 20 cm from the top and bottom of the side where the door will be attached. It is necessary to carefully select the stand for mounting the hinges, keeping in mind the side of the door opening.
Assembling an MDF or wood box involves several types, depending on the presence of a threshold, the angle of the joints (45 or 90) and the availability of ready-made tenons for more practical assembly.
90 degree angle
You can easily assemble a door frame with your own hands, step by step instructions, using assembly at an angle of 90 degrees. It becomes obvious that this type of box assembly involves cutting the racks separately to suit the height and width of the opening. This assembly option is extremely easy for a beginner to do with his own hands, because all cutting is carried out without the use of a miter box and does not require special skills. It is important to remember that even with the elementary assembly of a 90-degree frame, you should not rush; it is better to double-check the calculations and pencil marks on the posts several times before starting cutting, be sure to remember the 3 mm gap between the frame and the door. After the racks have been cut, they should be joined into a single structure. Self-tapping screws tighten the entire box, forming a box ready for installation. For this type of assembly, it will be quite enough to use two self-tapping screws at each mounting point of the racks. It should be noted that before screwing in the screws (you should step back 1 cm from the edges), you should carefully drill holes in the intended places so that the screws go in smoothly and without deviations. In general, it is the assembly of the door frame at 90 degrees that is the simplest, but its main drawback is the final appearance, which may not appeal to everyone. If everything is done correctly, installing the door leaf will be as simple as possible, just by hanging it on the hinges.
At an angle of 45 degrees
Considering all the methods for assembling the door frame of interior doors, the most popular is assembly at an angle of 45 degrees. This assembly of the box is a little more complicated compared to the 90-degree option: here you will have to use a miter box to adjust all the joints at an angle of 45 degrees. Assembling the box at 45 degree angles is the most common, because it creates the best appearance of the box, while at the same time being a strong option for assembling the structure. The difference from the 90-degree assembly is that the two upper corners and two lower ones (if the assembly is a rectangular box) are filed at 45 degrees, all elements are clearly connected with self-tapping screws. When calculating and drawing cutting lines, you should definitely remember about the gap between the frame and the door leaf - it should be equal to 1 cm. Assembling the frame at 45 degrees also differs in that the screws will tighten the frame not in a straight line, but at an angle.
Tenon assembly
There is another device for the door frame of an interior door, which involves assembly according to the tongue-and-groove principle. It will be extremely difficult for an inexperienced craftsman to create a reliable and correctly sized tenon fastening from the bars. Therefore, this method of assembling a box is suitable for experienced craftsmen or those who have received a ready-made box with a tongue-and-groove fastening to order. Thanks to the complex fastening, this type of tenon door frame assembly is the most durable and reliable.
Assembling a box with a threshold
Those who have planned a wall doorway with a threshold need to immediately assemble a rectangular solid box. It differs from the U-shaped one in that the bottom will also have to be adjusted and tightened with self-tapping screws. With modern renovations, most people are gradually abandoning boxes with thresholds, but they cannot be avoided when installing a door in a bathroom or toilet.
Errors that prevent you from performing high-quality fastening
There are errors that lead to poor fastening. Take them into account and try not to do:
- You cannot attach the block only to polyurethane foam because it is unreliable. Foam is an elastic substance and cannot prevent bending;
- foam itself can be a problem. This may cause bending. Everything is very simple - if it lies unevenly somewhere, this provides a bend.
Even professional installers often attach blocks to three points, and not to five, as we advise. This is bad because then the entire lower part of the jamb will be loose, which is why the fasteners bend. So listen to us and don't make mistakes.
Double doors often lack fastenings between the hinges. This is a mistake that should not be made. Be sure to add another fastener between the loops.
The flexible plate must be fixed to two walls. If it is attached only on one side, nothing good will come of it. There is no reliability with such a door. Not only will the jamb bend, it can also turn like a screw.
Removing the old interior door frame
Direct work on replacing the door frame and door begins with dismantling work. There are two ways to dismantle a door frame - dismantling while preserving the integrity of the old frame (for example, if it is needed for installation in a country house) and without preservation. In general, the process of dismantling one box, with the correct distribution of forces and skills, will take no more than half an hour.
No saving
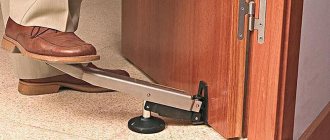
The easiest option for dismantling the old box is the option without saving it. In this case, you do not need to carefully pull out all the nails; you just need to make a few cuts in the box and use an ax and hammer to break the load-bearing side parts. Of course, dismantling will begin with the platbands; in order to remove them carefully and quickly, you will need to carefully drive an ax between the platband and the frame using a hammer. The resulting doorway should be cleaned and it will be completely ready for installation. The main thing to remember is that when dismantling the box without saving it, you should not use too much effort, because you can damage the brick and plaster, which will increase the installation time for a new one.
Saving
sometimes it is necessary to very carefully dismantle the old box while maintaining its structure. This may be due to the need to further use the finished frame and door in other openings, or to the presence of a fragile wall (old brick and plaster can crumble during hard dismantling). The dismantling and preservation option, of course, requires much more effort. You will also need to carefully remove the platbands using an ax and hammer. Then, you should study the method of installing the old door frame: it can be attached with nails directly to the wall or through bars (often found in old houses where there were too large gaps). Using a nail puller, you should pick up and remove all the nails (and sometimes these can be anchors, screws), and then just carefully remove the box. In general, dismantling with preservation is a rather delicate job that can be done either with your own hands or by contacting specialists.
Bottom line
High-quality materials and tools allow you to ensure the reliability of the door frame for many years. Do-it-yourself installation is a completely feasible undertaking if you strictly follow the rules.
Did you manage to solve your problem using the recommendations from the article?
Yes!
46.79%
No. More answers required. I'll ask in the comments now.
37.43%
Partially. There are still questions. I'll write in the comments now.
15.78%
Voted: 716
Door frame installation
Before proceeding with the actual installation of the box, you will need to check the correctness of the assembled box. To do this, you will need to check the correct geometry of the assembled box; the diagonals must be the same. The surface of the opening must also be smooth, all irregularities must be eliminated. Only then can you begin installing the interior door frame with your own hands, according to the chosen method.
Step-by-step instructions for installing an interior door frame with your own hands
Depending on the chosen installation option, there is a ready-made procedure for installing the box. First, the box is placed against the opening, then wooden wedges are used to secure it (or mounting plates). Secondly, using a level, the evenness of the installed box is checked and, if necessary, correction is made. Then the box is fixed to the wall using anchor bolts, self-tapping screws or a special mounting kit with plates. The hole between the wall and the frame will only need to be filled with mounting foam on the open parts and decorated with platbands. That's all there is to it, after which all that remains is to hang the door, which should already have holes for the hinges and door lock. Interior doors are installed in exactly this order, but it is necessary to examine in more detail some installation options using self-tapping screws and mounting plates.
Fastening the box with mounting plates
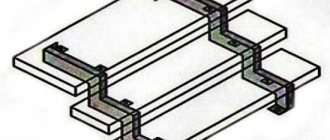
A fairly simple method of fastening a door frame is used using a special fastening kit. This option for installing the box can be done even without the use of polyurethane foam: it is enough to correctly install the box in a level and securely fasten it to special plates. Before installing the box in the opening, special plates are installed, which must initially be attached to the wall. In most cases, these mounting plates will require small new holes in the wall to which the plate is attached. The holes themselves with the plates can then be easily hidden using putty and finishing material. In general, this method requires certain skills, but at the same time it is the most modern.
Fastening with self-tapping screws and dowels
A more classic option for fastening the box is to use anchors or self-tapping screws with dowels. The procedure for this installation is as follows: the box is applied to the opening and fixed (bars or wedges will help). Then, through holes are drilled in the box, into which dowels are driven and a self-tapping screw or anchor screw is screwed. These holes, for aesthetics, should be made in several places; some can be hidden where the hinges and one self-tapping screw will be attached to the recess where the door lock tongue will go. These holes are enough for the box to fit into the opening as firmly as possible and be as reliable as possible. This method is notable for the fact that now there is no need to repaint or hide the box fastenings themselves with plugs, because they will be hidden under the fittings. To complete this installation and give greater strength, the hole between the box and the wall should be sealed with polyurethane foam by hand. At the final stage, you will need to install the trim and the finished door leaf of the structure.
Using direct hangers
Suspensions used for plasterboard and suspended ceilings are suitable for installation. The suspension plates are attached to the box, after which the structure is inserted into the opening. Using plumb lines and a level, the location of the door relative to the vertical and horizontal is adjusted. Next, the plates are fixed, the gaps between the wall and the box are foamed with polyurethane foam.
This method is suitable for doors of light weight and in the absence of fine finishing of the walls.
Features of installing a box with a threshold
There is a significant difference between installing framed interior doors for bathrooms: here frames must be installed together with thresholds. This type of box is different in that errors made during assembly cannot be eliminated during installation, so before installing the box with the threshold, be sure to check that the diagonal dimensions match. The installation of this box follows the same principle and procedure as described above. The only clarification: you will have to fix the threshold. It is on the threshold of the box that there will be constant pressure both from the box and from the residents of the house. It can be secured to the floor using self-tapping screws and dowels, and the attachment point can be hidden using a plug.
Why jambs bend: all the reasons
You know that door frames are made of wood. And, as you know, wood perfectly absorbs moisture. Of course, the outside of the jambs is varnished. And this, in theory, should protect the material from water. But the fact is that the varnish perfectly allows moisture to pass through.
The result is the following diagram. By absorbing moisture, the tree increases in size. And when it gives it away, its size decreases. The process is natural - but unpleasant.
Since wood has a non-uniform structure, it both increases and decreases non-uniformly. As a result, the jambs bend.
This is the main, only and main cause of the problem. How to solve it? Yes Easy! The jambs should be properly secured. Then they will remain in their place in any case, even when exposed to external factors.
Expert advice
- It is important to know that the main load of the frame comes from the side of the hinges, where the massive door is attached. That is why the planks, threshold, and other parts of the frame do not need to be drilled and secured with anchor screws; just three fastening points are enough: two under the hinges and one under the door tongue.
- Immediately after installing the box, you should check its strength and stability; it must stand firmly on the mounting plates or screws. In this case, the mounting foam will provide not so much durability as noise and waterproofing of the room; it will definitely not be able to eliminate the backlash of the box after installation.
- Any defects from the aesthetic side can always be eliminated with the help of platbands, flexible thresholds or applying additional paint to the box. When installing and assembling, the most important thing is durability and precision, while chips and scratches can be easily repaired.
- When installing a box in a concrete wall or brick, you will need a hammer drill or impact drill; a conventional drill will not be able to achieve the proper result when installing the box on screws or plates.
- In new buildings, it is recommended to use special kits for installing door frames. They consist of several metal plates and screws with dowels that are ideal for flush mounting and simple, lightweight installation.
- At the stage of cutting the box before assembly, it is recommended to use a hacksaw for metal, because it will protect against scratches and misfires, compared to a hacksaw for wood.
- When miscalculating, if the box turns out to be much smaller than the size of the opening, you should use a wooden extension.
- For greater adhesion of the polyurethane foam, it is recommended to wet the wall a little before applying it.
- We should not forget about small gaps in the size of the frame and door in the lower part, up to 1 cm. This is necessary so that the ventilation between rooms and spaces functions well, special attention to the kitchen.
Did you like the article?
Tell your friends: 5
shares
Required Tools
For self-installation you will need a certain set of tools:
- screwdriver;
- hammer;
- nail puller;
- nails (including furniture nails);
- milling cutter;
- slats;
- chisel;
- level;
- bars;
- polyurethane foam.
In each individual case, this set may change. It all depends on the type of door, size and purpose. For example, to install frames under sliding door systems, only foam is now used.
Adjusting hidden hinges when installing invisible doors
So, the hardest part: installation, preparation and painting is over. It's time to hang the canvas in the door frame. Hidden hinges allow you to adjust the perfect gaps.
Follow, step by step, the instructions in the image, carefully studying each diagram. Difficulties may arise only on the first door, then, having understood the essence, you can quickly adjust each door.
Scheme of step-by-step adjustment of a hidden door after its installation
Additional equipment
In addition to the standard configuration, there are a lot of additional options on how to improve the functional qualities of the product. These additions include:
- hidden threshold. A unique development of a door threshold that is mounted in the door leaf and is activated only when the door is closed, completely protecting you from drafts. Relevant for children's rooms, when babies like to crawl or play on the floor;
- hidden hinges with a closer. A handy feature when you like your doors closed, or for rooms where it makes sense to close the door behind you;
- lock mechanism with hidden handle. If you really decide to make invisible doors as invisible as possible. Not very familiar in everyday use, but definitely an interesting design solution;
- concealed mounting stopper. A real find when you need to prevent the door handle from hitting a nearby wall;
- electric deadbolt lock. Obviously not for home use, but for offices, hotel-type premises - a convenient addition to the standard package;
- mounting grid. Be sure to use it when finishing installation gaps. Without it, there will be trouble - the finish will crack at the joints of the wall and the door frame. It is supplied as an additional set, only because the installers do not do the finishing work, this is done by your craftsmen. Check with them if they have this mesh or if it is better for you to order it along with the doors.
For clarity, study and decide for yourself one or another additional function.
Additional equipment options for installing hidden doors