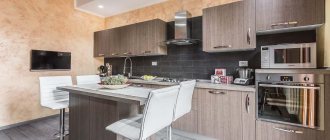
An apron or protective screen is an incredibly useful device. It is no secret that soot, steam, temperature changes, and condensation quickly destroy finishing materials and significantly limit their choice. A glass, plastic, or ceramic panel near the stove and worktops prevents damage to materials and prolongs their life.
Installation of a kitchen apron is often done independently. This is quite a difficult but doable job.
Decorate with foil
We are not talking about food foil, but about self-adhesive one: this is a cheap way to transform the kitchen without knocking down the tiles. The adhesive layer is already applied to the back of the film, so there is no need to purchase additional materials.
The work is easy to do yourself according to the instructions on the package. Typically, the foil is made of aluminum, has a relief pattern, is easy to clean and can withstand temperatures up to 250 degrees.
The manufacturer guarantees excellent wear resistance of the material, so it recommends using foil over the stove and sink.
What you need for self-installation
An apron is an integral part of the kitchen interior. This element can make the design of the room more stylish and practical, but it can also radically change it for the worse.
It is important to treat this part of the wall with maximum attention. How the apron will fit into the interior depends not only on its style and color scheme, but also on the quality of installation.
When installing an apron in the kitchen with your own hands, prepare in advance for this creative and responsible process. Choose a material that suits the color and style, make markings, acquire the necessary tools and study the installation process.
Before proceeding with the points listed above, prepare the wall on which you will install the apron. Its appearance will largely depend on this.
Preparing the wall for installation:
- Remove old trim from the wall. Old tiles, wallpaper and plastic panels under the new finishing material will worsen its appearance and reduce its service life.
- Apply a special primer to the surface. It will increase the quality of adhesion to the wall of subsequent layers. If there was mold and mildew on the old finish, use antifungal compounds.
- If necessary, apply a new layer of plaster composition . The condition for high-quality fastening to the wall of some types of material is a flat base surface.
Only after the surface preparation work has been completed can the apron itself be installed directly. Otherwise, the repairs will soon have to start again.
Advice ! It is better to install the apron before the main wall finishing is completed. This will reduce material costs and provide a neater appearance to the interior.
Preparing tools for work
Installing a kitchen apron is impossible without special tools. The list of required items may vary depending on the material chosen and the method of its installation.
| Apron type | Installation method | Materials and tools |
| Sheet plastic | Liquid glue | Glue, for example, “liquid nails”. |
| Self-tapping screws | Decorative plugs, screws, screwdriver, drill. | |
| MDF | Lathing | Wooden slats, at least 2 cm thick, decorative self-adhesive tape, a protective agent for processing slats, a screwdriver, drill, jigsaw or hacksaw. |
| Glue | Decorative self-adhesive tape, liquid nails. | |
| Self-tapping screws | Self-tapping screws with butterfly dowels, decorative plinth, decorative plugs (optional), screwdriver, drill, jigsaw or hacksaw. . | |
| Plastic panels | Lathing | L-profile made of metal or wooden slats, screwdriver, drill, decorative plinth. |
| Self-tapping screws | Self-tapping screws or staples, decorative plugs, screwdriver, drill, decorative plinth. | |
| Glue | Liquid nails, decorative plinth. | |
| Tiles and mosaics | Installation with special glue | Tile cutting tool, tile adhesive, grout, notched trowel, smooth trowel for tile adhesive, rubber grout trowel, glue mixer (optional). |
| Glass | Self-tapping screws | Self-tapping screws with elastic dowels and decorative plugs, screwdriver, hammer drill. |
| Decorative rock | Special glue | Special glue (tiles are suitable), a protective composition for processing the finished apron. Mixer for mixing glue, notched spatula, smooth spatula, grinder. |
Advice ! When choosing a method and material for installing an apron, adequately assess your strengths. If this is your first time doing repair work yourself, choose simpler options. Otherwise, you may not only fail to complete the job, but also ruin expensive material.
We are developing a plan for installing the future apron
Before attaching the kitchen apron to the wall, you need to draw up an installation plan and make markings. To do this, a kitchen interior design is prepared in advance, taking into account the size and installation location of the set.
The marking is carried out taking into account the parameters of the kitchen unit. It is usually done both on the project and on the wall.
What is included in the marking of a kitchen apron:
- The height at which the apron will be located. This size is determined by the height of the working surface. On average it is 85 cm.
- The height of the apron itself. The value of this parameter will be equal to the height of the gap between the work surface and the kitchen cabinets. Standard - 55-65 cm.
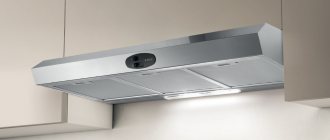
- Distance from the working surface to the hood . Whether you need this size depends on whether you will be installing a backsplash over the stove. This is mandatory in cases where the hob is built into the kitchen unit. According to standards, the gap between the countertop and the hood is 75 cm. Often, the part of the finishing under the hood is higher than the rest of the apron.
- Marking for sockets. The location of kitchen appliances is taken into account here.
Important ! All marking lines must be perfectly straight. To make drawing these lines easier, use painter's thread.
Decorate with stickers
If the ceramic apron is in good condition, you can diversify its appearance using special stickers tailored to the size of the product. Stickers should be applied to grease-free tiles, removing the film from the back side and smoothing out air bubbles.
The work requires accuracy and patience. Look for labels that state on the packaging that the product is intended for use on tile, metal and exterior surfaces - these are the most resistant to temperature changes and moisture.
It is optimal if the image on the stickers is slightly dim: too bright prints look cheap and immediately give away a fake.
How to properly install a plastic screen
Its installation is possible in two ways: with glue and with lathing. In the first case, the walls must be perfectly smooth, in the second, their condition is much less important. However, in the first case, the appearance of fungi or mold is excluded, and in the second, this possibility remains, since free space is maintained between the screen and the wall.
Installation with glue takes from 20 to 60 minutes.
- Measure the size of the future apron and cut the panels to size. If the material includes a pattern or image, this should be taken into account.
- Mounting adhesive is applied to the inside of the panel - preferably in strips at a distance of 15 cm from each other
- We press the plastic against the wall and secure it with heavy spacers. After the glue has dried, remove the spacers.
Installation on the sheathing is somewhat more complicated and takes more time.
- To begin with, a wooden beam 20–30 mm wide or a metal profile is fixed around the perimeter of the future screen. The second is preferable. Holes for fasteners are drilled, and the material itself is secured with self-tapping screws.
- If the dimensions of the apron are large enough, then intermediate apron elements are installed - either in the center or at a distance of 30–40 cm from each other.
- Mark places for sockets on the apron, switches, roof rails and other things. In such areas additional transverse bars are fixed.
- Plastic panels are cut to size and mounted on the sheathing. They are fastened with self-tapping screws and a press washer. Start from the bottom or from the corner that first catches your eye.
- The seams between the sheets can be masked with strips matched to the color of the product or a contrasting shade.
Restore single copies
If one or more tiles have fallen off, and all the others are holding up well, it is not necessary to make a full-fledged repair. It is optimal if you have saved spare parts - updating the apron will not be difficult.
But even if there are no tiles left, you can pick up contrasting products of the same size in a hardware store - one package will not break your pocket, and stylish “patches” will enliven and decorate the interior. Creative individuals can use mirrors, as well as purchased or homemade mosaics.
To dismantle the element, drill holes in it and carefully break it with a hammer and chisel. To restore the apron, you need to thoroughly clean the surface where the tiles were attached. Then apply adhesive and glue the product.
Preparatory stage
Attaching the apron necessarily includes preparatory work. Their nature is to some extent determined by the method of fixation. However, the general recommendations are the same for any type of installation.
- The walls are cleaned of old coating , deep cracks and potholes are sealed with plaster. The surface is well leveled. If installation is planned with glue, then the walls are also covered with putty.
- Treat the surface with a primer. The nature of the latter is also determined by the type of work. When installed on the sheathing, the walls are treated with an antiseptic primer to prevent the appearance of mold. If the material needs to be attached to the wall, the surface is primed with a composition corresponding to the type of facing material.
- Installation of sockets is carried out after installing the apron. However, the area for the device must be properly prepared, and holes for sockets and switches must be made in the finishing material. The number of outlets in the kitchen is determined by the amount of equipment.
Metal sheet
If you want a high-tech kitchen, then this is your decision. There are shades of brass and stainless steel on sale. Oil stains are visible on the metal apron. It is more convenient to carry out installation by two people.
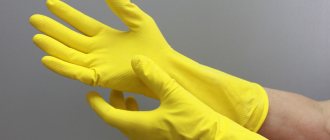
The edges of the panel are sharp and can cause injury, so wear gloves.
Preparation of panels - layout, cutting
Circumstances do not always allow you to attach the entire apron to its rightful place - this may be due to insufficient space prepared for the height of the canvas. In other cases, in order to save money, potential consumers assemble a new coating from fragments of previous ones, or purchased on favorable terms.
The bottom line is that you have to cut it. You can do it with one knife, but the smoothest result will be using an angle grinder, better known as an “grinder.” The most sophisticated option is to contact specialists who practice laser cutting.
What to glue
Today there are two types of tile adhesive on the market - paste and dry. Those who have no experience in installing tiles should purchase the first adhesive option. This composition for gluing tiles can be used immediately.
But you can also purchase a dry tile product, which is cheaper. In this case, you will have to make the solution yourself. The dry mixture is diluted with water in accordance with the manufacturer's recommendations. As a result, you should get a mixture that is not too thick, but not liquid either. To check if you have prepared the glue correctly, take a piece of the solution and squeeze it in your hand. The resulting lump should not spread or crumble.
Hail the size of tennis balls fell in the US
Delicious potatoes for the Lenten menu: four cooking options
17 years ago Ruslana won Eurovision. How she lives today
Glue the tiles
The process of attaching tiles to walls is not complicated at all. The adhesive can be applied either to the wall or simply to the back of the tile. For beginners, the first method may be more convenient. In this case, the glue can be applied in strips, focusing on the markings. This will make it much easier to align the tiles in the rows.
When gluing tiles, be sure to use plastic crosses. Their use will allow you to make the most accurate seams. The crosses have the same thickness. Consequently, the gaps between the tiles will be the same.
You can also stick tiles one above the other. But it is better to arrange the tiles in a checkerboard pattern. This way you can create a more reliable and durable coating.
Paint
Latex, oil and alkyd enamels are suitable for you. When working, follow the technology. The surface must be cleaned and degreased with a solvent. Then go over with sandpaper. Then apply primer. Take a pause between operations. It is recommended to paint with a roller in two layers. For added durability, coat everything with varnish. If the previous apron pattern is bright, then more layers will be needed. With a flat wall without sagging seams, the work can be completed in a weekend. Neutral colors will not irritate the eye and are cheaper.
Strictly follow the paint manufacturer's specifications to prevent peeling.
Cover with stickers
The film has an affordable price and various pictures. Show your imagination! The result depends on accuracy. The sticker format can be adjusted to suit any apron option. This could be ceramic tiles or PVC panels.
It is difficult to glue the film evenly, without blisters. In addition, high-quality printing differs from the original. Therefore, avoid bright colors. Photo printing allows you to develop your own kitchen design.
When working, use a rubber spatula. It does not allow air to pass through and prevents the formation of bubbles.
Related article: How to turn a closet into a cozy dressing room [6 fresh ideas]
Purpose
First of all, it is worth identifying the goal.
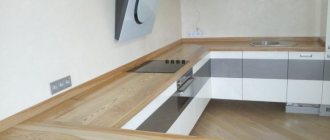
What is a kitchen apron? This is the space between the dining area and the hanging cabinets.
We can say that the apron is the face of the kitchen. Therefore, its color must be combined with the rest of the kitchen design.
It is also necessary to fulfill a number of conditions that the selected finishing material must meet:
- high practicality , especially with regard to the ability to clean the apron from dirt;
- resistance to high temperatures;
- moisture resistance;
- resistance to various chemicals such as detergents;
- long service life.
Since the apron is located in the kitchen work area, you need to provide as many items from the list as possible. By choosing MDF material as a kitchen apron, you will additionally protect the walls from: water, soot, grease and other external irritants. Panels for bathroom furniture also meet all these requirements.
Schedule
Painting the backsplash white and adding decor is a great idea! You will need a primer and alkyd enamel. Choose a drawing from a culinary theme. Contemporary art will serve as inspiration.
Cover the decor with glass, otherwise there will be problems with cleaning. In addition, the painting fades from sunlight.
Production and replacement of apron and table
The company operates in the production of custom kitchens. We can complete work of any difficulty perfectly and in the shortest possible time, so you can completely rely on us.
Workers replace tables and aprons that will last for many years. During this period of time, you can improve your own skills and look at the new catalog of finished products.
It is more difficult for a non-professional to choose the right tool, material, and accessories. You also need to know the features of the material and how to work with it. If something is done incorrectly, then such a mistake will cost a pretty penny and, as a result, replacing the countertop will result in a decent amount.
The company will take into account any desire of the client, will accept edits and correct the drawn blanks in a situation of need in a short period of time. We can change the table or apron most accurately and instantly. You should definitely be convinced of our professionalism and integrity. All that remains is to call the written telephone number and then at the same moment each person will receive a discount.
Return to list