Hi all! Quite often in apartments and houses you can find niches in different rooms. They are found in the bathroom, often along with sewer pipes, in the kitchen and hallway, less often in the living room and bedroom. And if you make shelves in a niche, this will maximize its practicality.
Agree that simply covering an existing niche, or leaving it without shelves, storing all things only on the lower edge, is an extremely irrational way to use this interior element.
Yes, a niche is a kind of recess in the wall. Therefore, the shelves will be built-in and not protrude beyond the walls of the toilet, bathroom, living room or other room.
The only question is how to make a shelf and what material to choose from.
How to make shelves in a niche with your own hands: choosing material and technology
Hi all! Quite often in apartments and houses you can find niches in different rooms. They are found in the bathroom, often along with sewer pipes, in the kitchen and hallway, less often in the living room and bedroom. And if you make shelves in a niche, this will maximize its practicality.
Agree that simply covering an existing niche, or leaving it without shelves, storing all things only on the lower edge, is an extremely irrational way to use this interior element.
Yes, a niche is a kind of recess in the wall. Therefore, the shelves will be built-in and not protrude beyond the walls of the toilet, bathroom, living room or other room.
The only question is how to make a shelf and what material to choose from.
Materials used
First, let's talk about what kind of shelves there are.
There are actually several options:
Mainly used are plasterboard shelves, as well as wooden and glass structures.
You can make them yourself, buy them from the manufacturer, or take them to order if you need something very original and individual. For example, you want to install a dozen shelves in a narrow niche.
The nuances of creating furniture
If you want to make furniture with your own hands from available materials, then first of all you need to clean the surfaces from dirt, sand them to eliminate unevenness, and treat them with special compounds that prevent rotting or rust.
Be sure to use varnish and other products that will extend the life of your homemade furniture.
Before starting work, make a drawing of the item being manufactured, and apply the appropriate markings on the parts.
Before planning furniture, build a work plan and make a sketch.
To increase the strength of furniture at the joints of parts, in addition to the main fasteners, you can use appropriate glue.
Important! Furniture made with your own hands from scrap materials at home is not suitable for every interior.
A bed made of pallets is cheap and non-standard.
In a lush and elegant bedroom in the Baroque style, a bed made of wooden pallets would look completely out of place.
Furniture made from pallets is a good option for furnishing an apartment.
Below we will look at the step-by-step process of creating some furniture with your own hands.
Mounting methods
Having decided what the shelf will be made of and paying attention to the material of the niche itself, you can begin installation.
The question now is this. How to secure the shelf better? There are several options here. Each of them is quite easy to implement with your own hands.
The mounting itself in a niche is usually done using:
Now I will try to briefly talk about how to install shelves in a niche in one way or another.
Glue or liquid nails
Perhaps the easiest option to implement is installing shelves in niches.
Here you will need to do the following:
This method is suitable for the lightest shelves made of thin plywood, plasterboard and even glass. You just can’t put anything heavy on them.
Load the shelf below at least 5-7 hours after installation.
This is necessary so that the glue has time to fully set.
Dowel-nails
This installation method is suitable for shelves made of thin wood, chipboard and MDF.
Again, they withstand a small load, but demonstrate greater endurance than glue.
Here you will need to do the following:
The shelf can have hidden hooks for invisible installation, or regular ears. It depends on which option you chose when purchasing.
Expansion dowel
Perfect for massive shelves made of wood and MDF. Withstands increased load.
This method will require purchasing several drop-down butterfly fasteners.
Here the technology is not complicated:
Depending on what type of fastening the shelf itself is used, you may need to first tighten the screw and hang the shelf on its head. Either a shelf is first applied, and a fastening element is screwed through its hole for fixation.
Shelf supports and brackets
Exquisite metal brackets are suitable for massive wooden shelves for wine or books, for example.
And if we talk about pelican shelf holders, then this is the best choice for glass shelves.
The principle of working with them is almost the same. First, the holders themselves are mounted in the niche in the form of a bracket or shelf holder. Dowels with self-tapping screws are used here. The shelf is then attached to the holders themselves.
Pelican gently presses the glass on both sides in special holes where gaskets are provided so that the glass does not crack. It's even easier with brackets.
The only question is whether it makes any sense to use beautiful metal brackets or shelf holders when it comes to installation in a niche. Here it is just better to make the fastening invisible.
Just a few more words about installation in the groove. In theory, this option is also possible. To do this, a recess is made along the perimeter of the niche using a grinder, and a shelf is inserted inside it. But implementing such an idea is difficult. It must be provided for at the stage of redevelopment or the start of repairs. So many people naturally reject this idea.
What ideas can you offer? What did you think of necessary for the niche?
Write your stories and suggestions in the comments.
Source
Types of shelves
Shelves can be divided into several types depending on the purpose of their use. So, you can select shelves:
- for the corridor, which are used for storing hats and scarves;
- for the kitchen, where there can be various jars and packages of spices;
- for souvenirs;
- flower shelves;
- bookshelves;
- for the office;
- for toys;
- for personal care products, etc.
A corner shelf in the hallway will create its own atmosphere
On a note! There are also specialized shelves designed to store a specific item. For example, a shelf for a musical instrument.
The shelves can also be divided into:
- closed and open . The latter are a plane that has neither side nor back walls. Closed ones are a kind of hanging cabinets, but small in size;
- straight - the simplest shelves having a horizontal plane;
- corner – shelves that are designed for hanging in the corners of rooms;
Beautiful corner shelf
- multi-level - have not one, but several horizontal planes for arranging objects;
- racks , which can be classified as multi-level shelves. But they must have reliable, dense support;
- hanging ones , which have various belts, ropes, etc. as fasteners, can be mounted not on the wall, but on the ceiling, hanging along the wall;
- shelves with a back wall and without walls ;
- round, square, rectangular depending on the shape . Asymmetrical shelves do not have an axis of symmetry, but they can be quite functional.
You can make shelves for walls with your own hands from available materials.
In the table below we will take a closer look at the main and most popular types of shelves for walls according to the most common classification.
Table. The most common types of shelves.
| Type | Description |
| Wall mounted | These shelves can be fixed either on the wall or even rest on the floor or other furniture. They are usually very durable and can support quite a lot of weight. Often used for storing heavy, bulky items. They take up very little space. |
| Classic | These are ordinary rectangular shelves that are mounted only on the wall. They may not have a back shelf; they allow you to place objects both inside and on top. Very functional, often used to store items and create coziness at the same time. |
| Multi-tiered | These shelves have several tiers at once and look very original. They can be asymmetrical and have storage areas of various sizes. Sometimes this is quite convenient, especially if you need to create books of different parameters - large and small. Often such products fit surprisingly easily into certain interior styles and become their direct complement or even their embodiment. |
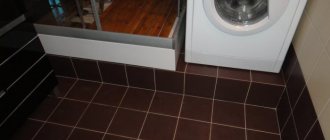
| Corner | Such shelves allow you to save a lot of space, as they occupy the remaining free corners in the room and do not interfere with anyone. They can be placed in absolutely any room, but most often they can be seen in the bathroom or kitchen. |
Making shelves on the wall with your own hands
Plasterboard niche with shelves
The longer people live in a house, the more small things accumulate. Figurines, photo frames, things. Then the redevelopment of the house begins, because children appear and relatives come. There is a need for additional shelves and cabinets. Drywall replaced metal and wood. It is very practical, long-lasting, and harmless to health.
Design and decoration of a plasterboard niche with shelves The question arises: “how to make a niche with plasterboard shelves”? It's simple, although looking at the photo it seems impossible. A niche with shelves will help:
Types of niches with plasterboard shelves
A niche with shelves can be different:
If the niche is illuminated, it uses spotlights and LED strips. Sometimes both are illuminated, creating an extraordinary range of light. When decorating a niche with shelves, various materials are used for decoration. Wallpaper or painting, wood or plastic, metal or glass.
Design options for a niche with plasterboard shelves
Nightstand
To make a nightstand, follow these steps:
- prepare a drawing;
- cut out the necessary parts;
- drill the necessary holes in the sides to install drawer guides;
- assemble the cabinet frame;
- install the rear wall;
- install drawer guides;
- insert the assembled boxes.
The bedside table is very functional and mobile, it has space for various small items, books and magazines.
Using exactly the same principle, but using larger sizes, you can make a chest of drawers with your own hands from available materials.
Features in drawings and accurate calculations
When you come up with the idea of creating a niche with shelves, you need to decide what it will be like? Where will it stand? Why is it needed? When all the answers to these questions have been received, you need to start designing, drawing and drawing. In order to design a drawing on which the entire installation will be based, it is initially better to draw a drawing with the number of shelves, the color of the light, and the installation location. To install shelves, you must take into account the interior of the room.
So, for the drawing you will need: a ruler, a pencil, a square, an eraser, a meter. Accuracy in calculations is required, because they will be transferred to the walls. All the numbers must be put on the sketch: depth, width of the shelf, height, location of the shelves in the niche. If you plan to install lighting, you should draw the wiring and the places where the lighting device is planned, as well as the location of the switch.
Diagram showing the dimensions of a niche with plasterboard shelves. In some cases, it is necessary to mark on the drawing the location of the socket in the plasterboard or the cable connectors. After completing the sketch, you should carefully check everything again, down to the smallest detail.
Creating shelves with stiffeners
After installing the base, you should begin installing the shelves. To do this, according to the width of the shelves, additional profiles are vertically attached to the wall for the strength of the structure. The profile must have stiffening ribs. These are mainly galvanized profiles, which have a thickness of 0.55-0.8 mm. Between the vertical posts, horizontal sections of the profile are inserted, connecting the verticals.
The base of the shelf is 10 cm. In order for the horizontal profiles to be reliable, corners are attached at the bottom. The recess of the shelf will be as shown in the diagram. This will be the thickness of the entire structure. Jumpers should be installed as often as possible to ensure the reliability of the structure. Let's say every 30 cm.
Scheme for creating plasterboard shelves with stiffeners. Basically, around a niche, a wall or corner needs to be sheathed with plasterboard for an impressive appearance.
Technology of covering a niche with plasterboard
Before you start covering the niche with shelves, you need to prepare the gypsum board. To do this, plasterboard sections are cut to size. You can cut gypsum board sheets either with a hacksaw or a construction knife.
The edges of the cut part should be processed (sanded), after which, using self-tapping screws, each part should be attached according to the planned plan in its place.
If you plan to backlight, you should make holes in the places of the lamps, but so that the diameter of the lamp matches the diameter of the hole.
Ideas for new furniture from old items
Look around you - there are so many different objects around you. What if you look at them outside the box and use your imagination?
You can make upholstered furniture from plastic pipes.
You can make a frame from the remains of plastic pipes, which you then cover with thick fabric - and now a new cabinet is ready. Make a metal lattice frame and attach old unnecessary computer disks to it - you have a room partition or screen.
Shelves can be made from old boxes and unnecessary boards.
But the housing of Soviet speakers, which have not worked for a long time, will make good bookshelves.
Even a desktop can be made from inexpensive pallets.
Saw the table top and legs from an old Soviet table lying on the balcony in half, cover them with furniture film, connect them with screws - have you really got a new coffee table?
Get creative when creating your coffee table.
But vegetable boxes can make an interesting and original rack. Several car tires can quickly turn into a soft pouffe or the basis of a future table; by the way, old glass from a window may well serve as a tabletop.
A table top and old drawers will make a comfortable desk with open shelves.
Plastic bottles, a computer case, cardboard, an iron barrel, doors from a kitchen unit... All you have to do is your imagination, and a little know how to use various tools.
Use natural wood to create furniture.
Finishing a plasterboard niche
First, finishing should begin to mask the fastening points. They are carefully plastered using putty.
Final plastering of the plasterboard niche After which you need to begin finishing the plasterboard joints and corners. For this, reinforced mesh is used. It is secured with glue or a thin layer of plaster. After each step taken with putty material, you should wait until it dries completely. As a result, you need to putty the entire surface of the drywall and, after drying, go over it with grout. This can be a special mesh or sandpaper - zero. It removes all the errors left during putty (small pebbles, stripes). An example of finishing a niche made of plasterboard with stone. If you plan to decorate a niche with stone or facing tiles, then special adhesives are used. Before applying the adhesive, in some cases it is necessary to use a primer. This is also used when covering drywall with wallpaper. If painting is intended, then after the putty has dried, the paint of the desired tone is diluted.
We are approaching the finish line. Attaching the front panels
Melamine edge
If you sheathed the rack with MDF or chipboard, then upon completion of the sheathing, you need to glue a special melamine edge to all ends of the parts. This can be accomplished using an ordinary iron. Place the edge on the end treated with sandpaper (fine-grained) and smooth it with a hot iron. Trim off any excess edges with a utility knife.
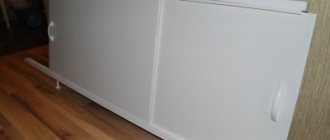
Some shelves can be closed by attaching beautiful doors to them. This type of shelving can be used every day, and its neat appearance will become a successful and original decoration for any living room.
With drawers
Shelving for home
Rack with doors
Garage rack
Unusual for toys
DIY plasterboard shelves
DIY plasterboard shelves often have an unusual appearance and can accommodate a large number of different items. Thus, even equipment can be installed on a rack with additional metal reinforcement. In order to make a structure with your own hands, you first have to decide on its shape, then purchase all the materials. Of course, such work requires certain skills, so it is better for beginners to choose the simplest shelf option or turn to specialists. Below we will tell you how to do this work yourself.
DIY plasterboard shelves
Shelf-sofa
This is an ideal DIY chipboard shelf for books and for reading while sitting or lying down. For children and adults. The depth of 42 cm can provide comfort. The shelf is installed on the floor, and a soft seat is made on top. The complex design performs two important functions at once: such furniture saves space and makes it possible to increase the area of the room.
In order to create the design, you will need:
- chipboard boards, dimensions 60 x 147 cm and 10 x 100 cm;
- the upholstery material is 2 cm longer and wider than the boards (62 x 149 cm), the thickness is selected at your discretion, for example, 4 cm;
- fleece, approx size 1m x 2m;
- fabric, approximately 1m x 2m;
- furniture stapler and paper clips;
- screws, brackets for attaching the structure to the wall;
- drill;
- plates for the rear of the rack;
- glue.
If it is not possible to buy upholstery of the required size, the first step is to cut it yourself using a sharp knife. This could be, for example, foam rubber or expanded polystyrene. It should extend 1 cm beyond each side plate. First, it is secured with glue.
Attention! Try to make sure that the material stretches evenly, but don't worry if it doesn't work out perfectly.
When it comes to upholstery fabric, the thicker it is, the better. Especially for sitting in the living room. Especially if you have many children. First, the fabric is secured with staples along the long sides, it is pre-tensioned, and then fastening is started on the short sides. After the seat is ready, manufacturing of the shelf begins. Its parts are firmly connected with screws, reinforced with corners, and for stability the structure is additionally attached to the wall.
Advantages and disadvantages of drywall
Drywall is classified as a universal material that has various purposes - ceilings, niches, and all kinds of shaped structures are made from it. This popularity is due to the following advantages:
Plasterboard construction can also be durable
Despite the large number of advantages of this material, some of its disadvantages should be highlighted:
Bed
The bed is a more complex structure compared to the table and wardrobe, but if you follow the instructions, you can also assemble it yourself. For this:
- prepare a drawing of the bed;
- Assemble a frame from durable pre-polished bars and paint it;
- make slats (cross slats) for the bed;
- fasten the bars along the inside of the frame sides;
- on the fixed bars, place the lamellas at the same distance, not exceeding 6 cm;
- attach the bed supports to the frame;
- Sand the structure with sandpaper and varnish it.
Add under-bed lighting to make your bedroom unique.
Types of plasterboard shelves
There are several main parameters by which such designs differ. Before choosing one option or another, you should familiarize yourself with them.
Table No. 1. Types of gypsum plasterboard shelves
| View | Description |
| Open | Such shelves mainly have a decorative appearance; they are placed to display various souvenirs, cups, photographs and other decorations. |
| Closed | These are already more functional shelves, so they are often made deep to accommodate many items. |
Table No. 2. Types of shelves by type of placement
| Accommodation | Description |
| In the center of the room, a large structure consisting of many shelves is most often installed. This option will best fit into the interior of the living room. | |
| Such plasterboard structures will fit perfectly into the interior of a small room. Moreover, they are not only decoration, but also perform a functional task. Quite often, a bookcase is placed in the corner. |
Position of shelves in the corner
In this case, any plasterboard structures can be designed as follows:
LED lamps are often used for lighting
Shelves made of gypsum plasterboard are:
An unusual version of plasterboard shelves
Video - Shelves made of gypsum plasterboard: original ideas
Restoration of old furniture
Restoring old furniture can give new life to a beloved item.
Upgrade old furniture to freshen up the space.
The advantages of this work include the following:
- saving money. In most cases, restoration is cheaper than purchasing new furniture;
- design improvement. The furniture industry, like other areas in our lives, is constantly evolving, so your old furniture can get a modern look;
- quality materials. As a rule, the frames of old furniture are made of higher quality materials than modern ones. Therefore, new upholstery or facade will give you a chance to use a better quality item for a long time;
- This chair and that chest of drawers are dear to you as a memory or a family heirloom. In this case, there is simply no other alternative except restoration.
Breathe new life into old things.
Not always old unnecessary things should go straight to a landfill, because they can be given a second life. But there is no need to fix everything and try to make new things out of all sorts of rubbish. For example, you shouldn’t make a kitchen set from scrap materials. The “golden” mean is important here.
Painting on furniture will become unique if you paint it yourself.
Making shelves from plasterboard
In the process of creating shelves you will need the following materials:
In addition, we will need the following tools:
If you have all the tools, you can get the job done faster
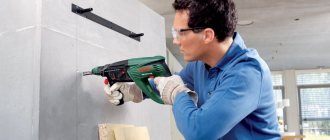
Prices for popular hammer drill models
It is worth noting that not all devices and materials may be useful, because if we plan to make a structure for heavy objects, then we will need a metal profile to create the frame. For decorative shelves, a simple rack profile with guides will be sufficient.
Important! In order to make the final finish, you will need putty, paint, a set of brushes, and rollers.
Create a project
First we need to develop a design for the finished shelf. It is recommended to do this in the following ways:
Approximate design diagram showing all shelf sizes
Important point! It is advisable to design a universal design that will be not only decoration, but also a functional element of the interior. That is why it is recommended to strengthen it.
Typically the following parameters are displayed on the drawing:
Important point! When drawing up a drawing, it is necessary to take into account the thickness of the materials used (gypsum board sheets and metal frame).
Sheets can be of different thicknesses
Regardless of the choice of one option or another, creating a diagram is an important step, thanks to which it will be possible to make a structure of an ideal shape. This way you get the opportunity to evaluate the correct placement of the shelves and avoid various problems during the installation process.
Surface preparation
Before starting installation work on the manufacture of plasterboard shelves, you will need to prepare the walls. Here, any irregularities can become an obstacle to the normal fastening of the frame, causing the structure to turn out crooked.
It is necessary to assess the condition of the surfaces. If there are all kinds of cracks, sagging, and depressions, they should be eliminated. In addition, it is better to treat the walls with several layers of primer so that they do not crumble in the future.
It is necessary to plaster the uneven areas
Important point! In some cases, preliminary floor preparation is required.
Step-by-step instruction
Frame installation
Step 1. Mark the wall. In order for the base for our shelves to be reliable, it is necessary to take the markings with special responsibility. At this stage we will use a building level, mark the location of all heights, and fasten the dowels. To mark the surface, you must use a marker or a simple pencil.
Leaving marks on the wall
Step 2. Calculate the load. Calculating the load on the shelves is not difficult - it is important to know what these shelves are supposed to be used for. For example, if a TV is installed in a niche, it is important to make it durable. For such purposes, it is better to strengthen the frame with metal jumpers.
If you plan to make a small shelf for shoes or other not very heavy objects, then a standard sheathing for drywall will be sufficient. The shelf for various postcards and souvenirs does not have to be strengthened at all.
Calculating the load is of great importance, because the durability of the plasterboard structure will depend on it
Step 3. Assembling the frame. The basis of the frame is made up of metal profiles that serve as guides. Thanks to the use of such beams, you can make a structure of any shape - for this you will need to make notches on the metal. It turns out that the more different bends there are, the more such notches will need to be left. It is recommended to use metal scissors when working. All parts of the frame are secured to each other with self-tapping screws. It is necessary to carefully tighten the fasteners to ensure a strong base.
You should check the correct location of all parts using a building level
Prices for building levels
Step 4. Attach the profiles to the wall. It’s not difficult to fix the shelf on the wall, because it already has markings that we set in advance. In any case, even at this stage you can still slightly change the location of the structure.
The frame of the shelves is fixed to vertical posts, which are first fixed to the wall
In the case of assembling built-in structures, it is necessary to secure the racks along the facade. To do this, lay a jumper according to the markings and then attach a jumper. Supports are fixed at its ends:
It is worth noting that the more you plan to load the shelf, the more dowels and screws you will need to use to secure the frame. Typically the pitch between fasteners is about 200-250 millimeters.
Installing drywall sheets
Step 1. Mark the gypsum plaster boards. Some craftsmen prefer to calculate the required amount of material at the stage of creating the project. The standard length of sheets ranges from 200 to 450 centimeters, and the width is 120-130 centimeters. Since additional changes are often made during the frame assembly process in order to mark the sheets, it is necessary to measure the frame. In this case, you will need to leave a few centimeters for gaps, because the entire base must be covered with plasterboard panels.
In order to avoid inaccuracies, it is recommended to use a cardboard template for this purpose (boxes from large household appliances will do). These parts can then be attached to the frame and some changes can be made if desired.
These patterns should be transferred to gypsum board sheets - for this we need a marker or a simple pencil
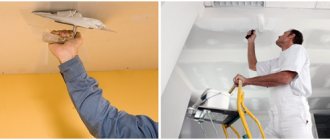
Step 3. Installation of lighting. It is at the stage of creating the frame that it is necessary to carry out wiring for the lamps. Of course, this step is not mandatory; it is only necessary if lamps are included in the project.
Holes of the appropriate diameter should be made in the plasterboard panels for spot light devices
Important point! There is an easier way to install lighting - using LED strip.
Step 4. Install the parts on the frame. It is important to be especially careful at this stage. The sheets are used either immediately after cutting, or they are additionally given different shapes. If you choose the second option, it will be necessary to carefully process the sheet with a wet roller on all sides, as a result of which it will become very plastic.
This is an example of installing gypsum board panels on a frame
After preparing all materials, it is necessary to begin installation:
We fix the sides of the structure
Shelves inside the frame
Prices for the range of drills
Here, too, it is necessary to calculate the optimal distance between the screws depending on the purpose of the shelves - it is important to remember that they should be no further than 100 millimeters from each other. However, it is recommended to take a minimal step between them.
Finishing
Prices for popular types of putty
When the entire structure is securely fastened, you can begin the finishing stage.
Step 1. Prime the surface. In order for the putty to adhere reliably to the plasterboard sheets, they should be pre-treated with a primer (a total of 2 layers will be required). It is better to apply the primer using a roller, this way you can quickly distribute it even over a large structure.
Choose a universal primer
Step 2. Apply putty. Now we have to apply the first layer of putty to the structure. It should be quite thick to hide all fasteners, joints, and irregularities. It is better to use a spatula to apply putty. The result should be a smooth surface.
It is better to take a medium-sized spatula
Step 3. Sand the surface with sandpaper. When the first layer of putty has dried thoroughly, it will need to be sanded using sandpaper - this will allow you to achieve an ideal surface.
For this work, it is recommended to purchase a special sandpaper holder
Next, you will need to putty this structure again. If desired, you can apply decorative plaster because the next step will be painting. The design of the shelves can be different, here everyone can show their imagination.