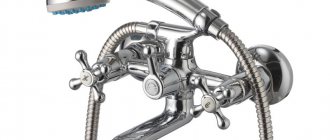
The flexible hose is an important element of the shower system, and without it, hygiene procedures would not be as comfortable. But sometimes it breaks down, which causes a lot of inconvenience and increases water consumption. In this case, it is useful to know how to repair a shower hose or replace it with a new one if the old one cannot be repaired. It would also be useful to familiarize yourself with the intricacies of choosing hoses so that you do not have to change them every year.
Shower hose
Design and necessary tools
The shower hose is the most frequently broken part of the shower; most often it begins to leak.
The design of the shower hose is a rubber tube placed in a metal sleeve. There may be no metal hose; in this case, the hose is a tube made of flexible plastic. The quality of the rubber part will determine the service life of the entire hose. The service life of a rubber tube, in turn, depends on water and is 5-15 years. Rubber tends to harden over time, the elasticity of the material decreases and this leads to the appearance of cracks and tears. These tubes are simply replaced. It is difficult to look for a replacement rubber tube for a shower, since most often replacement ready-made hoses with a metal sleeve are available for sale. And the cost of such a hose is not very high. Replacement is also carried out if the hose has a rusted metal sleeve. The aesthetics of such a faucet are generally worse, and rust can get on the enamel of plumbing fixtures, which is quite difficult to remove.
Before completely replacing the shower hose, you can try to repair it yourself, unless, of course, it is completely old.
To repair a shower if it breaks, you will need the following tools:
- adjustable wrench;
- screwdriver;
- knife.
This minimum will be a sufficient set, since it is not very difficult to troubleshoot problems with your own hands.
No. 9. Hose care and maintenance
To ensure that your shower hose serves faithfully for many years, follow a few simple rules when handling it:
- After taking a shower, place the watering can in the holder. Do not throw the hose into a bathtub or onto a tray, do not twist it around the faucet, do not twist, bend, stretch or pinch the product;
- abrasives, aggressive chemicals and hard metal brushes are not suitable for cleaning the hose - it is better to use a soft cloth, a synthetic brush and ordinary detergents;
- It is better not to allow very hot water to pass through the hose for a long time.
If you follow these rules, then even the simplest hose will last quite a long time. If handled carelessly, an expensive product will quickly break.
Types of faults and repair work
With prolonged use, the product wears out. Leaks appear and the water pressure from the watering can decreases. Hoses that have served for more than 15 years can be thrown away. Their service life has expired, so the product will quickly break again.
The shower and faucet connection is leaking
Breakage near the connection is most often observed in long hoses with metal braid. Such products are too heavy and create large loads on the mixer. To repair, you will need pliers, a screwdriver and large scissors. You may also need plumbing tape, which can be used to strengthen the joints.
It is necessary to disassemble the joint to check the lining. If it gets wrinkled, straighten it and position it so that it fits snugly against the nut. Such operations are carried out only with rubber elements. Silicone ones cannot be straightened and will need to be replaced. In cases where a part is worn out, you need to remove the old one and place a new one in its place. The torn lining will also have to be replaced.
Leaks can occur due to poorly tightened nuts. Elements can become loose or loose due to prolonged use of the shower, even with a well-done job. Try loosening the nuts. If the parts move or spin easily, use pliers or a wrench and tighten them tightly.
You should also consider the plastic bushings located at the ends of the hose. If irregularities or burrs appear on them, the tube will adhere less well to the lining. Because of this, leaks appear. You can repair the part using sandpaper
Use caution when sanding. The cracked bushing is replaced because the crack cannot be repaired.
When the shower is leaking near the showerhead
If a shower flows near the connection to the watering can when the tap is turned on, proceed according to the same algorithm. You need to check whether the nuts are tightened well, whether the gaskets are jammed, and what condition the bushing is in. If defects are found, they must be eliminated.
If such actions do not help to fix the shower hose, you should unscrew the shower head and check how tightly the rubber core fits to the bushing. If you find an area where the tube has expanded and gaps have appeared, you can use a copper wire clamp to tighten the part. Because of this, however, difficulties arise with installing the nuts. You can shorten the tube to a section with a smaller diameter, remove the sleeve from the cut part and secure it to the end of the hose.
Sometimes the watering can needs to be replaced. This part can also become unusable, crack, which will lead to leaks.
When the leak is in the middle
In such a situation, it is most difficult to make repairs. Most often, this phenomenon is observed if, due to careless handling or constant exposure to hot water, the integrity of the rubber core has been compromised. If a breakage is found near the junction with the mixer or watering can, you can shorten the part so that the cracked part is cut off. Then a nut is attached to the repaired hose and the product is attached to its original place.
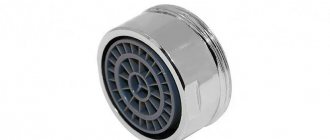
How to disassemble and clean a shower head
Although modern watering cans with rubber nozzles are free from clogging the holes with limescale, large particles of dirt get stuck in the rubber holes and have to be removed manually. When the water supply is resumed after a shutdown, due to water hammer, rust flakes peel off from the walls of the water pipeline, and if at least a coarse water filter is not installed on the water pipe entering the apartment, then dirt particles clog the openings of the divider.
To clean the holes, you must first disassemble the watering can. In old shower heads, the divider was simply unscrewed from the handle. In modern ones, the divider is attached using a self-tapping screw, which is closed with a decorative plug. Therefore, disassembling the shower head begins with removing the plug.
To do this, use a sharp object, such as a knife or an awl, to pry the plug over the edge. Sometimes there is a recess on the edge of the plug for this purpose, and the plug will easily come out of the installation location.
Next, use a screwdriver to unscrew the screw and remove the diffuser from the body of the watering can. Now you can start cleaning the holes. Clogged holes are clearly visible in the light. As a tool for cleaning the holes of the divider, you can use a thin metal wire; an unbent paper clip is good for cleaning.
After cleaning, the divider should be rinsed thoroughly with water. If there is limescale deposits, it can be easily removed from the rubber by wiping with a cloth. The shower head is assembled in the reverse order. When assembling, do not forget to replace the rubber gasket between the body of the watering can and the divider.
The shower head is easy to disassemble and has been in use for a relatively short time. But if you need to clean a watering can that has served for many years, you may encounter a seemingly insurmountable problem - a screw head that has rusted to such an extent that there is nothing to grab onto with the screwdriver blade.
When trying to unscrew a rusty screw, its head crumbled into powder. I had to use proven technology for unscrewing plastic screws with rusted or non-standard slots in the heads.
First, in the center of the screw head, using a mini hand drill, a hole with a diameter of 1.5 mm - 2 mm is drilled to a depth of a couple of millimeters. At the end of drilling, slightly rocking the drill in opposite directions, the hole is shaped into an ellipse.
Then, using a 40 W electric soldering iron, heat the screw for 2-5 minutes until the plastic around the screw softens. In the photo, the self-tapping screw is heated using a “Moment” pulse soldering iron.
The soldering iron is removed and a screwdriver blade is immediately inserted into the drilled hole. A suitable screwdriver must be prepared in advance. Even a clock screwdriver with a sufficiently wide blade will do. The remains of a rusted screw can be easily unscrewed without damaging the body of the watering can.
The shower head is disassembled and the diffuser can be cleaned. After removing the dirt and rinsing the shower head, it is reassembled in the reverse order.
To attach the water divider to the body of the shower head, you must use a new self-tapping screw of the same size as the self-tapping screw that was unscrewed.
I came across another type of shower head, the design of which was different from the designs discussed above.
Upon inspection, it seemed that to disassemble the shower head it was necessary to remove the plug installed in the center of the water divider, but an attempt to remove it did not yield any results. Upon closer examination, it turned out that this was not a plug, but just a decorative groove.
An attempt to unscrew the divider counterclockwise from the shower head body was successful.
Caring for shower sets, preventing breakdowns
As you know, it is more difficult to repair components than to prevent breakdowns. Long-term operation will be ensured by proper care of the plumbing fixtures.
What not to do:
- allow prolonged exposure to hot water to the hose;
- wrap it around the faucet;
- clean from plaque using chemicals with an aggressive composition or abrasive particles;
- twist and/or wring.
These simple recommendations will allow you not only to choose the most suitable shower hose, but also to properly care for it, thereby maintaining its performance characteristics and appearance.
Please note that it is best to give preference to products with antibacterial coating
Recommendations for selection
The range of shower sets and components is now huge, but the quality of the products does not always correspond to the declared characteristics. Before you go shopping, it’s worth taking a closer look at the criteria for choosing shower hoses.
- Manufacturer . German-made products have the highest quality and durability. These are premium products, with an exquisite design, very functional, with a protective system against twisting. True, they are the most expensive, but this is their only drawback. Hoses from Czech, Hungarian and Russian production have a more affordable price and good quality.
- Material . The most reliable are hoses with a silicone sheath on a metal body. The multilayer structure protects the inner tube from kinks, the smooth surface does not leave scratches on the walls of the bathtub (relevant for acrylic models). The most unreliable are hoses in a simple metal corrugation.
- Length . The ease of use of the shower directly depends on this parameter. A hose that is too short will be constantly stretched; a hose that is too long will interfere with procedures. As a rule, a 1.25 m hose is suitable for a hygienic shower, a standard one and a half meter hose is suitable for a bathtub up to 1.7 m long, for tall shower sets and large bathtubs you should choose a hose 1.75 or 2 m long.
- Equipment . At the junction of the watering can and the mixer, the hose must be equipped with bearings or a special rotating cone. For German-made products, all hoses have an Anti-Twist protective system, which eliminates the risk of creases at the joints with fittings. Pay attention to the quality of the connections themselves - it is advisable that they are not pressed. Be sure to check that the threads on the nuts match the threads on the mixer and watering can. It is best to select commensurate options, otherwise you will have to buy additional adapters. And one more thing: if possible, choose hoses with antibacterial coating.
- Appearance . Carefully inspect the hose from all sides: it should not have burrs, crooked threads, or sagging at the joints. Uneven corrugation, uneven color of the coating, thickening on the hose indicate low quality, and such a product is not worth buying. The hose should come with two gaskets for the nuts. The packaging must indicate the manufacturer and all parameters of the product - length, thread diameter, material of manufacture, equipment.
Zerix shower hose
Troubleshooting methods
Only simple faults can be repaired independently, which can be repaired with minimal time, effort and money, without the use of professional tools.
Shortening the shower hose
If there is cracking at the joints between the hose and the mixer or watering can, the joints are disassembled by unscrewing the union nut and moving the braid to the central part.
It is recommended that you do not screw the new hose too tightly to avoid cracking the nuts.
Detection of destruction of a rubber element involves cutting off the damaged area, heating it and reinstalling it on the nipple part. After assembling the plumbing fixture, its functionality is checked.
Replacement of rubber and seal
Quite often, a malfunction of the shower hose provokes wear and depressurization of the gasket. This type of breakdown does not involve shortening the flexible part of the plumbing fixture and can be repaired very quickly.
Sometimes it’s enough just to replace old gaskets with new ones so that the shower stops leaking
After the sealing gasket has been replaced, carefully but firmly tighten the union nut by hand until it stops, and then check the operation of the repaired shower hose
Fight against weakening pressure
Too weak or no water pressure from the shower head may be the result of a kinked hose that is too long. In this case, the union nut is removed and the excess length of the plumbing fixture is cut off.
This is one of the most common shower problems.
Sometimes a lack of pressure indicates that the outlet holes in the watering can are clogged. Cleaning can be done by immersing the shower head in a vinegar solution for half an hour, followed by rinsing under running clean tap water.
How to replace an old hose with a new one
Replacing a shower yourself is not a difficult task, but it requires some knowledge and attention from the master. At the dismantling stage, the shower head is unscrewed and the hose is removed, after which a gasket is placed in a shorter nut (hexagon shaped) and screwed to the mixer.
First of all, you need to remove the hose from the mixer
The second part of the hose, which has a long conical nut with a gasket, is intended for screwing on the shower head. You can check the quality of the work performed under strong water pressure through the shower head.
What to look for when choosing a hose
To ensure that your purchase does not disappoint you in a short time, when choosing a model, pay attention to:
- brand, giving preference to well-known, trusted manufacturers;
- uniformity of braid winding, uniformity of metal coating, absence of external defects - burrs, sagging, thickening, etc.;
- the presence of sealing gaskets in the kit;
- availability of an accompanying document with product characteristics, address and telephone number of the manufacturer, and other important data.
Don't try to save money by choosing the cheapest model, because the service life of such a product is unlikely to be long enough to justify your expense.
Principles of repair work
As a rule, water leakage indicates a faucet malfunction.
Repair begins with identifying the cause of this unpleasant phenomenon. The breakdown of the mixer switch is considered difficult, since it is located between the drain tap and the hose.
This is a complex mechanism that blocks the flow of water. When the “spout” mode is turned on, the “shower” mode is disabled.
Such a device has two positions: flow redirection and stop mode. When the “gander” is turned on, the “shower” mode is immediately blocked. And the opposite effect also occurs. A faulty switch violates this concept.
Attention! The main enemy of plumbing products is tap water, which is not always of high quality. It contains impurities that can render any faucet unusable.
Problems and solutions
So, what to do if the shower switch on the mixer breaks down in each of the cases described above? Let's move on to the common problems with each type of switch.
Suberic
Mixer tap with cork switch.
As already mentioned, these products are extremely fault-tolerant. However, they also have two diseases.
Leak along the plug rod
Uneven wear on the plug or body
The solution is the same as in the previous case. Viscous silicone grease will make it easier to turn the handle and fill in uneven areas of rubbing surfaces
Button
What does repairing a switch with a gander and shower mode look like for a push-button design?
She has three typical malfunctions:
- The switch does not hold water: it flows into the gander and shower at the same time. The reason is uneven wear or complete destruction of the rubber valve. It can only be treated by replacing it or, if the corresponding spare part is not on sale, by completely replacing the mixer.
- The button spontaneously returns to its original state after pressing with a small amount of water pressure. The reason is an excessively tight return spring. It is enough to bite off one or two turns of the spring - and the mixer starts working absolutely normally.
The return spring is clearly visible in the photo.
- Finally, if the shower switch on the faucet is leaking, the cause is a worn o-ring. It again changes to a new one; rings, as a rule, are included in gasket sets for repairing domestic faucets. The price of a set rarely exceeds 20 - 30 rubles.
Hint: if the push-button switch is equipped with a gland nut, instead of a rubber seal, you can place a thread of graphite gland under it.
With a keg
Here are the diseases of this design:
The water does not shut off to the gander or shower. The reason is wear of the gaskets or, which happens much more often, the destruction of the bolt securing one of them. The problem, as you might guess, is eliminated by replacing the gasket or bolt.
Useful: it’s easy to cut a gasket with your own hands from an old inner tube from a truck wheel.
The switch does not rotate to its extreme positions. The reason is the wear of the barrel or the guides in the mixer body: due to the large gap between them, the barrel stands up askew and jams.
Repairing a shower diverter for a faucet usually involves replacing the barrel; A temporary solution to the problem could be to install improvised guides made from pieces of aluminum wire into the mixer body.
If there is a leak along the rod, the rubber seal is again changed or the oil seal is filled.
A beginner may have a reasonable question: how to remove the shower switch on the mixer if the barrel does not want to leave the body?
The sequence of operations is important here.
- After unscrewing the fastening screw, remove the switch lever.
- We unscrew the oil seal (if there is one).
- We take out the eccentric.
The eccentric will not allow the barrel to be removed while it is in the mixer body.
- Unscrew the nut on the mixer body under the shower hose.
- We remove the gander.
- We push the barrel through the hole in the mixer body from the bottom up.
Ceramic
How do I repair a shower diverter whose handle can turn a full rotation?
Of modern mixers, these are the most fail-safe; the author cannot remember a single one of them breaking due to natural wear and tear.
Problems can arise only when two circumstances coincide:
- Lack of filters at the entrance to the apartment or house. When repairing the water supply line, scale or coarse sand may get into it, which sooner or later will end up in the mixer.
- Significant physical strength of the owner with a complete lack of common sense. If you try to turn a cartridge jammed by scale by force, the result will be a little predictable: either one of the ceramic plates or the plastic retainer that holds it will break.
The repair instructions in this case are also quite predictable: the damaged cartridge is replaced with a new one. To replace, simply remove the handle and the fixing nut.
This is what the cartridge looks like.
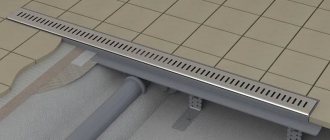
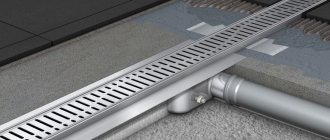
What is a floor drain made of?
Before you equip a shower with a floor drain, decide on the components of such a system
This will be very important when installing it.
The drain allows water from the bathtub or shower to flow into the drain. The pipe outlet should be made of plastic with an outlet diameter of up to 50 mm to ensure normal wastewater flow. Corrugated pipe is also suitable, but many experts believe that for this device it is better to use a smooth pipe that cannot impede the flow of water. Also remember that the drain will be in the floor and access to the pipe will not be as easy as usual. The corrugation will impede drainage due to the following problems:
- hair stagnation in it;
- bars of soap;
- mud.
All this can subsequently lead to the entire sewer being clogged. And there is no urgent need to install corrugations; to install a drain in the floor, you will need such devices as:
- connections;
- adapters;
- couplings.
The outlet for the siphon must be straight and have an angle of 135 degrees with respect to the main pipe. Its slope should be 15 degrees relative to the drain. Thanks to these parameters, the floor drain will ensure the unimpeded flow of water from the bath or shower into the sewer.
Review of common breakdowns
Economical shower cabins with a minimum of functions or expensive hydromassage boxes are designed for daily hygiene - taking a shower.
Some of them can be used as a bath. These are complex devices consisting of many parts. There are a lot of modifications of boxes: from open ones, reminiscent of a regular shower with protective partitions, to closed, sealed and stuffed with electronics.
Image gallery
Photo from
The simplest version of a shower stall
Model with plastic tray
Inexpensive shower cubicle 90*90
Shower hydrobox with a set of additional functions
Both simple models, built with your own hands without a traditional pallet, and complex factory designs break, but some of the problems are common. For example, any of the presented cabins may have a cracked protective screen or a faucet that may fail.
List of breakdowns that users of shower boxes most often encounter:
- wear of the ladder or water seal installed under the bottom;
- deformation of the pallet or the appearance of cracks on its surface;
- mechanical damage to doors or protective screens;
- damage to door rollers or hinges responsible for opening;
- failure of shower equipment - watering can, hose, mixer.
In complex electronically controlled models, electrical parts may break or software failure may occur.
Only specialists can deal with electronics on their own; broken glass, a drainage device or a deformed shower tray are best replaced, but minor damage can be repaired yourself.
For example, even an amateur can repair rollers, restore a pan, clean a plumbing filter, or remove scratches on a plastic screen.
Shower hose repair - Find out
Yesterday I wrote about the reasons for the break in the shower hose and decided to immediately write a continuation on how to repair a shower hose, so as not to return to this topic, although I still probably have to (for example, how to choose a new one, etc.).
New hose
Strange as it may seem, many family members who do not take part in the subsequent elimination of the problem do not remember the true causes of breakdowns, simply do not think and continue in the same spirit without knowing it, breaking household items. All you have to do is either repair it or buy a new one, a regular one at the market or order a special one on the Internet (which they also sell). Today I will briefly tell you and show in detail on video how to repair it, saving on buying a new hose.
Repairing a hose is not a problem, all you need is to have the right tools: pliers, a knife, scissors, and a couple
Hose repair
hands I won’t give a full breakdown of how to repair the shower hose in the description, I did it all in the video. The only thing I want to remind you is that you are dealing with tightness and you don’t have to hope for MAYBE. We untwisted the watering can, found the torn part of the internal hose, shortened the protective metal hose, screwed everything into place and the repair of the shower hose was completed. Everything will take from 15 to 30 minutes (depending on your abilities). Now let's move on to raising pests.
Re-education of family members
What I will focus on in more detail is your relatives, who only break things, but require you to do the repairs. If these are your children (and your sons are already big teenagers), then provide them with the necessary tool and my lesson and let them learn on their own. You just look from the outside (for the first time) or do it together. If this is your wife or your beloved daughter’s beauties, then of course you won’t put pliers in their hands, but put a hose in their teeth and go do it yourself. Thus, you will only undermine your authority as a unique person in the eyes of your family. But if you ask them to help you, say, you need another pair of hands, and you only have two, for example, you need an assistant to hold a hose or hand a tool (even a 5-year-old daughter can handle this). What does this give?
- Firstly, it will be useful for them in life to know how this is done (especially boys).
- Secondly, you will take away their time from idleness and keep them busy. They will not like it very much and next time they will think that it is better to spend 2 minutes warming up the hose or spend 30 minutes repairing the hose. If you understand me correctly, then believe me, this works well, after the third repair, even the most clueless ones understand what needs to be done and what not. Good luck to you in repairing and raising your family. By the way, joint work (repairs, cleaning, etc.) only goes towards strengthening your family. I warn you, without these upbringing procedures, nothing will change, even if you have a “prophetic dream” that your family suddenly reformed. Well, now, watch the video How to repair a shower hose if it breaks.
myplans.su
What glue is best to use to glue a plastic shower holder in the bathroom to the tiles?
What glue is best to use to glue a plastic shower holder to ceramic tiles in a bathtub? The fact is that the wall is very thin, and it was not possible to install it on self-tapping screws! Cracks appeared on the other side, so it was decided to put it on glue. But I’ve already tried three glues, and at most they lasted a few weeks!
comment favorites Kim Jong-un [412K] over a year ago
The glue should be strong, but flexible after hardening.
The shower head is constantly inserted into the same holder, that is, you “disturb” the adhesive seam.
If the glue is brittle after drying, then the holder will not stick, especially not on the tile.
I glued it and even bought a metal holder with ordinary silicone sealant using Soudal sealant (a cartridge for a “gun”).
Or you can buy glue-sealant, that’s not bad
"Moment - Montage is the same for everything."
You can glue the holder with double-sided tape.
In addition to choosing the glue, you need to properly prepare the surfaces for gluing.
Attach the holder to the wall and trace its outline with a marker.
If the tile is smooth (glazed), then within the boundaries of the markings, walk along the surface with sandpaper; the smooth surface will become rough, which will improve adhesion.
Next, remove dust from the surface.
Then degreasing and degreasing not only the tile, but also the surface of the holder that is adjacent to it.
Then glue is applied and the holder is pressed to the surface, excess glue is removed.
Perhaps you used durable but not waterproof glue; the bathroom is a room with high humidity, so sealant or adhesive-sealant are more preferable options.
Next, do not glue the holder into the seams of the tile; try to ensure that the entire surface of the holder is adjacent to the entire tile, and not to the seams.
The holder can be used only after the adhesive layer has completely dried and not earlier.
If this is a hollow structure, then you need butterfly dowels, and not the spacer dowels from the holder kit.
The tile can be drilled without impact; without impact, you can also drill the surface underneath it, unless of course it is concrete.
Hold the drill at the exit of the drill, there will be no cracks.
the system selected this answer as the best in favorites link thank NikApolo [3] Thanks I tried the adhesive-sealant, it lasts for the 2nd week. — more than a year ago comment Elden [87.1K] more than a year ago
I can disappoint you, I encountered the same situation when I glued a towel hook onto the tiles in the bathroom. I also have nothing behind the tiles, except for two thin sheets of drywall, insulation and tiles on the other side.
The fastening that was included initially, and this is something like double-sided tape, hung for quite a long time, which is a little more than a month, and all subsequent adhesive compositions that I tried did not last more than 2 weeks.
So my towel is lighter than a shower, especially when you use it, the water not only weighs it down, but also vibrates.
But then I discovered a very good glue in the form of silicone, I now use it everywhere, from shoes and in construction to repairing equipment and cars.
By the way, this is a silicone sealant for cars.
But he glued it for a reason, but according to the technology he developed himself.
1 - In the wall where the part needs to be glued, I drilled three holes in the tile with a shallow depth, and with a slightly thinner drill I expanded the holes behind the tile (initially I tried to catch on the tile).
2 - The part itself must be treated with a file or sandpaper on the side of the surface where the glue will be applied to make it rough.
3 - Be sure to wipe the tiles and the part with a solvent; silicone “loves” degreased surfaces.
4 - Apply sealant inside the holes, and on the tiles connect these holes with a not very thin layer, and at the same time apply a not very thin layer to the part. The silicone layer should not be visible, it should be a layer of about 2 millimeters, which will give a total of 4.
5 - We wait 5-15 minutes, depending on until the sealant dries to the point that it does not smear on your fingers, and apply another layer, about 3 millimeters per part, on top of the first layer. Spread it evenly and glue it to the layer of sealant on the tile.
6 - If the holder is heavy, then you need to hold it pressed against the wall for a while.
7 - Do not touch the holder for 48 hours, let it dry well.
This is the method of gluing that has lasted me for 3 years and has not fallen off.
Procedure for replacing a damaged flexible hose
To replace an old hose with a new product, there is no need for plumbing skills, it is only important to perform all actions carefully. If the shower system has been in use for a long time, it may be difficult to remove the old hose - it will not be possible to unscrew the nuts manually
The problem is solved with the help of an adjustable wrench, which allows you to move the “stuck” nuts.
The work is performed in the following order:
- Check the quality and contents of the new hose.
- Unscrew the extended nut to separate the watering can and the old hose.
- Unscrew the old hose from the mixer. If you cannot unscrew the nut manually, you should use an adjustable wrench.
- Insert a gasket into the short nut of the new hose, and then screw it to the mixer.
- Place a gasket in the extended cone-shaped nut, and then screw the watering can to the hose.
- Turn on the water and check the quality of the assembly.
If, upon inspection of the old hose, it is discovered that the internal part is damaged near the watering can, then you should not throw it away. After simple repairs it can be used.
No. 3. Connection Size
The standard thread diameter of the nut on both ends of the hose is 1/2 inch, but 3/8 inch nuts are also available. It is important that the size of the connecting elements of the hose matches the size of the connecting elements of the watering can and mixer. Otherwise, you will have to use special adapters.
The European inch system in determining thread sizes is used everywhere today. There is also a domestic metric system, but it is used very rarely: hoses and watering cans with Russian threads are difficult to find today. By the way, it is not easy even for a professional to determine by eye which type of thread is used in a particular sample. Our sample nuts are slightly larger. To avoid mistakes, the easiest way is to take an old hose with you to the store.
Repair of flexible shower pipe
Cheap parts made in China are on sale. They often break and require replacement. A similar shower hose has a low price. If you take it apart, you can see low-quality rubber that cracks and leaks after a few months of use. Surely, the manufacturer of a disposable hose makes money by quickly replacing the product. But there is a problem with calling third-party specialists.
There is a way out of this situation. This is the purchase of good plumbing equipment and the opportunity to repair the shower hose yourself. Repair is not a tricky business. Let's look at what's wrong? In the case of a visible hole, everything is clear.
First you need to disassemble:
Figure 2. The notch on the flexible hose must be bent back.
- Unscrew the shower head.
- We take out the flexible part (rubber, silicone tube, flexible) and look for the part that needs to be repaired.
- After finding the breakage, cut off this part (Fig. 1).
- We put on the fitting removed from the broken part and secure it.
- After that, put on the shower head.
In order to put the tube on the fitting, you need to stretch the shower hose (insert a pencil or a stick of larger diameter into it), when the nipple goes in, secure it. It will be enough to heat it with hot tap water or pour boiling water over it. The rubber will tighten and the fastening will be strong.
This is how easy it is to repair a flexible shower pipe. But there are also nuances. If you inspect the part and do not find a breakage in the form of a hole, but it is still leaking, you should completely disassemble the shower. This type of shower repair will take more time and effort. The problem may be a bad inner tube, because... Low quality rubber can crumble or burst in many places. In this case, it is better to replace the shower pipe.
If you need a quick repair of a shower tube for a short period of use, it is possible to repair a hose with a soldered fitting (disposable). In this case:
- We remove the watering can.
- We take out a flexible hose and cut off the broken part of the tube (everything is the same as in the previous case).
- Next, make a small cut and bend the cut part. Then we wrap it with plumbing tape or glue it with plastic film (Fig. 2).
- We put on and screw on the shower head and you're done.
This method is not a high-quality repair of your shower, but it is suitable for an emergency. The hose will still have to be changed.
The modern problem with plumbing parts is that their quality is very low. Happy owners of Soviet-made faucets do not face such problems. Domestic pipes last for 20 years and do not break. However, now that you know how to repair a flexible pipe with your own hands, this problem will no longer exist for you. You can perform all plumbing work without the involvement of a third-party specialist. Good luck with the renovation!
Repair features
At home, plumbing repairs are not always carried out. If cracks appear inside the tube or the product bursts in the middle part, you will have to buy a new one and replace this part of the equipment.
When the braid or inner tube is damaged closer to the watering can, you can repair it yourself. To do this, you need to unscrew the nut, remove the watering can from the hose, remove the gasket and brass bushings, being careful not to damage the parts.
Some owners try to use a knife, but this can scratch the product. Therefore, it is recommended to use special keys and a screwdriver.
Next, you need to take the inner tube, carefully pull it out to the damaged area, then cut off the unnecessary piece. The tube is heated in warm water so that it becomes flexible, installed in place until it stops, the gasket is changed, and the elements are put back together. At the last stage, screw on the watering can.
Such repairs can be repeated again, but only if the damage is again near the watering can. Nothing more can be done because the structure will become short. The repaired part will not be able to withstand high loads for a long time. Therefore, repairs should be considered as a temporary measure until a new element is purchased.
Leaking walls and roof
If the shower stall leaks at the joints, the integrity of the structure is compromised.
A leak can form at the site of soft seals - cords on the doors, or hard joints - the places where parts are connected.
Important! If the cord itself is leaking, it will have to be replaced. It will definitely not be possible to revive him. When the shower stall is leaking at the seams, the action plan is quite simple:
When the shower stall is leaking at the seams, the action plan is quite simple:
- Unscrew the screws at the junction of the cabin elements;
- clean the remaining sealing agent without damaging the body of the parts;
- wipe the future joint areas dry;
- apply a thin layer of sealant;
- fasten the elements together.
Leaks at the junctions of the cubicle walls and the wall are eliminated by using additional sealants - plumber's rubber, mounted on fixing silicone.
If the faucet in the shower stall is leaking, and other plumbing elements are leaking at the junction with the shower body, then use gaskets and sealant.
Is a leaking shower a threat?
The level of danger depends on the damage the leak causes to the enclosing structures of the apartment or house. If there are no visible problems, this does not mean that the malfunction can be ignored. In fact, a leaking shower needs to be repaired or replaced as soon as possible. Having small droplets increases your water bill and ultimately leads to bigger problems. Moisture accumulates in the walls - and this is where the trouble begins.
Penetrating through the walls, water will reach the base, which in most cases is not waterproof (concrete floors, wooden floors). As soon as water reaches wooden structures, the moisture begins to attract pests and contribute to the rotting of the beams.
Moisture also encourages the growth of mold, which poses a serious health hazard. Some types of mold are toxic to people, causing sore throats, eye irritation and allergic reactions. These are just some of the potential health problems.
Types of shower hoses
There is a large selection of modern hoses and sleeves on the market.
Plastic braid
The shower hose made of solid plastic with the addition of steel wire is flexible and strong, which means its service life increases.
Disadvantages include low elasticity. Because of this, the sleeve begins to crack. It is not advisable to keep it under hot water or rolled up for a long time.
The braid of the tube can be colorless, colored or “chrome-plated”. Structure - spiral or smooth.
Attention! Transparent braiding is good only at the beginning of use, as soon a coating from contaminants in the water will appear inside the hose.
Metal
This option protects the shower hose from tearing during bending. Although it is not considered the most durable, because over time the metal breaks. But the low cost of metal braiding makes it easy to replace damaged elements with new ones.
Silicone wrap for drain hoses
It is considered the most durable. The silicone braid on top of the steel body of the sleeve guarantees durable use. Such a hose will cost more than others, but it also has more advantages:
- no leaks;
- longer period of use;
- There is no fungus on silicone;
- The ideal surface makes it possible to keep the hose clean.
Photo 1. Silicone braiding is one of the most reliable options and is available in a variety of colors.
Reinforced back braid
This type is made of stainless steel, which reduces absorption and permeability. The corrugated tube is flexible and almost completely eliminates the formation of kinks.
Well-known equipment manufacturers
Many people choose products from German manufacturers. But there are hoses from other brands on the market that are not inferior in quality.
Leaders in this segment:
- Hansgrohe is a German brand that produces sanitary equipment, incl. several collections of hoses, differing in braid and inner tube materials. There are both budget and expensive products with protection against bacteria. The latter are covered by a guarantee.
- Grohe is a German brand that focuses not only on quality, but also on design. The products have an innovative anti-twist system called Twist-Free.
- Ravak is a Czech brand whose products are cheaper than German ones. The models are protected from twisting and are covered by a warranty.
- Aquanet is a Russian brand that produces types of hoses in the middle price segment.
- Zegor is a Chinese brand that produces shower products with different windings, incl. with metal reinforcement.
Device
Before the actual process, it is important to understand how the shower head is disassembled, and for this we study its structure. Initially, it is important to decide whether the watering can is stationary or equipped with a flexible hose
If there is the first option, then it can be ceiling or wall.
If there is a product equipped with a hose, then it can be fixed:
- brackets to the wall;
- using special fittings, represented by special brackets, and it is in them that the structure is installed, and the fittings are fixed using a fixed rod located vertically.
bracket
Barbell
The structure consists of elements:
- stub;
- screw holding the mesh;
- the mesh itself;
- body made from different materials;
- pad.
Shower head device
When is specialist help needed?
We do not recommend repairing the cabin electronics. If the equipment no longer executes commands correctly, you need to call a technician. Warranty repairs are carried out free of charge, so be sure to keep your receipts and documents.
For post-warranty service, you can contact a company specializing in plumbing repairs. To replace the glass, pan or completely disassemble/assemble the booth, you can also contact a specialist. If you do not have experience in such work and free time, then you can save more than one day by spending a small amount.
Don't be afraid to contact private companies. Often these are the same craftsmen from service centers who work part-time in their spare time, or experienced specialists who have retired
If you have free time and a desire to replace the glass of the shower stall yourself, the instructions we provide will provide significant assistance.
Before starting repairs, it is useful to familiarize yourself with the prices of parts. It also happens that replacing a tray or shower block costs a little more than restoration work, so it makes sense not to waste time and just install new structural elements.
A common problem for the operation of a shower box is disturbances in the connection to communication networks. How to connect a shower to water supply and sewerage is described in the following article. We advise you to read the useful information.
Types of shower hose
Shower hose is a component. Visually, it is a flexible long tube, the main purpose of which is to connect the nozzle and the mixer.
As a rule, the base is made of dense rubber or plastic. To add rigidity, the material is covered again with windings. They also perform a protective function, preventing destruction as a result of exposure to high temperatures and pressure, external mechanical influences in the form of twisting.
The flexible shower hose is equipped with tapered or straight end nuts on both sides. One is used to connect to the shower head, and the other is used to connect to the mixer.
To replace the hose, you need to choose the most suitable option, since it is an integral element of the shower system. There are several main types, their difference lies in the winding material.
Metal winding
Metal shower hoses are a tube made of polymer, rubber or plastic, enclosed in a metal-coated braid or spring casing. Thanks to such a durable coating, it is possible to make the product resistant to bending or breaking.
When choosing a component, it is recommended to give preference to a hose with a length of at least 2 meters. This will reduce the load at the junction with the mixer.
Plastic winding
Hoses made from plastic can be made entirely of plastic, or the substance can serve as a wrap for a base of high-strength rubber. The latter can withstand temperatures up to +80 degrees.
The operational technical characteristics of the mechanism are excellent; in tandem with metal wire they are capable of exhibiting the following:
- long period of use;
- high strength;
- flexibility.
Negative qualities of the product include a predisposition to cracking and drying out. Therefore, it is not recommended to wind plastic hoses around the faucet after use or expose it to warm or hot water for a long time.
Innovative developments
Every year, plumbing accessories and components for them are improved, therefore, they serve as a worthy alternative to traditional plumbing. An innovative silicone layer (silicone) on the metal winding protects the metal from delamination and the harmful effects of corrosion, improves the performance characteristics of the main segments. Due to the characteristics of the material used, this hose has excellent elasticity and flexibility.
Popular models from the best manufacturers
Each manufacturer produces shower fittings in entire series and collections, which allows you to select components that perfectly suit any design style. Let's look at the most popular models from several well-known brands.
| Name | Short description |
Grohe Rotaflex (Germany) | Metal hose with a reinforced body, equipped with a Twist-Free protective system. It has a chrome finish, length 150 cm, threaded connection diameter ½ inch. Manufacturer's warranty - 2 years |
Hansgrohe Isiflex (Germany) | Plastic hose with a chrome-plated glossy surface. It has an Anti-microbial coating and is equipped with protection against kinks in the form of a thrust bearing. Available in lengths of 125, 160 and 200 cm. Manufacturer's warranty - 5 years |
KorDi (Switzerland) | Metal corrugated hose, glossy, chrome plated. Equipped with Anti-Twist protection with brass connections. Length 1.25 and 1.5 m. Manufacturer's warranty – 1 year |
Zegor WKR (China) | Plastic hose with reinforced metal body. Equipped with a thrust bearing and internal connections made of brass. Thread diameter ½ inch, length 1.5 m. Warranty – 1 year |
IDDIS (Russia) | Polymer hose with reinforced body. Equipped with Twist-Free system and fine filter pads. Eyeliner diameter ½ inch, length 150 cm. Manufacturer's warranty 3 years |
| Ravak SilverShine (Czech Republic) | Plastic hose with a chrome-plated glossy surface. Equipped with anti-twist protection, liner thread diameter ½ inch, available in lengths of 150 and 200 cm. Manufacturer's warranty - 2 years |
How to choose a shower hose
Types of shower hoses
The traditional structure of a flexible shower hose is an elastic tube made of rubber or plastic, which is protected from external mechanical damage by a corrugated durable shell. At the ends of the hose there are union nuts necessary for connecting the hose to a shower head or mixer.
The union nuts differ slightly in shape:
- A narrow nut with a ribbed surface is attached to the mixer;
- A nut with an extended base is connected to the watering can.
Existing plastic shower hoses, which are helically reinforced with soft wire, have poor torsion resistance. These hoses lose their cylindrical shape overnight, which leads to poor water flow into the watering can. To ensure that such hoses serve for a long time and do not get twisted, it is preferable not to remove the attached watering can from the wall bracket at all, but then the purchase of a shower hose itself loses its meaning. They are interchangeable with hoses that are corrugated with a durable metal protective sheath, so it is better to replace them.
As mentioned above, a shower hose can be structurally represented as an elastic tube made of rubber or polymer placed in a special metal sleeve. The service life of the hose depends on the quality of the tube material. The material must withstand not only high temperatures close to the boiling point of water, but also be resistant to poor quality water inherent in our hot water supply systems. The inside of the hoses quickly becomes clogged with limescale and rust deposits, which prevent the shower hose and sprayer from functioning properly.
Additional Hose Features
There are other parameters that need to be looked at just as carefully. Considering your desire to buy from an online store, you can ask for live photos of the product before shipping or inspect it immediately at the point of delivery.
- The product must be of a uniform color (unless its transition is due to a design decision), and the winding spirals must be the same size.
- A high-quality hose does not have defects that can be distinguished by touch or visually (sagging, burrs, thickening).
- The most hygienic are hoses with antibacterial and antifungal coating.
- Good connecting elements are made of brass and their threads are straight.
- It is important that the kit includes spacers for the nuts.
- It is desirable to have anti-twist technology, which prevents the hose from twisting at the connection points.
If you find even one defect, do not justify its presence by a low price or a familiar brand. But the characteristics that increase comfort and quality of operation depend only on personal preferences and the funds allocated for the purchase.