Obviously, the floor is an important detail of any industrial or residential building. To improve the quality of the floor and increase its service life, a variety of materials are used. Of particular interest are polymers that cope excellently with physical and temperature stress. Before shaping, it is necessary to clarify the specifics of polyurethane floors. This allows you to choose the best coating option to meet your requirements.
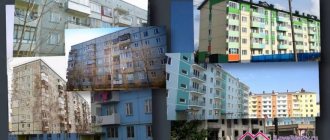
Self-leveling polyurethane floor
Specifics
Polyurethane flooring is a seamless coating, the base of which includes several types of polymers. They are prepared through special chemical reactions, thanks to which it is possible to obtain a mass with given technical parameters. These types of surfaces are very popular because they are characterized by very little shrinkage and excellent strength.
Polyurethane floors are used in:
- houses and apartments;
- industrial workshops and warehouses;
- entertainment and shopping centers;
- hospitals;
- freezers;
- parking lots, garages and so on.
Polyurethane floors are particularly durable, which is why they are often installed in high-traffic areas - for example, in hospitals, shopping centers, etc.
This type of floor is a multilayer material and includes the following components.
- The bottom layer is a special impregnation. The substance is characterized by low viscosity and homogeneous composition. Thanks to this, the layer adheres well to materials such as concrete, wood or ceramics.
- The middle layer contains a two-component coating, the base of which is polyurethane. The elasticity of this substance is already significantly higher in comparison with the previous component. The material is characterized by good adhesion indicators. This layer has high strengthening properties. The service life of the foundation is specifically associated with it.
- The top layer contains substances characterized by resistance to corrosion and strength. Not afraid of mechanical and chemical influences.
Certain types of polyurethane floors can level spontaneously.
Self-leveling polyurethane flooring consists of several layers
This is ensured thanks to special components that increase the viscous and fluid properties of the mixture. Some manufacturers add quartz sand to the composition, which increases the strength of the material. This type of product is considered the longest-living, which is why it is so loved by customers.
Features of polymer coating for concrete floors
Self-leveling flooring is a seamless coating that is made from several types of polymers. When they interact, chemical reactions occur, due to which a mass is synthesized that has certain technical characteristics. The self-leveling floor has a complex structure due to the presence of many auxiliary components that can influence the properties of the coating, giving it certain parameters.
Polyurethane floors are rigid-elastic, impact-resistant, do not allow water to pass through, and have good sound insulation properties
Important! Polyurethane enamel for concrete floors is considered similar in properties and purpose to self-leveling floors, the price of which is lower.
The most popular are polyurethane and epoxy industrial self-leveling floors, which are characterized by a large number of common properties, but also have individual characteristics. Both materials are made on the basis of a resin and a hardener, which makes it possible to obtain a durable surface that exhibits increased resistance to various mechanical and physical influences.
Today, polymer floors can be found in warehouses, production workshops, shopping and entertainment complexes, health care institutions, refrigeration units, freezers, garages, parking lots, and living rooms.
The polymer coating in the form of a polyurethane floor is represented by a multilayer material, which consists of three layers. The lowest layer is a special impregnation, which has a homogeneous composition with minimal viscosity. This layer has good adhesive properties, which allows the coating to reliably adhere to a wooden, concrete or ceramic base.
The polymer coating in the form of a polyurethane floor is represented by a multilayer material
The middle layer is a two-component coating, which is made on the basis of polyurethane. The material has good elasticity, high adhesion, and enhanced strengthening properties. The durability of the coating depends on this layer. The top layer is characterized by increased strength, wear resistance, resistance to mechanical and chemical influences, anti-corrosion and moisture resistance.
Important! To increase the strength characteristics, quartz sand can be added to some self-leveling floor compositions.
Advantages and disadvantages
Polyurethane flooring has a complex structure, since various auxiliary substances can be added to its composition. Each of them helps to significantly change the characteristics of the surface, setting the required properties.
So, polyurethane floors have the following advantages.
- They are very durable and at the same time elastic. A well-laid coating can easily cope with static and dynamic impacts.
- The top layer of the coating is difficult to scratch or erase.
- The service life of the floor can reach ten years or more. It is worth saying that the structure itself is not distorted, or the changes are insignificant.
- Polyurethane material does not absorb water. Therefore, the coating can be used as a protective layer for the substrate.
Polyurethane does not absorb water and does not deform from moisture
- The structure of the product is characterized by smoothness and increased density, as a result of which dirt is not absorbed. Thanks to this, cleaning the surface is not so difficult.
- Despite the fact that the floor is quite smooth after hardening, it is completely non-slip. So these kinds of products are used for exits and inclined surfaces.
- Polyurethane materials are not afraid of high temperatures and aggressive mixtures. This type of floor will not burn, so to some extent it is safe. When it is heated, it melts and evaporates, releasing toxins into the air. Polyurethane can also be used at sub-zero temperatures, but not more than minus 25 degrees.
- Antistatic. Thanks to special components, dust does not stick to the floor.
Polyurethane floors are not afraid of “chemicals” and high temperatures
This synthetic material also has quite a few disadvantages.
- To install the floor, you need to prepare the base very well. When styling, you need to protect yourself from drafts and maintain above-zero temperatures. Direct arrangement of a surface of this kind may take from 2 to 6 weeks, everything is related to the compositions used and the size of the area.
- Huge costs of materials. For this reason, the price is high, so some people are looking for alternatives to the material.
- The floor will be cold. This does not always allow for pleasant working conditions.
The disadvantage of such floors is that they are quite cold.
- Virulence. Sex involves the inclusion of a sufficient amount of toxic substances, which can include formaldehyde, phenol, and so on. By the way, some manufacturers write that the coating does not produce toxins into the environment, but long-term tests show the opposite. Don't trust such marketing tricks.
- Polyurethane flooring is practically impossible to restore. You can only get rid of minor problems, but there is no way to completely remove significant damage.
- Laying the floor itself is expensive, so only the most experienced employees can do the job correctly.
Installation of such a floor is quite expensive, and this is another disadvantage of this option.
Negative aspects of polymer self-leveling floors
It is impossible not to mention when considering the advantages of a self-leveling floor and the disadvantages of such a surface. The arrangement of this coating requires high-quality preparation of the base. When installing indoors, it is necessary to ensure positive temperatures and the absence of drafts. The duration of the process can reach 2-6 weeks, which is determined by the area being treated and the quality of the composition.
Important! To get a good final result, it is better to entrust the filling of the floor with a polymer composition to a specialist.
The duration of the installation process of a self-leveling polyurethane floor can reach 2-6 weeks
The arrangement of such a floor requires a significant amount of material, which will entail serious financial costs, which are multiplied when creating a reliable foundation. Installation of coating is a complex and expensive process, for which it is recommended to use the services of specialists to perform it efficiently.
The polyurethane surface is quite cold to the touch, which can cause some discomfort during operation. The coating is characterized by toxicity due to the fact that the material contains a large number of harmful components, among which are phenol and formaldehyde. This type of floor is practically impossible to restore. It is possible to eliminate only some minor defects.
Comparison of epoxy and polyurethane floors
Both of these polymer floors are wear-resistant, highly durable, and they are also non-hazardous and resistant to chemical and aggressive influences. Maintaining these floors is not difficult, nor is applying them.
The epoxy product is provided as a two component material. The composition includes a resin and a hardener, and polyurethane can consist of only one component. The latter material, by the way, is characterized by good elasticity, thanks to which the finished coating is not afraid of stretching and impact loads. This type of floor is difficult to scratch, damage or erase.
Both surfaces are pleased with their increased resistance to wear, and they also cope with any mechanical stress. But if we compare it with an epoxy floor, the self-leveling polyurethane floor will last less.
Epoxy and polyurethane floors are similar in many ways.
Polymer floors can remain in their original form for about 15 years and do not lose their beauty. Polyurethane and epoxy resin are resistant to moisture, therefore, there is no need to form a protective layer.
Since the material is very dense and completely smooth, dirt is not absorbed, and specialized components prevent dust from being attracted. For this reason, cleaning the flooring can be done without any problems.
Both of these coatings are highly resistant to chemical compounds, but they may respond differently to different acids. A polyurethane two-component self-leveling floor is much more resistant to lactic acid, and the epoxy material becomes yellow and cracks. True, this product is not so afraid of sulfuric acid.
Although the self-leveling polyurethane floor, when cured, has a smooth base, it is not at all slippery. Therefore, this type of coating is suitable for use on inclined surfaces and stairs.
The self-leveling polyurethane floor is non-slip, so the risk of injury is minimal - even stairs can be covered with this material
Self-leveling polyurethane floors can easily cope with exposure to high or low temperatures and aggressive environments. Epoxy, if you do not use an additional plasticizer, will not survive significant frosts. Both of the products we are considering do not burn, so they are fireproof. As soon as the floor is heated to a certain temperature, it begins to melt, releasing toxic components into the environment.
Laminate
Laminate is a beautiful, wear-resistant and practical material, one of the most popular types of flooring in modern apartments and offices. When developing an interior design and selecting the right material, you cannot do without high-quality laminate textures. Using texture, you can create realistic models in a graphic editor and know exactly which coating will look harmonious in the interior of the selected room. Also, seamless textures of laminate and parquet are in demand among Web designers and gaming application development specialists.
Varieties
Polymer bases are currently manufactured by a variety of companies. These types of solutions are used to perform a wide range of tasks. Based on the composition, polyurethane floors can be divided into such varieties.
| View | Description |
| One-component | From a technical point of view, this type of product is very similar to oil paint. They are used in a thin layer, wanting to provide additional protection to the base. The thickness of the floor should not exceed 0.4 millimeters. |
| Two-component | Products of this kind are composed of a polish base and a hardener. To obtain a floor, the components are mixed and then covered with the finished base. Solutions do not spread so well, so the layer thickness sometimes reaches a couple of millimeters. |
Which is better - one-component or two-component polyurethane flooring?
Polymer bulk solutions can be divided based on the amount of filler in the composition.
- Thin-layer. Here the thickness cannot be more than a millimeter.
- Self-leveling self-leveling. If we talk about the percentage of filler, it already reaches 50%. It is applied in a layer whose thickness reaches 5 millimeters.
- Highly filled. In this situation, the filler already makes up 85% of the total volume. Using the named product, it is quite possible to obtain a coating whose thickness reaches 8 millimeters. These substances almost do not exfoliate and do not suffer from cracks in comparison with the types mentioned above.
The greater the thickness of the layer of this substance, the greater the quality it shows in terms of load resistance and service life. In this situation, quartz sand is added to the mixture mostly during the laying process by workers.
The more filler in the solution, the better the final coating will be.
There are several other classifications of polyurethane flooring. Today in stores you can find elastic, elastic-hard and hard surfaces. The top layer of the material can be matte or glossy, with different types of transition colors.
Types and composition of modern polyurethane coating
Based on the number of ingredients in the mixture, it can be classified into 2 types:
- one-component;
- two-component.
Single-component ones are also called enamels. They resemble liquid oil paint and are sold in a form ready for application. Before pouring, they are mixed and poured in a thin layer of no more than 1 mm. Typically, this composition is used in private construction to form a beautiful, even decorative coating.
Using a two-component mixture
The two-component polyurethane mixture is highly durable and is not damaged by pinpoint impacts. In addition to the polymer base, the composition includes a hardener, so the solution must be thoroughly stirred before pouring. The consistency is thick, the mixture sets quickly, so it can be applied in several layers in a relatively short time interval.
The thickness and strength of the coating is determined by the inclusion of quartz sand. Thus, the composition is divided into the following subtypes:
- low-filled – applied in a layer up to 1 mm thick;
Low-fill type
- self-leveling - they contain up to 50: sand, and the thickness is up to 5 mm;
Self-leveling composition
- highly filled - they contain almost 85% quartz, and the layer thickness is up to 8 mm.
Highly filled composition
In construction stores, the compositions initially do not contain filler; quartz sand should be purchased separately, and only then mixed. Sand helps improve the anti-slip properties of the floor and makes it a little rougher.
The low-fill mixture should be applied very quickly; it costs several times less. But with the help of the other two types it is possible to create reliable, durable floors that are resistant to mechanical damage, cracks and melting.
Areas of application
During installation, a uniform, seamless coating is obtained that has high performance characteristics. The surface is easy to lay, and complete hardening will take only 5-7 days, you can walk in 4-5 hours.
The strength of the material is high due to the presence of quartz sand in the composition. It also allows you to create textured surfaces if desired.
As a rule, this type is equipped in premises where they are exposed to a high level of load - warehouses, shopping centers, swimming pools. But there are other areas of application. These include:
- refrigeration chambers - the base can withstand sudden temperature changes, both high and very low levels;
- parking lots - daily mechanical load will not cause rapid wear of the coating;
In parking lots
- hospitals - wet cleaning is often carried out there, which does not affect the quality and service life of polyurethane;
In hospitals
- offices;
- production workshops - polyurethane is not destroyed by most known chemicals;
- car washes - humidity and constant exposure to water will not damage the coating.
At car washes
Rating of self-leveling floors, detailed overview of compositions
- The most famous among many compositions is the self-leveling polyurethane floor Polymerstone-2 , characterized by good mechanical strength and elasticity. The material is best used for objects that have special requirements in terms of chemical and abrasive resistance of the coating. It is also used in rooms with high humidity and where it is important to organize special sanitary and hygienic conditions.
If we talk about the price tag for the named product, then it is 13 thousand rubles for 30 kilograms.
Polymerstone-2 coating can be laid on concrete screed, old coating or rigid metal structures. The final surface is resistant to wear, impact and chemicals.
Polymerstone-2
- Another good option is Akvakhim EPK .
This coating is characterized by good elasticity, resistance to water and shock, and strong mechanical loads. The product allows you to install waterproofing or replace floor tiles. This material is also suitable for swimming pools. As for the cost, it is approximately 9 thousand per 25 kilograms. Akvakhim EPK - An excellent composition based on epoxy is the PolyTek System , which is suitable for various rooms. The material is tinted, as a result of which it is used to form 3D surfaces. The floor is highly durable and is not afraid of wear and mechanical stress. The price of the product is 11 thousand rubles per 30 kilograms.
PolyTek System
About different manufacturers of self-leveling polyurethane floors
Polyurethane-cement floors
Polyurethane cement floors are ultra-durable, two-component polymer coatings designed for use in extremely harsh environments. Cement components give such floors high strength and heat resistance, and polyurethane elastomer - resistance to chemicals, mechanical stress, and abrasion.
Article on the topic: 3D wallpaper: 3D on the wall in an apartment, photo for the living room, stereoscopic in the interior, abstraction, fluorescent with effect, with a pattern, video
Polyurethane-cement floors are quite common.
Although the installation of such floors is quite labor-intensive, due to their operational properties, polyurethane-cement coatings are today widely used in the food industry, agriculture, aviation and mechanical engineering.
Products used for concrete bases under self-leveling floors
Before installing self-leveling floors, it is necessary to treat the surface with a special impregnation, which will increase strength, remove dust from the base and give it the required adhesive characteristics for excellent adhesion to the self-leveling polymer mixture.
To make the concrete surface more durable, it is permissible to use acrylic or epoxy impregnation before pouring.
Strengthening polyurethane impregnation for concrete floors has become widespread. It is distinguished by its versatility of use; it can be used as a surface in absolutely any room. The product provides the base with excellent strength and moisture resistance. This polyurethane product for concrete floors can be used for surfaces made of low grades of cement. A significant drawback is the noticeable odor of the product. Therefore, it is necessary to treat the base with a polyurethane primer for concrete floors in a room where good ventilation is provided.
Before pouring a polyurethane floor, the concrete coating is treated with a special impregnation
To make concrete surfaces more durable, before pouring work it is permissible to use epoxy impregnation, which is characterized by environmental friendliness, the absence of any odors and excellent absorption, due to which the base becomes more durable and lasts longer. It is worth saying that this product will not be cheap.
Water-based acrylic impregnation is considered environmentally safe. It is used for foundations made of low grades of concrete. The treated surface will be durable, water-resistant and hygienic.
Features of creating a self-leveling floor for heated floors
One of the main disadvantages of self-leveling floors is the surface that is cold to the touch, which, for example, in residential premises will cause some discomfort during operation. This negative quality can be eliminated by installing a heated self-leveling floor.
To do this, you should choose a heating system, which can be represented by a water, electric or infrared option, which depends on the coolant. The best solution is an electric floor. The coating is formed from a thin heating cable, which is laid according to a certain pattern. For this, a single-core or two-core option is used, which is determined by the power of the system.
The cable is laid on a special base in the form of a mesh and fixed with a thin layer of mortar. The cost per m2 of self-leveling polyurethane flooring with electrically heated surfaces starts from 1,300 rubles.
First of all, before pouring the coating, you should choose the type of heating that is suitable for the self-leveling floor.
An infrared heated floor is formed using thermal film equipped with thin heating elements. The system is laid on a thick concrete screed and fixed to the surface using ordinary tape. The price per m2 of polyurethane flooring with an infrared heating element starts from 1200 rubles. The water heated floor is represented by pipelines that are laid in the form of a snake. It connects to the existing autonomous heating system. The cost of installation starts from 1500 rubles.
Note! To regulate the temperature of a heated floor, any system is connected to a thermostat, which is located near the surface.
The least expensive option (relative to the amount of materials for filling the finishing surface) is an infrared heated floor. The polymer mixture is laid on it in a thin layer. A water heated floor requires a large consumption of material to form a self-leveling floor.
About polyurethane floor varnish
In order to protect floors made of concrete or epoxy self-leveling surfaces, polyurethane varnish is often used. It can be used to protect wood, stone and furniture surfaces. The product may be water-soluble or contain components of organic origin.
The entire dry surface is covered with varnish using brushes or felt rollers.
This product is characterized by high plasticity and provides a good degree of surface protection from water, physical, mechanical and chemical loads. As a result, the surface is more resistant to wear, thanks to which the original decorative properties of the floor remain in this form for a very long time.
The product perfectly resists the negative effects of sunlight, temperature changes and shocks. Upon completion of the work, the surface can be glossy, semi-gloss, semi-matte or matte.
The final floor covering must be coated with polyurethane varnish
The product we are considering can be one- or two-component. The first type can be used without additional preparation. As for the second, the components need to be mixed, so it is not so easy to operate. Its price is high, but its performance data is much higher.
The dry self-leveling surface is covered with varnish or the base is pre-treated with impregnation for concrete or floors made of this material, using brushes, felt rollers or a pneumatic spray gun in three layers.
Important! Before you buy a product, find out whether the components of the material are compatible with the components of the self-leveling coating.
Polyurethane varnish stands out due to its increased ductility and strength.
Polyurethane varnish will protect the self-leveling floor from moisture, UV rays, and mechanical loads
The best varnishes for polyurethane polymer floors
- Perti took the leading position in the production of polyurethane varnishes. The product is characterized by excellent properties, due to which the surface has enviable technical and operational characteristics. The varnish does not harm human health in any way. Many people love it because it dries quickly and it does not have an unpleasant aroma. Thanks to the use of the product, the coating itself becomes pleasant to look at, and the quality remains exactly the same as it was.
Polyurethane varnish Perti
- An excellent choice would be domestic varnish.
The product is environmentally friendly, water-based, provides excellent surface coverage, sets and dries almost immediately. The product makes the coating durable, resistant to various types of loads, and extends its service life. This final coating is often used in a wide variety of rooms in which the floor regularly suffers from mechanical and chemical actions. Polyurethane varnish Krasko - VGT Premium varnish, which is based on polyurethane, has excellent decorative properties. It has no odor and dries quickly. The product can be tinted with specialized color pastes from the same manufacturer to make the floor look more pleasant.
Polyurethane varnish VGT Premium
Varnish makes the floor stronger, allows it to withstand mechanical and impact impacts, and the coating lasts longer.
Self-leveling polyurethane flooring is a modern product that can be used to create a durable, wear-resistant, long-lasting and pleasant-looking surface. This coating can be laid on a concrete base without any problems. To ensure satisfactory results, it is recommended to follow all installation rules.
Photorealistic floors 3D
Thanks to the special design of the self-leveling floor, 3D art has penetrated into residential interiors: living landscapes, three-dimensional images, optical illusions. It all looks really amazing. In addition, right under the transparent layer of polyurethane varnish, you can easily lay out anything you want: coins, your personal photographs and letters, beautiful fabric, shells, money and other pleasant little things. And all this is the path to truly exclusive design. In corporate buildings, company logos are applied to such floors, and the color and design are sure to echo the walls.
The most common type of decorative flooring, which is also conventionally classified as 3D, is photorealistic images that use the principle of airbrushing. Let us explain: this is a special art technique that uses compressed air as a tool. Thanks to the thin application of paint and smooth spraying, the decorative effects are stunning: volume, smooth color transitions, imitation of rough texture and amazing photographic realism. Those. The procedure for creating a polymer layer itself is almost no different from the usual one, only here an additional 3D image is used at the finish. The only point: use polymer mixtures as a rough layer, but not just cement-sand screed.
By the way, among the polyurethane self-leveling floors there is still one that is absolutely transparent; it is more expensive than epoxy, but it will not deteriorate over time from ultraviolet radiation. Why 3D polyurethane flooring? Because it is more durable, it cannot be pushed through by furniture (and therefore does not distort the design), and, unlike epoxy, it will not turn yellow over the years.
The process itself looks quite simple:
- Step 1. Prime the prepared base well with the compound, which we will then use for the finishing coat. Dilute it in a 2:1 ratio with 646 solvent.
- Step 2. After a day, stick the finished film or fabric there, smooth it well from the middle to the edges. If you used fabric, give the adhesive layer time to dry.
- Step 3. Fill with the finishing polymer layer: EkoteX, Elakor-ED or Tapping Floor 205.
- Step 4. Now fill it with protective varnish: Elakor-PU Lux, Multiprotect or LEVL Coat 252.
In total, you will need approximately 1-3 kg of polymer varnish per square meter.
Floor construction
Creating a polymer floor is a labor-intensive process.
The installation steps are as follows.
| Sequencing | Description |
Step 1 | First you need to take steps to prepare the surface. The base for polyurethane should be moderately strong. The best choice is a concrete screed. Therefore, it is done using good cement solutions. In a situation where this type of foundation has already been made before, it is recommended to close all the cracks and level the surface with a cement mixture. Then the floor must be sanded using special mechanisms. The most important thing is to avoid grease stains. |
| Step 2 | Before applying the product to the floor, it is thoroughly cleaned of any dust and dirt. Once the surface is in a suitable condition, it is treated with special primers. After finishing the coating, you need to let the concrete absorb - this will take several hours. |
Step 3 | After this, the intermediate layer is laid. The finished composition is poured onto the base in small portions. For leveling purposes, you can use needle rollers or squeegees. |
| Step 4 | The final layer is placed on top of the intermediate layer according to the same rules. However, this is done only after 6 hours. A specific time period is associated with the product used, all data is recorded by the manufacturer. |
Features of self-leveling 3D floors
In terms of manufacturing technology, 3D floors are practically no different from their self-leveling counterparts, which were previously used exclusively in industrial and public spaces. The main highlight is the effect of presence. Three-dimensional drawings have long been included in many areas of our lives. You will no longer surprise anyone with such things as photo wallpapers, stretch ceilings with a realistic image of the starry sky.
The drawings can be absolutely anything: your own photos from a digital camera; ready-made pictures downloaded from the network; paintings made to order. The main thing is high quality, large size images that can be transferred to the base using a large-format plotter in any advertising agency. However, finding a device of the appropriate size is quite difficult, so in most cases the picture is divided into several fragments.
The image is printed either on banner fabric or on a satin base. You can also use ready-made vinyl films or photo wallpaper. You can also create a 3D effect using various objects placed on a base polymer layer. For example, multi-colored sand, shells, pebbles, wood slices, coins, etc. When choosing this method, it is worth taking into account the high consumption of materials and the increased cost of coating.
Possible floor decor
Polymer floors are characterized by a uniform structure.
To make the look of the floor more interesting, you can use these features.
- During the process of pouring the floor, you can place paint between the layers, spreading it in unusual ways. Thanks to this, you can achieve an imitation of marble and decorate the surface.
- Using glitter. These are voluminous glitters that are made from polyester or aluminum foil. The shade of sparkles can vary; they can be either solid or fluorescent. Often, designers combine several different types of glitter at once, creating unusual designs.
- Placing drawings in between layers. To complete this task, take three-dimensional pictures. This creates a realistic surface of almost any type. There are no restrictions regarding complexity, since everything is connected precisely with the choice of the owner.
You can decorate a self-leveling polyurethane floor in different ways, using glitter, paint, placing various designs between layers
How to install a self-leveling polyurethane floor
Installation of a polyurethane self-leveling floor, the price per m2 of which is determined by the labor intensity of the process, is a complex and time-consuming operation, consisting of several successive stages. Initially, you need to prepare a very solid foundation. The ideal option is a concrete screed, which should be made using high grade cement.
When installing a self-leveling floor on an old base, it is necessary to level it and repair all cracks and defects. Then the coating is sanded with a special machine. The cost per m2 of turnkey self-leveling polyurethane floor will depend on the condition of the concrete coating.
Important! Before pouring the surface, there should be no greasy stains, dirt or dust on the surface of the base, as this will lead to the destruction of the floor, which will be removed in layers.
The main thing is to correct the unevenness of the screed and clean it well
Before pouring the base with a polymer composition, the surface is carefully primed using a special impregnation for concrete floors. The mixture should be absorbed for 2-3 hours. Next, the intermediate layer is laid. The prepared composition is poured onto the surface in small portions, distributed and leveled using a squeegee or needle roller. The same principle applies to laying the topcoat after 5-6 hours. After complete drying, the finished surface is coated with a polyurethane-based varnish, which will provide the floor with additional protection.
Important! The price per square meter of self-leveling polyurethane flooring up to 30 mm thick starts from 250 rubles, more than 35 mm – 350 rubles.
A conventional bulk polyurethane mixture is characterized by a uniform structure. To make the coating more decorative, there are several techniques. You can distribute paint in an original way between the layers of the floor, which will allow you to imitate marble.
To obtain an unusual abstract image, you can use glitter, which is represented by voluminous sparkles made of aluminum foil or polyester. Elements may have different sizes and colors. There are plain or fluorescent options.
The composition of the self-leveling floor is poured onto the surface in small portions, distributed and leveled.
You can embed a design between layers. For this, three-dimensional images are used, which makes it possible to create a realistic surface. The cost per m² of self-leveling polyurethane flooring with a three-dimensional image starts from 600 rubles, which depends on the complexity of the pattern application technology.
Selection rules
Sometimes choosing the right product for your concrete floor can be a little challenging. Simple rules come to the rescue.
- Surface color and texture. When polymer is needed for high-tech residential premises, you can take glossy surfaces. If we talk about the Provence style, then it is better to take matte options.
- Application environment. When a polyurethane floor will suffer from heavy loads, it is best to take a two-component product. Due to this, the coatings are dense and do not suffer from abrasion. The most important thing is not to forget that this specificity is related to the thickness of the polymer itself. Each type of floor is suitable for different load forces.
- Price. The cost of products is directly related to their technical properties. It varies over a wide range, so you can choose the best variations to solve various problems.
When choosing materials, be sure to pay attention to the color and texture of the surface, manufacturer, as well as cost
- Firm. Here you need to look exclusively at the reviews of people who have already tried such products. Only they allow us to really judge how good a specific type of polymer is.
Design options for different rooms with self-leveling floors
There are many different ideas that will suit any room.
Pay attention to these:
- Living room. For the living room, you will have to choose a neutral design so that it harmonizes with other decorative elements. You will definitely amaze your guests with your sophisticated taste.
- Kitchen. You can choose options with or without drawings on various topics. Give free rein to your imagination to make your dream come true.
- Bedroom. Looks elegant and expensive. You will have to spend money to achieve the desired effect. Additionally, a heated floor system is installed for heating during the cold season.
- Children's room. Various design options are possible - cartoon characters, clouds, beautiful natural effects, landscapes, animals. You will also have to take care of insulation.
- Bathroom. 3D designs with a marine theme have gained particular popularity. This coating is protected from moisture and is also resistant to temperature changes.
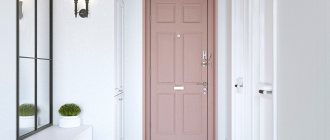
- Hallway. It is used quite rarely in the hallway. You can choose a plain option or use a design to level the floor.
- Corridor. This solution doesn't come around very often, so you should think carefully about the design. It is recommended to choose a monochromatic coating in light shades.
Good examples and variations
A polyurethane floor in an apartment can significantly change its appearance in order to highlight the design of the room and make it unusual.
For example, in the bathroom the floor can be made in the form of an ocean with its inhabitants. The effect is simply incredible.
In the kitchen, you can make a floor that will look like a rich parquet made of wood.
In the bathroom, a self-leveling polyurethane floor is often installed, placing three-dimensional images of the ocean and its inhabitants between its layers
It would be nice to organize a spring meadow with bright flowers in the living room. This will make the room beautiful and pleasing to the eye, and will create a feeling of relaxing in nature.
Parquet
The “Parquet” collection is a set of images with which designers can create original and stylish projects that can sparkle with new colors when using other 3D design elements. From us you can download free seamless textures of various colors and options: from classic herringbone to palace (artistic) parquet. Our website also presents seamless parquet textures of various colors. Exotic options are presented in “wenge” and “stained oak” colors. For more laconic options, use the texture of pine, birch or alder. Our textures can be used in such graphic editors as 3DS max, Maya, as well as Photoshop.
Features of pouring polyurethane floors
Pouring a polyurethane floor is somewhat similar to painting a floor with oil paint. Although even more so, because the material spreads over the floor like water - incredibly quickly, as a result of which it covers cracks or irregularities without any problems. The wear resistance here is much higher, so even car brake pads are made from polyurethane.
Pouring onto a fresh concrete screed
When you want to make a new one, you will then need to wait a month, only after that work on the polyurethane floor is allowed. This is required to ensure that the base moisture does not exceed 4%. As for the strength of concrete, it should be no less than M200.
Installation of a self-leveling floor can be carried out only a month after pouring the concrete screed
On an old concrete base
What to do with the old screed? It is very important to correct any imperfections and do a good cleaning. Cracks and other problems must be carefully repaired, and then the base itself must be leveled. It is also possible to use self-leveling mixtures.
If possible, make a horizontal base so as not to have to deal with further leveling. For leveling, use a screed made of cement and sand.
By the way, some are wondering if there is an alternative to the difficult work of grinding the surface. Exactly two hours before using the primer, you must vacuum the base. As soon as the first layer dries, apply the second and sprinkle the floor with hot quartz sand. Once everything is firm, vacuum up any excess sand.
If necessary, eliminate defects of the old screed - remove irregularities, seal cracks
How to care?
In terms of operation of self-leveling floors, there are no special requirements. However, in order to maintain their attractiveness for many years, it is recommended to regularly treat the surface with a special mastic. It is applied in a thin layer at least every six months. When performing repairs, it is advisable to cover the coating with thick fabric or other material.
In the “Cozy Wall” studio you can order photo wallpapers for arranging rear floors in any style with delivery throughout the Russian Federation. Our catalog has a large selection of popular designs in various categories and the ability to create images based on client sketches.
Common mistakes
It is very important to try to avoid the following mistakes when performing pouring work.
- If you did not dry the base properly before pouring, allow grease stains to appear or leave dust, the floor will begin to peel off in layers when a certain amount of force is applied. If you notice this phenomenon throughout the coating, you will need to remove it. If only a few areas are affected, you can re-flood them. If you allow debris to get in, get rid of it after the composition has hardened using simple sandpaper.
- You should be very careful about the amount of water in the mixture. When there is not enough of it, lumps will begin to form; if there is too much, the quality and strength of the polymer will decrease.
It is important to carefully monitor how much water has been added to the mixture - both excess and deficiency can affect the quality of the floor
- It is very important to be aware of this mistake, which can be very costly for people pouring polyurethane floors. In hot weather, after finishing mixing the mixture, you are literally distracted for a few minutes, and as soon as you return to work, you will find a tightly frozen mass. Of course, the instructions say that hardening occurs in 20 minutes, but in the heat everything can happen faster. Many novice masters make precisely this omission. So in the heat it is better not to work with compounds. At normal temperatures, it is better to immediately place the mass in the application area.
It is worth saying that during the process of pouring the floor, a nasty smell will most likely arise, which will disappear after a couple of hours.
How to pour a polyurethane coating with your own hands
Anyone can make a liquid decorative floor in an apartment with their own hands, even without construction experience. To do this, you should follow a certain sequence of actions and some recommendations for installing the coating.
If you decide to fill the polyurethane floor yourself, then you should prepare the base, room and solution in advance
The technology for laying self-leveling, decorative flooring includes the following steps:
- Preparing the base. Before applying the mixture, the base is repaired (if necessary), leveled (for professional installation, the cement screed is leveled using a surface grinder; in an apartment, a primer can be used to eliminate small differences in height), and thoroughly cleaned. The self-leveling floor is installed only on a dried floor.
- Preparing the premises . The polymer floor must be installed in a draft-free room with an air temperature within +15-25°C.
- Preparation of the solution. The solution is mixed strictly according to the manufacturer's instructions. At the same time, when calculating the amount of material, it should be taken into account that the mixture loses its fluidity after 20 minutes. To give the coating additional qualities, you can add quartz sand to the mixture (to obtain an anti-slip surface), and provide the floor with copper plates (for an antistatic effect).
- Pouring the floor. The floor in large rooms is poured in parts. After the initial layer has dried, designs are applied to the coating. The mixture is leveled using a squeegee - a professional spatula for ideal distribution of bulk mixtures.
- Applying the finishing layer. As a finishing coating, special varnishes or a transparent polyurethane mixture are used.
The polyurethane surface will be completely ready for use within the next day after the applied mixture has dried. When installing floors, it should be taken into account that epoxy mixtures do not have an unpleasant odor, whereas polyurethane mixtures often have a very strong odor. Therefore, it makes sense to take care of purchasing or renting respirators for the duration of work.
Related article: Programs for apartment and house design - choosing the best
Working on the base layer of the floor with a pattern
At this stage, the base mixture of the floor is prepared, which should be perfectly flat.
- The dividing element of the structure will be a damper tape, which should be secured around the perimeter of the room.
- Using a level or level, you need to install beacons. They should be fixed as evenly and accurately as possible.
- Three-dimensional patterned floors require a special solution. It consists of a building mixture and water, which must be mixed in a ratio of 25 kg to 6 liters. You may need less liquid, so there is no need to rush to add a lot of water; the resulting mixture should be viscous. Excess liquid can lead to the fact that the finished coating will not be very durable and of high quality.
- The prepared mixture must be applied to the finished base.
- Using a T-bar, you need to level the mixture on the surface.
- Use a needle roller to remove air bubbles.
Necessary materials and tools for work
In order to prepare a high-quality solution, you need to take care of tools, equipment and protection. List of the most necessary items:
- Squeegee for leveling the solution.
- A needle roller made of metal or plastic to remove air bubbles.
- A notched trowel is useful for working with a self-leveling base.
- A level at least 2 m long for height control.
- Container for diluting the material.
- Pin beacons performing the function of guides.
- Construction mixer or special attachment for mixing components.
- A grinder that will be needed both at the stage of preparation for work and at the finish.
- A respirator that prevents inhalation of harmful vapors.
- Protective gloves.
- Metal platforms that are attached to shoes and prevent damage to the finished coating.
If you decide to make a self-leveling floor with your own hands, you must purchase the necessary material in advance:
- mesh for reinforcing liquid floors;
- concentrated additives serving as dyes;
- polymer mastic as protection;
- adhesive composition for eliminating minor flaws;
- fillers that reduce the consumption of the finishing mixture;
- varnish for added strength and shine.
Professional tools for leveling the mortar: notched trowel
Surface preparation
When screeding the floor with a special solution, there is no need to additionally prepare the surface, since the filling is done in a thick layer.
Self-leveling floors require careful preparation and cleaning of the surface.
Arrangement of beacons
Fill the screed, focusing on the beacons. Most mixtures have self-leveling properties under their own weight and do not require beacons.
Using rack or pin beacons when pouring
Pouring the composition
Base primer
Having removed the loose layer of concrete, sealed all the cracks, and removed dust from the surface with a vacuum cleaner, the base should be primed, thereby reducing the consumption of the base material, creating conditions for its better spreading over the surface and increasing its adhesive properties. An edge strip should be laid along the perimeter of the walls.
Preparation of the solution
Preparation of the solution will take no more than half an hour and must comply with the manufacturer's recommendations.
A ready-to-use solution must be used immediately after preparation, otherwise its properties will deteriorate.
Checking the solution for spreadability
If, when making a self-leveling floor with your own hands, you doubt the amount of liquid per bag of material, it is recommended to check the level of spreadability of the finished mixture. This can be done using a simple technique:
- Cut a ring from a five-liter plastic bottle, the diameter of which is 20 cm;
- Place it on a pre-cleaned glass or ceramic surface;
- Pour the prepared liquid solution into the ring;
- Pick up the ring.
If the solution, after removing the limiter, spreads on a surface with a diameter of about 60 cm, that is, three times the diameter of the bottle ring, you have found the optimal amount of liquid.
The key to good spreadability of the mixture is the correct consistency of the solution, which is obtained by strictly observing the proportions recommended by the manufacturer
Pros and cons of self-leveling mixtures
Mixtures with self-leveling properties have many advantages:
- Easy to install;
- Dries for a short time;
- Create a durable coating;
- fire resistant;
- environmentally friendly;
- durable.
The technology for applying them is simple - pour the solution and stretch it with a spatula: the mixture will spread on its own, eliminating all flaws
The disadvantages of such mixtures are the high cost of materials and knowledge of technology when using.
Calculation of material consumption
To calculate the mixture consumption per 1 sq.m of floor, it is necessary to take into account the parameters of the layer thickness and the brand of material. The standard consumption rate is 1.5 kg of mixture per 1 sq.m.
Screeds: main differences
Screed is a traditional floor leveling technology, and self-leveling floors are modern. Both technologies have positive and negative properties.
Screeding is a more expensive process in terms of physical effort and time: it requires strict adherence to technology and a waiting time of up to 20 days
Blend selection
For a self-leveling structure, you can choose different mixtures. When choosing between them, you need to consider in which room the floor installation will take place.
Cement mixtures, which are distinguished by high technological characteristics and low price, contain:
- cement;
- Sand sifted through fine sieves;
- polymers;
- mineral supplements.
Gypsum mixtures are very popular among those who do their own repairs. A gypsum floor is easier to pour, process and dismantle than, for example, a cement floor. It does not require additional additives to prevent cracking. The only negative is its low moisture resistance, so it is not recommended to fill them in rooms with high humidity.
The final coating of gypsum is an indispensable condition for its effective and safe operation.
Quick-drying compounds will shorten and simplify the installation process of the base. The fillers and additives included in their composition allow you to walk on the surface within 3 hours and cladding 10 hours after pouring.
Base and finishing levelers
Levelers for roughing (basic) processing and finishing (finishing) differ in composition and characteristics.
Basic ones have a coarser texture, a larger fraction, serve to eliminate significant defects and are applied in a thick layer to ensure strength.
The main component of base levelers is most often cement, which provides strength and the necessary adhesion
Finishing agents, in addition to leveling the base and increasing its stability, result in an even and smooth surface due to a more complex and uniform composition.
When carrying out cosmetic repairs, you can level a floor that has minor defects using a finishing screed
↑ What to cook first?
It’s quite possible to create 3D self-leveling floors with your own hands. Of course, the technology cannot be called simple, but if you have the necessary knowledge, materials and desire, anything is possible!
To create decor, it is permissible to use one of 3 methods:
- three-dimensional picture;
- small elements in transparent resin;
- opaque base with stenciled image.
In the first case, we will need to select a design from an advertising agency for the production of 3D stickers using 3D printing. You can contact the printing house and order vinyl self-adhesive film with three-dimensional graphics. In the second - select decorative elements (coins, shells, pebbles, coffee beans, quartz sand), in the third - purchase a self-adhesive stencil.
The second important material is a transparent polymer consisting of a hardener and resin, called a compound in professional circles.
To fill a three-dimensional floor you will need the following tools:
Tools must be prepared in advance
- Grinder;
- industrial vacuum cleaner;
- construction mixer with screw attachment;
- flat and notched spatula (squeegee);
- fur and needle rollers, flat brush;
- studded shoes, respirator, gloves, workwear.