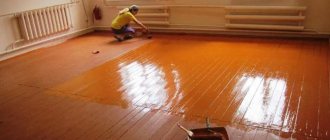
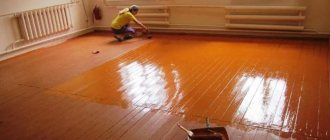
Volma Leveling Comfort self-leveling floor is a dry type mixture made on the basis of fractionated, astringent quartz sand, as well as modifying additives,
which help ensure high solution mobility, optimal working time and strength.
General information
Brief description (characteristics)
| Formation thickness | 0-10 cm | |
| Optimal layer thickness | 0.0.5-10 cm | |
| Material consumption with a thickness of 1 cm | 12 kg/m2 | |
| Water consumption per 1 kg of dry mixture | 0,30-0,35 | |
| Water consumption per 20 kg bag | 5.85-6.85 liters | |
| Viability of the finished solution | 1 hour | |
| Temperature of use (air, surface to be treated, materials) | From +6 to +32 degrees | |
| Compressive strength after 4 weeks | Not less than 16 MPa | |
| Surface adhesion strength | Not less than 1.0 MPa | |
| Ability to walk on the floor | After 240 minutes | |
| Possibility to load the floor | After 3 days | |
| Production of coating with residual moisture | No more than 1.5% | |
Application area
The mixture was created to level and create a high-quality floor with a thickness of 0.05 to 10 cm, the base being concrete or cement-sand, and for further decorative finishing of the coating - linoleum, carpet flooring, parquet, ceramic tiles, etc. Used for any residential premises and public buildings. For interior work only. The mixture is suitable for application by hand and machine, as well as for heating using a floating floor system.
Floor requirements
The base must be dry, highly durable, and free of dirt, dust and grease stains. The “age” of a cement and sand base should be at least 4 weeks, and a concrete base at least 3 months. It is recommended to carry out work under conditions where the base humidity is not more than 6%, the temperature is not less than +5 degrees, the air temperature is not less than +7 degrees, and the relative humidity is not more than 70%.
Advantages and disadvantages
Today, the technology, originally developed for the needs of industrial enterprises, is of interest to specialists involved in the construction and repair of office buildings, residential buildings, medical complexes, various institutions... It has confirmed its effectiveness wherever:
- The ability to withstand mechanical loads and the effects of substances of various chemical compositions. It is important for industrial facilities, scientific laboratories and warehouses.
- Resistance to abrasion, mandatory for floor coverings used in high-traffic areas and transport facilities.
- A satisfactory level of fire safety, achieved by complying with the requirements for flammability, combustibility, smoke generation and toxicity of combustion products, which apply to building and finishing materials.
- Hygienic properties. Reviews of the Volma self-leveling floor confirm that ordinary detergents are sufficient to maintain cleanliness in the rooms where such floor coverings are installed.
- Maintainability. Using the same materials and technologies as for pouring floors, it is possible to quickly eliminate even complex damage.
Flaws:
If we add to this durability and affordable cost, it becomes clear why the Volma self-leveling self-leveling floor attracts consumers. For the sake of obvious advantages, users are willing to put up with the existing disadvantages:
- Significant expenditure of effort and money required to prepare the base, laying thermal insulation and sound insulation.
- The high cost of equipment used during the work.
- Specific heat transfer characteristics. No matter how good the Volma self-leveling floor is, comfort in living quarters can only be ensured if heating systems are installed under the floor covering.
- Prices several times higher than the cost of linoleum or laminate floors.
Customers are not even afraid of the complexity of dismantling, the need for which arises for a variety of reasons. The pros outweigh the cons. But there are some nuances.
Execution of work
Preparing the base
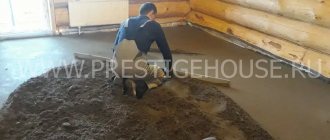
Before making Volma Level Comfort self-leveling floor, you should clean the base from dirt, dust, oils, lime, wax, grease, paint residues and other contaminants. Remove loose and loose parts of the floor, and along columns and walls in places where the floor adjoins, damping pads (tape or thin strips of polystyrene foam) should be laid. It is also necessary to seal all cracks and large recesses using a mixture that will be filled with a small amount of water at least 24 hours before pouring.
Care should also be taken to protect steel elements from corrosion, namely those that come into contact with the self-leveling mixture solution. On very dirty and damp substrates on which machine oil or bitumen mastic remains, as well as with low strength, it is recommended to install floors on a separating layer.
The thickness of the layer can be noted if you install level templates with a leveling ruler and a portable benchmark. It is also important to note the technological type areas for pouring the floor. According to the size of the area, which is more than 50 m2 and has a diagonal of more than 10 meters, an expansion joint should be installed in the floor, but only above the existing joints in the load-bearing base.
Next, we prime the entire prepared surface and part of the walls that will come into contact with the self-leveling floor. Porous surfaces should be primed a couple of times at intervals of 240 minutes. Laying the floor should be done only after the primer has completely dried. We do not recommend using other primers without consulting with specialists.
How to prepare the solution
Solution for manual application: the dry mixture should be poured into a clean liquid at a temperature of +5 to +20 degrees, in a proportion of 0.3 to 0.35 liters of water per 1 kg of mixture, and mix everything using a drill with an attachment or a professional construction mixer until smooth mass for 6 minutes. Let the solution sit for 3 minutes and then mix everything again. Don't pour too much water!
For application by machine: pour the dry mixture into the unit’s hopper and adjust the addition of water, and then select the required consistency.
Work order
So, here are the step-by-step instructions:
To begin with, the finished mixture should be poured onto the floor evenly to the thickness that you set, and avoid technological breaks.- Mark the technological area and fill it in 2/3 or 1 hour. When pouring the floor manually, the area of the area should be from 20 to 25 m2 or correspond to the area of one room.
- Next, after pouring the solution, you should remove the levels and remove air bubbles from the mass using a needle roller, brush or squeegee, and also make translational movements across and along the pouring surface, and start with areas that are adjacent to columns and walls.
- When the self-leveling floor begins to harden, during the first couple of days, avoid direct exposure to the sun's rays and drafts, and also create natural ventilation and keep the rooms well ventilated.
- The drying time of the floor will depend on the thickness of the layer, as well as on the humidity and temperature inside the room.
- Work on laying the coating on a leveled floor can be carried out no less than a week after pouring. The residual moisture content of the floor for laying the next coating should not exceed 1.5%.
Heated floor system
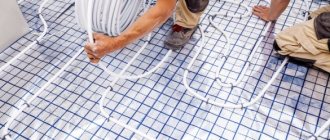
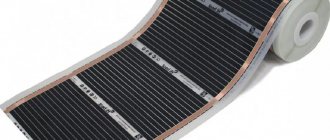
Volma Leveling Comfort self-leveling floor is perfect for working in a heated floor system. In this case, the minimum layer for pouring is 4 cm. If such a system is installed in the base base, then the thickness of the pour is from 0.05 to 10 cm. The first heating of the floor is permissible no earlier than a week after pouring, and the temperature should be from +25 to +27 degrees from 2 to 4 days.
How to calculate the required amount of Volma dry mixture for leveling the floor
If you plan to level the floor with Volma self-leveling compound, then, one way or another, you will have to purchase the material. It doesn’t matter whether the work is carried out independently or a team is invited - it is necessary to know the required amount of dry mixture.
For each type of liquid formulations, the manufacturer indicates the average consumption. It is usually expressed in kilograms of dry mixture, which must be spent in order to pour a 10 mm layer over an area of 1 square meter. All these values are indicated in the tables above.
Using this indicator, the known area of the room and the planned thickness of the future leveling screed, it is not at all difficult to calculate the total amount of composition.
In addition, sometimes it is necessary to take into account the difference in heights if there is a large deviation from the horizontal plane on the original surface. Even during preliminary inspections and measurements using a hydraulic or laser level, the ideal horizontal line is struck. Starting from it, they find the “extreme” points, that is, the highest and lowest. The difference between them will precisely show the amount of difference that needs to be eliminated by pouring the leveling mixture.
It is probably clear to everyone that the minimum specified thickness of the screed (leveling layer) will be exactly at the highest point of the original floor surface.
When making calculations, it is recommended to immediately include a reserve of about 10% - it’s rare that there is enough material “neck to neck”. In addition, there may be unforeseen losses, especially due to inexperience.
The calculator offered below is specially programmed to calculate the amount of Volma dry mixture for pouring floors. The cost values of the listed varieties are already included in the calculation algorithm. The result will be shown taking into account the reserve (10%), in kilograms, with subsequent conversion to the number of standard factory packaging (20 or 25 kg bags).
Calculator for calculating the required amount of dry building mixture "Volma" for pouring a floor
Go to calculations
Reviews
Boris, Astana: “The material consumption was 1 m2 more than indicated on the packaging. There were also some problems with the amount of water, as they thought. I understand what the consistency should be, I have experience, but what should beginners do who don’t know what is what and sacredly believe what is written on the product.”
Anton, Moscow: “I filled an 18 m2 floor. If you dilute everything strictly according to the instructions, then the mixture turns out thick, and if you pour it alone, then while you take measurements, the previous area will have time to dry out. As a result, it is difficult to make a smooth transition between sections, and it is also difficult to fill a large area at once, which is why the floor turns out to be multi-level. Then I tried mixing 8.5 liters of water per 20 kg of mixture, and then everything went like clockwork. The mixture spread on its own, and everything was smooth, the only thing was that it took a little longer to harden. I drained the excess water into the corridor from the room through a slot in the foam edge, and then covered the entire surface with shavings and sawdust so that the water would be absorbed quickly.”
Characteristics of Level Express
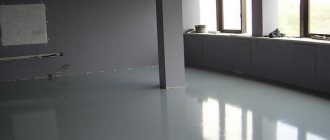
The floor is called self-leveling due to the principle of a self-leveling system. A wet solution is poured onto the prepared base, which spreads evenly over the surface, filling all the unevenness, potholes and cracks. Due to the reduced viscosity of the mixture, an absolutely smooth and even floor is formed.
The Volma level is suitable for pouring concrete and cement-sand foundations. With its help you can create an even coating up to 100 mm thick. This is an excellent basis for laying linoleum, parquet, laminate, ceramic tiles, and carpet.
Advantages of Volma brand Nivelir-Express mixture
- Ideal leveling - the plastic solution independently fills all the cracks and establishes balance in case of differences in the floor. The smooth surface does not require additional processing.
- High strength - an indicator of 15-20 MPa in compression is noted. The self-leveling floor seems to be a reliable basis for various types of finishing coating.
- Manufacturability - the leveling solution is easy to prepare and levels the surface without additional effort.
- Ecological purity - the Volma mixture is based on natural ingredients that are safe for health.
- Reduced thermal conductivity is the optimal material option for installing heated floors.
- Reasonable cost - for a package of Volma Nivelir Express weighing 20 kg in different regions the price is offered from 230 to 325 rubles.
- High hardening speed - the mixed solution is suitable for use within 45-60 minutes. After 5-6 hours you can walk on the floor freely. The self-leveling surface reaches its final strength after 72 hours.
- The versatility of the coating - it is possible to apply the quick-hardening composition manually or mechanically.
What is the consumption of dry mixture per 1 m2 of floor?
The instructions on the paper packaging indicate that the approximate powder consumption when pouring 10 mm thick is 12.5 kg. For example, in order to level the base of the floor in a room of 20 sq.m. A centimeter layer will require 13 bags of dry material. With a coating thickness of 15 mm, the consumption per 1 m2 will already be 19 packages weighing 20 kg.
Reviews of the self-leveling field Volma Level Express
Evgeniy, Moscow.
“When we decided to repair and insulate the balcony, we began to look for different options and calculate the cost. Neighbors gave excellent characteristics to the Volma self-leveling floor. We listened to their feedback and chose the fast-hardening brand Level Express. The difference in the floor in different places was from 0.5 to 6 cm. First we bought 4 bags of the mixture, then we had to get another one. To knead, you needed a bucket and a construction mixer. The finished solution is liquid, similar to kefir. They poured it in several stages and immediately rolled it with a needle roller. There were few bubbles and they went away quickly. Overall, we were pleased with the result - fast, clean and relatively inexpensive.”
Svetlana Kononenko, St. Petersburg.
“I heard a lot of rave reviews about self-leveling quick-hardening floors and decided to buy them for a kitchen renovation. The positive characteristics turned out to be not entirely accurate. I filled the floor in one step, having previously prepared a solution from 6 bags. It only took me half an hour to distribute the entire solution. But I did not dare to roll it with a roller, since the surface began to set instantly. As a result, irregularities and small depressions remained along the walls, which had to be corrected with additional filling. My review is negative: the Leveling Express self-leveling floor is very strong and thick for self-leveling, and its hardening time is too short. Therefore, it is unrealistic to treat a large area at one time.”
Nikolay, Ufa.
“I heard a variety of characteristics of self-leveling floors. Many were satisfied with the quick results and inexpensive price. There were also negative reviews from those who were unable to cope with the leveling work on their own. Still, I decided to buy the fast-hardening mixture level from Volma. For two rooms I needed about 60 bags of 20 kg each. Online stores offer different prices for packaging. Considering the volume of the order and advance payment, I managed to purchase the goods for 250 rubles. The floor pours easily and spreads quickly. The work is simple and mess-free. The surface is smooth and shiny. My review is positive: this is an excellent option as a subfloor under laminate.”
Andrey, Moscow region.
https://youtube.com/watch?v=lgTQUZZhfso
Preparation of working solution "Nivelir Express"
The standard packaging of Volma brand self-leveling floor contains 20 kg of dry mixture. To prepare a solution with the required parameters for 20 kg, you need to take about 6 liters of clean, cool water. It is not advisable to use warm (above 20 ˚C), especially hot water, since the higher the temperature, the shorter the period when you can work with the finished mixture. The “lifetime” of the prepared self-leveling floor mixture is up to 60 minutes. That is, during this time you need to have time to fill the entire surface allocated for leveling to the intended level. Therefore, if the pouring area is impressive, it is better to divide it into technological zones.
The “lifetime” of the prepared self-leveling floor mixture is up to 60 minutes
First, a measured amount of water is poured into the prepared volumetric container. And only then gradually (not all at once) the dry mixture is poured from the bag. If you do it according to the technology, after filling you need to let the dry substance soak in water for 3-5 minutes, and only then start mixing using a construction mixer or a drill (perforator) with an appropriate attachment. However, if there is work to be done over a large area, soaking the mixture is usually neglected, since the time for preparing the solution plays an important role.
After initial mixing until a homogeneous mass is obtained, the solution should be allowed to stand for up to 5 minutes, and then mixed again. This point cannot be neglected, since during the indicated period, small dry inclusions are dissolved and the mixture gains technological characteristics. Immediately after the end of the second mixing, the solution is immediately poured onto the work surface.
Pouring technology
If you have already decided which self-leveling leveler is best for the floor, then without proper filling you will not get an ideal surface. The process of pouring a self-leveling self-leveling floor involves two stages: preparatory operations and direct pouring. Preparation involves activities that include cleaning the base, sealing cracks and applying primer. Thanks to the priming solution, it is possible to penetrate into the pores of the screed and slightly level the surface. Next, the finishing coating will spread over the primed surface, forming an even, smooth outer layer.
In the article you can find out what are the pros and cons of dry floor screed.
The video shows a self-leveling self-leveling floor with your own hands:
To fill the floor, you need to dilute the mixture with water in the proportion indicated on the package. Liquid self-leveling floors are characterized by rapid hardening, so you need to prepare no more than 1-2 buckets of solution. To determine the solution consumption, it is necessary to know the thickness of the coating. If the layer is 10 mm, then the material consumption is 14-16 kg per m2. A bag weighing 25 mg will cover 2 m2 of floor.
Before stirring the solution, you need to install beacons for the self-leveling floor. Thanks to them, you will be able to know the level and height of the finished floor. Now you can pour the solution onto the floor and use a wide spatula to thoroughly level everything. To remove all air bubbles, you must use a needle spatula.
The video explains which self-leveling self-leveling floor is better:
Varieties of consistencies from the Volma company
The demand for ready-made dry mixtures is growing from year to year, as workers appreciate the convenience of dissolving ready-made components without selecting them in suitable proportions. Different types of work have different consistency requirements. Therefore, manufactured products differ in certain main indicators. There are two main types of consistencies for self-leveling floors:
- With a cement base. This type of consistency has become very widespread, as it corresponds to the traditional recipe for floor screed, which has been used for decades. The advantage of cement screed is that it smoothes even the most complex surfaces and is used as a preliminary layer for the purpose of repairs.
- With a plaster base. It is on this basis that self-leveling floors are made. Consistencies with a gypsum base are used for final finishing of the floor. Its advantage is that during the work there is no need to do difficult preliminary work and lay the coating on the base.
Consistencies from the Volma company are presented in a wide range, among them two brands stand out in particular - “Rovnitel Rough” and “Nivelir Express”.
