Due to the abundance of cleaning and grease, the problem of how to clean the siphon under the sink in the kitchen arises more often than in the bathroom. The recommended method for flushing the drain depends on the design of the siphon, the nature and intensity of the contamination.
To avoid stagnation of water and the formation of congestion in the sewer, it is necessary not only to clean the siphon in a timely manner, but also to prevent dirt and debris from entering the drain.
The kitchen sink is used more often than any other plumbing fixture in the house.
Types of siphons
The procedure for cleaning a siphon largely depends on the structure of the latter. Structurally, they can be divided into the following types:
- Bottle (aka flask);
- Corrugated;
- Pipe;
- Flat (similar in shape to a bottle, but at the same time has a flat sump shape).
Each type has its pros and cons. It is worth noting that the bottle model is most common for installation on kitchen sinks and bathroom sinks. A tank with a sump not only provides reliable protection against unpleasant odors, but the design also provides a large space for debris to accumulate (compared to tubular or corrugated models).
Tubular siphons have a very simple design. In fact, they are a curved U-shaped pipe. The rotation creates a seal that prevents unpleasant odors from entering the room. To clean this model, it is necessary to remove the curved section of the pipe, where all the debris usually accumulates.
Corrugated siphons are similar to tubular ones. In this version, the bend is formed independently from corrugations. Cleaning is usually done using a cable. Corrugated and tubular models are commonly used for installation on bathtubs and showers. They are compact in size (compared to bottle ones), which means they take up little space. However, this design gets clogged faster. However, the only waste in bathtubs and showers is usually soapy water and hair, so these models are considered the most suitable.
Required materials and tools
To change the drain device, you will need a minimum set of tools consisting of a screwdriver, pliers and a wrench.
Before starting work, the completeness of the factory delivery of the sanitary siphon is checked, including:
- frame;
- drain pipe;
- decorative grille masking the drain;
- cuffs made of rubber and polymers;
- fastening hardware (bolts and nuts);
- elastic gaskets for sealing joints.
If one or more items are missing, the missing parts must be purchased separately.
In addition, high-quality installation work is impossible without additional materials:
- tow or rags;
- sealing composition based on silicone or rubber;
- FUM tapes.
When dismantling, you will need a container to drain the water. A large bucket or basin will do.
Clearing the blockage
Siphon cleaning can be done mechanically or chemically.
Mechanical, in turn, can be done using the following methods:
- With complete or partial disassembly of the siphon;
- Using a plunger;
- With the use of a hydraulic pump;
- Using a cable.
Partial disassembly
This method is available for bottle siphons; it does not imply complete dismantling of the latter. A bucket is installed under the sink or sink into which water and waste will drain. The sump is unscrewed, the cause of the blockage is eliminated, and the part is installed back. When installing, pay attention to the correct installation of all gaskets, otherwise leaks may occur. Cleaning the siphon of washbasins and sinks usually just comes down to a partial disassembly procedure.
Complete disassembly
Cleaning a bathroom siphon usually involves completely disassembling the siphon. Before starting the procedure, place a container into which the water from the system will be drained. Siphons may differ in design, however, in general, the procedure boils down to the following:
- The nut on the knee is unscrewed and it is removed;
- The nut connecting the siphon to the corrugation is removed;
- We dismantle the connection pipe to the washbasin (sink);
- After mechanical cleaning, we wash all parts. The siphon reservoir with outlet must be completely disassembled and cleaned using a piece of cable;
- That's it, you can assemble the siphon in reverse order. Be sure to check the nuts for proper fit and tightness. We let the water run and check for leaks.
Cleaning with a plunger
A plunger is a simple product consisting of a rubber valve and a handle. To begin with, the sink must be filled with water to a level of five to seven centimeters. We press the valve of the plunger to the drain hole, without lifting it from the surface, we make several vigorous movements up and down, as if pushing water into the drain. Remove the plunger and check if the water has started to drain. If not, repeat the procedure. Usually five or six approaches are enough. When cleaning, it is necessary to take into account the presence of an overflow, which should be closed with a stopper or rag to create a vacuum when working with a plunger.
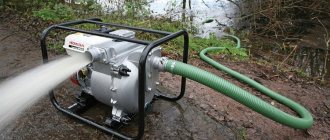
Using a manual hydraulic pump
A manual hydraulic pump is a more modern tool for dealing with blockages. The principle of its operation is quite simple: a water flow is created that pushes the obstacle down the pipe. If this fails, the tool, on the contrary, can direct the flow upward, creating a suction effect on the blockage.
The technology for using a hydraulic pump is quite simple:
- The overflow hole closes;
- A certain amount of water is drawn into the pump (depending on the model);
- The nozzle of the tool is pressed against the drain;
- The trigger is pressed and water is pumped;
- The procedure must be repeated until the blockage is cleared.
Cleaning with a plumbing cable
A plumbing cable is a more difficult tool to use. It is a twisted wire, the length of the cable is usually three meters, but the diameter can vary, depending on the purpose. There is a drill at one end and a handle at the other. The cable is used to remove blockages directly from the water supply system, and not from the siphon itself.
The procedure for removing blockages using such a tool includes the following steps:
- Cover the floor, and preferably the walls, with oilcloth;
- Disassemble and wash the siphon;
- Two people should work with the cable; one person will push the cable and the other will turn it. The cable should be pushed until it fits freely into the pipe, and it must be constantly turned. If progress slows down, it means you are approaching a mud plug. Try to advance the cable, turning it all the time. If forward movement is not possible, do several back-and-forth moves.
- If unsuccessful, remove the tool, clean it and repeat again. It may take up to three or four attempts.
- After the plug is removed, reassemble the siphon and pour a couple of liters of boiling water into the system, this will help drain the remaining dirt.
Removing blockages using chemicals
Today, manufacturers offer a number of ready-made products to remove blockages. Their range is quite large, however, they all act either on the basis of acids or alkalis. When choosing a product, carefully read the instructions for it and follow it exactly. Do not exceed the specified concentration and under no circumstances use two products (especially if we are talking about acidic and alkaline) at the same time, this can lead to damage to the pipes and overall failure of the drainage system.
You can also use a home remedy consisting of non-carbonated soda and table vinegar. True, this mixture only helps with mild blockages. Pour two tablespoons of soda into the drain hole (note that it must be pushed in), then pour in about 200 ml of vinegar. We are waiting for the reaction to end. After a couple of minutes, add two more liters of boiling water.
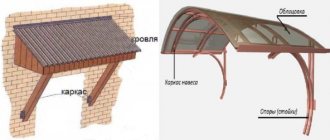
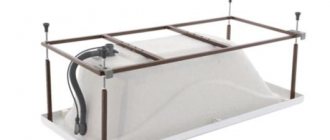
How to assemble a bath drain device
Assembly methods vary according to the type of structure. In a pipe device, the parts are connected one by one. To properly assemble the bottle system, measure the distance between the floor surface and the bathtub.
Next steps:
- First, a flask is built. By sealing the fixation with a rubber gasket, the bottom is attached to the cylinder. Fixing nuts with a seal are screwed onto both ends of the drain pipe. One side is inserted into the top hole of the container, the second is connected to the neck. The joints are sealed with silicone compound.
- The overflow hose is fixed to the corresponding outlet of the flask. The required length is formed by stretching the corrugation. The telescopic design allows you to adjust the size of the prefabricated pipe by extending individual elements of the part. After creating a given configuration at a fixed bend point, the outlet is connected with a nut to the overflow pipe.
A prerequisite is that the hole in the bathroom matches the diameter of the hose. The factory package of the bottle siphon includes a gasket. The seal is placed between the surfaces when securing the overflow.
Design
Before you get interested in how to remove a siphon from a shower stall, let’s get acquainted with its features. This element is also called a “ladder”. This product can be used to connect various plumbing fixtures. It is not used for structures with a built-in water lock and those that are connected directly to the sewer system. The following elements are suitable for shower trays: 1. Bottle (flask) trays. The functional element here is a special compartment with the shape of a bottle. These siphons are installed for high shower trays. 2. Pipe. They are assembled from several pipes of different lengths, which are connected by adapters. They are characterized by compact dimensions, therefore they are in demand for almost all shower cabins. 3. Corrugated. These are also pipe devices, but instead of hard ones, soft pipes are used that bend easily. They have a rough inner surface, which causes them to become clogged faster, which is why they are less popular. The best option for a shower stall is a pipe siphon, which has suitable characteristics and small dimensions.
Drain design
How to choose the right siphon for a shower stall?
Grabber Claw
You can look for such a device in hardware stores or order it from a well-known Chinese online store.
The principle of using the claw-grabber:
- Insert the tool into the sewer hole up to the siphon.
- Press the spring located on the handle - the “claw” will compress.
- Pull out any dirt caught in the tool.
- Repeat the procedure until the siphon is clear.
- Author: iarriba
Rate this article:
- 5
- 4
- 3
- 2
- 1
(1 vote, average: 4 out of 5)
Share with your friends!
Replacement
Let's move on to how to change the siphon under the shower stall. It is not recommended to buy cheap products, since in order to replace a failed siphon, you will have to remove the pan. And to do this, of course, not in all cases, you have to dismantle the shower stall. Not all parts can be reused later, so you should immediately choose a reliable product that will not require frequent maintenance. No matter how reliable the equipment is, it cannot last forever. To replace the siphon, first remove the decorative panel from the bottom of the tray. It is often secured with snap-on clips. To open them, you should press the panel around the periphery with slight force. Dismantling is carried out as follows: 1. The elbow is detached from the external sewer pipe. 2. The elbow is unscrewed from the pallet, for which an adjustable wrench or washer is suitable. 3. The overflow, if any, is disconnected. 4. The drain is removed.
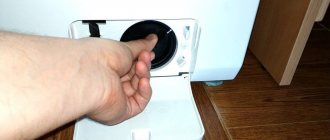
Element dismantling
The next step is how to disassemble the shower siphon for cleaning. The sequence of work looks like this: 1. Place a container under the siphon into which the remaining dirty water will drain. 2. Unscrew the union nut. It is better to do this slowly so that the liquid does not get on the floor. 3. Pour out the remaining water. 4. Remove the gasket from the rubber.
Appearance of the disassembled device
Read also! Maybe
An effective folk method
A time-tested folk remedy will also help eliminate the problem. A solution of soda ash and vinegar gives a good effect. When baking soda reacts with acid, it produces large amounts of carbon dioxide. In a closed space, it pushes through the congestion.
To enhance the effect when carbon dioxide is released due to the interaction of soda with vinegar, after filling the components, you need to tightly close the drain hole
Instead of vinegar, you can use citric acid or freshly squeezed juice of one lemon. In any case, the prepared product will not “hit your wallet” much.
Sequence of actions:
- Pour ½ pack of baking soda into the drain hole.
- After 10-15 minutes, when the powder is compacted, half a glass of vinegar is poured into the hole.
- When the chemical reaction begins, the hole is covered with a stopper.
- 60-90 minutes after the “seething” is completed, the tap is opened and 5-6 liters of hot water are poured into the hole.
The method using soda and vinegar is only effective for clearing blockages located close to the drain. The further away the plug is, the lower the pressure of the released gas.
Image gallery
Photo from
Step 1: Load the Drain with Baking Soda
Step 2: Boiling water to pour into the drain
Step 3: Add Vinegar to the Pot
Step 4: Pouring the solution into the drain hole