On the issue of fixation
Half-timber joinery joints do not have a mechanical connection, so they are secured using gluing. We discussed in detail how to properly glue wood and choose the appropriate glue in previous materials.
Read also: What can be made from thermomosaic
While drying, the structure must be secured with clamps. When placing the clamps, make sure that their pressure is distributed evenly. An incorrectly installed clamp can deform parts or disrupt the fit of the connection.
Unlike frame structures, logs or beams are strengthened using a different technology. In this case, screws, dowels or dowels are used to secure the connection.
The type of connection based on the insertion of a tenon into a groove appeared in Europe almost simultaneously with floorboards and lining. The finishing material is simple and easy to install and has a lot of advantages. True, the cost is more expensive than ordinary boards and strips, but the joints are much neater, and the service life is much longer.
Tenon-groove connection: tenoning device and cutters for a hand router
Knowing how to make a tenon and groove with a hand router, you can even at home make not only beautiful but also reliable furniture, but also various wood structures characterized by excellent load-bearing capacity. The tongue-and-groove system connects not only elements of various furniture (tables, chairs and shelves), but also frames of low-rise buildings that experience significant loads during operation.
A tongue-and-groove joint made by hand
In order to make a tenon on a wooden beam using a hand router, several conditions must be met:
- securely fix the workpiece and correctly orient it in relation to the guide sole of the router;
- set the height of the working part of the cutter so that the tool removes a layer of material of the required thickness from the surface of the workpiece.
Even using the simplest tenoning device for a router when performing such processing, you can not only increase its productivity and quality of the result, but also make the technological process safer. It is especially important to use such a device, which can be made with your own hands, in cases where furniture is produced not in single copies, but in series (in this case, the craftsman has to perform a large number of similar operations both with the same type and with wooden pieces of different shapes and sizes details).
Rating of the best models
There are two main types of edge routers: corded and cordless. Each of these groups includes many models of units. We bring to your attention an overview of the best device models.
Network
Let's look at the best network models.
Makita RT0700CX2
The cost of this device is about 12,000 rubles. The total power of the model is 710 W, the unit is in demand and popular among professional carpenters and joiners. The rotation speed reaches 10,000-30,000 rpm. For user convenience, the manufacturer has provided a rotation speed control system. There is also a modern soft start function.
Bosch GKF 600 Professional
This model is excellent for use in home workshops, which is due to its low power, which is 600 W. During operation, the Bosch GKF 600 Professional router model produces a large amount of noise; therefore, it is mandatory to use headphones to protect your hearing.
Rechargeable
Among the battery-powered ones, there are several best models.
bo KFM 18 LTX 3 RF 5.5Ah x2
This unit belongs to the professional category, which directly affects its cost, which is about 76,000 rubles. The rotation speed reaches 7,000 rpm. The total weight of the structure is about 3 kilograms, so it is quite convenient to use and transport if necessary.
Makita DRT50ZJX2
The market price of the device is about 15,000 rubles. The minimum rotation speed is 1,000 rpm. Vacuum cleaner connection and lighting complete this equipment.
In addition to those listed, the Fes model is also popular.
Useful DIY crafts
In order to make something useful, for example, a box, it is not necessary to have a whole arsenal of complex equipment and expensive tools. You can get by with a minimum of tools and mechanisms . To perform carpentry work you will need:
- milling cutter;
- electric jigsaw;
- Sander;
- several clamps;
- set of cutters
You can use absolutely anything as a material - for example, scraps of parquet boards, pieces of plywood and waste chipboards, but always at right angles. To simplify the work, you need to make a simple milling table. To process workpieces, you will need a large-diameter straight groove cutter. The process looks something like this. On a makeshift table, plan the ends of parquet board scraps. Mark the sides of the box and use a jigsaw to remove all excess.
The resulting blanks must be processed with a thicknesser to maintain the size of all sidewalls. If you don't have a surface planer, you can use a milling table. To do this, set the stop to the size of the workpiece and move the part between the stop and the rotating cutter towards you. The next operation to calibrate the sidewalls in length is performed with a jigsaw.
Straight edges start in the shop
When purchasing lumber, select the best boards possible, paying particular attention to the grain pattern and how it will look on the finished product. You can purchase unplaned material, either having two planed faces or planed on both faces and on both edges
The latter option, being more expensive, often solves the problem of obtaining a straight edge. However, even such boards can warp. Warped boards, although difficult to work with, can also be a good material. A flat board with curved edges (photo on the right) can easily be processed to straight edges by following the decision diagram.
Selecting a longitudinal groove with a router
To select a groove 6 mm wide and 4 mm deep at a distance of 10 mm from the edge of the board, do this. Attach the router to your workbench and install a 6mm router bit. Set the guide bar to 10mm. Adjust the height of the cutter so that it is 2mm above the table. Make a pass along the guide to create a 2mm deep groove. Turn off the router, raise the cutter another 2 mm and repeat the pass. You will get a groove 4 mm deep.
Selecting a longitudinal groove with a router
Quarter selection sequence
- We adjust the reach of the saw blade so that the cutting depth is equal to half the thickness of the board being processed. The easiest way to do this is right on the spot. To do this, place the board on the side of the saw blade, as shown in the photo, and adjust the reach of the blade.
- We install a parallel stop on the machine so that the width of the cut is also equal to half the thickness of the board. We take into account the thickness of the disk itself. This completes the machine setup.
- We make longitudinal cuts on opposite sides of the board.
- We make cuts from the ends of the board. A quarter is ready. As a by-product we get glazing bead)).
Seam using an electric planer: purpose and application
Quarter or other name for seam. This is a selection in the form of a step along the edge of a board or block. It is designed to allow you to create overlays for workpieces. This simplifies the process and also eliminates the need to make tongue-and-groove joints in parts that are burned. The board is peeled, used mainly for the manufacture of floors or panel structures.
First, the workpiece is placed on a carpentry machine and secured as tightly as possible with clamps. Fasteners should be on the opposite side of the processing area.
Tools used
The creation of tenons and grooves, with the help of which the connection of two wooden blanks will be ensured, involves taking a sample of material on the side surface of a beam or board using a hand router. In this case, all geometric parameters of the elements of the future connection must be strictly maintained.
To perform this operation with a hand router, you can use tools with shanks with a diameter of both 8 and 12 mm. The most universal in this case is a groove cutter, the cutting part of which works as follows:
- the lateral surface forms the walls of the groove and the sides of the tenon;
- the end side processes the bottom of the groove and removes a layer of material of the required thickness from the base of the tenon.
Cutting a tenon with a mortise cutter
Thus, using a tool of this type, it is possible to form both a tenon and a groove on the side surface of a beam or board. Moreover, their sizes can be adjusted within a fairly wide range.
In cases where higher demands are placed on the reliability of the connection of wooden parts, the grooves and tenons are made not of a rectangular shape, but of a shape called “dovetail”. Grooves and tenons of this configuration are created using dovetail cutters. It is also possible to perform the procedure for forming grooves and tenons of this shape with a manual milling cutter, but for these purposes you should use devices of a different design.
Dovetail sampling using a template
So that the question of how to make a groove in a board or beam or a tenon on their side surface does not cause any particular difficulties, it is better to use a power tool equipped with comfortable side handles, a wide guide sole and the option of protecting the spindle from turning during the process of replacing the cutter. In addition, it is desirable that such equipment have a side stopper, due to which the overhang of the cutter used with it will always remain constant.
Marking of the second part
Tenon joint elements.
After this, we move on to marking the second part of the connection. To do this, you need to take the two parts that are supposed to be connected and attach them tightly to each other. In this case, you need to ensure that it matches the lines of the cuts. When the parts are perfectly attached to each other, it is recommended to clamp them in a vice so that they do not move.
Now that the parts are properly fastened, you need to apply marks with a pencil on the second part that has not yet been marked, and then make the initial cuts with a file. These will not be solid lines, but just thin marks, similar to scratches. But it is still necessary to do them, since it will be easier to work later. Only when making marks, try to do it in such a way as to achieve perfect evenness and avoid bending.
Related article: Technology of interior finishing with gypsum bricks
After this, it is necessary to release the parts and move them further relative to each other. It is important to take this into account. If you move the parts just a little by the width of the file, the connection will turn out to be quite rigid. And if you make the shifts a little more, it will be freer.
However, it cannot be said that any of the options is bad. It all depends on the nature and size of the parts being connected. And also on the specific type of wood used. If you use plywood, then you can make shifts only along the width of the cut, since in any case it will not be subject to severe deformation.
Curved cuts
A curved cut can be made with an electric hacksaw, jigsaw or band saw. The hacksaw is good for large radius cuts and thick wood, when the cutting line goes away from the edges.
Curved cut
Hacksaws are equipped with rotating bases that change the cutting angle, and depending on the type and thickness of the material, different saw blades should be used. For curved cuts of small radius and with wood thickness less than 50 mm, use a jigsaw or jigsaw.
Jigsaw machine
Install the new file and tighten it until it rings when you click it with your finger. If you need to cut an opening, you can do two things: either start cutting from the edge, or, if you do not need to touch the edge, first drill a hole in the part to be removed, then release one end of the file, pass it through the hole made and clamp and tighten again.
This saw makes it easy to make cuts at any angle. Place the cutting blade on the frame at the required angle (90, 45, 36, 22.5 or 15°) and fix it. Set the depth gauge to the desired mark. Place the workpiece on the saw table, press it against the fence, and then make the cut using smooth back and forth movements.
Drill saw
Neither a hand saw nor an electric hacksaw will help if you need to cut a small hole in the workpiece - less than 10 cm in diameter. A jigsaw may also be useless if the workpiece is large. In this case, the most suitable tool is a drill saw. With its tip it bites into the wood like a drill and thus makes a “starting” hole for further cutting. Externally, the saw is similar to a round file with the difference that its shaft is surrounded by a spiral around the cutting edge.
Drill saws are available with interchangeable attachments of various diameters, designed for processing both soft and hard wood, as well as a variety of materials made from it.
The working body of a drill saw is a metal rod with a cutting tip, like a gimlet, and a cutting edge that goes around the rod in a spiral.
This is what the narrowest of hand saws looks like. Thanks to the fastening unit, the blades in the hacksaw can be changed depending on the nature of the material being processed.
Drill attachment
One of the most popular and convenient options for cutting a hole is a special attachment for a drill. It is made in the form of a crown comb and has a rounded shape. With this attachment, cutting holes occurs quickly, and they turn out quite smooth.
drill bit for holes
Nozzles come in different diameters, which allows you to cut a hole of the required diameter. If you have already prepared a hole, we can advise you to try your hand at options trading.
Drill
You can also cut a large hole using a drill. To do this, it is necessary to pre-mark the outline of the hole to be drilled. Next, use a small drill to drill through holes along the contour prepared in advance. Next, using a jigsaw or a very sharp knife, we cut off the holes, thereby connecting the holes. After which you can smooth the circle using sandpaper of various grain sizes.
Chisel
You can also cut the required hole using a chisel. It is enough to remove the wood layer by layer along the contour. This option is the least suitable for interior decoration. The hole must be smooth, which cannot be achieved by using improvised and unsuitable materials for the job. The best option would be to use a drill bit. The hole is even and has smooth edges.
Thus, to summarize, it becomes clear that you need to choose a tool for cutting a hole based on your goals. If you need a high-quality cut, then you cannot do without a special tool.
Types of groove boards
Many users have no idea how to choose a groove in a board, believing that the store will offer them only one option for connection and material.
This is far from true; there you will be greeted by a large assortment:
- Symmetrical groove. This is the simplest type. In it, the lengths of the upper and lower shelves are the same, and they protrude at the same distance.
- Asymmetrical groove. Here the upper shelves are longer than the lower ones.
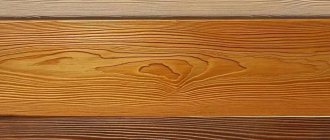
- Block house, used mainly for finishing walls and ceilings. The planks often imitate the relief of timber and have a semicircular or shaped profile on the front side.
- Euro lining, like block house, is often supplied with a relief pattern.
- Decking boards, made of wood and polymer, also have tongues and grooves that simplify installation.
Note! If you plan to mount walls that are not level, have protrusions and dents without a groove board, do not expect good quality from the result. The cladding will not lie flat, height differences and cracks are inevitable.
OPERATING THE DEVICE
Marking the grooves is very simple. Determine the shoulder line for each groove by making a pencil mark on the face of the piece. You can put two side walls together and mark all the grooves at once, or mark the second side wall after routing the first.
Once the fasteners are aligned and the cuts are marked, line up the stationary straight edge with the mark (Photo C), lightly tighten the clamps and make the cut with a router, then move the fasteners to the next mark. A well-chosen groove should fit the Tenon without gaps or play (photo D).
Processing of wooden parts
The first thing you need to learn is to correctly set the milling depth. To do this, you need to set the zero point. It is impossible to set it rigidly, because it changes every time the cutter is changed. The zero point is the position of the tool when the end of the cutter touches the material and is fixed with a special device called a clamp.
It is necessary to pay attention to the fact that each router has a different position when fixed. To control the depth of immersion of the cutting tool into the body of the material, a stop pin with a coarse adjustment scale is used.
We suggest you familiarize yourself with How to work with a hand router on wood: making a groove and cutting tenons, making furniture
When milling with an end mill, the counterforce from the cutting force moves the router to the side. To prevent this from happening, you need to use a rip fence. The milling process is as follows. Place the cutter along the marking line and secure the position of the stop with a special screw. Set the milling depth and turn on the machine. If the rip fence is installed on the left side, you need to pull the router towards you, when on the right side - away from you.
In order to select a quarter on a beam, you need to set the cutting edge of the cutter at the very edge, fix it, set the depth of the quarter, turn on the router and pull it towards you (if the stop is on the left edge of the beam). Milling the surface of narrow bars has its own peculiarity. The problem is that it is very difficult to hold the router on the narrow side of the workpiece. If it wobbles during operation, the groove will be inaccurate.
Working with a hand router can replace working with a planing machine. To do this, you will need several accessories for the milling mechanism. It looks like this: attach a milling mechanism to two equal-sized slats and use it as a planer, where a large-diameter milling cutter is installed instead of a shaft.
Types of cutters
For processing wood, board and composite materials based on it: chipboard, OSB, MDF, plywood and others, two types of cutters are used:
A Forstner drill allows you to make through and blind holes in wood materials. There are plenty of them on the market, but with standardized sizes: from 10 to 35 or more mm in 5 mm increments. What if we need a hole with a diameter of 17 or 22 mm?
Take a bolt with a head a couple of millimeters in diameter larger than the drilling diameter. A pair of symmetrical slots are made in it, which will become the cutting edges.
The bolt is placed in the drill (its standard chuck accepts bolts with a diameter of up to 13 mm), and it is clamped in a vice. The electric motor power button is clamped and fixed. Using a grinder, the edges of the bolt are cut to the diameter of the hole. Additionally, the operation will reduce vibration.
The end part is slightly removed, but so as to form a point in the center. It is better to leave the needle a larger size, and then modify it with a burr or a needle file.
They are formed, brought to perfection and sharpened at an angle of 35-40° - the harder the wood, the blunter the angle - the cutting edges of the tool. Afterwards they can be finished with a whetstone to give them ideal geometry and sharpness.
After completion of the work, the homemade cutter is tested at low speeds in a drill or drilling machine. It is strictly prohibited to install such equipment on a high-speed milling cutter:
Expert opinion
Strebizh Viktor Fedorovich, leading construction foreman
Then the second board is placed on the workbench, and the first one is placed on it, in order to install and secure the metal template in the desired position, the protrusion on the edge of the template must fit exactly into one of the middle grooves of the first board. If you want to clarify something, please contact me!
About Watts drill and Reuleaux triangle
In order to understand how the Watts drill works, you need to take a short excursion into geometry. Back in the 15th century, mathematicians became interested in the interesting properties of flat figures with equal thickness. The most famous such figure is the circle. Another simple shape from this series is a rounded triangle.
This figure turns out like this. An equilateral triangle is taken as a basis. Then a circle with a radius equal to the side of the triangle is drawn from each vertex of the triangle. The result will be a new shape with arched sides (see picture below).
A little later, the scientist L. Euler drew attention to the interesting trajectory of rotation of a rounded triangle. Then the engineer Reuleaux saw that with a certain way of rotating the figure, the trajectory of its vertices describes a shape very close to a square. To do this, it is necessary to rotate with some eccentricity. With this movement, minor roundings are formed only in the inner corners of the resulting square. Such a triangle is today known as the Reuleaux triangle.
At the beginning of the 20th century, the English scientist Watts was able to invent and patent a technical solution that would ensure such movement of a metal-cutting tool that it would ultimately result in a square hole in the workpiece. The resulting tool became known as the Watts drill.
When milling grooves and tongues by hand, use guides
To achieve the best results, you should consider the capabilities and limitations of your router and the cutters themselves. Removing a tongue with a cross-section of 19×10 mm in an oak board leads to overload of the electric motor and rapid dulling of the cutter, so this operation should be performed in two passes, each time immersing the cutter to half the required depth.
Downward helix cutters cut cleanly but guide the chips down rather than pushing them out. Remove debris with a compressor and make another pass.
Sometimes chips and dust accumulate in the depths of the hole or under the board, lifting it slightly, resulting in unevenness at the bottom. Once all passes have been made to the final depth, remove any chips and dust from the table and workpiece and make another pass to clean the sides and bottom of the sample without changing the settings.
Ascending helix cutters, on the other hand, are good at removing chips from deep in the tongue, but can tear off the edges of face veneer on plywood. Our advice is to use an upward helix cutter wherever a straight cutter can be used, and reserve the downward helix cutter for applications where the cut has an open edge or where the cutter is cutting right through the material.
For the first option, attach a straight cutter or a cutter with an ascending spiral into the collet and adjust the routing depth. Measure the distance from the edge of the router sole to the cutter blades. Fix the guide at the same distance from the marking lines, trying to align it as accurately as possible. With the router turned on, move it along the guide to select the tongue or groove.
In order for the tongue or groove to be straight, the sole of the router must move along the guide, touching it at the same point.
Since the cutter's cutter and bearing are the same diameter, you only need to align the guide with the marking line without measuring.
The second option (with a copying cutter) saves you from the error associated with measuring and setting the distance, since the cutter bearing located above the cutting part moves along the edge of the guide. You only need to secure the guide exactly along the marking line.
If the workpiece is too large to be processed on the router table, use a side stop to help make a groove or tongue parallel to the edge of the workpiece at a distance usually not exceeding 200 mm. For this operation, it is better to install a straight cutter or a cutter with an ascending spiral into the collet.
Drilling holes
Use a drill press and Forstner bits to drill large holes accurately and accurately. Mark the center of the hole, attach the corresponding drill bit and set the depth stop. Then press the workpiece with clamps to the workbench (this will take some time, but it will be completely worth it).
Drilling holes
To drill holes for screws and installation holes for nails, you should use a drill, and it is more convenient to use a cordless drill. If you need to screw in a lot of screws, install the screwdriver included with this tool into the drill chuck.
Driving screws with a drill
Making grooves for cutting
Strengthen a block or strip on the surface of the workpiece, for example with pipes, and use it as a guide when cutting a groove on a wide board. The rail must be larger than the board and extend beyond it on both sides so that the router is securely pressed against the guide along the length of the entire passage groove.
Always make the first pass with the tool along the right guide, then move the router to pass along the left guide. With this method, the rotation of the cutter helps move the machine along the ruler when cutting a single-sided dovetail, after the first pass, replace the dovetail cutter with a straight cutter.
Monolithic panels and frames are often made with relief, rounding and other chamfers to decorate the appearance, add lightness and protect sharp edges. The fold is a more functional part; for example, it is used when attaching a panel to a frame.
You can cut folds with a straight cutter using a ruler, moving it along the edge of the workpiece. The same method can be used to create a bevel with a V-groove cutter or a concave chamfer with a round groove cutter.
Making chamfers
The creation of shaped chamfers or folded wide panels is carried out using chamfer cutters with guide tips. Practice on scraps of wood to learn how to guide the tool with the tip only lightly touching the edge of the board - this will reduce friction and prevent burning of the wood.
Bevel the edges of the faux panel by working counterclockwise one at a time. so that the rotation of the cutter helps to cut it into the workpiece. If the panel is solid wood, sand the end edges first. and then move on to the side ones. In this case, possible chips at the cutter exit from the far ends of the end edges can be corrected by passing the cutter along the side edges. When finishing only the end edges, press a piece of wood or lath against the far edge to reinforce it.
Sometimes it is more convenient to process the inner edges of the frame after it has been assembled. The outer edges are processed as described above, and the inner edges are processed using an inner edge router or a wooden block in the shape of a right triangle, attached at the hypotenuse to a straight edge. In this case, it is important that the geometric vertex of the right angle (in fact, it is cut) coincides with the center of the cutter.
Before turning on the router with a vertical movement mechanism, lower the cutter onto the surface of the workpiece and place it exactly at the beginning of the groove. Raise the cutter, turn on the motor, and slowly lower the cutter to the set maximum depth. Bring the cutter to the end of the intended groove and release the vertical movement mechanism and turn off the engine. Using a chisel, trim the ends of the groove. Making a groove parallel to the edge Most grooves are cut parallel to and close to the edge.
We suggest you read: Is it possible to change the temperature in the bathhouse?
Included with any router, manufacturers supply side rulers (stops) with bolted screw fastenings, which can be adjusted to set the router to the required distance from the edge. If you have them, then place the router on the workpiece and align the cutting edge along one side of the groove marked on the surface.
For more efficient processing, attach a wooden strip made of hardwood to the working edge of the ruler
Creativity without limits
Milling equipment is indispensable when processing wood. With its help, you can turn a wooden blank into an elegant decorative product. This equipment is most often used by professionals, but experienced amateurs can also master it. Using mechanisms is not an easy task , so before you start working with them, you need to ensure your comfort and safety. Organization of the workplace is very important. The home craftsman must remember that during work there is a possibility of damage not only to the cutter or mechanical device, but also to health.
Woodworking is not only about working at the machine , but also about preparing the workplace and planning the sequence of work performed. Before you start milling, you need to select the appropriate type of cutter for a specific task, taking into account its shape and size. You should select the speed of the machine and the cutting depth and do not forget that the material being processed must be securely attached to the table.
Depending on the specific type of milling device, the rules for their use are different in many aspects. Today, vertical milling machines in which the spindles are located above the work table are widely used. They have proven themselves to be excellent in operations such as wood milling, processing the edges of shelves and round tabletops, making a groove, and joining wooden parts. When processing round structures, an indispensable addition is a special compass with a support plate, which ensures precision processing.
When working with a router, you need to learn how to move it calmly and smoothly. The key is to move the material being processed correctly and safely. This should not be done too slowly, as burn marks may appear on the wood, which can lead to damage to the material.
Chips appear when milling woodworking against the direction of the wood grain. In one pass it is necessary to mill to a depth of up to 8 mm; some models allow adjustment with an accuracy of 0.1 mm. Deep grooves and quarters need to be milled in several passes.