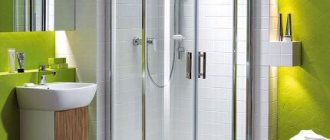
A shower stall is an excellent replacement for a traditional bathtub, allowing you to save space in the room and increase the comfort of showering. You can buy it ready for assembly and with a bowl. But recently, a shower tray made of tiles is often chosen. The tiled base looks impressive and lasts longer than structures made from most other materials. But before choosing a pallet, you should get acquainted with the advantages and features of its design.
Tile shower tray Source ytimg.com
Types and features of pallets
The main purpose of the design at the bottom of the shower stall is to protect against water getting onto the bathroom floor. Among the standard options are the following types of pallets:
- acrylic - inexpensive and lightweight, but scratchy and quickly turn yellow;
- steel structures are durable, affordable, but noisy and slippery, and sometimes even covered with rust;
- ceramic or made from natural stone - durable and beautiful, but heavy, expensive and practically impossible to repair.
Metal shower tray Source gidroguru.com
Ready-made kits are chosen for their high level of tightness, short installation time, and minimum “wet” work. But a homemade shower cabin without a tray is becoming increasingly popular. The reasons for choosing a tiled floor over an acrylic, ceramic or metal structure are the many advantages of the latter option.
Insulation
To insulate the shower tray, a layer of polystyrene foam insulation, 50 mm (5 cm) thick, is placed on its bottom.
Generally speaking, a brick shower tray is made to save money, and laying insulation significantly complicates the work. And it's not about laying insulation. To lay tiles on the insulation, it must be covered with a screed. To make a screed over the insulation, you need to lay rolled waterproofing, and the screed itself may need to be reinforced with mesh if you use a simple “wet” DSP mixture. It makes more sense to insulate the shower floor by making a concrete tray rather than a brick one.
Therefore, they often do not do insulation, but simply raise the bottom of the brick pan with two layers of laid brick, with channels for sewerage.
Advantages of tiles
Shower stalls with tiled floors provide homeowners with the following options:
- creating pallets of any size and shape - large and compact, square, rectangular and corner;
- reducing costs and saving time on installation;
- choosing tiles in accordance with other details of the bathroom interior - including tiles on the walls;
- increasing the service life of the structure, the strength of which is higher than that of acrylic and ceramic sanitary ware;
- changing the height of the shower fence in accordance with the preferences of homeowners - or eliminating the sides;
Tile tray without threshold Source stroypomochnik.ru
- manufacturing not only a tray, but also a shower cabin from tiles, characterized by the same durability and aesthetics;
- easy maintenance - ceramics are easy to clean using ordinary household chemicals.
One of the disadvantages is that it is very labor intensive. When taking into account the time required to complete the work, it is worth taking into account several tens of hours for the drying of first the screed, and then the glue on which the tile is installed. And when installing a shower tray, you should take a responsible approach to the choice of materials, the quality of which determines the service life and ease of use of the shower stall.
Dimensions and shape
Tile pallets can have almost any shape - in the form of a circle, oval, square, rectangle, sector or complex figure. The length and width of the structure are usually selected according to the size of the bathroom and start from 70 cm. When choosing, you can focus on a ready-made booth - or vice versa, buy or order plumbing fixtures that are suitable for a tiled tray.
One of the popular options for a small bathroom is a corner shape and large tiles. The tiles are selected in the same color scheme as those used for finishing the walls and floors. The color of the pallet makes the interior of the room more harmonious, and the design allows you to save space.
Corner design with tile trim Source ligastroygroup.ru
The depth of the pan can be small - only sufficient to drain liquid with a slope of 0.03-0.05. If there is a side around it, the design performs almost the same functions as a shallow bathtub. The pallet is laid out with small tiles (mosaics), and the walls with large tiles, preferably made in a similar color scheme. The same material can be used to decorate shower partitions.
Project preparation
The height of the floor is from 6 to 10 cm . It is impossible to lower the sewer pipes without disrupting the flow of wastewater throughout the house. Therefore, the floor in the bathroom will be higher than the floor in other rooms. Or the level of sewage throughout the entire house should be lower.
Selecting a drain - the location of the shower and the type of sewer drain are taken into account. Stainless steel products are preferable. They are more expensive, but last much longer. Plastic structures are lightweight and easy to maintain, but they will have to be replaced more often.
By design, ladders are divided into 2 types .
- Point – looks like a funnel closed with a lattice. The sizes are small. Can be located anywhere in the shower.
- Linear - is a long groove or tray. Its receiving area is larger and it is more efficient. Usually placed on the edge of the site or even in the wall, but can also be installed in the center.
There are models with a grid (linear drain) and a slotted one (invisible). The working area of the latter is closed by a flap so that it really looks like a gap. However, its throughput is no less.
Walls and barriers - in a country house, you can include stone and brick walls in the design, forming a shower niche. In a modern interior, preference is given to a glass booth or barriers made of transparent or colored polycarbonate. For their installation, only brackets are required on the walls, floor or ceiling. The weight of brick partitions must be taken into account when calculating the load on the foundation and floor.
At the project stage, the type of hydro- and vapor barrier , as well as the type of insulating material, is selected. Each of them has its own characteristics, some materials do not combine with each other.
The project includes a list of materials and tools used. The sketches accurately indicate the dimensions of the shower, its position, and the connection of sewer and water pipes.
Pallet design
Before you make a shower without a tray with a drain in the floor, you should decide on the appearance of its base. The easiest way is to plaster and prime the surface, painting it with moisture-resistant paint. But the best option would still be a tile shower tray. The choice of tiles is so large that you can choose it to suit any interior - or, if the walls are also decorated with ceramics, you can decorate the floor of the booth in a similar style.
Different types of shower tray designs Source gidpoplitke.ru
The tiles can be matte or glossy, plain or patterned. Design with a combination of different colors is allowed. Mosaic could be an interesting option - especially if it is already present in the decoration of other interior elements. Small details allow you to lay out a complex-shaped pallet - round, oval or in the form of a sector.
Interesting ideas for decorating a shower room in different styles
- If you want to achieve an elegant, stylish and at the same time discreet design, you need to use tiles with marble effect, which will perform all the functions of tiles. At the same time, it will emphasize the presentability of the shower room and add a touch of discreet luxury. As decoration, you can use gold-plated accessories for towels, as well as gold-plated sanitary ware and other decorative elements. All these accents will emphasize the sophistication of the style.
- Natural motifs are most suitable for wood-effect tiles. Stylization inspired by nature in combination with elements of ethnic motifs is very relevant today. Also, wood-look ceramic tiles are perfect for a vintage shower or eco-style. In a rustic or country style, imitation wood will allow you to feel the atmosphere of a country bathhouse.
To create your own unique design, experts recommend using and combining various materials: stone, mirror, ceramics, glass and chromed metal.
Other Features
When choosing a shower without a tray with a tiled base, you should pay attention to the degree of wear resistance of the materials. It determines how long such a tile will last and what it will look like some time after use. Therefore, even in a shower in a country house, for which a small budget is usually allocated, it is not recommended to skimp on finishing. The cost of tiles will be recouped due to the increased service life. Water absorption of tiles for the cabin should be minimal - class BI or BII (up to 3% or 3-6% of weight gain due to water absorption, respectively).
The “warm floor” system allows you to increase the comfort of using the shower. When choosing this option, pay special attention to safety. For heating, you should choose not a water floor, but a cable floor with good insulation and a protective screen. The moisture resistance class of the heating element must be at least IP44. The system controls are placed outside the room to avoid the influence of water and humid air.
“Warm” floors under the base of a tile shower stall Source moydomik.net
See also: Construction companies that specialize in heating, water supply, sewerage and gasification
Waterproofing
As I already wrote in the article on waterproofing a shower, it is very advisable to keep the pan flooded for at least a couple of weeks. With the semi-dry finishing screed method, the time can be reduced. This statement is not an axiom, but just logic: often cracks in the screed do not appear in the first days after pouring.
On the other hand, if the waterproofing is sufficiently elastic after drying, then hairline cracks in the base will not damage it.
In any case, you need to choose a coating waterproofing that has the ability to stretch. There are a lot of cheap compounds that have no elasticity at all. Such a layer will crack along with the base - it is better not to use such compounds.
It is mandatory to use reinforcing tape for the corners, and I also highly recommend laying façade fiberglass mesh on the bottom (between layers). The junction of the drain flange with the screed must also be taped with tape - if it is not included with the drain, then use the same tape as for the corners.
If there are sinkholes and recesses on the screed, the pallet can be puttied with tile adhesive. This will reduce the consumption of waterproofing and eliminate untreated areas.
Regarding the question of the height of the waterproofing layer: the main thing is to provide a “bowl” with edges of 10-15 centimeters, and higher - according to desire and finances.
Stages of work
If you have a concrete covering, which is usually found in modern apartment buildings, or a ready-made concrete screed, the work is simplified. In this case, you can immediately erect the sides of the pallet and waterproof the previously cleaned surface. But, if the base is uneven or wooden, you should screed before making a shower stall.
Preparatory work
A rough screed is often made using a regular mortar made from M400 cement and mixed with sand in a 2:1 ratio. You can immediately buy a ready-made building mixture such as M200 or M150, which will take several times less time to dry.
The process looks like this:
- A diversion is made for drainage into the sewerage system. It is recommended to complete the work in advance to avoid crumbling the concrete due to installation errors.
- The formwork is placed in the form of a pallet. When marking, take into account the height of the side, the width of the brick, the thickness of the tile and the adhesive. You can do without formwork if the screed is poured for the entire bathroom (for example, when installing a “warm floor” or major renovation).
- When the base height is up to 70 mm, the structure is reinforced using a metal mesh installed at a height of 30 mm above the floor level. If the height is more than 100 mm, it is not necessary to strengthen the structure.
Reinforcement of the shower tray screed Source userapi.com
- The solution is mixed using a drill with a special attachment. To reduce the weight of the structure, it is worth diluting the screed with expanded clay.
- Marks are placed on the walls of the formwork according to the height of the screed.
- The solution is poured and leveled using a rule or trowel.
The main part of the work on preparing the floor for installation of the pallet takes no more than one working day. It will take a few more days for the screed to dry. You can proceed to the next stage of work only after the solution has completely hardened.
Waterproofing and drain installation
To waterproof a shower cabin without a tray, two types of materials are usually used - polyethylene film and roofing felt. Bitumen or special fill is used less often. All options provide fairly effective protection, so you can choose any one.
. Waterproofing of rough screed Source izoler.ru
The process of installing a ladder requires the following steps:
- Drain installation . The drain funnel should be located high enough to ensure a pipe slope of 0.03 to 0.05.
- Insulation of the base for the pallet . The recommended option is rigid polystyrene foam, laid on top of the rough screed along the perimeter of the side.
- Assembly and installation of the ladder . When using insulation, the drainage device can be immersed in polystyrene foam.
- Adjusting the edges of the ladder funnel according to the level and securing it to the alabaster to avoid accidental movement in the future.
Leveling the ladder Source ytimg.com
The ladder should be assembled carefully, without making mistakes. After completing the installation of a floor shower drain without a tray, the problem can only be solved by disassembling the entire structure. A damaged drain device usually has to be replaced with a new one.
Creating sides
Tiled shower thresholds, which protect bathroom floors from flooding and limit heat and waterproofing, are made immediately after installing the screed and drain. Before installation, it is worth determining the height above the top of the pallet. For one brick it will be approximately 5 cm - taking into account the immersion of 8 cm, the thickness of the glue, mortar and tiles. The threshold can be increased by adding a new layer of the desired height. These can be whole bricks or parts cut with a grinder.
Brick thresholds for shower tray Source stroy-okey.ru
Installation of a drain ladder
Whatever the design of the drain and pan, the best option would be to “rigidly” install the drain before pouring the pan/screed. Rigid installation is when the drain, tray or channel is securely fixed with a solution. Trays and channels usually have special fasteners included, but they do not fix the structure rigidly enough and the design position can easily be disturbed when pouring the screed.
Therefore, it is best to first install the drain on the kit (if available) or homemade fasteners, and then fill the entire space under the drain with cement mortar or tile adhesive. This will not only allow us to securely fasten the structure, but we will also have a clear idea of the lowest point of the pallet.
As a last resort, rigid fasteners can be made before forming the finishing layer of the screed, if the pouring is carried out in two layers.
In this photo, the shower tray, in addition to the complete fasteners in the form of legs, is additionally secured with cement mortar. This was done while pouring the first rough layer of screed.
I want to say right away that drain designs without a flange are not even considered. If you need high-quality waterproofing of the shower, and in most cases it is necessary, then the presence of a flange in the design of the drain is a must!
A flange is a border of several centimeters around the drain, specially designed for reliable connection with waterproofing.
To set the ladder to the desired level, four studs are used, screwed into suitable dowels. The studs support the structure by the flange, and the height of each stud is adjusted by tightening and unscrewing it using two locknuts.
The drain design in the photo above is made in such a way that the level of the flange will inevitably be lower than the finishing screed. Therefore, in the future it is necessary to form the screed only up to the flange, leaving a recess around the drain. An example in the photo below.
The recess around the drain is sealed with tile adhesive after applying the coating waterproofing (of course, after the latter has dried).
The drain itself is connected to the sewer with a 40 or 50 mm pipe. I prefer to use the 50th pipe, although I think that this is not essential and the 40th will also do its job perfectly. If the drain outlet is 40 mm, which is often the case, then when installing the 50th pipe, an adapter is used immediately behind the drain.
As with any sewer installation, it is best to avoid 90-degree angles and use two 45-degree angles. I do not recommend using corrugated sewer pipes - as practice has shown, they are quite unreliable.
Good to know: if the sewer riser is poorly ventilated, then there is a high probability that the drain water seal will often break. In general, “grunting” sounds will often be heard from the pan. Therefore, for such cases, it is better to choose a ladder with a high-quality combined shutter. For example, a “dry” shutter mechanism should not contain springs - this is an a priori unreliable technical solution.
Also, in the absence of ventilation of the riser (this occurs in old houses), an aerator (a valve that allows air into the sewer, but restrains odors) will help solve the problem. However, you should not rely entirely on the valve, because it will serve the entire riser (all apartments) with its work. If only we could agree with most of our neighbors to install the same ones for ourselves...
Video description
Watch the video on how to make a shower tray in a bathroom from tiles:
To increase the accuracy of constructing the side, it is worth making preliminary markings by drawing vertical and horizontal lines on the floor and walls. Bricks must be moisture resistant - for example, M-125. For installation, a mixture of water, cement and sand with a ratio of 1 to 1 to 3 is used; a special mesh is needed to reinforce the structure.
When constructing a reinforced concrete threshold in a shower room without a tray, it is advisable to follow these recommendations:
- it is worthwhile to provide for the installation of the side at the stage of pouring the rough screed - the formwork for the mortar is immediately made high so that it can also be used for the threshold;
- a round-shaped reinforced concrete threshold increases the safety of using the booth, makes it more compact and more aesthetically pleasing;
Semicircular reinforced concrete side Source sovety-vannoy.ru
- Along the perimeter of the sides it is worth laying 4-5 pieces of reinforcement with a cross-section of 10 square meters. mm, which will act as stiffening ribs - it is recommended to immediately cut them below the side;
- after the screed has hardened, new rods with a cross-section of 8 square meters are attached to the already installed reinforcement with knitting wire. mm, curved around the circumference;
- The formwork material for a reinforced concrete threshold can be fiberboard, which bends well, and when reinforced with spacers (corners made of bars), it is no less durable than boards.
After installing the formwork and pouring the cement-sand mixture, you will have to wait for it to completely harden for at least 2 days. After this, you can proceed to the installation of the top layer - the screed on which the tiles will be glued.
Filling the screed
When installing a shower from tiles, it is worth considering that the funnel of the drainage device should be higher than the tray by the thickness of the layer of glue and tiles. The result of leaving such a reserve is that the top of the drain coincides with the floor of the shower stall. The top of the drain grate may be slightly lower than the tiles after finishing the pallet, but it will still rise above the screed.
Finishing screed Source izhevsk.ru
Markings on the sides will help to fill the solution correctly, ensuring the required slope. The beacons along which the finishing screed will be aligned should tilt towards the drain. No formwork is required - its role is played by the already installed sides of the pallet. The average drying time, depending on the chosen material, is from 2 to 3-4 days.
Re-waterproofing
The hardened finishing screed should be re-waterproofed and leveled. To do this you need to do the following:
- Treat the surface of the screed with a waterproofing compound - a polymer-cement composition, bitumen-rubber or bitumen-polymer mastic.
- Lubricate the inside of the thresholds with the same waterproofing material.
- Wait for the coating insulation to dry.
- Apply self-leveling mixture to the dry surface.
- Round off the drainage area by increasing the flow rate of water.
Re-waterproofing a tile shower stall with a floor drain will increase the time it takes to complete the job. But due to its design, the risk of leaks is reduced - an important advantage for bathrooms that are not on the ground floor. Properly performed waterproofing allows you to avoid the accumulation of moisture, which causes fungus and mold to appear in the bathroom.
Adviсe
- When performing work on the manufacture of the cabin, keep in mind that the entrance to the sewer pipe must be below the level of the pan: from the drain hole to the entrance to the tee drain, there is a slope of 2 centimeters per meter;
- It is advisable to decorate the pallet with whole lamellas or mosaic blocks;
- use pebbles of different colors and shells as cladding: place them on the base and fill with transparent sealant;
- a homemade cabin can be equipped with a hydromassage, decorated with shelves for placing hygiene products or a chair lined with tiles.
Having decided to make a cabin yourself, start by developing a plan and a sketch, taking into account the size of the room, the location of utilities and the features of supplying pipes with hot and cold water. Installing a shower area without using a tray is a practical and original option for a bath.
Video description
In this video you will see how to make a drainage channel for a pallet:
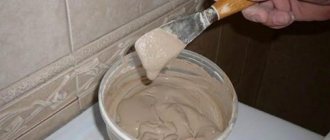
The adhesive can be applied to the inner surface of the tile or to the pallet. The first method allows you to reduce the number of possible errors, the second increases productivity. There should be enough glue so that there is no empty space left under the tile.
Many designers choose mosaic for finishing cheap pallets, which improves the decorative properties of the booth and is quite simple to install due to its increased flexibility. The standard size of elements is 5x5 cm, sheets are 30x30 cm. Installation is almost no different from finishing with ordinary tiles, however, glue is applied only to the surface of the material, and not to the pallet. After installing the mosaic, smooth it out, leveling it in one plane, and after 24-48 hours, grout the joints.
Shower tray finished with mosaic tiles Source remontspravka.com
Final stage
The shower enclosure is installed after all work is completed and the finish has completely hardened. This process can be accelerated by ensuring the room temperature is 25-30 degrees, effective ventilation and acceptable humidity (about 60%). Bathroom doors must remain open throughout the drying period.
If these conditions are met, the fence can be installed just 2 days after installing the pallet. The cabin frame can be assembled from metal profiles and moisture-resistant plywood, and finished with tiles or mosaics. The last step is the installation of swing doors, instead of which it is possible to install a plastic screen or curtain.
Shower, completely decorated with tiles Source stroyka-ug.ru
Laying tiles
Whatever the shape of the shower, there will be a lot of trimming. How to make a high-quality cut of tiles or porcelain stoneware is described here.
One of the frequently asked questions: How to join the tiles to the drain
. I will not pretend to be true, but I will say what I think: the tiles should be 2-3 millimeters higher than the grating. The same applies to mosaics.
In fact, this question needs to be asked while pouring the pallet in order to lay the tiles without layers, on a fine comb.
You can control porcelain tiles with a level only across the slope. The plane of the slope can be controlled by a rule.
I would also like to recommend choosing the least slippery porcelain stoneware or mosaic tiles possible, although this is quite difficult...
Any cement-based grout for tiles is suitable, preferably hydrophobic. There is an opinion that epoxy grout is necessary in the shower. Of course, such grout is good, durable and can provide additional waterproofing. However, grouts on cement binders also perform well.
That's all. Later I plan to add higher quality photos, which are not yet available.