A staircase connecting two floors of a building and made of a profile pipe is a fairly popular design today. Like all structures of this type, it is subject to strict requirements for both manufacturing and installation. First of all, it must be safe for moving people of different heights, weights and ages. Let's consider what an interfloor staircase made of a profile pipe is, what aspects you need to pay attention to when making this structure.
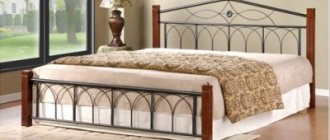
Stairs made of profile pipes
General technical characteristics of interfloor stairs
Profile steel pipe is a metal material with high load-bearing capabilities. Therefore, a ladder made from it is a durable and reliable structure that meets all safety requirements. There are other advantages:
- full combination with other materials;
- the ability to carry out different types of finishing;
- Can be used for indoor and outdoor installation;
- installation is carried out at any stage of house construction, even with completed finishing of the premises;
- simplicity of the assembly process.
Many people ask whether a DIY staircase made from a profile pipe will be reliable. The quality of assembly of a staircase structure depends on the experience of the workman, on his skills in working with different tools, where the grinder and welding machine are the main ones. If there are no skills, it is better to place the responsibility of production on the shoulders of the master.
Profile thickness and drywall type
Attention!
Choose the correct profile thickness. It depends on the thickness of the metal used as the material.
For light partitions, a profile with a thickness of 0.4 mm is suitable. But its use to create a partition that is attached to the floor is considered irrational. Any serious loads will ruin the resulting structure. Profiles with a thickness of 0.45 mm are stronger, but for the described option it is better to choose a thickness of 0.55 mm. It guarantees excellent resistance to stress and wear. If desired, even shelves can be mounted in such a partition.
Additionally, take care of the selection of the drywall sheets themselves. Many people prefer the universal option. It comes in gray with blue markings. If the partition is installed in the kitchen or bathroom, choose a moisture-resistant or fire-resistant option. A plasterboard sheet that is resistant to both moisture and elevated temperatures is optimal. Its price is high, but its characteristics fully justify it.
Dimensions of stairs
Dimensional parameters are the basis of manufacturing. Therefore, it is necessary to understand what the limitations and requirements for the stairs themselves are.
The staircase made from a profile pipe is based on steps. It is their dimensions that are taken as the basis for the manufacture of the staircase structure. Required parameters:
- tread depth: 20-32 cm,
- tread width: 90-125 cm,
- step height: 14-18 cm.
Dimensional parameters of stair steps
Regardless of the length and angle of inclination of the device, these parameters are strictly adhered to.
Calculation of a ceiling frame made of gypsum plasterboard
The ceiling frame is calculated in the same way as the wall frame. Namely, a scaled drawing with the location of each element is drawn on a blank sheet of paper.
The guide (PN) profile is attached to the wall around the perimeter of the room. Consequently, the length of all the walls will be the value that we take as the total length of the ceiling profile.
PN for ceilings = total length of walls
The ceiling profile is inserted into the groove of the ceiling profile. It is recommended to place it parallel to a short wall. The distance between each element is 40-90 cm, depending on the design load. A large step (90 cm) can be taken if the load on the ceiling does not exceed 0.15 Nm. In practice, you never know for sure whether such a load will be fair to your ceiling. Therefore, builders always play it safe and take a step of 40-60 cm, no more.
In increments of 40-60 cm, jumpers are attached to the ceiling profile - cut pieces from the same PP profile. Crabs are used for fastening. The number of crabs will be equal to the number of intersections of the PP profile with the jumpers.
It is also important to calculate the suspensions. These are elements for attaching the ceiling profile to the ceiling. Typically, the suspension mounting step is 0.6 meters. When installing two-tier ceilings, this distance is reduced to make the structure more rigid. In general, the drawing should look something like this:
When the schematic diagram of the ceiling frame is transferred to paper, the required amount of all materials is calculated from the drawing. Then they are purchased and the most interesting process begins - assembly.
Types of stairs
There is a fairly wide variety of stairs made from profile pipes, which differ in their approach to purely structural forms and assembly elements. Here are a few varieties.
Staircase with two broken stringers
One of the frequently used options, which has proven its high load-bearing capacity.
Staircase on straight stringers
The model consists of two straight stringers made from a profile pipe. Stepped tread elements made of the same material are installed and fastened on them.
Marching model with one central stringer
This model is one of the most difficult in terms of fitting elements to each other. This requires experience in this type of work. Often, metal stairs with one central stringer made of a profile pipe are used in small rooms. Where you need to save more free space.
With a central broken stringer
A subtype of the previous model, only it uses a broken string rather than a straight one. An interesting option in terms of unusual design and the ability to play on the size of the room.
Let us add that 90° or 180° rotary staircases (with winder steps, intermediate platforms), and screw models are assembled from profile pipes.
Briefly about the main thing
A staircase made with your own hands from a profile becomes an original interior solution and at the same time saves the family budget. It is made based on measurements of a specific room and a project that takes into account the preferences of the owners.
Most often, for a private home, a staircase on a stringer or bowstring is chosen. To make the structure convenient, it is designed taking into account average statistical parameters (for example, step length). To make the frame design reliable and safe, it is important to purchase high-quality (certified) material with the required characteristics.
Question
Write in the comments what you think - what is better to attach treads (horizontal elements of steps) to the frame: with bolts or using universal construction glue?
How to properly design a staircase
The parameters of the steps are known; now they need to be placed in the staircase structure. Therefore, a small sketch is made on a sheet of paper and the necessary calculations are made regarding the number of steps. It is necessary to measure the height of the interfloor ceilings and the angle of inclination of the device.
There are no problems with the latter, because there are standards that are taken as a basis - 25-45°. The height of the stairs is the distance between the already laid floor covering of the first floor and the second.
Dimensions of the staircase structure
Calculation of the number of steps
Look at the photo above, which shows the size of the march length. It is determined by calculating the height of the stairs and the angle of inclination. Both indicators are known. You can calculate the length of the march using the formula indicated in the photo below.
Ratio of triangle sides to angle
For our situation, we need to determine the value of AC. From the lower formula, taking into account mathematical relationships, it is deduced that AC = BC / tan A. Tangent of the angle - table value.
The length of the march is derived by mathematical calculations. Now you need to calculate how many steps will fit on this segment. For example, if the length of the flight is 3 m, and the depth of the steps is 30 cm, then a profile staircase assembled according to these parameters will accommodate 10 steps.
Regarding the height of the steps. It is necessary to divide the height of the stairs by the number of steps. For example, the height of the structure is 2.5 m, divide this figure by 10, we get 25 cm.
Correct marking of the space for the partition
The frame is the basis of the partition. He admits that there will be about 25 cm between the partition and the ceiling. A larger distance is not recommended, since in this case reliability will be lost, and it is unlikely to add aesthetics to the room.
Marking
Frame installation begins with markings. A chop cord and level will help with this. Initially, the required height of the partition is selected from sheets of material. It is preferable to do this along the bottom corner of the room, measuring from the ceiling. This will eliminate visual unevenness, even if there is a gap between the ceiling and the structure.
After this, marks are left on the wall to which the frame is attached. They are performed using a chokeline - the chop cord is pulled back and abruptly released. The result is a reference line on the wall. It is recommended to verify its correctness using a building level.
If you wish, you can start marking from the floor, this will eliminate the need for measurements. The resulting line is then accurately transferred to the surface of the selected wall or walls. Additionally, you can use a plumb line. It is this line that becomes the control line for placing the guide profile.
It is not difficult to determine the boundaries of the resulting structure. To do this, the thickness of the selected sheets of drywall, putty and the planned finish is added to the marked parameters. If you are planning an arch or doorway, take this into account during the marking process.
Manufacturing technology
A staircase made from a profile pipe is a responsible structure. To carry out the work you will need the following tools:
- welding machine,
- grinder with cutting and grinding wheel,
- locksmith's square,
- tape measure, ruler, pencil.
Let's look at how to properly assemble a device based on broken strings. To do this, it is necessary to make blanks of material that define the parts of the stringer structures. There are two of them: to suit the size of the step and the riser. The parameters are derived mathematically from the calculation of the height and angle of inclination of the stairs.
Regarding the pipe profile. It is better to choose a section of 80x40 or 80x80 mm with a wall thickness of 3 mm. Let’s make a reservation right away: it is better to join the pipe elements together at an angle of 45°. A right angle joint is not maximally load-bearing. But this is not a strict requirement, because small interfloor metal stairs can easily withstand the weight of 1-2 people.
Chopped parts of the stringer
The required number of elements are cut from a profile pipe of the selected size using a grinder. Supports for steps and risers are cut separately. Their number is multiplied by “2” at the rate of two broken stringers.
Joining two elements
From waste material, you can weld a special device - a 90° jig, with the help of which two elements of the stringer are joined. This is where the welding work begins - tack welding of two pipes.
Two elements welded together
Next, the joined parts are completely scalded around the perimeter of the joint and polished with a grinder so that there are no metal smudges or burrs left at the joint.
Ready stringer
The next stage is joining the blanks into a finished product - a stringer. It is carried out using identical technology for joining and welding individual pipes.
Rules for assembling the second stringer
The second stringer is easier to assemble. It is necessary to lay the first one on a flat area, on it sequentially, starting from the edge of the structure, lay and join the semi-finished products. Make tack welding immediately on the spot. After which the joints are completely scalded and polished. Don’t forget to check the joints with a plumber’s square.
The next step is very important. It is necessary to connect two stringers into a single staircase structure (frame). To do this, install pipe sections from a profile with a cross-section of 20x40 mm and a thickness of 2 mm between them, the length of which is equal to the width of the step. Therefore, the crossbars are first cut to length using a grinder, after which the stringers are set in parallel and connected by the cut out elements. The crossbars are supports for the steps. The frame is ready, installation can be carried out.
Stringers connected by crossbars
Watch the video: how to assemble a staircase from a profile pipe on two broken stringers.
Fastening the ladder at the installation site
There are many options for attaching a staircase structure (frame) to the floor of the first floor and the ceiling of the second floor. It’s easier with a ground floor base. A simple option is to drive metal pins into the base, to which the stringers are welded. You can place an embedded part in the form of a rectangular metal sheet into a concrete screed, and the staircase is welded to it.
Regarding the floor slab of the second floor, there are also several simple options. One of them is shown in the photo below. It clearly shows that the top last step lies on top of the floor of the second floor, and the stringer is attached to the end of the slab with metal anchors. To do this, a rectangular metal plate is welded at its end.
Fastening a metal stringer from a profile pipe to the ceiling
Selecting profiles and thickness of plasterboard sheets
Drywall is used in conjunction with profiles. They are represented in an impressive number. Each type has its own functional purpose. In accordance with this, the desired option is chosen in order to achieve the reliability and durability of the partition.
The design will require a guide profile. It is distinguished by a sheller-shaped cross-section. It is used as a base for fixing the rack profile. The standard width of the shelves is 40 mm, and the width of the backrest can vary from 50 to 100 mm.
You will also need a rack profile. Its distinctive features are the presence of bends on the shelves and a width of 50 mm. There is also a ceiling option, but it is not needed, since there is no attachment to the ceiling.
If you plan to create corners that require aesthetic design, purchase a special corner profile. With its help, it will be possible to protect soft corners that are created using sheets of drywall.
Arched profiles will help you create elegant curved structures. They are represented by shelves and a back, which are integrally connected to each other. However, there are divisions that help to bend them and achieve sophisticated rounded shapes. The last possible profile option, which is distinguished by functional purpose, is a beacon profile. It is used to level the wall as a stop.
Plasterboard partition with internal lighting
Photo gallery
180° rotatable staircase on two broken stringers made of profile pipe
An economical option, original with wide steps and well-designed and installed railings
A structure with a 90° rotation on two stringer supports with an original fence made of profile pipe and square reinforcement
A complex staircase with several turns, winder steps, landings on one stringer made of a profile pipe
Staircase structure made of profile pipes: stringers and railings
Procedure for installing a frame for a wall
- To sheath the wall, it also needs to be marked. To do this, draw lines for the UW guides, using a level. The width of the marking line is calculated based on the thickness of the profile and the thickness of the plasterboard sheet.
- Further along the wall, one of the guides is attached to the ceiling with dowels.
- Then, using a plumb line, the installation location of the second guide is determined on the floor. Two points are marked exactly under the ceiling guide and a line is drawn through them for the second guide profile.
- To install rack-mount CW, markings are also made in increments of 40 - 60 cm. Markings are applied on the ceiling guide and vertical lines are marked on the wall with a plumb line. The profiles should be positioned so that the joints of the plasterboard sheets are exactly in the middle.
- Along the vertical markings, straight 60x27 hangers are attached to the wall with dowels. Rack-mount CWs will be attached to them, the ends of which should be inserted into the guides. The step of fastening the suspensions along one line is 50-60 cm.
- Supporting profiles are mounted between the floor and ceiling guides. They are fastened to the guides using crabs. In addition, the supporting profiles are attached to the hangers. It is important to ensure that the position of the profile is strictly vertical.
- When the vertical sheathing is ready, cross members are installed to strengthen the structure. Their arrangement is similar to installation on the ceiling, but the gap between them is 60 cm.
- Now the finished frame can be sheathed with plasterboard sheets, screwing them with self-tapping screws for plasterboard. The caps are deepened into the sheet by 4 mm. The installation step of the screws is about 10-30 cm. The sheets are attached along the profile from bottom to top and top to bottom. In order to give mobility to the structure, a gap of 1 cm is provided between the gypsum board and the floor and 0.5 cm between the gypsum board and the ceiling. The seams are puttied (we can recommend an excellent putty for joints, Knauf Fugen), and the gap from below is closed with a plinth.
- The walls are treated with putty only after the ceiling. First, using reinforcing mesh, the seams at the joints of the drywall are sealed and then the entire wall is puttied.
Finishing
Options for painting the structure:
- at home using primer and enamel:
- Powder painting is possible using specialized equipment.
In most cases, the metal frame of the staircase is left simply painted with the steps attached.
You can also cover the frame with wood, which will give the structure the appearance of a wooden staircase.
Construction drawing
Drawing up a drawing is necessary in order to know what dimensions the frame and cladding elements will be. The diagram will allow you to take into account all the calculations and prevent errors when cutting the material. In addition, using the drawing you can easily calculate the amount of plasterboard material and fasteners for the frame equipment.
To make a drawing you need:
- Measure the length and height of the flight of stairs.
- Determine the size of the steps. The size of the step consists of the width of the tread and the height of the riser.
- A separate calculation and drawing is drawn up for the fence (balustrade). This is carried out if not only the stair stringer or stringer will be sewn, but also the fence.
If you plan to install some additional elements under the stairs or inside the frame, it is recommended to take this into account when drawing up the drawing. Having determined the dimensions, they must be plotted on paper in a convenient scale. You will get a diagram of the frame, according to which you can calculate the dimensions of the sheathing material.
It is necessary to include in the drawing not only the dimensions of the stairs, but also to decide whether there will be something under the stairs or not.
- place of the structure in the house;
- stringers;
- steps;
- supports;
- handrails;
- filling the railings;
- fastening to supporting structures;
- platforms in a multi-flight structure;
- connections to the floor and ceiling.
Use at home and in the countryside
A stepladder is used to reach high, inaccessible places: chandeliers, wiring under the ceiling, the second floor of a building, etc. But this is only its primary role, and the secondary one is the ability to be at heights without much discomfort and perform work without the risk of falling.
To ensure this, the stepladder has 4 support points, which distribute the total weight of the structure and the user.
The design of the stepladder itself may have some differences that will be useful in a given situation:
- Standard A-frame stepladder. It has 4 supports, a leg position lock and a small upper platform. Convenient for working at low heights.
- Folding A-shaped stepladder. Unlike the first option, it can be folded out into an extension ladder, increasing its maximum possible height. In the normal state it is still stable, but in the folding state you can reach an object that is very high.
- Transformer - the design is a multifunctional model that can be used both as a staircase and as part of the interior. A very expensive option, although it has practical applications in everyday life.
Of these three options, you should choose the one that is most suitable, and then follow the instructions.