Even a short grocery shopping trip requires a preliminary list that will help you purchase everything you need at once and navigate the size of your upcoming investment. What can we say about construction, because you can’t bring materials for it in a bag, you also have to take into account transportation costs. That is why during the design process, in addition to architectural and construction documentation, an estimate for the construction of a house made of aerated concrete is also developed. This is exactly what we will talk about in this article.
Types of construction estimates, the purpose of their preparation
When performing estimate calculations for large construction projects, they are guided by existing standards: territorial, industry, federal (if financed from the state budget). There are state standards for the implementation of estimates (GSN), which are used by design institutes. There are also individual (company) standards: they are developed by a certain organization, which itself is engaged in construction.
There is nothing particularly new in these standards, since they are in any case based on territorial or federal directories. All these collections constitute a unified system of rationing and pricing in Russian construction. To take into account the inflationary rise in prices of materials and the features of new technologies, the information in them is periodically updated.
Vitaly Kudryashov
Builder Author of the portal full-houses.ru
Ask a Question
The larger the project, the longer it takes to build, and the more difficult it is to determine its estimated cost due to inflation. After all, in addition to materials, prices also change for everything else: equipment, energy, costs for renting special equipment, and wages for workers increase.
To get out of this situation, several estimates can be drawn up for the same object.
Local
In this estimate, the costs of one type of work or stage of construction are calculated, taking into account the volume, standardized quantity and prices of materials, inventory and equipment necessary to complete it.
- Let’s say an estimate is being drawn up for a 10x10 aerated concrete house, in which direct and overhead costs are localized only taking into account the construction of the box. The data in it is grouped into sections according to the required construction sequence and by type of work. As a rule, these are: earthworks; foundation formation; walls and partitions; ceilings and staircases; roof.
- The materials required for their construction (not only quantities, but also prices) can be indicated in a separate resource sheet, or included in the general estimate. If the costs of using equipment are not included in overhead costs, then the time and cost of its use are also included in the local estimate.
- The costs of work in the estimate can be displayed in two categories of prices: current (existing at the time of drawing up the estimate) and basic (with a projected increase in price).
- When determining the estimated cost of an object, the presence of complicating factors must be taken into account: carrying out work near power lines, in cramped conditions (for example, near existing buildings or communications), on a mountain slope. These factors are taken into account by using the coefficients given in the reference books.
- Local estimate is the simplest type of financial and construction documentation. It consists of two interconnected parts: the first is a list of works with a code, their unit of measurement and costs of implementation; to the second list of materials with prices and total amounts for their purchase.
Vitaly Kudryashov
Builder Author of the portal full-houses.ru
Ask a Question
The essence of the local estimate is to detail technological operations and determine the scope of work. As for the costs, at the time of drawing up the document they have not yet been finalized and adjustments are possible.
Local estimates can be prepared not only for general construction or engineering work, but also for special types of work - the construction of a drinking well, for example, or the installation of forced ventilation. The initial data, according to which the scope of work is determined, are drawings and diagrams of components, specifications of equipment and tariffs for its rental.
Overhead costs represent a certain percentage of the amount of direct costs, and are accrued either for each section separately or according to the estimate as a whole.
Object
An object estimate is a general financial document for the construction of an object, into which all local costs are summarized and summarized. That is, it is compiled on the basis of pre-developed local estimates, and can combine not only the work on the construction of the building itself, but also, for example, landscaping the garden area.
This also includes costs that, not having a direct relationship directly to the construction process, are classified as other. This could be renting a cabin for workers, or an increase in the cost of monolithic work during the winter season. For small facilities, such an estimate may not be carried out. In this case, the limited costs that we just talked about are included in the calculation, which plays the role of a local estimate.
Summary
The summary estimate differs from the object estimate in that it does not include limited costs. It is also compiled according to a certain form and represents the sum of local estimates compiled at two price levels.
The consolidated estimate compiled for residential buildings and social and cultural facilities includes 9 chapters into which funds are distributed. These include:
- Preparing the area for construction or major repairs.
- Construction of main facilities.
- Construction of secondary objects.
- External engineering networks.
- Landscaping and landscaping.
- Temporary structures.
- Other expenses.
- Technical supervision of construction.
- Survey work and design.
The estimate is accompanied by an explanatory note containing all the main parameters of the object. If several contractors are involved in construction, a separate statement of work performed and costs is drawn up for each of them.
Most often, the stumbling block between the customer and the contractor is the cost of work. On large projects, where any customer has his own capital construction department with a full set of specialists, he can submit his own version of the estimate. The document is drawn up on the basis of data gleaned from the project, and is called a project estimate.
The contractor, for its part, provides its estimate (it is called “contractual”), which will take into account the costs of subcontracting work and determine the projected profit. The two estimates are compared, disagreements are discussed, and this makes it possible to come to a solution that suits both parties.
By the time construction is completed, the contractor draws up another estimate - an executive estimate, which takes into account all the funds actually spent. This document, which presents tables detailing the work performed, the materials used and their cost, is fundamental for calculating the book value of the object when it is put into operation.
If the executive estimated cost exceeds the previously agreed amounts, the customer may not agree to pay extra. In this case, he has the right to involve independent experts to assess the value of the object. But considering that you will also have to pay for the examination - and not at a fee, but half a percent of the estimated cost, it may still be cheaper to meet the contractor halfway.
Preparation of the land plot
Purchasing a plot of land is a rather complicated procedure for an unprepared person. But only after going through the entire process of registration, receiving a certificate of ownership, cadastral number, permission to use the site for individual housing construction, can you begin to build a house.
You should not start by leveling the surface of the site or cutting down trees for the construction site of the house. A house begins with a project, and a specialist designer always takes into account in his work such subtleties as the terrain or the preservation of trees and shrubs. And, most likely, construction and even preparatory work before the development of a construction project will turn out to be wasted costs.
The terrain of the site quite strongly influences the cost of preparatory work. Source stroytehnika.su
How to make an estimate - popular techniques
An estimate developed by a professional for the construction of a house made of aerated concrete (10x10 2 floors, or any other) will allow you to achieve the correct and most efficient use of the budget. There are several methods by which calculations can be made. Some of them are used to calculate large objects, others are more applicable for individual construction.
Analog
The name speaks for itself. The calculation of one object can be made on the basis of a previously constructed another, with a similar design (similar). This technique is used precisely by organizations that build turnkey houses that differ only in plan size or architectural style of the facade. At the same time, the estimate for a house made of aerated concrete is 100 sq. m., in the structural part it may well be formed according to the estimate of a house of 150 sq. m. Only the volume of work is adjusted, and the final price per square meter of living space will be the same.
Time-based
This technique is used less frequently, since it is based not on the volume of work, but on the cost of a certain amount of time spent on their implementation. It is applicable in cases where the amount of work as a whole is small, but it takes a lot of time to complete it. Accordingly, the estimate is made not for the object or its part, but for a certain type of work, often special. For example, when designing a facade or interior, a panel using the sgraffito technique or stucco on the ceiling can be made according to this estimate.
Basis-index
The calculation basis in this method is based on basic prices from federal or territorial directories approved back in 2000, and recalculated to current prices using a system of coefficients (indices). This makes it possible to take into account the factor of inflationary rise in construction costs both in general according to the estimate and for individual types of work.
For small objects, indexes can also be used at the end of sections of local estimates. Alternatively, according to the certificates of completed work, direct costs are calculated (taking into account the coefficient for cramped conditions), and the inflation index is applied to this amount.
Basic compensation
When using the basic-compensation method, the estimate is based on basic prices (in current prices), and expenses incurred during construction due to price increases are compensated by the customer upon completion of the work. In addition to the increased cost of materials, the list of costs to be paid includes increased electricity tariffs, temporary losses, and reduced labor productivity, which do not depend on the contractor.
The described method very accurately reflects the state of affairs at the construction site, therefore the estimate for the construction of a turnkey aerated concrete house (6x20, 13x13, 7x8 or other size) is most often drawn up precisely on the principle of compensation in relation to the base tariffs. But there are other ways to determine real prices for materials and work, which designers most often use in the process of cooperation with private customers.
Labor cost estimate
This type of estimate is used mainly when the estimate is made not for an object, but for a certain type of work - for example, for installing a foundation or laying walls. The contractor determines the optimal cost of 1 m2 or 1 m3, and based on this figure, calculates the total amount. True, it does not include overhead or transportation costs, and the customer will have to compensate for them separately.
It is difficult to determine how much this will cost for large volumes of work, so this method is used mainly by private teams that do not have their own transport base. The owner pays the costs of delivery of materials himself, as they arrive at the construction site.
Universal estimate
There is such a thing as the universality of estimates compiled on aggregated indicators. This document, which is also drawn up by the contractor, lists all the technological stages of construction, but without detailed details of the work. Simply, the estimate is accompanied by an explanation of the materials reflecting their prices and total amounts. On the part of the customer, only an analysis of the estimate is carried out with control of the volume of work according to the project, as well as a comparison of prices, for example, those offered by competing contractors. By agreement of the parties, the price level can be adjusted.
Detailed estimate
Unlike the universal version, the detailed estimate contains all the necessary data that allows you to see all the names of the works and their technological sequence. This may well be an estimate for a 100 sq. m aerated concrete house. Its normative part is usually based on the contractor’s technical conditions and calculations, including those taking into account the technologies he uses in construction.
Any serious company has its own documentary base, and many even draw up technological maps for this or that type of work on their own. A distinctive feature of a detailed estimate is the allocation of the full amount of costs for each stage of construction, which allows the customer to pay for the work actually completed. The document is simple in form and understandable to anyone - there are prospects behind this technique, and it can be used not only on small objects.
Construction of the “box”
The “box” is usually understood as the frame of a building without additional insulation, finishing, wiring and pipes. The cost of its construction depends on the chosen material:
- The cheapest option is to build a frame or frame-panel type house - from 11,000 rubles/m2;
- Construction of a “box” of a wooden house will cost from 13,000 rubles/m2;
- The construction of a house frame from foam concrete will cost from 14,000 rubles/m2;
- Buildings using the Izodom technology are offered from 15,000 rubles/m2;
- To build a brick wall frame will cost at least 18,000 rubles/m2.
Now we multiply this price by the estimated area. Thus, the cost of constructing a “box” of a country house or cottage with an area of 100 m2 will average 1.5 - 2 million rubles.
We will look at the features of these materials in more detail at the end of this article.
Estimate for the construction of a house made of aerated concrete 10x10 - how to draw it up correctly
To draw up an estimate, you need initial data (they can only be gleaned from the project), according to which the volume of work and selection of materials will be determined.
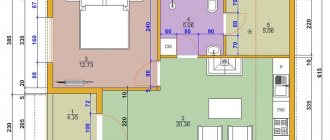
Let's present an approximate data table for an estimate for a 10 by 10 house made of aerated concrete (box):
| Necessary information | Data for estimates for a one-story aerated concrete house |
| Wall material | Aerated concrete |
| Wall height including ceiling | 3m |
| Wall thickness | 0.4 m |
| Number of storeys | 1 |
| Attic | No |
| Length and width of the house in plan | 10*10 m |
| Foundation type | Monolithic reinforced concrete slab |
| Foundation slab thickness | 0.25 m |
| Floor type | On beams 100*180, in increments of 500 mm |
| Armopoyas | No |
| Roof structure/covering | 2-pitch/soft tiles |
| Overhang length/roof angle | 500mm/45 degrees |
| Drainpipes | PVC |
| Wall insulation | Slab extruded polystyrene foam |
| Insulation thickness | 100 mm |
| Wall perimeter | 35 m |
| Window | No |
| Doors | No |
| Facade finishing | No |
| Interior decoration | No |
| Partitions | No |
If you prepare an estimate for a house made of aerated concrete yourself, it is better to calculate each stage of construction separately. This is convenient if different contractors will be hired for the work, or you plan to do some of it yourself (for example, laying walls).
Preparatory work and laying the foundation
To get a detailed estimate for a house made of aerated concrete, it is necessary to detail all the processes and identify the materials used in them. Let us present to your attention a list of work that precedes construction and is carried out when laying a slab foundation at the lowest possible level of foundation - when there is only a bulk cushion in the ground, and the slab itself is located on the surface.
| № p/p | List of construction and installation work and necessary materials | Unit change | Quantity | Materials | Works | ||
| Price | Sum | Price | Sum | ||||
| 1 | Ground leveling and geodetic work | M2 | 100 | ||||
| 2 | Excavation work with soil removal | M3 | 40 | ||||
| 3 | Construction of a cushion made of a mixture of sand and gravel | M2 | 135 | ||||
| 4 | PGS | M3 | 30 | ||||
| 5 | Pouring a sub-concrete slab (100 mm) | M2 | 100 | ||||
| 6 | Lean concrete (class B7.5) | M3 | 11 | ||||
| 7 | Installation of embedded parts | set | 1 | ||||
| 8 | Set of embedded parts | set | 1 | ||||
| 9 | Formation of the main slab with installation of a frame made of reinforcement bars | M2 | 100 | ||||
| 10 | Fittings A III (D14) | tn | 1,53 | ||||
| 11 | Fittings A III (D12) | tn | 1,17 | ||||
| 12 | Annealed wire d=1.2mm | kg | 18 | ||||
| 13 | Lumber | M3 | 0,59 | ||||
| 14 | Heavy concrete for the main slab (class B22.5) | M3 | 39 | ||||
| 15 | Concrete pump rental | change | 1 | ||||
| 16 | Slab waterproofing (coating) Penetron Admix | kg | 159 | ||||
| 17 | Polyethylene film 100 microns | M2 | 182 | ||||
| 18 | Assembling inventory formwork panels | M2 | |||||
| 19 | Rental of inventory formwork | set | 1 | ||||
| 20 | Sealing seams | kg | 30 | ||||
| 21 | Penebar harness for seam waterproofing | M.P. | 46 | ||||
| 22 | Assembling the frame for the plinth | M3 | 6,7 | ||||
| 23 | Concrete pump rental | change | 1 | ||||
| 24 | Concrete M22.5 for pouring the base | M3 | 5,85 | ||||
| 25 | Reinforcement A III (D8 mm) | tn | 0,092 | ||||
| 26 | Reinforcement A III (D12 mm) | tn | 0,077 | ||||
| 27 | Annealed wire d=1.2mm | kg | 13,5 | ||||
| 28 | Dismantling of formwork | M2 | 40 | ||||
| 29 | Backfilling of soil around the perimeter of the pit | M3 | 18,5 | ||||
| 30 | Truck crane operation | change | 1 | ||||
| 31 | Consumables and hardware | ||||||
The table shows a list of work performed during the construction of a slab using rigid concrete preparation. This is a classic technology, but today, when constructing shallow slabs, the concrete base is often replaced with a PVC membrane. In this case, instead of lean concrete used for preparatory concreting and coating or roofing felt waterproofing, a layer of membrane will be present in the slab cake.
We did not put prices in the estimate - they differ greatly in the regions, so there is no point in making calculations. Enter them yourself, focusing on the prices of local contractors, and by multiplying and summing, you will get an approximate estimate for zero-cycle work.
If we add another column to the table we propose, it will be possible to enter the actual amounts spent, including unexpected ones.
Advantages of aerated concrete
1) Aerated concrete has high strength, that is, it does not break or crumble, maintaining its appearance.
2) A house made of this material can last more than thirty years (manufacturer’s warranty).
3) Aerated concrete blocks are produced in quite large sizes, hence the speed of construction of the house frame.
4) Low thermal conductivity, which, coupled with small seams, allows you to retain heat in the house.
5) Cost-effectiveness, low price allows you to save on material.
Video: Laying aerated concrete - features of laying blocks
Negative sides
1) Aerated concrete contains a lot of lime impurities, so it cannot be called hygienic.
2) Aerated concrete accumulates moisture and can store it for years, which leads to freezing of the wall or the appearance of mold.
The first stage of any construction work is site planning. When building with aerated concrete, you should use geodetic data that is reflected in the documents; you can obtain such documents from the BTI.
We should not forget about the wind rose; do not place the bedroom and children's room on the north side.
Estimate for laying walls made of aerated concrete blocks and installing floors
Here's what the list of work on the construction of walls covered with wooden beams will look like:
| № p/p | List of construction and installation work and necessary materials | Unit change | Quantity | Materials | Works | ||
| Price | Sum | Price | Sum | ||||
| 1 | External walls 400mm thick made of aerated blocks: | ||||||
| 1.1 | Leveling the base and installing cut-off waterproofing | M. p. | 40 | ||||
| 1.2 | Ruberoid | rolls | 6 | ||||
| 1.3 | Wall masonry | M3 | 104,5 | ||||
| 1.4 | Gas block 600*250*400 mm D500 | M3 | 104,5 | ||||
| 1.5 | Cement-based adhesive in bags | kg | 3020 | ||||
| 1.6 | Formation of window and door openings | M. p. | 34 | ||||
| 1.7 | U-blocks for covering openings 600*250*400 mm | PC | 50 | ||||
| 1.8 | Jumper fittings A III (d12) | tn | 0,175 | ||||
| 1.9 | Wire rod AI (d1,2) | tn | 0,03 | ||||
| 1.10 | Concrete B15 | M3 | 1,27 | ||||
| 1.11 | DSP M200 for leveling the base | kg | 590 | ||||
| 1.12 | Basalt mesh for masonry reinforcement | PC | 60 | ||||
| 1.13 | Installation of jumpers in openings | PC | 5 | ||||
| 1.14 | Arrangement of reinforced joint for supporting rafters | M. p. | 100 | ||||
| 1.15 | Truck crane | change | 2 | ||||
| 1.16 | Hardware and consumables | ||||||
| 2 | Installation of ceilings on beams: | ||||||
| 2.1 | Logs 100*180 mm | M3 | 12 | ||||
| 2.2 | Block 40*40 mm (cranial) | M3 | 2,2 | ||||
| 2.3 | Plywood thick. 5 mm | M2 | 215 | ||||
| 2.4 | OSB board thickness. 9 mm | M2 | 100 | ||||
| 2.5 | Fasteners | set | 1 | ||||
| 2.6 | Construction of a wooden subfloor | M2 | 100 | ||||
| 2.7 | Ceiling lining | M2 | 100 | ||||
| 2.8 | Laying insulation | M2 | 100 | ||||
| 2.9 | Mineral wool thickness 100 mm | M3 | 10 | ||||
| 2.10 | Installation of vapor barrier layer | M2 | 100 | ||||
| 2.11 | Roll vapor barrier | M2 | 100 | ||||
Creating a roof
Now let's look at the stages of building a gable roof covered with bitumen shingles:
| № p/p | List of construction and installation work and necessary materials | Unit change | Quantity | Materials | Works | ||
| Price | Sum | Price | Sum | ||||
| 1 | Waterproofing the edge of the wall and installing the Mauerlat | M. p | 40 | ||||
| 2 | Gidroizol | rolls | 5 | ||||
| 3 | Beam with a section of 100*100 mm | M3 | 0,5 | ||||
| 4 | Impregnation of wood with fire retardant | M2 | 160 | ||||
| 5 | Fire-retardant composition for priming | l | 100 | ||||
| 6 | Assembling the rafter system | M. p. | 160 | ||||
| 7 | Board 50x200 mm | M3 | 3,1 | ||||
| 8 | Board 50x150 mm | M3 | 2,3 | ||||
| 9 | Board 50x100 mm | M3 | 2,7 | ||||
| 10 | Bar 150x150 mm | M3 | 0,95 | ||||
| 11 | Installation of flooring under the covering with waterproofing | M2 | 160 | ||||
| 12 | Waterproofing membrane | M2 | 250 | ||||
| 13 | Bar 50x50 mm | M3 | 1,54 | ||||
| 14 | Bar 50x100 mm | M3 | 2,55 | ||||
| 15 | Installation of roofing and ridge installation | M2 | 160 | ||||
| 16 | Soft tiles | M2 | 200 | ||||
| 17 | Ridge elements 2m | PC | 5 | ||||
| 18 | Truck crane | change | 1 | ||||
| 19 | Hardware and consumables | ||||||
Calculation of the required number of blocks
So, the construction plan is in hand, now we need to determine how many blocks will be required.
There is no point in taking too much, and not having enough will lead to additional financial costs (delivery, etc.). We will need to calculate the number of cubic meters of blocks.
We will be guided by the size of the blocks and the building. First you need to calculate the area of the walls. For example, the length of a wall is 10 meters (there are 2 such walls) and the other is 8 meters (also two). So 10+10+8+8=36 is the length along the perimeter. The height of the house is, for example, 3 meters. We calculate 3 x 36 = 108 square meters - the area of the walls.
Aerated concrete blocks are sold by the cubic meter. Now we multiply 108 by 0.3 (the thickness of the block) and we get 32.4 cubic meters. This is the amount required for the construction of external walls (we count internal ones in the same way).
When purchasing material, do not forget that you may need bricks for the main wall and plinth, the quantity of which can be calculated using the same principle. In addition, construction will require costs for concrete and glue.
Is it possible to save money on building a house?
It is unlikely that even those people who do not have any special problems with financial support will refuse reasonable savings - what can we say about developers with a limited budget. Therefore, tips that will help reduce unnecessary expenses to a minimum will be useful to both.
- Any construction begins with the selection of a site, and its location can entail unexpected costs. Even two plots of identical size, located within the same village or dacha cooperative, can create completely different conditions for construction. One, for example, will be at a higher point, where the soil will be dry and dense - and the other will be in a lowland, and water will stagnate in it after rains.
A geological defect does not affect the price of land in any way, but its elimination may entail considerable expenses. Therefore, if you have a choice, give preference to a site at a higher location; with a minimum of terrain changes; with the ability to organize a convenient check-in. The most inconvenient areas can still be sold at a discount. In this case, in order to assess the upcoming costs of planning the site, it makes sense to make a preliminary estimate for the preparatory work.
- In cottage villages, the price of land often includes the ability to quickly connect to centralized communications (electricity, gas, water supply and disposal). Try to find out exactly which highways run through a populated area or a specific street, and evaluate the chances of them being connected to the house. On land that is not provided with communications, the cost of landscaping work is always higher.
- Decide in advance how actively you personally intend to participate in construction. The “do-it-yourself” option is cheap only on paper; unskilled work will create problems, if not during the construction process, then during the operation of the house. Ordering turnkey construction is attractive, but the price of the house doubles. A golden mean is possible: you could build aerated concrete walls yourself, install windows and doors, and do the finishing. It's always best to leave the foundation and roof to the professionals.
Having a normal project and detailed estimates for all stages of work will allow you to “stay on top of things” and adequately handle numbers when concluding contracts with contractors.
- Individual design is more expensive than standard design, but you can immediately provide for everything you need, and in the way required by the conditions of the construction site. You have to pay extra for any alterations made to a standard project, so it remains to be seen which option will be more profitable.
Vitaly Kudryashov
Builder Author of the portal full-houses.ru
Ask a Question
Do not neglect the preliminary design, because at this stage any amendments can be made free of charge. After detailed design has been completed, any rework becomes subject to a fee. And of course, the costs will be much higher if alterations have to be made during the construction process.
- There are situations when saving is inappropriate. The category of such work includes geological surveys on the site, which provide a complete picture of the composition, mobility and strength characteristics of the soil, and the water level. Only the results of the research will make it possible to make a correct calculation of the foundation. Not only gas-block masonry, but also brick cladding reacts to minor millimeter movements with cracks.
- Work should begin only after the project is completely ready, including the cost estimate. Saving time is illusory, and may be fraught with the fact that workers will be forced to stand idle due to the lack of drawings of the required unit or will be forced to work out connections according to their own understanding. An incorrectly determined volume of material or fasteners will force the contractor to run around the shops in search of what is missing. The worst situation is when the structure was made, but they did not know where to lay the inputs for communications. As a result, you have to break through finished walls or ceilings, which also entails certain costs.
- When looking for a contractor, consider several proposals and compare prices. They shouldn’t be very different, and if someone offers services at a clearly reduced cost, find out what the savings are due to. Perhaps this is just a marketing ploy, and during construction there will be so many unforeseen expenses that the “profitable” commercial offer will still exceed the competitors’ estimate due to the rise in price.
Conclude a formal contract with the contractor, which includes schedules for work and payment. Do not be fooled by offers of large advance payments in order to speed up construction time, and finance only the actual amount of work completed. If something goes wrong, you can change the contractor at any stage, while it will be almost impossible to return the money paid in advance.
- Start monitoring the construction from the moment the foundation is laid, and not when it’s already time for finishing. If you don’t understand this yourself, hire a technical supervision specialist who will take over the work at such important stages as:
- pit development;
- filling of soil cushions and degree of compaction;
- drainage device;
- laying out communication inputs;
- waterproofing;
- reinforcement work;
- concreting.
All this is hidden work, which is impossible to control after its completion. The money spent on technical supervision will pay off by saving you from many problems in the future.
Note: During the construction of walls, the masonry should be controlled both vertically and horizontally. Differences between gas blocks must be eliminated with a plane; this will relieve the walls from internal stresses, to which the blocks react with cracks. Also, eliminating irregularities minimizes glue consumption, which will result in direct savings.
Dependence of timing on materials and construction technology
The time frame for constructing a country house depends on the choice of material and construction method.
You can build a house from:
- bricks;
- aerated concrete;
- foam concrete;
- wood (timber, logs, carriage).
Each of these types of materials, due to its individual characteristics and characteristics, has its own safe construction period. Here one should not neglect building codes and technical standards.
In addition, each material requires a special approach. For example, laying brick is a more labor-intensive process than laying foam concrete blocks. And a wooden frame made from logs is built more slowly than a building made from timber.
The time frame for constructing a country house also depends on the method of constructing the box. In addition to the traditional method, boxes are used in country house construction:
- panel;
- frame;
- modular;
When constructing panel boxes, finished products in the form of panels, made of composite wood panels with glue, are assembled into one whole. Then they strengthen it. Then ready-made partitions for the interior walls are also installed. They are also strengthened. All that remains is to build the top and cover it, and then carry out communications and do finishing work.
When a frame object is built, first a frame is created from boards and logs on a finished base. Rafters for the roof are being installed. Then this frame is sheathed with thermal insulation fragments. At the end the top is completed.
Frame and panel buildings are somewhat similar in their design. Both initially have a frame. However, other construction methods are coming onto the market. For example, a modular house assembled from wooden panels, insulated with composite compounds.
A frame or modular house can be built very quickly - literally in 2-3 months, if you do not do the basics. A building with a foundation, of course, takes longer to build.
Interior decoration
Decorating the inside of a house can be done with any materials that match the properties and characteristics of an aerated concrete block. Plaster mixtures and screeds must be selected from highly specialized raw materials, and finishing materials must meet all the requirements stipulated by GOST and SNiP.
First, you need to decide what you want to see in the end. Let's consider the possible options.
Search for design solutions and a brief description of the progress of work
For clarity, we will use the method of stage-by-stage planning of the design of individual parts of the premises.
Table 3. Alternative designs for interior decoration of the house:
| The ceiling in a house can be finished in several ways: by plastering and subsequently painting, or by installing plasterboard boards. In the second case, the choice of design options is extremely large. With the help of gypsum plasterboards it is possible to create complex multi-level ceilings with specialized lighting of any desired shape. Drywall is attached to a pre-assembled frame. Plastering will not be necessary, but insulation will be quite important. |
| First, before applying the finishing layer, the walls should be plastered and leveled at the same time. Priming and laying the reinforcing mesh is mandatory, since the adhesion of aerated concrete does not allow the materials to be reliably fastened together without additional impact. Next, the finished surface should be painted, covered with wallpaper or covered with textured plaster. Individual areas can be decorated with artificial stone or any other material. The emphasis can be placed on the corners, window openings of the room, as well as highlighting certain areas of the room. |
| One of the most common options is laying laminate, parquet and linoleum. Ceramic tiles and porcelain tiles are used more often than usual in bathrooms, kitchens and hallways. The device begins with the installation of wooden logs. Next, the floors are insulated and, as an option, covered with floorboards. |
| With the help of gypsum boards you can diversify the interior with arches. Since drywall is easy to process, you can create even the most incredible designs and shapes. |
Foundation
Let’s immediately begin to debunk myths and misconceptions:
- Aerated concrete blocks are lightweight, which means you can save money on the base.
- A building made of such material can only be installed on a concrete basement floor, which increases the construction price.
One thing should be said: a good foundation is one that is capable of providing a constant shape to the structure, regardless of the material of the latter. We can agree that the blocks will not put much pressure on the ground, so this will not be decisive when choosing a foundation.
You should also not consider a foundation made of aerated concrete; it should be built from “solid” material. The best option for cellular concrete at the moment is considered to be a reinforced concrete slab, which can ensure uniformity and a minimum level of shrinkage deformation.
Also, the foundation for such houses can be a strip monolithic foundation installed on a sand cushion or a columnar one, tied with a monolithic reinforced concrete belt.
Manufacturing of strip base
Walling
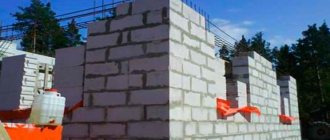
The order of operation does not depend on the design of the blocks. First you need to clean the surface of the foundation from dust and dirt, then cover it with roofing felt.
For laying the first row, a solution of sand and cement should be used. It dries much longer than conventional glue, which allows you to correct the evenness of the layer. The minimum thickness is 1 cm, but there are no maximum restrictions.
Next, you need to determine the highest angle and use a fishing line to mark the wall of the house. Aerated blocks are laid at all corners, then a rope is pulled between the building elements.
After laying each block, be sure to check the evenness. Door openings are skipped. Polishing should be used to polish the surface. A similar procedure must be followed for each layer laid.
The rows are tied, moving half of the gas block. The process is no different from bricklaying. The minimum shift level is 8 cm. To apply the glue, you can use ladles with teeth. The blocks should be pushed end to end; you can check the evenness of the masonry using a level. A rubber hammer is suitable for removing uneven surfaces.
When laying an opening, it is not always possible to fit into the length of the gas block. The excess part can be sawed off using a hacksaw.
Window arrangement
If the window sills are four rows of blocks high, the window openings should be reinforced after laying the third row. For this you will need a wall chaser. With its help we cut two parallel lines. They should extend beyond the opening by 30 cm on each side. Then reinforcing bars are installed in the grooves and filled with a solution of sand and cement.
Installation of jumpers
Lintels are necessary to strengthen the wall above openings - window and door. Otherwise the structure will collapse. The jumper above the window can be made as follows:
- a board is installed;
- then a non-removable structure made of blocks: outside (15 cm), in the center (15 cm), inside (10 cm);
- squares are cut from the reinforcing mesh, after which reinforcement bars are tied to them;
- A frame is inserted into the opening between the gas blocks and then filled with concrete.
You can simplify the task by using ready-made U-shaped blocks. They need to be glued to a sufficient length and installed. Then the reinforcement is laid and filled with cement mortar.
The optimal width of aerated blocks for making formwork is 10 cm. But porous material of standard parameters is also suitable; it can be cut into three identical parts. Glue should be used for fastening.
The lintel over the interior doors is installed as follows:
- the blocks are glued to the required length;
- three ditches are made using a wall chaser;
- reinforcement bars are laid;
- cement solution is poured.
It will take an average of 24 hours for it to dry. When installing jumpers, the fittings should be located at the bottom. The gaps should be filled using gas blocks cut to the required sizes.
