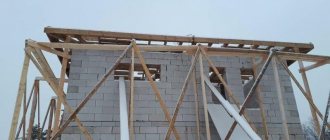
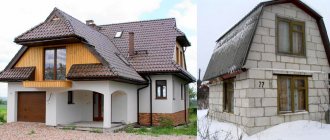
Small-sized architectural forms, which include the design of a 6 by 6 house made of foam blocks, are quite in demand in the private sector when developing a site. In fact, with such dimensions it is possible to implement many design ensembles, but our goal is not the artistic design of the building, but the construction of the foundation along with the frame.
House 6 by 6 made of foam block with attic
Now we will talk about what we need for such a design in terms of specific materials, and also, as additional information, we will watch the video in this article.
Advantages and disadvantages of 6 by 6 m houses
A square house with a floor area of 36 meters has multiple pros and cons.
Positive properties:
- since the building is made in the shape of a square, the space is not wasted on arranging long, practically useless corridors;
- saving materials and time on installation of communications - heating, water pipes, electrical wiring, etc.;
- it is relatively easy to make a second floor in the building, using a spiral staircase to reach it;
- ready-made projects for residential buildings of this size are offered by many companies specializing in country house construction.
Negative factors:
- an excessively steep staircase to the second floor is inconvenient, especially when the family has small children or elderly adults;
- In a narrow area, it is problematic to place the building so that movement past it is free.
Start of design
An important issue in the construction of a 6 by 6 country house is the choice of building materials. Today, a variety of building materials are used with their own advantages and disadvantages. However, you should decide whether the dacha will be used in winter.
The choice of material and layout depend on this fact. After all, in the summer there is no need to heat the room and think about maintaining heat in the room. Such a house is cheaper, and construction takes place quickly (in a matter of days).
When your plans include a winter vacation, you need to approach the choice of building materials responsibly. You should also think about insulating the room to prevent heat loss. After making a final decision on this issue, they begin to select building materials and draw up a plan.
Conclusion
At this point, the design of the house can be completed - you have in your hands all the initial data that allows you to begin construction. If you saved money on creating a plan for a country house, maybe you’ll decide to build it yourself?
If you add up all the savings, you will end up with a rather impressive amount that can be spent on the interior. Again, the one you create yourself.
In the video presented in this article you will find additional information on this topic.
Choosing a budget material for construction
The ratio of price and quality of building materials is considered by most owners of the future cottage, especially if the budget is limited.
For construction use:
- foam concrete blocks;
- aerated concrete;
- laminated veneer lumber;
- SIP panels;
- rounded log;
- brick;
- wood concrete
Each of the listed materials has its own advantages and weaknesses. The design of the structure depends on what it is built from: Canadian and Alpine styles are made from logs that must first be rounded; medieval styles are recreated exclusively from brick, like Gothic.
For constructivism, cubism, and the Greek version, foam blocks are suitable, and a house in an ecological, country and Japanese style is often built from laminated veneer lumber.
Foam concrete
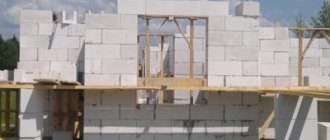
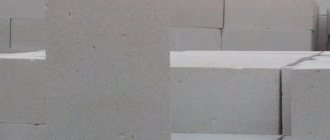
Porous cellular concrete blocks have low weight, high thermal insulation properties, reduced hygroscopicity, and durability. The material is resistant to fire, it is easy to lay any communications through it by making the necessary holes by gating. A house made of foam blocks or gas blocks can be built very quickly, and the price per square meter of a wall is 25-35% cheaper than one made of brick. It is not necessary to heavily insulate the building, nor is it necessary to make an excessively heavy foundation.
The disadvantages of the material include porosity, which complicates the installation of fasteners, and a long period of shrinkage of the finished structure. Concrete walls need reinforcement; they look ugly without finishing with special paint or plaster.
When building with blocks, you need an accurate calculation of all loads.
timber
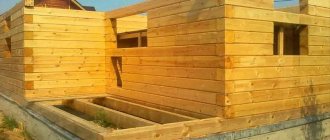
Profiled timber structures are subject to the most minimal deformations along the helix - the material does not warp, the finished house does not need to be caulked, sealing gaskets will suffice. The shrinkage here is minimal, so construction can be completed in the shortest possible time. Finishing is also not necessary - the walls will come out smooth.
The disadvantages of timber are that all parts of the structure must be periodically treated with antiseptic compounds, and for year-round use it is advisable to sheathe the inside of the structure with clapboard or other similar material.
Frame-panel house or SIP panel
The frame-panel version and construction from SIP panels are two different methods of construction. A frame house takes a relatively long time to build, it requires a strip foundation, and its frame is not very strong, since the parts are connected point by point.
A structure made of SIP panels is sometimes erected in a matter of days, the building elements are connected to each other quite rigidly, and the cladding with insulation is applied over the entire surface. A columnar or pile foundation is suitable.
The cost of construction from SIP panels is high, but the quality is appropriate. Such a house will last up to a hundred years, while a frame house will last a maximum of 35-45. The main disadvantage of SIP panels is low air permeability, therefore the device of forced ventilation is most important here.
Brick
A brick house is environmentally friendly, durable, and reliable. It is built relatively quickly - there is no need to wait for the material to shrink. Brick does not rot, is not damaged by bugs or mold, and therefore does not require treatment with an antiseptic.
The heat in such a house is retained perfectly, the building is waterproof, fireproof, and has an aesthetic appearance.
The disadvantages of the structure are the cost of construction - brick laying, its cost is quite high and costs increase with the number of floors. The construction of the strongest possible foundation made of high-quality concrete is also necessary, since brick is a very heavy material.
Selecting a project based on number of storeys
The number of floors is a very important characteristic of a house built from foam blocks.
Attention: Determining the number of floors should occur at the very initial stage in order to more accurately determine the layout of the house and for a more correct calculation of the required material.
One-story houses made of foam concrete blocks are not widespread in construction, and this is primarily due to the fact that the main deterrent factor is the building area.
When choosing house designs made from foam blocks - 2-story projects are in great demand, which is based on the fact that such houses are more practical and compact. But it must be said that in some cases it is necessary to have an additional frame, the role of which is to redistribute the load.
- Projects of two-story houses
The main stages of planning a two-story house
Creating a new home begins with competent design and the most detailed plan. The design documentation specifies the materials used for construction, the dimensions, area of each room, and the location of the stove or fireplace. An important element of a two-story structure is a staircase that allows you to climb upstairs.
When the project is drawn up independently, it is necessary to take into account the thickness of the walls - it can be up to 50 cm.
At the very beginning, a list of all the rooms that are planned to be made is compiled - this is a living room, a kitchen, a bedroom, or even two or three small ones separated by partitions, a terrace, a basement, a separate room where the boiler that heats the building will be located. It is advisable to have bathrooms on each floor, especially when there are more than three or four people in the family.
It is important to immediately include a porch and veranda in the project - they must form a single ensemble with the main building. If you plan to build a basement, then a special foundation is made for it.
When the house is two-story, the land is used to its maximum benefit.
Construction from foam concrete
| Overall dimensions, mm) | Weight of 1 piece (kg) | Weight 1m3 (kg) |
| 200x300x600 | 22 | From 580 to 630 |
| 100x300x600 | 11 | From 580 to 630 |
| 80x300x600 | 8,5 | From 580 to 630 |
| 160x300x600 | 17 | From 580 to 630 |
| 240x300x600 | 25 | From 580 to 630 |
| 200x400x600 | 28 | From 580 to 630 |
| 200x200x600 | 14 | From 580 to 630 |
Having such a table in front of your eyes, it will not be difficult for you to calculate the required amount of material for construction to implement a 6 by 6 house project made of foam block. We, as an example, will consider one of many such projects, so that you can understand how you can calculate the materials needed for laying foam blocks.
Recommendation. We will perform calculations using the most frequently used combinations, but this does not mean that this is the only way to solve the problem. In your work you will be able to use the knowledge of the principles that you will now acquire.
Foundation
The most common types of foundations for houses made of foam blocks are pile (in rare cases columnar) and strip (monolithic or prefabricated). We will turn our attention to the best-quality option, a monolithic tape, and will briefly examine the principles of its installation and the required amount of materials for filling.
To mark the site, we will need a plan of the house or its 1st floor, which is located above, in order to create a zero cycle for load-bearing walls and partitions.
Let’s assume that on the site being built we have non-heaving soil, then we will make a shallow foundation, 60 cm from the base to the ground level and the tape will protrude 40 cm above the surface as a plinth. We will make the tape thickness 0.5 m, but we will have to dig a trench at least 0.8 m deep, leaving 20 cm for a sand (or crushed stone) cushion. Now, based on the plan of the 1st floor, let's calculate the total length of the trench.
So, we need a foundation for a 6 by 6 house made of foam blocks, but in addition to the square on the plan, we have a protruding terrace and partitions under which we will need to pour strip lintels. This means that our entire trench will be: 6*4+3*2+1.5*5+1+0.5*2=39.5 linear meters. Now you can find out the amount of concrete; for this we need the total volume of the tape: 39.5/1.0*0.5-19.75 m3.
In the same way, you can calculate the number of components for a concrete mixture, for example, we will use the popular brand of concrete M 300, then for one cube we will need 385 kg of M 400 cement, 1080 kg of crushed stone or gravel, 705 kg of coarse sand and approximately 220 liters of water (it all depends on the moisture content of the fillers ). Everything else is somewhat simpler, since we know the cubic capacity of the tape, then 19.75 * 385 = 7603.75 m3 of cement will be used; crushed stone – 19.75*705=13923.75m3; sand – 19.75*1080=21330m3; water approximately 19.75*220=4345l. You will also need sand for the pillow, which is 39.5 * 0.2 * 0.5 = 3.95 m3.
Advice. On water-saturated soils, it is better to make a cushion under the foundation tape from crushed stone or gravel, or pour two layers of 20 cm each - sand and gravel. If necessary, the tape must be equipped with a cut-off waterproofing or even a drainage pipe, buried at the level of the sole with a slope of 1 cm/1 m at a distance of 1.5-2 m from the foundation.
For a metal frame with a strip foundation, reinforcement with a cross-section of 10 to 16 mm is usually used as longitudinal load-bearing rods, but given that 6 by 6 house designs made from foam blocks are quite light, the instructions allow using a diameter of 12 mm. This means that we will need 39.5 * 4 = 156 m of longitudinal load-bearing supports (two rods each at the upper and lower levels), and if we take into account that each profile has 6 m, then 156/6 = 26 rods.
For lintels, you can use corrugated or smooth-walled reinforcement with a diameter of 8 to 10 mm. With these dimensions of the tape, the optimal dimensions of the frame will be 3075 cm, which means that the vertical jumpers will be 0.8 m each, and the horizontal ones will be 0.35 m each, and the ring will be 2.5 m in total. If we make them step by 0.5 m, then we will need 39.5/0.5 * 2.5 = 197.5 m or 197.5/6 = 32.9 or 33 pieces.
The reinforcement is connected using soft steel wire and it is knitted with your own hands, but for this they use a variety of devices - pliers, screwdrivers and even special guns, but the most popular remains the hook, with a bent rod ground into a cone. Each joint requires about 0.5 m of wire, and we have a total of 39.5/0.5*4 = 316 joints, which means we will need approximately 316 * 0.5 = 158 m of soft wire.
Walling
After building the foundation, we need to make a floor and reinforced concrete floors are perfect for this, as can be seen in the top photo. Considering that we have a 6x6 house made of foam blocks with a terrace, we will need two types of PC 60-12-8 (5980x1190x220 mm) slabs - 5 pieces and for the terrace ledge PC 30-12-8 (2980x1190x220 mm) - 1 piece. But exactly the same ceilings are suitable for the ceiling, which means the whole set needs to be multiplied by 2 and we get PC 60-12-8 (5980x1190x220 mm) - 10 pieces and PC 30-12-8 (2980x1190x220 mm) - 2 pieces.
Now let's look at several types of masonry and the number of blocks that will be consumed if they are laid in one way or another. For load-bearing walls, we will take a foam block 200x300x600 mm and try to raise the wall in two ways - with a whole stone and half a stone. Solid stone laying involves placing the block on the bed, poking in and out of the house.
Let's take 2.8 m as the design height (together with the seams it will be 2.87 m) and find out the total area of the load-bearing walls, it will be Swalls = 6 * 3 + 1.5 * 2 + 3) * 2.8 = 67.2 m2. If the masonry is carried out in one whole stone, then we will need another area of the butt, and this is Stitch = 200 * 200 = 60000 mm2 = 0.06 m2. In this case, for all load-bearing walls when laying in whole stone, you will need Swalls / Stick = 67.2 / 0.06 = 1120 pieces.
Also, 6x6 house projects made of foam blocks (load-bearing walls) can be carried out using half-stone masonry, which, of course, will reduce thermal insulation, but material consumption will be significantly reduced, and someone may consider it quite reasonable to argue that a thermal barrier can be installed separately. Half-stone laying involves placing the block on the bed, with the spoons facing outwards and inwards of the house.
We already know the area of the load-bearing wall, now we find out the area of the spoon, and this is Slozhka = 200 * 600 = 60000 mm2 = 0.12 m2. Thus, we can find out the number of blocks for all load-bearing walls and this will turn out to be Swalls/Spole=67.2/0.12=560 pieces. As you can see, the number of foam blocks turned out to be half as much, and if you use, for example, mineral wool for insulation and line it with siding, then the price for all the work in the second case will be more profitable, besides, the first option remains without lining for the same money .
We continue to consider the project of a house made of 6x6m foam blocks, in which we need to build partitions, but we will do this with a quarter of a stone and use a different size of blocks for this - 600x300x100 mm, which is quite acceptable inside the apartment.
Of course, you can put other sizes, but for the example we will use this one. Quarter stone laying means placing the block on a spoon, with the beds facing to the sides, and butts end to end.
If the total length of our walls is 6 * 4 + 3 * 2 + 1.5 * 5 + 1 + 0.5 * 2 = 39.5 m, and the length of the load-bearing ones is 24 m, then we have 39.5-24 = left for partitions 15.5 linear meters. The area of all partitions will be S partitions = 15.5 * 2.8 = 44.24 m2, and the area of the bed S bed = 600 * 300 = 180000 mm2 = 0.18 m2. Now we find out the total number of blocks - S partitions / S beds = 44.24 / 0.18 = 245.7 or 246 pieces.
Optimal solution
For those who want to save both money and space on the site, there is a decent option - a 6 by 6, two-story house. Its layout can be done as efficiently as possible, so there will be enough space for living.
These dimensions are not taken out of thin air: these are the parameters that can create an area that is optimal and sufficient for an average family to live. If the internal layout of the premises is carried out effectively, the usable space can be used in full - up to 70 m2. At the same time, a 6 by 6 two-story house, the layout of which takes into account the entire internal territory, can accommodate more rooms than a city apartment of the same area.
Space planning and zoning ideas
If the design of an 8 by 8 house with an attic floor is done professionally and boasts an excellent layout, it will be comfortable for everyone in the family. In addition to the rational distribution of living space, the following techniques are used to increase comfort:
- The kitchen is combined with the living room. A combined space is an ideal option for receiving guests, providing freedom of communication.
Three in one: living room, kitchen, dining room Source pic2.me
- A terrace is being built. You can arrange a comfortable summer kitchen on it. Glazed and insulated terraces are popular; they are used as an additional room.
- Living room with second light. The effect reduces the area of the attic, but visually increases the space of the living room (or living room-kitchen).
Living room-kitchen with second light Source blog.parisattitude.com
- A large number of windows in the project. Thanks to this solution, the rooms are not only better lit, but also look more spacious and fresh.
- Setting up a fireplace in the attic guarantees luxurious winter evenings.
- Using the space under the stairs. If size allows, a storage room or even a dressing room is installed under the stairs.
Visualization of the 1st floor of the 8x8 project Source phpdugbookmarks.info
- In a house with a basement, the veranda can be replaced by a porch with a protective canopy. It is planned to be the length of the entire wall, or in the manner of a corner veranda.
- A boiler room with a separate entrance is a practical option that eliminates inconvenience.
Features of construction from aerated blocks
It has already been said that aerated concrete loses its positive properties when wet. This must be remembered during transportation and storage of the material.
In addition, the instructions require taking into account other features of the material:
When building with aerated concrete blocks, it is advisable to make thin joints. This material, like all cellular concrete, has high thermal resistance. And thick cement joints reduce this figure for finished walls by tens of percent.
For reference. Manufacturers of aerated concrete recommend using special glue and tools for laying blocks, which allow reducing the thickness of the seams to 3-5 mm without losing the quality of installation.
This material is very vapor permeable, which puts it on par with wood in terms of comfort of living in such a building. But only if the water vapor generated in the house will freely escape outside without accumulating in the walls. Therefore, the interior and exterior decoration must be thought out so that the vapor permeability of each layer increases outward. Or it is necessary to design good supply and exhaust ventilation.
Where to start construction
Naturally, from the foundation.
Foam concrete is not a very heavy material, so for the construction of a two-story house you can use a strip foundation buried to the depth of soil freezing, that is, one and a half meters.
First you need to clear the site for the future home and level it. Then, using ropes with pegs, the places where the trenches will be dug are marked. They should be under every wall of the house.
Trenches are dug to a depth of 1.5 meters, a layer of gravel and a sand cushion are poured onto the bottom. Cellophane is laid to prevent dehydration of the concrete mixture, and formwork from boards is installed.
Inside the formwork, reinforcement is made of a metal rod, which is attached to each other in the form of a lattice. The thickness of the rod is 10-12 mm. Cell width - 300-400 mm. The rod is fastened together with knitting wire.
Then concrete is prepared from cement, sand and crushed stone in proportions of 1/3/5, and poured into the formwork. Concrete gains its strength within 6 weeks.
Construction of reinforced houses
In the process of building small-sized houses, a unique technology is used. It comes down to the fact that reinforcement is not required here. When constructing large buildings, everything is different. In this case, you simply cannot do without it: the blocks will not be able to withstand heavy loads, as a result of which the walls may crack.
The technology under consideration for the construction of small-sized houses will make it possible to create a structure that will delight you with warmth, coziness and comfort at any time of the year.
Main stages of construction
To create a high-quality project, you need to perform the following steps:
- Creating a detailed drawing on a sheet of paper. In this case, all proportions must be observed. And besides, you need to schematically indicate the location of the furniture.
- Determine the number and functional purposes of the room. Thanks to this stage, it will be clear which rooms are best combined, reduced or enlarged.
- It is necessary to indicate the size of the rooms, taking into account the thickness of the walls and the location of communications.
- Indicate the roof structure, the presence of external extensions, terraces, the layout of a 6 by 6 house with an attic, the location of windows and doors.
- You can create the project yourself or use the help of professionals. The first option will help you create a layout that you like, and the second will guarantee a high level of quality.
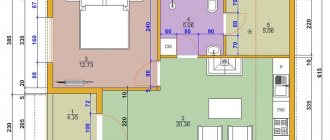
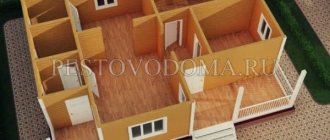
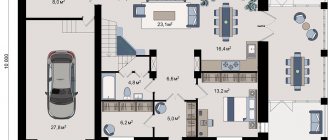
First floor layout
On the ground floor there is usually a bathroom with a shower or bath, a boiler room that heats the entire house, a kitchen, and a living room. The best shape for any room is square or close to square, the optimal width is 2.5-3 meters. There is practically no corridor as such here - the width of the hallway where the staircase is located is about one and a half meters.
You should not make the kitchen area too cramped - this is inconvenient. The bathroom should also not be tiny, especially if it houses a washing machine. A basement is often made under the floor - it will make the house warmer, but in this case the foundation is made higher.
Second floor layout
On the second floor they make an office, a spacious bedroom or even two; it is permissible to equip another toilet - this is especially important when the family is large. Often there is a balcony - its size depends only on the preferences of the home owners.
Sometimes there is only a huge living room upstairs with a billiard table, several sofas, and a home theater. It would be convenient to create a full-fledged gym here.
A staircase leads to the second floor; the place where it joins the upper room must be fenced off with railings to prevent falls. The design of the first and second floors may differ slightly in color, but it is advisable to design both spaces in the same style.
Overview of typical 8x8 projects
A typical house design with an 8x8 attic is considered as the best option for a family of 3-4 people. The area of such housing ranges from 90 to 120 square meters. Its size is significantly influenced by the size of the usable area of the attic, which, in turn, depends on the roof design.
Standard designs take into account the soil characteristics of a given region and the possibility of connecting communications (gas, electricity). The internal layout is based on maximum use of usable space. In the 8x8 project with an attic, certain changes are allowed, according to the needs of future residents. Thus, during approval, the customer chooses a layout that is convenient for his needs, as well as materials for the roof, façade finishing and interior walls.
Typical project with an attic Source juliz.pl
If you cannot find a suitable ready-made option, a custom-made project will come to the rescue. The future owner will be able to create the house of his dreams by determining the configuration of all elements of the project: roof, attic, garage, terrace. If desired, new elements are added, for example, a bay window on the facade or a balcony on the attic floor. The project, measuring 100 square meters, looks compact, but accommodates all the necessary rooms, which include:
- Entrance hall with corridor or small hall with stairs, bathroom.
- Living room and kitchen. Sometimes a kitchen-dining room is planned (by reducing the living room).
- Additional room. Depending on the needs of the owners, this could be a guest bedroom, an office, or a dressing room. You will need space for a boiler room and a storage room. The bathroom can accommodate both a shower and a bath.
Project with attic and terrace Source drevolog.ru
- Attic floor. Its capabilities are more modest and are limited to two or three bedrooms (including a children's room) and a bathroom.
- Additional options. A house with an attic floor becomes more practical if you add a basement to the project. A good addition is a terrace, the width of which is limited to 3-4 m.
- Garage. Its dimensions can reach 3x8 m, in case the owner needs space for a workbench or other equipment. Sometimes a shed is built next to the garage, a convenient place for servicing the car.
