10.19.2021 Author: VT-METALL
From this material you will learn:
- Rules for performing welding work using electric welding
- Methods for welding vertical and horizontal seams
- Rules for creating corner and butt welds
- The nuances of welding a ceiling seam
- Possible errors when welding seams
Knowing how to weld seams will improve your own skills in this area or help you with everyday tasks. It is important to remember that no theoretical knowledge guarantees an ideal result in practice, so it is necessary to constantly practice welding so that the seams turn out better and better.
There are different types of welds. And some are easy to do, even with minimal experience, but to perform more complex ones you need to have a certain technique. In our article we will tell you how to weld seams of varying complexity and analyze the most common mistakes.
Rules for performing welding work using electric welding
It’s not enough to just learn how to weld seams; it’s important to always follow these steps when welding:
- Monitor the length of the electric arc.
We are talking about the distance between the material being processed and the ignited electrode, at the end of which there is a stable electrical discharge. In order to qualitatively connect the workpieces, it is important to maintain the arc of optimal length. It is customary to distinguish the following arc gaps:
- short, 1-1.5 mm in size;
- normal length or 2-3 mm;
- long, that is, 3.5–6 mm.
You can tell that a short arc was used to form the seam by the presence of an undercut or a small indentation along the edges. The cause of the defect is insufficient heating of the working area in width, which leads to poor quality of the connection.
A long arc inevitably extinguishes from time to time, so its use is fraught with poor heating of the metal in depth. As a result, the welded joint is also of low quality.
It is recommended to choose a normal arc, as it is important to weld strong seams. Its length is determined based on the following formula:
Ld = 0.5 × 1.1De,
Where:
- Ld – arc length;
- De – diameter of the electrode.
- Control the angle of the electrode.
The welder himself selects the required angle, based on current production conditions. In this case, the angle is right, forward or backward relative to the metal surface.
The forward angle is often used when performing ceiling work, and the use of this method is the answer to the question of how to weld a vertical seam. This technique allows you to weld pipe joints if it is not possible to turn the structural elements themselves.
The electrode is placed at a right angle to perform work in hard-to-reach places.
The “corner back” method is considered indispensable for forming corner joints.
The rake angle is often used when processing products made of thin metals, because it provides a wide, strong seam with a shallow welding depth. For thick-walled workpieces, it would be more appropriate to choose the “backward angle” method, since this ensures deep heating of the metal.
- Select the speed of the electrode and change the current strength.
The quality of the welded joint largely depends on these characteristics, which is important to remember when learning how to weld a seam correctly. By using a high current, it is possible to achieve deeper heating of the metal. This way the master is able to move the electrode faster without changing the quality of the work. A strong weld is formed when a specialist manages to select the optimal ratio of current strength and electrode feed speed.
The relationship between current strength, electrode thickness and metal looks like this
| Current strength, A | Electrode diameter, mm | Metal thickness, mm |
| 35–50 | 1,6 | 1-2 |
| 45–80 | 2 | 2-3 |
| 65–100 | 2,5 | 3-4 |
| 85–150 | 3 | 4-5 |
| 125–200 | 4 | 5-6 |
The speed of movement of the electric arc depends on its power. You need to understand that if the consumable is supplied too quickly and the arc power is relatively low, it is not possible to heat the metal to the required depth. As a result, a surface seam is formed, which only slightly catches the edges of the structural elements. And the opposite situation: slow movement and a sufficiently powerful discharge lead to overheating and a change in the shape of the workpiece along the seam line. Thin-walled products often burn through with the formation of through holes - this is important to remember when talking about how to weld a welding seam.
Expert advice
- Use the purchased profile welding strictly for its intended purpose. What works well for joining metal may not work if you want to glue wood or plastic. Waterproof or high temperature options also cannot be fully replaced.
- Universal welding will help out in many cases, but its properties are inferior to specialized compounds.
- To guarantee the quality of the repair, be sure to prepare the area where you will apply the adhesive mixture: thoroughly clean the metal of paint, rust, grease and moisture.
- Follow the instructions exactly and consistently.
Have you already used this amazing invention? Congratulations, there is a reason to celebrate Welder Day with a clear conscience on the last Sunday in May!
Methods for welding vertical and horizontal seams
- Vertical seams.
Hot liquid metal flows down from vertical parts. This can be avoided by using a short arc, that is, a smaller distance is left between the end of the electrode and the weld pool. When the electrodes do not stick, the craftsmen even rest them on the workpiece being welded.
Preparation for processing, that is, cutting the edges, is carried out in accordance with the type of connection and the thickness of the material. Next, the elements are fixed in the required position, connected with “tacks” in increments of several centimeters - due to the use of such small seams, the parts remain motionless relative to each other during the welding process.
Basic rules for joining parts
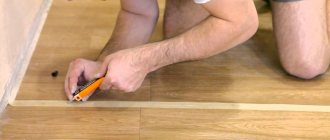
After you have mastered the basics of welding, you need to weld metal structures yourself and move on to performing simple assembly and tack operations at home. As a rule, a home craftsman does not weld thick metal, so cutting edges is not required. First, you can practice connecting a profile pipe. To do this, you will need to cut sharp corners at the ends of the parts for a larger penetration area.
The parts are inserted into the corner clamp and secured with a clamping bar. Now you need to first grab it from several sides. To do this, light an arc and place a small point.
There is no need to withstand a large leg, you just need to fix the parts. After checking the diagonals, tacks are performed on all accessible sides. Now the structure is removed and welded with a reliable and high-quality seam.
If the lessons on the angle of inclination and laying metal in a molten weld pool are well learned, then the operations of assembling metal structures will not cause difficulties even for dummies in welding.
Having studied the basics of welding and gained theoretical knowledge, you need to practice as often as possible, put on welding equipment, turn on the welding machine and hone your skills for a long time. Only practice will allow you to become a high-class welder.
Rules for creating corner and butt welds
- How to weld fillet seams.
Molten metal tends to flow down, so it is best to use a method called “in a boat” when welding such seams from the bottom position. In other words, the part is installed so as to avoid slag leakage directly in front of the arc.
Forming a fillet weld with a horizontal position of the lower plane is fraught with poor-quality penetration of the corner vertices. This is explained by the fact that they started working from a vertically located sheet, which is why the hot metal began to flow onto the second, still cold sheet.
Recommended articles
- Manufacturing of welded metal structures: understanding the methods and operations
- Manufacturing of welding equipment: necessary characteristics and best manufacturers
- Welded sectional fence: selection criteria and installation instructions
To avoid this problem, you need to cook from the bottom plane and light the arc at a strictly defined point. The electrode is inclined at 45° relative to the workpiece being processed. During operation, the consumable is tilted slightly in different directions.
As soon as the “boat” method is abandoned when welding fillet welds, it is necessary to use a single-layer seam with a leg of up to 8 mm. Otherwise, you need to make several layers.
To weld several layers of a fillet weld, a narrow bead is formed using an electrode with a diameter of 3-4 mm - in this case, it is possible to completely weld the root.
The number of passes depends on the cross-sectional area of the seam. Typically this value is 30–40 mm2.
- How to weld butt seams using electric welding.
If there are no bevels on the edges, the overlay bead needs to have a slight flare on each side of the joint. Lack of penetration can be avoided by evenly distributing the hot metal.
Without bevel of the edges, a product 6 mm thick can be boiled only through proper selection of current strength and electrodes. It is worth noting that the current value is adjusted exclusively experimentally - for this you need to weld several test strips.
On parts with V-shaped bevels, both single-layer and multi-layer seams can be welded. Here, the choice of approach primarily depends on the thickness of the metal. If one layer is formed, the arc is ignited at point “A” - at the border of the bevel. Next, the electrode is lowered to completely weld the root of the seam, after which the arc is transferred to the next edge.
The movement of the electrode along the bevels is deliberately slowed down, since only in this way is full penetration achieved. At the root of the seam they move faster to avoid burning through the metal.
On the reverse side of the connection, specialists make another welding seam. Or a steel lining with a thickness of 2-3 mm is mounted there. For this purpose, the welding current is increased by 20–30% relative to the standard indicator. It is important that through penetration is impossible in this case.
Movement of the holder
For proper welding, it is necessary to hold the tip of the electrode core at a distance of at least 2 mm and see the weld pool.
The problem for beginners is the need to perform several actions at once. To better fill the joint bead, it is necessary to guide the electrode in several ways.
For welding metal whose thickness is more than 6 mm, it is better to use a triangle motion. And for parts less than this thickness, it is better to use a broken zigzag welding line.
At first, only these methods of guiding the electrode will be required. Pay attention to the constant size of the oscillatory movements. You may first need to simply guide the electrode in a straight line to gain proficiency.
Don't think that you will succeed on the first try. This is a long process, so you need to be patient while mastering the basics.
The nuances of welding a ceiling seam
Beginning craftsmen often wonder how to weld ceiling seams if the hot metal becomes liquid and flows down? In this case, a short arc and an electrode with a refractory coating are used. During the formation of the seam, a cap is formed at the end of the electrode - it is this that prevents drops of metal from rolling off. The end of the electrode is evenly removed and brought closer to the workpiece, allowing the joint to cool slightly and harden. In this case, only a consumable with a small cross-section can be used. The current strength is set 10–12% lower than when welding workpieces of the same thickness, but located below.
When forming ceiling joints, gas bubbles float to the surface and enter the root of the joint, which negatively affects the strength of the entire joint.
You need to understand that ceiling welding is used in rare situations, if it is not possible to apply a seam from the lower position.
Organization of the workplace and reliable equipment for the welder
When welding with electrodes, strong infrared radiation occurs. To protect your eyes and skin, you must use a special welding mask and protective clothing made of dense material .
It is better to buy a welding helmet with chameleon glass, with the ability to adjust the degree of darkening of the glass. You need to wear split leather gloves or mittens on your hands. Protective clothing should be used regardless of whether you are a beginner welder or an expert.
The welding site must be fenced with protective screens to prevent damage to the eyes of others, especially at home. Welding shoes should not be nailed.
In such shoes, the welder will constantly dance even with slight dampness in the air. Before welding, be sure to ensure that your work area is properly grounded.
Having completed the preparatory work, you can begin learning welding and learning the basics.
Possible errors when welding seams
Thanks to the recommendations of specialists, it becomes clear how to weld seams in order to avoid mistakes and always get a high-quality result.
The most common mistakes during welding are:
- The electrode is moved at too high a speed, causing the connection to be insufficiently smooth.
- The electrode moves too slowly along the weld line, resulting in burns. Professionals consider them to be serious defects that are not allowed in critical structures.
- The angle of the electrode is incorrectly maintained. Normally, this indicator is at the level of 30–60°; failure to comply with it affects the shape of the seam.
- Blanks of metals of different grades, which have completely different properties, for example, melting point, are connected. As a result, one metal manages to melt, while the second remains only slightly heated - this situation prevents the elements from joining. Instead of a seam, cracks form that need to be dealt with.
- Wet electrodes are used. To prevent this from happening, the consumables need to be dried or calcined before starting work. The fact is that this problem is fraught with uneven arc burning.
- The welding mode, electrode type, and current strength are selected incorrectly.
- The arc is too long or too short.
- Work is carried out with a welding machine that has an expired verification period.
- The edges are not heated sufficiently - it is important to select transverse oscillatory movements with a span equal to the width of the seam.
- Too large a gap is left between the elements of the future structure, which leads to the appearance of a shrinkage cavity.
Experience and understanding of how to weld seams comes with time. The main thing is not to stop practicing, because with its help, skills are developed, and a specialist becomes in demand in his profession.