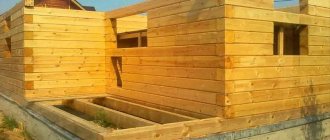
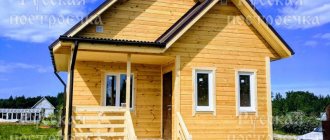
On a plot of 10 acres, a frame bathhouse has already been built, then it’s up to the house, we decided to build a frame structure on two full floors, measuring 7 by 10 meters, plus an adjacent garage to the left wall, 10 by 5 meters. The whole thing will stand on a strip foundation. We carried out the work together, we were building for ourselves and for the first time. I’ve read and watched a lot about frame houses on the Internet, so I have an idea of how to assemble a frame house with my own hands. Don’t judge strictly, we are not experienced builders, so there are a lot of mistakes, we know it ourselves)))
Pouring the foundation
We start with the foundation, make formwork from boards from pallets, in the distance we can see a bathhouse built last year.
We begin reinforcing the foundation with fiberglass reinforcement, prudently leaving out one side of the formwork so that there would be access. The crushed stone that lies at the bottom of the hole for the foundation compensates for the depth of the hole; we dug it manually, of course, since a frame house requires a minimal foundation, 20-30 cm wide, with a depth of about 30 cm.
This angle (2) turned out to be high, because the difference in height of the area along the diagonal of the foundation was about 40 cm; the photo below shows the lowest angle, so the depth of the hole was slightly reduced. What am I leading to all this, before making a foundation for the frame, check the height differences using an optical or hydraulic level
We tied the reinforcement with ties, it didn’t turn out very smooth, but it’s been standing for three years now, no problems. The width of the foundation was 35-40 cm.
We begin to mix the concrete using a concrete mixer.
The proportions were as follows: 1:4:6 (cement: screenings: crushed stone). Everything was filled in for about a week. Size 7*10 meters plus a garage 5*10 meters, one partition for the house and garage is common.
We waited a little (a week), removed the formwork, and this is what happened. They laid sewer pipes and brought them under the foundation, to the future septic tank.
They brought timber, 10 cubic meters. Board 50 by 150, regular, not dry.
Combined houses: stages of construction
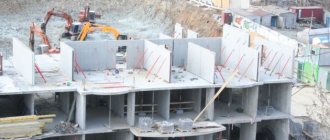
Combined houses are buildings whose floors are made of different materials. Traditionally, combined chalet houses are built of two full floors or with attics, the first of which is made of stone or brick, and the second of wood.
A little history
This is not a new thing in the construction market. Such a combined private house appeared in our country in the mid-18th century. At that time, mostly wooden buildings were built in Russian cities. But a series of devastating fires left many townspeople homeless. And by decree of the authorities, houses began to be built on the streets of Russian cities, the first floor of which was made exclusively of stone. In this way, buildings were protected from fires, and citizens were protected from unexpected loss of housing. It was a kind of Russian modification of combined houses.
But the Chalet houses came to us from the southeastern part of France. Then they built small shepherds' houses called Chalets. They built from scrap materials that were in abundance: stones and aspen. The stone first floor resisted not only wind and snow, but also mountain avalanches. The wooden top of the house was built in a sloping shape. This improved the streamlining of the structure.
The APS DSK company has been building combined chalet houses for more than 12 years. We design, build foundations, walls and roofs. We install windows and doors in built houses, insulate them and give a guarantee of the quality of construction for 25 years. Construction technologies do not stand still. Therefore, we use modern porous ceramic blocks Porotherm for the first floor and environmentally friendly laminated veneer lumber for the second floor.
Stages of construction of a combined house
Construction of the foundation
It begins with clearing the construction site of debris, perennial plants and their roots, as well as removing the axes.
We use a pile-grillage foundation to build combined houses using a reinforced reinforcement tying system. This is one of the types of foundations. It consists of reinforced concrete piles that are installed in the ground to a depth of 2 meters. At this level, the soil rocks do not freeze and firmly hold the piles without collapsing or subsidence.
Pile construction technology: piles are drilled into the ground and completely waterproofed. Threads of iron reinforcement are installed in the piles. Next, the resulting depressions are filled with M350 concrete using an automated concrete pump. This makes the foundation construction process faster.
It is important to ensure that the piles protrude 20 cm above the ground. This will be the basis for constructing the grillage. A grillage is a wooden, reinforced concrete or metal support on which the weight of the entire building is distributed.
In order for the grillage to hang above the piles, a sand cushion 25-35 cm high is constructed. Next, a monolithic reinforced concrete slab 16-29 cm high is constructed. The height varies depending on the weight of the future building. For each house project, individual grillage height values are established.
One of the advantages of the foundation from APS DSK is the presence of non-removable warm formwork. We use polystyrene foam boards to construct formwork using Super nord technologies. This allows you to fill the foundation even in winter, at temperatures not lower than minus 20° C.
The number of piles for each project is different, it depends on the area of the house being built, the quality and type of soil.
Advantages of a pile-grillage foundation
Provides additional insulation for the house, since the base of the house does not contact the frozen ground.
● The peculiarities of connecting the piles with the grillage eliminate possible vibration of the house, even if the building is located close to the railway tracks.
● The foundation is suitable for areas with a slope, heterogeneous terrain and the presence of groundwater.
Construction of the first floor
Ceramic porous blocks Porotherm are an innovation on construction sites. They are durable, strong and have a high degree of thermal resistance. It is enough to plaster the external and internal walls and start moving in. Ceramic block perfectly retains heat inside the house. In winter, you can save up to 30% on heating costs. Porotherm also has a high level of noise insulation, which becomes relevant for residents of noisy cities. The blocks do not allow sounds either from outside or from the next room, which becomes a salvation for large families.
Since they have a smooth rectangular shape, construction begins from the corners. The sides of the blocks have a corrugated surface, which are connected to each other into grooves. Therefore, only the upper side of the block is filled with solution. Laying Porotherm blocks is somewhat reminiscent of bricklaying, only the blocks are 7 times larger in size than bricks. Therefore, the construction of walls occurs much faster. Moreover, Porotherm blocks are quite light due to the voids inside, so for the construction of walls there is no need to order a crane, a professional team of 3-4 people is enough.
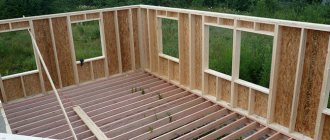
Installation of a frame made of boards
We begin to put the frame on the foundation, after reading on the Internet, we make waterproofing from roofing felt
We are assembling the lower framing of the frame, we are not building the garage yet, first the house.
We put logs where there will be a wooden floor, in a place where crushed stone is poured, there will be a bathroom, we will fill the floor.
The first wall was leveled. Corner boards sewn together with the letter “G”
We install the racks with a pitch of 59 cm (THIS IS VERY IMPORTANT!), so that we can then put the insulation into the spacer; the width of the slab is 60 cm. The same with the logs.
More photos
Added more racks
We placed all the racks around the perimeter of the first floor, added jibs, window openings were also outlined, there is an undoubted advantage in frame house construction, you can always make a window or doorway anywhere, even when the house has already been completed.
I sunk the jibs into the racks using a circular saw and an axe, then fastened everything onto screw and rough nails, which were available; rough nails hold much better. I took the length to 90 mm, so that I could sew two 50 mm boards without the nail sticking out of them.
We imperceptibly moved on to building the second floor of the frame house, first of all we laid the logs, with a distance of 59 cm between them so that the insulation would fit into the expansion. Looking ahead, we will insulate the frame with mineral wool.
Combined houses: stages of construction
When building a one-story house, you can save significantly on several expensive structures, in particular, a staircase and an additional bathroom.
Construction of a one-story house is possible even on your own, and in practice it is not too difficult.
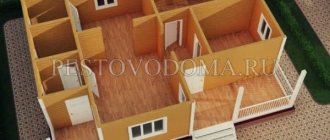
As a result, the layout of the house turns out to be simpler. With a proper plan, you can practically eliminate corridors that are not useful living space.
The cost of maintaining the building is lower as a result.
The disadvantages include the high cost of the foundation and roof. In addition, a one-story building takes up a large area on the site, which turns out to be more problematic when there is a small site or excessive land prices.
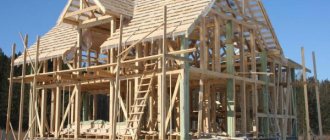
Installation of the second floor frame
We are putting up the racks of the second floor; it will be full-sized, 2.5 meters high, just like the first floor. This is due to the fact that OSB for finishing a frame house from the inside has a height of 2.5 meters, plus the attic roof is much more difficult to properly insulate, so there will be a cold attic.
We continue to install the second floor racks
Another photo of a frame two-story house in the process of being built with your own hands.
We installed the racks of the second floor, laid the attic joists, after 99 cm, there is no load on them, we are not going to walk through the attic, their role is only to carry insulation and OSB.
Average prices
The average cost of construction depends on the region of Russia, the number of rooms, the size of the structure, and the need to further strengthen the frame. For example, for a house measuring 6x6 meters with a balcony and terrace you will have to pay 2,000,000 rubles, subject to finishing. If you build such a house without finishing, just with a frame under the roof, then the price will be lower - 1,213,000 rubles.
For larger buildings prices are higher. So, for a house measuring 12x11 squares with finishing you need to pay about 4,545,000 rubles, without finishing only the frame - 2,231,000 rubles.
Installation of rafters and roofing material
We installed the rafters, having previously installed the ridge beam, we will make the roof from Ondulin, so after calculating the minimum roof slope angle for Ondulin, the ridge turned out to be about 1.5 meters high.
Then the rains began, so it was necessary to urgently make a roof; I took few photographs, mostly taking photographs while waiting out the rain under the already nailed ondulin. I did the roof alone, I had never done this before, I just watched videos on how to lay ondulin correctly, and everything worked out, nothing complicated.
It became more fun with the roof, the rain no longer interferes with the work, they poured a slab under the bathroom, adjusted the height by eye, so that later they could put 50 mm extruded polystyrene foam and make a reinforced screed on top with pipes for a warm floor.
Since we already have jibs and frame posts on two floors, we can cover the walls with a windproof membrane, we will insulate the walls from the inside, and we will make sheathing for the siding on the outside.
Risk assessment
To decide whether or not to build a second floor, you only need to first assess all the risks:
- A preliminary assessment by experts will help determine whether a wooden house is ready for additional loads.
- The examination will show the technical condition of the foundation, floors, and wall panels.
- The conclusion will determine the need and method of strengthening the entire structure.
Experienced experts always give practical advice on the savings and feasibility of building a second floor on an old house.
Making the floor in the house
We make a subfloor from pallet boards, mineral wool will lie on these boards, no loads are expected on them, we attach them to the floor joists from below, with self-tapping screws, with gaps so that the insulation in the floor can breathe through ventilation holes in the foundation
During the construction of the frame house, do not forget about the cellar under the floor, it was also slightly trimmed with pallets, pouring crushed stone to the bottom, groundwater is far away from us, so everything is dry.
Connecting the bathroom floor to the wooden floor of the house.
Of course, all subfloor boards and joists must be treated at least against fungus and mold. I did this using a regular sprayer.
Construction technologies
The second floor in a private house can be built in several ways. Their choice depends on the available material and the characteristics of the main building. To know how to build a second floor without loading the first floor, you first need to carefully familiarize yourself with the technologies for constructing an additional floor.
The following construction methods are distinguished:
- Frame technology. It is this method of constructing the second floor that will not impose too much load on the building; a building made of any material will support the frame. Material costs are minimal and installation can be carried out in any weather. In addition, the frame floor is fire resistant.
- Wood technology. Laying wood on floors and walls is carried out according to a rather complex principle. This method is used extremely rarely. In addition, a wooden frame will place a strong load on the base of the building.
- Metal or stone structures. The most durable materials for installation are stone and metal. However, they also fall into the most expensive category. A second floor built using these materials will be very durable. But the load on the first floor will be corresponding.
Frame building Source karkasnsk.ru
Insulation of a frame house with mineral wool
Next, we need to insulate the frame house from the inside; for this we will use basalt insulation, the density should be from 30 to 50 kg/m3. The manufacturer Ecover makes a good Ecover Light Universal slab, it is rigid enough that it can be installed in the walls of a frame house. They brought in some insulation.
We begin to place the slabs in the spacer between the racks. It is necessary to do it in several layers, and at intervals to cover the joints of the slabs with the next layer. We have three layers of 50 mm each, so the total thickness of the wall insulation is 150 mm, which is quite normal for the Urals. The windows, by the way, are simply installed on mounting foam, as in any other house.
They installed a metal door, after which there will be a waiting room. If the dressing room is not made, then an ordinary iron door, without “thermal breaks”, will “cry” very much.
Work on insulating a frame house continues in any weather and at any time of the day, as long as there is time, strength and desire.
We decided to hem the ceiling with OSB; to do this, we must first make a vapor barrier; we attach it with a construction stapler to the joists of the second floor. The vapor barrier was used with Stroizol B or Izospan B, I don’t remember.
This is how insulation occurs around the frame jibs, the slab is cut at an angle, and then placed on different sides of the jibs. Gaps should not be allowed between the mineral wool and the frame; they must be filled with pieces of the same mineral wool obtained from scraps.
Nuances of design and operation
A house built using wood frame technology is light in weight but durable. It is not inferior to stone structures, for which you will have to spend a lot of money. This technology is used in the construction of cottages for seasonal and permanent residence. It is advisable to entrust the construction of such a building to specialists who already have experience in applying the technology in practice.
In operation, such a house has several features relating to both the foundation and the walls themselves:
if groundwater on a site begins to affect the foundation, it is recommended to improve the moisture outflow mechanism;- in order to increase the strength of the foundation, it is recommended to carry out concreting from the frame walls to the green zone - this will help eliminate the destructive effects of moisture on the house;
- To finish such a structure, siding, timber or shingles are used;
- the use of synthetic materials for the wood base of the house is unacceptable;
- The house must have high-quality ventilation.
Ventilation is one of the keys to the durability of the frame. Since plastic double-glazed windows are installed in houses and layers of insulation are made in the walls without using proper ventilated gaps, condensation may form on the walls over time. This has a detrimental effect on the condition of the wood. To avoid this, air vents and split systems are installed.
It is recommended to regularly ventilate the house and follow fire safety rules. It is also necessary to carry out seasonal work to remove leaves and debris from drain pipes and gutters.
Important! One of the necessary points for the operation of a building is the regular treatment of wood with special compounds against biocontamination and mold.
OSB interior wall cladding
We have hemmed the ceiling and are starting to sheathe the already insulated walls. This is done with OSB sheets, the height of the sheet is 2.5 meters, the height of the wall is 2.53 meters. Coincidence? Don't think)). OSB on the walls is attached to the vertical posts of the frame, using self-tapping screws,
When sheathing OSB, there is a little trick, you need to get into the rack with a self-tapping screw, through a sheet of OSB, it is not so simple, you either need to draw lines on the sheet, or use a plumb line, both of these methods are time-consuming, the best option is an inexpensive optical level, which can draw lines on the wall and ceiling, I bought it on Aliexpress for 1200 rubles, you can see what they have now (link)
I have this one, we put it higher, it is self-leveling.
Then we point at the mark of the rack on the ceiling (we mark all the racks with chalk in advance), and the vertical line of the level shows us where to turn the screws, everything is simple and fast. Same thing with the ceiling.
It is also necessary to do foam insulation on the walls of a frame house from the inside of the room; it should not let moist air into the insulation, because it will condense there and turn into water.
More photos of the vapor barrier of frame walls
Strengthening old walls
Old wall panels remain stable as long as they are not overloaded by new structures. And if permission is received from the experts, you can safely build an attic or begin construction of the second floor.
Brick walls can be strengthened as follows:
- Square metal columns of 100*100 mm are mounted on the foundation and connected to an armored belt. The installation step is 2 meters around the perimeter of all walls.
- Metal reinforcement with a cross-section of 12-14 mm in increments of 2 meters is immersed in grooves hollowed out in the walls at the level of the lower border of the window openings.
Wooden houses only require strengthening the foundation, since the walls themselves cannot be significantly strengthened. In order for the foundation to withstand new loads, you need to do the following:
- Replace one side of the support or replace the supports completely. To do this, the house is cleared of all objects, doors and windows are dismantled and the structure is raised with a hydraulic jack. After which a new foundation is poured, on which the entire building will rest.
- Armobelt. A monolithic belt of reinforced concrete tape is poured along the entire perimeter of the building. This tape, as shown in the photo, is placed in a trench dug along the old supporting base to a depth of 0.8 m, 0.5 m wider than the old base. Clean the old foundation, treat it with a primer, drive horizontal pins into the foundation in several rows and you can weld this structure to the reinforcement. Next, a metal mesh is laid (on top of the reinforcement) and filled with concrete.
Important! Sometimes, to strengthen the base, it is enough to strengthen only the corner nodes. For example, if the second floor is planned to be completed with light frame structures. The corners dug with a diameter of 1 meter are equipped with a welded reinforcement grid, which is welded to the metal rods of the old foundation and then the whole thing is filled with concrete.
- In addition, in order to relieve load-bearing and wall elements, an additional external/internal frame is erected. This system allows you to build a superstructure without support; in fact, the structure consists of two houses connected by communications.
Important! Frame systems are installed around the entire perimeter of the house, regardless of the external or internal type.
Insulation of ceiling and floor
Next, we insulate the ceiling (aka the floor of the second floor), photo from the second floor. All the insulation was done by hand, there is nothing complicated about it. The fish is already drying here)). In the photo below, you can see the vapor barrier of the ceiling, made before the OSB3 filing
The floor of the second floor of a frame house was insulated very tightly.
Since we do not plan to leave the completion of the second floor until next year, we protect the floor insulation with a membrane so that the cotton wool fibers do not blow out and do not get wet from snow and rain, which can blow into the gables and roof overhangs.
Preparing for construction
To understand how to build a second floor in a country house or in a private house, you should approach the preparatory stage of the main work responsibly. You need to clearly understand the sequence of upcoming actions and have all the necessary materials and tools at hand.
The main materials that will be required during work include:
- Wooden beams of the same shape to support the overall structure.
- Bricks or timber leaves that will serve as the basis for the construction of the second floor. The main thing is that the material does not differ from that from which the first floor is made.
- Insulation. It is necessary to create additional thermal insulation so that the room is warm even in winter. It is best to select a material whose thickness will be at least 18 mm.
- Thin chipboard panels for cladding the outside.
Room in the attic Source mykaleidoscope.ru
See also: Catalog of companies that specialize in the reconstruction of the attic floor
Before purchasing material, it is necessary to make accurate calculations so as not to make a mistake with the quantity of goods. To do this, you need to know the floor area and the height of the walls.
Plywood flooring is an inexpensive option
The time has come to make the floor on the first floor, after estimating the cost of tongue and groove boards and other materials for the floor, it was decided to reduce the cost of the structure using free material, namely boards from pallets, among which there are boards with a thickness of 22-25 mm. (see article on how to disassemble pallets). We decided to make a sheathing out of them along the floor joists, then screw 12 mm plywood on top.
We place the sheathing of boards so that the edge of the plywood sheet lies in the middle of the board, the next sheet will lie on it in the same way.
We are making a partition at the same time, since it is starting to get colder outside, and we are simply closing the extra rooms so as not to heat them.
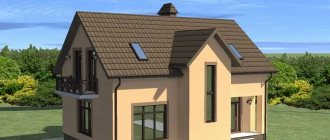
Which is better: a full floor or an attic?
Before building a second floor in a residential building, you should decide how best to organize this space. Depending on the needs and financial capabilities of the residents, this may be an attic or a full floor with or without heating. Both options have their pros and cons, so the following factors need to be considered:
- Price. The construction of an attic will cost less than the construction of a full floor. The main part of the costs during its arrangement is aimed at creating a roofing “pie”. You will not have to spend money on the construction of capital wall structures, as is the case with the construction of the second floor.
- Functionality. When choosing an attic floor, be prepared for the fact that you will not be able to use some pieces of furniture due to sloping walls, while the second floor gives you complete freedom of action. However, with proper design, the attic can also become a very functional and comfortable place in the house. Read Cold attic VS warm attic.
- Design. To create interesting interior and exterior solutions, it is better to opt for the construction of an attic floor. It allows you to make full use of non-standard shapes and proportions of the attic space, significantly improves the appearance of the building, making it unique, with a special “zest”. By choosing a full second floor, you can give the house a more solid and even austere look.
- Construction speed. Building an attic will take much less time than building another floor. You will not need to completely remove the roof, strengthen the foundation and build walls.
For a large family, in the long run it will be more profitable to make a full floor.
Making partitions in the house
We also put a vapor barrier in the partitions so as not to breathe in cotton wool, besides, in winter, we don’t heat non-living rooms, we just close the door, the temperature there remains +1+3, while the temperature in living rooms is +25+27
The floor is made of plywood, suitable for the cellar (here I am making a lid for the cellar). It's already frosty outside.
We are installing a dressing room partition; there will be two doors leading into the house. Entrance through the dressing room.
We put a door in the dressing room. with your own hands, using polyurethane foam.
In the meantime, the facade of our frame house will look like this. The top is covered with a windproof membrane, and the siding is partially installed. This way the house will be used for the winter, but the premises are already suitable for living on weekends.
Partition in the bathroom
We continue to do the interior work, it's a matter of partitions, in the photo below there is a bathroom partition.
In frame housing construction, walls are erected very quickly, and partitions even faster. On the left are the doors - a toilet and a bathroom, on the right is the kitchen. Straight ahead - exit to the dressing room.
Construction Features
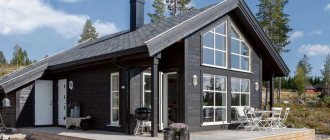
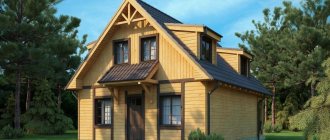
One of the main features of the construction of frame houses is that they can be erected without problems in a fairly short period of time. In just a month, a new building can be completely ready for a family to move into. In addition, it is currently possible to order a two-story frame house 7 by 7 or 8 by 8 meters on a turnkey basis.
Sectional view of the building showing its main elements.
Video of the construction of frame houses on our website. Thanks to this, the process of building construction can be constantly monitored, based on the experience of other people.
Wintering a “frame” without a façade
The frame house spent the winter in this form. Inside, everything has already been done for a comfortable weekend, except for the bathroom and water, since the septic tank did not have time to finish. The windows on the second floor were simply covered with a membrane, then we’ll just cut them out.
Winter has passed, the snow has melted, we purchased siding, it’s time to cover the façade of our frame house with siding. We are finishing the sheathing for the siding. The preparatory stage is the longest. The windows were framed with lathing. There is a mistake here, we did not install flashings on the foundation before covering it with siding.
Advantages and disadvantages
It is worth highlighting the main advantages of this solution:
- the building takes up less space on the site;
- the house looks beautiful, you can choose its architecture among many options;
- construction is cheaper;
- Suitable for small areas.
Among the disadvantages, one can note the difficulties in constructing the roof - it cannot be done alone. Also, in this case, a more powerful foundation will be required, since there will be two tiers.
Finishing the facade with siding
First of all, when installing siding, window trims, starting profiles, corners and other additions are installed; siding panels are installed last. The window is ready.
We waited until evening and screwed on the starting profile using an optical level, the length is 10 meters, so the optical level is just right.
The starting profile is ready, let's make the corners.
The first floor of a frame house is sheathed on one side. Siding from Deke, block house, Banana color. It looks very good, imitation of profiled timber.
They installed scaffolding, since the height of the frame walls, about six meters, would not be enough for ordinary scaffolding.
I trimmed the second floor windows with platbands. They put molding on top, there will be soffits.
We cover it with siding further, on the right in the photo is the bathhouse, which was built a year earlier. The siding on it is the same.
With the pediment, everything is more complicated, the scaffolding does not reach, so in order to cover the pediment of a frame house, we put ladders on the second floor of the scaffolding. The missing leaf of Ondulin is a hole from the roof, then I will install it. There is already an antenna on the pediment to enhance mobile Internet
We completed all three sides of the frame house, then began building the garage, which is adjacent to the house.
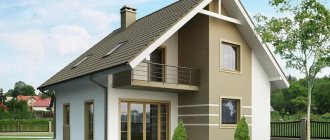
Varieties
All two-story frames can be divided into several types according to their type, style and the presence of additional rooms. For example, according to the type of construction, buildings are divided into:
- monolithic frame;
- half-timbered;
- frame-panel;
- frame.
- Monolithic frame technology involves filling pre-prepared frames with reinforced concrete. This makes the structure more stable. Monolithic columns are located in areas that are subject to maximum pressure. With this type of construction, a shallow foundation is also suitable.
- In a half-timbered house, the frame is also made of wooden posts, but the installation principle is different. All elements of such a frame are embedded into each other. This indicates that the joints work under compression and tension. In this case, the load-bearing element will be the half-timbered posts.
- Frame-panel structures are made of wood, and the walls are sheathed with special panels. Frame technology involves laying insulation in pre-prepared wood frames, after which the house is sheathed with slabs.
According to style, buildings can be divided into:
- chalet;
- Scandinavian;
- Canadian;
- modern.
- Chalet-style frames are distinguished by a flat roof and wide eaves. Which are installed perpendicular to the front of the house.
- The Canadian style is notable for the fact that it has 2 floors, a garage and an extension for several cars. There is also a wide porch with veranda and stairs.
- Scandinavian frame houses are distinguished by spacious rooms and thoughtful layouts.
- Modern frame houses are built according to the client's order. They often contain several bedrooms, a hallway, a kitchen combined with a living room, 2 bathrooms and a relaxation area.
Based on the availability of additional premises, buildings can be divided into the following:
- with terrace;
- with attic;
- with base;
- with a balcony;
- with a veranda.
Their advantages are as follows:
- In houses with a terrace, you can arrange a chic relaxation area, equipping it with beautiful and comfortable furniture.
- If the frame structure has an attic, then this is an additional bedroom.
- Houses with a basement are rare, but a storage room can be placed in the basement.
- Designs with a balcony will allow you to create a cozy place to relax there.
- And in houses with a veranda, you can plan an additional area for guests.
Attaching a garage to the house
The frame garage has one common wall with a two-story frame, so it was not covered with siding; the garage will be described in another article.
As a result, the construction of a two-story frame house took two years; they did it together, slowly, as building materials were purchased. The second floor has not yet been insulated, there needs to be a floor, partitions and other interior work, I will also make a staircase to the second floor with my own hands, there is work in this direction, I will make it from boards. There is already water in the house, a hydraulic accumulator distributes water to the bathhouse and to the house, so that the water supply does not freeze, a heating cable has been made.
Requirements and parameters
Despite all the requirements for such houses that apply to frame houses in general, it is also worth paying attention to the minimum and maximum sizes of projects. Thus, the minimum size for a two-story house will be 6x6 meters, while the area of such a building will be 71 square meters. The maximum size will be 12x11 square meters and its area will be 234 square meters.
As for the features of a two-story frame roof, it can be flat, single-pitched, gable, broken or hip. Considering the projects, we can conclude that most often a straight or flat roof is used during construction. It is the simplest in design and the most affordable.
To choose a roof design, the slope angle is determined, most often it is 30-45 degrees.
Next, the rafter system is calculated, taking into account all the loads from precipitation. The roofing materials chosen are those that are suitable for the construction region and roof configuration.
For the construction of buildings, strip, column and pile-screw foundations are suitable. Many companies offer the latter option because of its advantages. Such a foundation is erected without the use of special equipment, it is installed in a short time, has excellent load-bearing capacity, and the foundation can be built at any time of the year.
How much does it cost to add a second floor?
It is impossible to determine the exact, uniform cost of constructing the second floor without relying on the design of a specific house. When planning to convert an attic into a living space, several factors should be taken into account when calculating costs, among which the following are fundamental:
- condition of the house;
- type of second floor (attic or full floor);
- quantity and quality of materials;
- superstructure area;
- complexity of the project;
- cost of construction team services.
To get a general idea of the possible costs when constructing a second floor, we suggest studying a real example.
The procedure and cost of work if it is necessary to add a second floor for a house measuring 10x8 m are as follows:
- Calling an engineer and developing a reconstruction project – 48,000 rubles;
- The approximate cost for work and materials (note that it is impossible to accurately predict prices in stores, since they may change) is from 10,000 rubles. per m2.
- The turnkey construction of the second floor, taking into account interior and exterior finishing, electrical and heating installation, bathroom arrangement, installation of high-quality windows, laying a good roof and the use of 200 mm thick insulation will cost 20,000 rubles. per m2.
- When building the second floor from scratch, the price increases to 35,000 rubles. per m2.
As a result, the cost of turnkey work and materials for the construction of the second floor in a house with an area of 80 m2 is at least 1,600,000 rubles. (80 m2 x 20,000 rub.) However, keep in mind that each project is unique, and accordingly, the price will be different. If you have a real desire to expand your living space, contact a specialist with a request to calculate and provide an estimate with prices for work and materials, which will be tailored to your home and project.
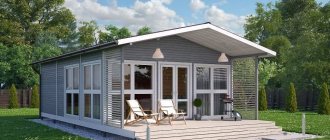
Houses 50-100 sq.m.
Building size: 6 by 7 Area: 85 sq.m.
This simple house can be easily erected by yourself or by a small construction team in a short time. It can be used year-round or seasonally - the project provides everything necessary for comfortable living at any time of the year.
Building size: 6 by 7.4 Area: 89 sq.m.
This project is an economical and comfortable house, which has large rooms and is intended for living throughout the year.
Building size: 6 by 6 Area: 72 sq.m.
This is an inexpensive house of a small area with a residential attic, but at the same time allowing you to live in it comfortably. It can be used both for relaxation in the summer and for trips to nature in the spring or autumn, as well as during the winter holidays.
Building size: 8 by 7.4 Area: 89 sq.m.
The project is a house with small rooms and a terrace, as well as a balcony.
Building size: 6 by 8 Area: 84 sq.m.
A simple budget house of a small area with a terrace and a residential attic.
Building size: 6 by 10 Area: 96 sq.m.
This is a very interesting option for building a small house. It has a terrace on one side and an insulated veranda on the other. The attached veranda can be used as a hallway and boiler room, where you can also place a washing machine.