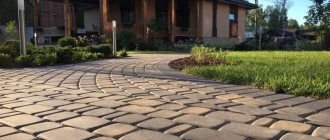
Stone garden paths are original, practical and durable. They will not be slippery and dirty even in frost and slush. Durable materials are used to build trails: rubble, crushed stone, flagstone, sandstone, granite and others. Such designs do not require special installation skills. The main thing is to properly prepare the base.
Combined garden path made of large stones and painted sea pebbles Source maja-dacha.ru
Advantages and disadvantages of stone paths
Organizing landscape design is a delicate matter. Stone paths will make the yard aesthetically pleasing and neat. The advantages of this installation are:
- long service life;
- variety of design;
- possibility of decoration;
- quick laying;
- lack of complex preparatory work;
- minimal financial costs.
Please note that garden paths may occupy most of the area. Therefore, it is important to acquire a material that will emphasize a unified design style. This functional decoration of the garden area has several disadvantages:
- difficulty in choosing the shape of the stone;
- poor performance in wet environments;
- overgrown with weeds (if not properly arranged);
- some material cannot withstand UV rays and frost.
In order for paths made of natural stone in the garden to be used reliably, you need to decide on the material that will be used as a basis. Be sure to study their characteristics. From them you can understand whether the stone is suitable for a particular area.
Path in the garden made of large light flagstone Source news.hitsad.ru
Materials used for masonry
To create small sidewalks, materials of different textures and fractions are used. The most suitable are:
- Granite. It comes in two types: processed and unprocessed. The second option will cost more. Each pebble of this material has a different shade. It looks beautiful covered.
- Sea or river pebbles. The pebbles have a smooth structure, making it convenient to lay out various compositions on paths. Pebble fragments can be painted and retain their bright shade for a long time.
- Booth. Stone made in large pieces. The thickness of these can reach from 2 to 7 cm. When laying stones, it is reliably compacted into the ground. This material can withstand mechanical loads and is resistant to fading.
- Crushed stone. Stones of different fractions can be used for one or several paths. The embankment is suitable for large areas. Withstands numerous vehicle passes.
- Sandstone. The stone is easy to use. It is easy to cut and has a rough texture. Thanks to this, it will not be slippery even in wet weather. Does not require special care.
- Slate flagstone. A flat stone that is suitable for finishing wide and narrow paths in the yard. This surface turns out to be very fragile, so each stone must be securely fixed into the ground. Differs in a variety of textures and colors.
Any type of stone is suitable for laying on different layers of soil with any content: clayey, alkaline, acidic. They can withstand the effects of a negative climatic environment only if they are equipped taking into account all the nuances and rules.
Garden path made of medium crushed stone and brick Source yandex.kz
See also: Catalog of companies that specialize in landscaping work on sites.
Granite tiles
Granite is one of the hardest paving materials. With it you can create an excellent alley. It is naturally very special, with shades ranging from pink to gray to black.
It is permissible to make paths from both treated and untreated stone. You can lay it in a checkerboard pattern, or in the form of a Christmas tree or an arc.
To develop a “antique” design, it is better to use chipped paving stones, to create a smooth surface - sawn paving stones, and for paths - chipped-sawn paving stones.
Preparatory stage in the construction of paths
Before you start laying, be sure to study the intricacies of preparing the base. If important points are missed, the paths will soon begin to fail, slide and dodge. The preparatory stage contains several steps:
- Preparing the pit. We dig a trench 20-25 cm deep (one bayonet of a shovel) of the required width.
- Cleaning up trash and weeds. We rake out all the soil from the pit, remove roots, stones, sticks and other objects.
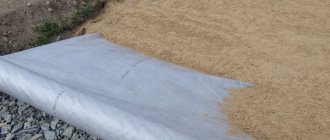
- Covering with geotectile. We prepare a geotextile fabric 2.5 times wider than the width of the track. We put it on the bottom.
- Backfilling with crushed stone. On top of the geotextile layer we pour a layer of fine crushed stone. Its thickness should be between 17-22 cm. If you pour less, the stone will quickly shrink.
- Enlarge the layer (if necessary). When vehicle traffic is expected along the design path, the bedding layer is increased by 10 cm.
- Pouring concrete. Cementing is necessary if the paths will be subject to constant loads. The solution is poured over crushed stone and reinforced mesh with a layer thickness of 10 cm.
Only after the concrete screed has dried is a dry sand-cement layer laid out. Stones are subsequently laid on it to complete the laying of the path.
Border for a path made of rectangular granite stone Source kivimeistrid.ee
Flagstone, pebbles and granite in a wide garden path Source priroda-kamen.ru
Step-by-step algorithm for creating a track
The most budget-friendly option is laying a stone path on the property adjacent to the house or on the territory of the dacha. For conditions where there is a close level of water occurrence, it is better to use a cement-sand mixture. Otherwise, a pure sand layer will do. All work is performed step by step:
- The mixture is being prepared. To do this, take five parts of sand and one part of cement marked M300 - 400. If marking M500 is used, increase the amount of sand to 7 parts.
- A paving layer is poured out and distributed evenly over the surface. The level is checked and bedding is added if necessary.
- Then the edges of the stones are aligned. This is done with a diamond disc or using a grinder.
- The structure is laid out in different patterns: mosaic, diagonal, arc and straight lines. Layout of various patterns is encouraged.
- The stones are placed parallel to each other with approximately equal sides. A gap of 5-10 mm must be left between them.
- Tamp them down carefully using a rubber mallet with a wide area.
- When laying adjacent stone, be sure to check the slope using a rule or building level. There should be no errors, otherwise there will be holes and puddles on the path after the rain.
- Fill all the cracks between the stones with sand. Then sweep using a broom with hard rods. If necessary, repeat the procedure until all the cracks are filled to the top.
Sandstone for a garden path with great thickness Source polivprocwet.ru
If you plan to create a more durable, immovable path, all the stones can be placed on the prepared mortar. In this case, it is important to lay the stones on the mortar gradually until the mixture hardens. Compact each stone and check the level. It is easy to correct while the cement is still fresh. All gaps are carefully filled with solution. To do this, it is better to use a construction syringe so as not to overdo it with the amount of mixture.
Laying sandstone on walls
For vertical surfaces, preparation of the base consists of stripping it of the old coating.
If the plaster is strong, prime it with a deep penetration solution.
This is a must, natural stone is heavy, and sandstone also has low moisture absorption.
The base absorbs water through it, which can lead to situations where the slab falls out of the masonry.
But one should not assume that only thin slabs are suitable for walls.
Sandstone with a thickness of more than 10 mm will be well supported by support at the end.
The finish is suitable for concrete buildings and walls made of white brick, but red is not the best option, as its strength decreases over time.
When choosing sandstone, the laying technology of which requires surface reinforcement, be prepared to fill the metal mesh in advance.
It is attached to 6-8 dowel nails per meter of area. The surface is leveled with a sand-cement mixture.
d05d8eca84104d0e1be786d232cf1f0d.jpe
There is no need to skimp on glue for installation, but it can and even needs to be diluted. The introduction of sand and cement into the mortar will add strength to the masonry.
The mixture should not be too liquid in texture; on the contrary, a slightly dry version is better.
This solution continues to breathe after drying, reducing the possibility of the slab falling out.
For larger stones, you can add a fastening with a wire passed through the back of the piece and the reinforcement mesh.
Complete drying of the masonry lasts about one month, so work with natural stone can be considered seasonal.
The air temperature, for proper hardening of the adhesive layer, should not be less than 5°C.
Features of water drainage
The role of drainage, where garden paths are made of natural stone, will be played by the first layer - crushed stone. How actively it will remove water depends on the fraction of the material. The finer the crushed stone, the slower the moisture will be removed.
If there is no slope in the area, then they resort to arranging gutters in the ground or raising the paths higher.
Concrete path for the garden made of large smoothed pebbles Source dacha-master.rf
Garden path options with step-by-step instructions
Each owner can build paths in his garden from any material. Paths made of gravel, pebbles, flagstone and others turn out to be very beautiful. In each individual case there are certain nuances of execution.
Garden paths made of medium-fraction crushed stone with reinforced mesh Source yandex.ua
gravel path
Gravel is a budget building material. It is easy to install and does not require special processing after making the tracks. To build trails in landscape design, follow the algorithm:
- We prepare a diagram on paper, then transfer the drawing to the area.
- We clear the area of stumps, debris, leaves, roots and weeds.
- We dig a hole of the required length, 20 cm deep.
- We level the edges of the trench, fill the inside with coarse crushed stone in a layer of 5 cm.
- We construct the full-length formwork from boards, installing crossbars every 50 cm.
- We treat the inner surface with bitumen or waterproofing.
- Cover the internal sections (sections) with a layer of wet sand.
- We take gravel of two or three colors and pour them one by one into each section.
The path will be colorful and designer. It is best to use fine-grained material for this purpose. It is easier to work with; no layers of solution are visible between it.
Path made of painted and natural pebbles with a pattern Source polonsil.ru
How to lay stone on a sand and gravel bed
The sand and gravel path is more durable because it erodes less and retains its structure for several years. In this case, you can also pave the paths with natural stone with your own hands. The sequence of actions is as follows:
- Dig a trench 15 cm deep, put pegs, pull ropes. Lay down a layer of sand, then gravel, then sand again. The height of each is 5 cm. In this case, the last sand layer can be made a little higher to level it with the surface.
- Lay out with stones, tapping with a hammer.
- Break up small pieces and fill gaps.
- Water it with water and let it dry for 3-4 days.
Useful tips for paving paths with natural stone
When building homemade garden paths, it is important to remember a few rules:
- The material used as a basis must be resistant to environmental influences and chemical components.
- Be sure to provide for the possibility of loads: driving a car, transporting furniture and equipment.
- You can build a slight angle of inclination in one direction. It will allow water to drain and will not affect walking comfort.
- For compact areas, it is better to use the design of wavy and arched paths. Straight-line ones do not look aesthetically pleasing.
- The garden path must be visible. Therefore, do not build such an object in thickets of tall grass.
- Combine natural stone with artificial or other types of wood: brick, wood.
It is not recommended to use stones that are too brittle for paving. They will begin to crack after moisture accumulates. The path will quickly begin to crumble and crumble.
Laying sandstone with your own hands
First of all, you need to wash the sandstone - laying it yourself is done only with clean stones.
Use a brush for best results. Afterwards, lay out the slabs to dry.
You can combine drying with the preparatory placement of stones to visualize the final result.
Trimming with a grinder to give the desired shape is easy, but don’t overdo it.
All the beauty of natural material is in its minimal processing.
Hammer stones of different thicknesses to the same level.
The final touches to the installation are cleaning up any drops of solution.
Such paths are rarely framed with a curb; often the ground levels and paths are leveled.


