“Bark beetle” is one of the types of finishing plaster. To apply it, a special heterogeneous mixture is used - viscous, with an admixture of solid components. "Bark beetle" is used to decorate external and internal walls. The advantages of this material are:
- simplicity and speed of application,
- practicality,
- durability,
- aesthetic appeal.
Bark beetle plaster is resistant to high humidity. It does not allow water to pass through, protecting building structures from getting wet. Another obvious advantage is the appearance.
When applied correctly, the result is a stunning finish that has excellent durability.
If you are thinking of using some other material instead of bark beetle, then you can see a list of modern materials, their advantages and disadvantages in our article: modern materials for finishing walls inside the house.
Applying bark beetle plaster - wall preparation
Let's look at the main stages of applying bark beetle plaster to the wall with your own hands. Here, as when performing any other finishing work, it is worth starting, first of all, with the correct preparation of the rough surface.
Preparing walls when applying bark beetle plaster - for this, the surface of the walls is thoroughly cleaned and leveled, preferably using plaster beacons that set the correct level of material.
Taking into account the peculiarities of applying bark beetle plaster, only durable putty is applied as a starting layer. It is recommended to apply it in two layers that are resistant to pressure when rubbing in the following composition.
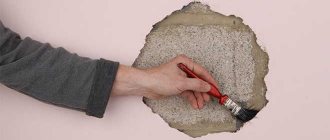
After complete drying, the wall is sanded, and excess protruding material is removed from it. Then an acrylic-based primer is applied to the surface. If such a mixture has a thick structure, it will strengthen the base as much as possible before applying bark beetle plaster to it.
Bark beetle plaster consumption
After thoroughly preparing the walls before applying bark beetle plaster to them, it is important to determine the consumption of the future material. It is recommended to use bark beetle plaster composition with a fine-grained structure, the diameter of the grains does not exceed a millimeter. You can buy ready-made bark beetle plasters on sale that do not require preparation.
When the diameter of the bark beetle plaster granules increases to 3 mm, the consumption increases by 1 kg. That is, to plaster a wall with an area of 1 square meter, you will need 4 kg of ready-made bark beetle solution.
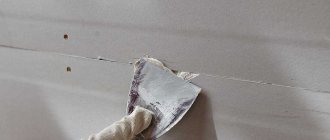
Grouting plaster using a trowel
There are two ways to grout plaster: in a circle and “running”. Rubbing in a circle is easier than rubbing, and is more convenient for beginners. But the second method has a cleaner result, and is more often used with high-quality plaster. Below will be a description of the technique for performing both methods.
There are two ways to grout plaster: in a circle and “running”.
Grouting method in a circle
The trowel for grouting plaster is pressed firmly against the plastered wall and made in a circular motion counterclockwise. All bulges are removed with its edge. This way the mixture will cover the existing indentations, and the covering will be rubbed. You should monitor the force of pressing on the tool; it acts more strongly on convexities, less intensely on recesses. During operation, the mixture will remain on the ribs and must be removed.
The surface will dry out little by little, so it is worth periodically moistening it with a chalk brush.
After completion of the work, round marks will be slightly visible on the surface; if high-quality plaster is required, it is necessary to carry out the “match-up” grout afterwards.
You should monitor the force of pressing on the tool; it acts more strongly on convexities, less intensely on recesses.
“Catch-up” method
The grout float is also pressed firmly against the wall and made straight strokes. Surfaces up to 4 meters are rubbed down, leaving only 1 joint. The technique consists of swinging first from the ceiling to the middle, then from the middle to the floor. To get the most even wall, you should first rub it with a wooden float. And then work with a grating tool with a felt or felt pad.
If rubbing is done to eliminate traces after a circular technique, then it is worth starting it almost immediately, approximately through areas of one floor or one square meter.
The technique consists of swinging first from the ceiling to the middle, then from the middle to the floor.
Bark beetle application technology
The technology for applying bark beetle to a wall is as follows: after the wall is lined with plaster, without waiting for it to dry, you should go over its entire surface with a plastic grater. The movements should be circular, with medium pressure.
10 minutes after completion, the procedure is repeated, but the applied efforts become stronger. It is worth considering that grating for too long will lead to an increase in the smoothness of the texture. At the end, the surface should acquire the characteristic pattern of a bark beetle.
However, this is not all, and after creating the bark beetle texture, finishing is performed. The surface can be varnished for greater aesthetics. An acrylic-based composition, glossy or matte, is well suited for this purpose. Options are available for sale in any desired colors, as well as with enhanced shine or mother-of-pearl.
It is important to know that it is not recommended to carry out work on applying bark beetle plaster in too hot weather. The mixture dries out too quickly at high temperatures, so the result may look much worse than intended.
Source
Pros and cons of the material
Decorative putty bark beetle has a number of advantages:
- the material contains natural components, which increases its strength and environmental friendliness;
- low specific gravity of the mixture due to polymer additives (does not place significant additional load on the load-bearing structures of buildings);
- breathable surface ensures the absence of fungus and mold;
- the putty is non-flammable, resistant to chemicals and ultraviolet radiation;
- withstands high humidity, retains strength over a wide temperature range (-55-+60˚С);
- the tinted surface does not fade when exposed to sunlight;
- easy to clean with water and detergents, durable;
- varied in texture, has many color variations;
- relatively inexpensive finishing.
Disadvantages of the composition:
- Applying bark beetle putty is a rather lengthy process, with several preparatory stages.
- Requires caution when performing work: one careless movement can ruin the entire pattern.
- After the mixture has dried, it is difficult to eliminate flaws in the work.
- Mechanical damage and chips are difficult to restore; in some cases, traces of repair remain on the wall.
Purpose and application
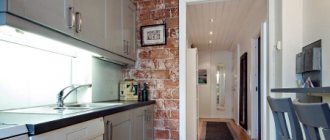
Where can you apply bark beetle putty? The range of applications of this material is wide. This can be the facades of a wooden house or its interior (walls and even ceiling). It has proven itself well in the restoration of old buildings. The most important thing is that the putty is applied to the material with which it will adhere well. These include brick, stone, concrete or drywall.
Attention. It is important! Putty should not be applied to glass or iron; it does not adhere to such material.
Composition and technical characteristics
The name “bark beetle” itself speaks of the unique texture of this material. A similar effect is achieved thanks to a special composition.
Attention. It is important! Plaster with the same name “bark beetle” can differ significantly not only in appearance, but also in technical characteristics. Therefore, before purchasing this material, experts recommend familiarizing yourself with all types of existing bark beetle plaster, as well as their features.
Consumption per 1 m2
One of the important points during repairs is the issue of consumption of building materials (in our case, bark beetle plaster) per square meter. meter of area. Several factors influence consumption:
The size of the granules in the bark beetle plaster themselves determines the consumption per square meter. meter, since they will be proportional to the thickness of the applied layer. When coating, the solution should be stretched to the thickness of the crumbs. If the thickness is less, then when the pattern is formed, the granules will begin to crumble, and if it is more, they will simply sink, leaving no relief.
So, bark beetle consumption per sq. The meter is determined primarily by the size of its fractions. On the other hand, if you calculate in volume units, you can use a simple algorithm.
For example, plaster has a grain size of 3 mm. This means that the layer thickness will also be 3 mm (0.003 m). Hence the volume is 1 sq. meters is equal to 1m x 1m x 0.003m = 0.003 m3.
However, to convert such a figure to the usual format - kg/m3, one should operate with the numerical value of the density of the material (density is the mass of a substance per unit volume). But it is not possible to do this, since this indicator is slightly different for each brand, which means it is also unrealistic to derive a general formula for calculation.
Peculiarities
The construction market offers the buyer two forms of plaster - ready-made paste or dry polymer-cement plaster, which should be diluted with water. It is logical to assume that 1 kg of dry composition after dilution with water will give more weight than the same 1 kg of paste mixture purchased.
drain pipe outlet in a private house
A huge advantage is that the dry product has an affordable price, which is covered by some inconveniences in its use.
All ready-made solutions are divided into several categories:
Tips and recommendations for use
The technology for applying putty is not complicated, therefore, following the recommendations described below, the putty process will not cause significant difficulties.
Before you get started, you should choose the right mixture. We remind you that when choosing, be sure to look at the type of putty and its grain size. The paste mixture is immediately suitable for use, but its cost is much higher. And the mixture that needs to be prepared will cost less. You should know that properly prepared plaster putty is not inferior in quality to acrylic putty. As for the cooking recipe, the manufacturer, as a rule, always writes it on the packaging itself.
To work you will need a certain set of tools:
Surface preparation
Preparatory work for plastering the surface occurs according to the standard scheme.
Attention. It is important! If you use colored polymer plaster, then the color of the primer should match the color of this decorative coating.
Priming technology
This procedure depends on the foundation, or more precisely on its condition:
Advice. Choose a primer from the same manufacturer as your putty. Materials from one manufacturer will ensure not only quality, but also reliability of finishing.
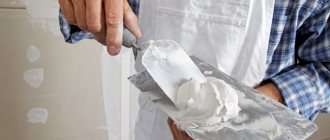
Preparation and application of the composition
To prepare putty from a dry mixture, you should follow some rules:
Once the solution is prepared, it is recommended to start working immediately and work until it runs out, so you should prepare only the amount you plan to make. When working, take into account the application features:
Grouting the surface
The simplest and most common patterns created by grouting are:
Plaster remover
A grater for removing plaster is made of metal materials, most often the teeth are made of steel to ensure strength during operation. These trowels are used for gypsum plaster and lime plaster. There are floats that can be used on cement plaster. They come in different sizes, choose the size based on the surface area.
A grater for removing plaster is made of metal materials, most often the teeth are made of steel to ensure strength during operation.
The choice of instrument for carrying out must be done carefully. Having studied all the nuances of work and types of graters, you can choose the most suitable and comfortable option for yourself. Beginners should use devices that do not require excessive caution and attention when working. It is better to choose one that has good strength characteristics. A good trowel for plastering work will help you level the wall efficiently.
How to choose façade putty
As a rule, modern putty for facade work is:
Today there are many manufacturers of these mixtures on the market, and everyone can decide for themselves which company is better. It is worth noting that Ceresit has proven itself very well and firmly.
For example, frost-resistant putty Ceresit CT-225 can be simultaneously used as a base for painting and finished finishing. Its advantage also lies in the fact that it does not crack, is easy to apply and has an almost indefinite service life.
It should be noted that not all even the best finishing putty can be used for exterior work. For example, the Vetonit powder mixture is excellent for indoor finishing, but in no case should it be used outdoors, because it is susceptible to moisture. Based on these properties, it cannot be used in the bathroom and in places with high humidity.
When choosing this product, please consider the following:
An example of a house facade treated with acrylic.
Note: The peculiarity of silicate and silicone mixtures is that you first need to apply a layer of adhesive to the insulation of the external walls in order to glue the reinforcing fiberglass mesh. Then level the surface and waterproof the surface using continuous priming.
The most convenient way to do this is with a paint roller. Then, using a spatula, apply the putty and rub it in. What other features of façade putty are there?
Finishing with silicate putty.
Finish "Bark beetle"
There is another way of unusual finishing of the facade - this is decorative plaster for exterior work. Thanks to its technology, it is possible to obtain an interesting texture, reminiscent of wood damaged by woodworms, which is why it received its name.
You can see what it looks like in the photo - the characteristic texture resembles the surface of a tree worn down by a bark beetle.
An example of a bark beetle texture.
If you apply such plaster to the base of a building, then in this way you can protect it from the negative effects of high humidity. The most common case is when storm drains are unable to cope with large volumes of precipitation.
Please note: Plaster consists of cement and marble chips of fractions from 0.1 mm to 4 mm. It is the marble chips that form the characteristic “wormholes” when grouted. The consumption of plaster per 1 m2 directly depends on the fraction - the larger the marble grain, the more plaster you will need.
Features of facade putty:
Depending on the rough finish of the walls, different types of putty can be used.
Facade finishing
Preparing the walls
We prime each layer, insulation is no exception!
We wait for the surface to dry completely and begin applying putty.
Finishing the facade is a labor-intensive process, but completely doable with your own hands.
Apply putty
When working with putty, it is very important to prepare the mixture correctly.
It is especially important when working with dry mixtures that the instructions on the packaging are followed.
Beat the mixture with a construction mixer.
If you use a ready-made mixture, beat it with a mixer before use.
Putty in the form of a liquid paste, applied with a metal spatula. After the solution has dried, if necessary, treat the surface with a diamond mesh or sandpaper.
The final stage of finishing is putty.
What kind of grater is needed for decorative plaster
To create a decorative surface using the bark beetle technology, a special plastic sponge grater for decorative plaster is used. It helps to decorate the wall with different patterns; the patterns are created in different ways by changing the direction of movements when working with a grater. When moving in a circle, you will of course get a circular pattern; if you make movements from top to bottom, you will get the effect of raindrops. Important! Do not press unnecessarily on the surface plastered with bark beetle with a plastic float, so as not to deform the layer.
If you decide to create a soft relief, then you need to use smooth graters; for an expressive structure, there are textured models.
To create a decorative surface using the bark beetle technology, a special plastic sponge grater for decorative plaster is used.
Workflow Features
The finish is very durable and therefore suitable for outdoor use.
To begin with, I want to warn you - be prepared for the fact that you will have to spend some time on the work; the process is not quick, especially if you are doing it for the first time and have not yet gained experience. It is also very important to use high-quality materials, I will list specific options that I have personally tested, if you do not find them, then choose analogues based on the recommendations of specialists, never save money and do not buy cheap mixtures .
The composition is highly resistant to moisture and can also be used in bathrooms
The texture of the bark beetle is such that minor flaws are easily hidden, but you must distribute the composition in the same way over the entire surface; below I will dwell on this aspect in more detail.
You create the texture on the surface yourself, so decide in advance which option will be on your walls
Stage 1 – purchasing the necessary materials and tools
First you need to stock up on everything you need for work, let's start with materials. Even before you go to the store, you must take measurements in order to know exactly the area of the surfaces to be finished, because the volume of components purchased depends on this. Just walk around with a tape measure and calculate the square of the bases, then add another 5%, since a small overspending is always inevitable.
Is it possible to apply bark beetle to putty?
Dmitry, yes - the bark beetle can be applied to putty. The only condition is that the putty will need to be treated with an adhesive primer.
hello, please tell me if it is possible to apply a second layer to the lambskin decorative plaster - due to the fact that when making the first layer, mistakes were made and places were visible that were distinguishable by texture - that is, the drying time of the layer during grouting was not maintained and due to overexposure, a spotty texture was obtained, thank you
Radislav, yes, you can apply a second layer of decorative plaster to one layer. Just to be on the safe side, prime the first layer with adhesive primer. It is best if it is a universal acrylic primer.
how to paint a ceiling with water-based compounds
Svetlana, if you decide that the best option for you is to paint the ceiling yourself using water-based paint, then you will have a difficult task: choosing from a huge assortment of products that would suit you in price and quality. Today on the consumer market you can find emulsion paints with various additives: acrylic, acrylic with the addition of latex, based on polyvinyl acetate, with a silicone or silicate base, with a mineral composition. The cheapest of them are polyvinyl acetate. But they can only be used in dry rooms. Ceilings painted with this paint cannot be washed. Paints with latex are the most expensive. They have a number of advantages, such as the possibility of wet care using detergents, obtaining a smooth, beautiful surface, etc. Acrylic water-based paints are the most popular. They can be used in almost any room; they have increased resistance to abrasion during washing. Paints with the addition of silicate (liquid glass) are widely used for painting plastered, stone or concrete surfaces. Silicone paints can be applied directly to plaster, without using a primer. Their advantage is their high vapor permeability, which makes it possible to use them for painting ceilings in kitchens and bathrooms. In addition, they perfectly protect the surface from various kinds of fungi and other parasitic microorganisms.
Source
What are they and which one is better to buy?
Externally, all devices are similar - a plane with a handle, as is the principle of their operation. The classification is based on what material they are made of. According to buyers, polyurethane, wood, foam, plastic and sponge are the most popular models.
Types and features of tools for plastering work:
- Sponge ones are intended primarily for decorative finishing. With their help, images can be obtained on the surface thanks to the spongy material on the grinding part. The body is made of aluminum or polyurethane, which ensures the light weight of the product. A grater is not suitable for compacting the solution or giving a perfectly smooth surface.
- Wooden devices are popular due to their low price and light weight. But, given their fragility and budget cost, it is worth purchasing several pieces if this is the material that is preferred. The short service life is due to the fact that wood, absorbing moisture, gains weight. As the sole dries, it begins to deform. In addition, the wooden surface is not resistant to abrasion, so its working qualities are quickly lost.
- Rubber work surface coatings are designed to work with epoxy compounds, as they do not harden with glue and are resistant to mechanical loads. Recommended for grouting tile joints.
- Metal ones are used to work with porous solutions, effectively compacting them, after which the surface is immediately ready for painting. As a result of using such a tool, the effect of so-called ironing appears - a water-repellent protective film is formed, and the surface is very smooth and glossy. This tool is also suitable for grouting rough plaster. The disadvantages of these models are their tendency to form corrosion and their relatively high price.
- The popularity of foam models is due to their light weight and low cost. But, despite the fact that they are made from hard foam, they are fragile. It is recommended for experienced craftsmen to purchase such devices, but even in this case, their long service life is not possible - the handle quickly breaks down. If handled correctly and carefully, these trowels are ideal for creating a smooth finish on gypsum and polymer plasters.
- Plastic ones are considered specialized tools and are recommended for experienced craftsmen. With their help, it is possible to flawlessly distribute the mixture over the wall, smooth out seams and irregularities. Their advantages include: corrosion resistance, light weight, ease of use. They are not used for distributing a thick layer of mortar, and due to their fragility they are suitable for one-time work. In addition, they are plastic and are not flexible, and when temperatures change, the product may break.
- Polyurethane is most in demand due to its performance characteristics:
- slight abrasion of the working surface;
- a light weight;
- wear resistance;
- strength;
- low price.
They are used when working with different solutions - thicker soles are suitable for applying and leveling gypsum and lime plasters, and thin ones for decorative plasters. The advantages include the strength of the material and the elimination of deformation even after a long service life. They are used to process large volumes of work.
Each type of grater has its own advantages and disadvantages, so when choosing, it is necessary to take into account the experience of the master, the amount of work during construction and the function of the tools needed to complete them.
Criterias of choice
What should you pay attention to so as not to make mistakes when choosing? The following parameters are important:
- The tool should fit comfortably in the hand, which is facilitated by the indentations for the fingers on the handle.
- The working surface must be smooth and level so as not to damage the coating during operation.
- Pay attention to the quality of the material.
- For a larger processing area, you need to choose a tool with a larger sole area.
- For easily accessible areas, it is preferable to use a grater with a long handle.
- If the final finishing stage involves painting, it is better to use a metal grater for polishing.
- Deteriorated wooden tools can be used to apply bark beetle type plaster.
Bark beetle putty - 4 aspects of ideal application of the composition on your own
In the photo: the bark beetle looks great in a variety of settings
Bark beetle putty is one of the most popular solutions for interior and exterior wall decoration, and if desired, the composition can also be applied to the ceiling. Today we will figure out how to properly organize the work process in order to achieve a high-quality result. The technology is not complicated and anyone can understand it; believe me, you can carry out the work without outside help, the main thing is to follow all the recommendations outlined below.
The bark beetle goes well with other finishing materials
Colors
Manufacturers of bark beetle plaster mixtures present a certain range of basic colors . If a different color scheme is needed, you can use color scheme . When preparing a mixture, color is added to the water before mixing. You need to tint extremely carefully and remember that the shade in the bucket is different from the applied and frozen color. Therefore, before completely covering the wall with material, it is recommended to apply the mixture to a small area and evaluate the result.
A variety of colors allows you to choose the best coating option for your interior
Workflow Features
The finish is very durable and therefore suitable for outdoor use.
To begin with, I want to warn you - be prepared for the fact that you will have to spend some time on the work; the process is not quick, especially if you are doing it for the first time and have not yet gained experience. It is also very important to use high-quality materials, I will list specific options that I have personally tested, if you do not find them, then choose analogues based on the recommendations of specialists, never save money and do not buy cheap mixtures .
The composition is highly resistant to moisture and can also be used in bathrooms
The texture of the bark beetle is such that minor flaws are easily hidden, but you must distribute the composition in the same way over the entire surface; below I will dwell on this aspect in more detail.
You create the texture on the surface yourself, so decide in advance which option will be on your walls
Stage 1 – purchasing the necessary materials and tools
First you need to stock up on everything you need for work, let's start with materials. Even before you go to the store, you must take measurements in order to know exactly the area of the surfaces to be finished, because the volume of components purchased depends on this. Just walk around with a tape measure and calculate the square of the bases, then add another 5%, since a small overspending is always inevitable.
second floor in a private house attic
This is the main working material, so it must be of high quality
| Material | Description |
| Composition of "bark beetle" | I recommend using the dry mixture “Ceresit ST 35”, it is sold in 25 kg bags. The composition can have different filler fractions - 2.5 and 3.5 mm, which allows you to create different textures. |
As for consumption, for the first option it is 2.5-3 kg per square meter, and for the second it is 3.5-4 kg. The price per bag in different regions varies from 680 to 750 rubles
Special primer for decorative coatings allows you to achieve the best results
In addition to materials, certain devices are also needed, their list is as follows:
Often the roller comes with a bath
A hammer drill requires a mixer with a special shank
A metal trowel is what you need to apply bark beetle
The trowel allows you to give the surface the desired effect
Without this simple device it is difficult to achieve a good result.
Stage 2 - preparation of the base
Before applying bark beetle putty, you need to prepare walls or other surfaces. You must understand one thing - the base must be even, the differences cannot be more than a couple of millimeters, otherwise you will not be able to apply the composition normally. The preparatory work may be different, I will briefly talk about them, each of the options is described in detail in separate reviews, if necessary, read them.
It all depends on the type of wall and its location:
The mesh is tightened with a special compound to create a smooth surface.
Plastering work is easiest to carry out along beacons
Putty allows you to level out minor irregularities
After sealing the seams, you need to putty the entire surface
Now we will figure out how to prepare a plane for applying bark beetle, the process is quite simple:
Mold stains should never be left behind.
It is very important that the base for the bark beetle has a similar shade to the main coating, so that later the dark base does not show through from under the applied decorative coating. Therefore, I advise using either a composition with pigment already added, or adding colorant already in place while mixing the solution.
Pigments allow you to give the soil the desired shade
The primer not only strengthens the surface, but also brightens it
Stage 3 – preparation and application of the composition
Do-it-yourself puttying of walls with bark beetle is a simple process, but it requires care and careful compliance with all the requirements of the technological process. The work consists of several stages:
If you break the work into separate actions, then everything is simple
It is best to work together, so that one person constantly applies the composition to the surface, and the second creates a texture on it. This option provides the best quality work and allows you to complete the finishing very quickly.
The mixture is always poured into water, and not vice versa
The composition is mixed again after 10 minutes
The composition is applied in order, not randomly
Excess must be removed while the composition is still fresh.
Stage 4 – surface grouting
When figuring out how to putty the bark beetle on walls, one cannot help but consider such an important aspect as its grouting, because it is this part of the work that gives the surface that unique look, by which it is very easy to distinguish this type of composition. A plastic trowel is used for the work; grouting should begin after the initial setting of the composition has occurred, usually about 20 minutes after application.
It’s not difficult to determine that it’s time to grout just by looking closely at the surface - when it stops shining and becomes dull, it’s time to get to work.
The process itself can be done in different ways, I will talk about the four most popular grouting options:
Press the grater firmly against the surface and move it in the direction you choose, the filler makes lines on the surface
The “lamb” structure is applied using movements as shown in the photo.
This structure is made by grouting in two directions
I said above that it is better to work together, I think you understand why: while one applies the composition, the second rubs it in, there is no need to waste time jumping from one operation to another. In addition, you don’t have to think about how to rub the joints of two sections when you work alone; it often happens that one part dries out and it’s impossible to make a neat joint.
That is why it is better to have a spray bottle on hand - by moistening the joint, you can make the layer more pliable and rub it.
Joints between different areas of application must be moistened
If certain areas have dried out, and you do not see the flaws, then you can correct the situation with the help of a nail - you can use it to draw lines on the frozen wall.
What is a plaster trowel?
It is now impossible to carry out plastering work efficiently without specialized equipment. Any person who decides to carry out plastering selects the most convenient and suitable devices. A plaster float is often recommended by experts for this type of work.
The minimum set for facing work includes:
- Rule;
- Trowel;
- Plaster trowel;
- Putty grater.
After carrying out the first stages of plastering the surface using the first three above-mentioned tools, they proceed to leveling the coating with a trowel for plastering work. It helps make the surface completely smooth, removing all defects.
Grouting helps make the surface completely smooth, removing all defects.
Grater or grater, what is the difference, which is better to use
A trowel can only be used to apply and eliminate errors and defects that appear after plastering walls. This tool is not suitable for completely leveling the surface being treated, it is not designed for this, and is not capable of coping with this task.
A trowel can only be used to apply and eliminate errors and defects that appear after plastering walls.
Graters for wall putty have their advantages compared to trowels:
- A large number of types, everyone can choose the most convenient and suitable model for themselves;
- Convenience, they are designed so that you can work with them for a long time without getting tired;
- Reliability, one tool can process thousands of square meters;
- Light weight, which makes work more comfortable.
They are designed so that you can work with them for a long time without getting tired.
Conclusion
Bark beetle is a good solution for decorating walls, which is reliable, and you can also apply it yourself. The video in this article will show the important points of the workflow clearly, so that you understand it even better and can cope with the work without any problems. If you still have questions, then do not hesitate to write them in the comments under this review, we will analyze each of them.
Source
| Primer | If work is carried out on smooth surfaces, then it is better to choose adhesive compounds such as Ceresit ST 16, which contain quartz filler. For surfaces with a more uneven structure, it is better to use strengthening compounds that will penetrate deeply into the surface, increase its strength and reduce absorbency. As for the price, adhesive primer costs about 1,200 rubles per 10 liters, and penetrating options from 50 to 100 rubles per liter |
| Dye | Since our composition has no color, after finishing the surface must be painted. You select the color individually, so a variety of compositions can be used, the main thing is that they are suitable for application to the putty. I advise you to opt for compounds with water-repellent properties. |