Tell me, is peeling plaster a reason to panic or not? For non-professionals, this situation can become stressful. Professionals will say that inconsistencies can be corrected. Moreover, even an amateur can eliminate plaster defects. And beginners will find useful information on how to avoid problems and give the building a respectable appearance.
Failure to comply and/or violation of technical standards and ignoring the recommendations of dry mix manufacturers can lead to defects in the plaster. When carrying out preparatory work for plastering, as well as when preparing mixtures, applying layers to the base, improper operation and when the structure settles, defects may appear on the treated wall. We will talk about them in detail in the article. For complete clarity, let's divide the problems into two categories:
- Technological defects.
- Problems arising as a result of operation.
Why does plaster crumble after drying?
Plaster can crumble in two cases: if the material itself is of extremely poor quality, or the master has violated the work technology. Let's figure out what to do to spend less effort and time on repairs, and not correct mistakes.
How to strengthen crumbling plaster with your own hands
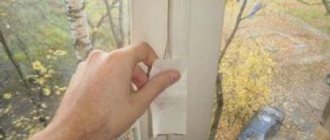
The plaster is crumbling, what should I do? It happens that, saving on cement, builders make plaster almost from sand. And this material is used indoors and for external decoration of walls of any building.
Plaster increases the strength of the wall by almost 30 percent, which is very important, and only then the owners decide for themselves: to paint the walls, tile them or glue them with wallpaper. In addition, such a coating helps to level walls, hide defects on them and ideally prepare surfaces for applying liquid or gluing regular wallpaper.
Adverse temperature conditions
The applied gypsum materials should not be left in a cold room over the winter. Cement plaster will not be negatively affected by frost. For the gypsum composition, maintain a temperature of at least +5°C.
Under normal conditions, gypsum plaster dries in just under a week. If the favorable drying environment is disrupted, this process can last for weeks, leading to mold. Depending on the density and thickness of the layer, cement dries for several weeks.
To speed up drying, do not use a heat gun. Otherwise, the top layer will be covered with a dry crust, while the inner layer will remain moist. Such a mistake will cause the plaster to fall off.
Preparatory work
The first step before starting work is preparing the walls. This includes the following steps:
- Removing the coating.
- Removing electrical wiring.
- Clearing the workplace.
- Work planning.
Each stage will require attention. If one of the points is not fulfilled, this will lead to serious consequences. The inability to apply paint is one of these.
Removing old coating
Wallpaper and layers of paint act as wall coverings. To remove them, you will have to use an additional tool such as a spatula or a grinder. The last option will allow you to complete the job in a short period of time.
If the coating is made of MDF panels or plasterboard, then you will need a serious tool that will allow you to dismantle such coatings faster.
When removing the old coating, you must use power tools carefully, otherwise the wall structure will be damaged.
Ways to get rid of dampness
You can do this on your own or contact specialized organizations.
Getting rid of external moisture
Some experience will help in resolving the issue. If it is missing, follow our recommendations:
- find a weak area that lets water in;
- insulate it with bitumen mastic;
- remove the damaged coating from the inside, apply mastic, plaster the surface;
- Cover the treated area with primer, paint or wallpaper.
Ventilation and electric heating will partially correct the situation.
Leaks in an apartment building are dealt with by building maintenance services.
Exhaust fan in the bathroom
Restoring ventilation
Local ventilation problems can be easily eliminated. they remove the cause of the ventilation problem, pull back the curtains, and rearrange the closet.
Blockages in ventilation shafts can be removed independently if they are located near the grille. Remove the protective grille and vacuum or clean the clogged area.
A clean, draft-free vent requires professional help. Solving the problem on your own will not bring results.
Often, ventilation problems occur due to the fault of neighbors above. Illegal redevelopment of housing alters the ventilation riser, which affects the air movement of other apartments. Specialists will be able to detect innovations and fix the problem. Cleaning out shafts in old houses is also their task.
Is the ventilation system normal, but the air flow is bad? The reason is plastic windows, open them more often, put them on micro-ventilation.
Installing forced ventilation is an excellent solution. Poor air flow inside the apartment requires the installation of supply ventilation, poor removal - exhaust ventilation. Look for compact, cheap devices that provide normal air exchange.
Instead of a grille, install an exhaust fan in the bathroom. There are fans with a timer that turn on and off periodically. It is advisable to purchase a fan with a check valve. If the neighbors install a similar device with more power, it will drive air back into the apartment. The kitchen must be equipped with a hood.
Elimination of high humidity
Dealing with moisture on the walls due to the basement is difficult. There are many reasons: high groundwater levels, improper waterproofing. Basement drainage should be carried out by specialists.
Dampness enters the apartment through microscopic cracks in the floor. Remove the floor covering, treat the base with mastic, put the covering in place, treating it with an antifungal agent. Carefully seal the seams with sealant.
Insulation from the outside
Elimination of freezing
The best prevention of freezing is insulation of external walls. Owners of the first floors can do this on their own; everything above is within the competence of specialists from construction companies.
Internal insulation has received mixed reviews. On the one hand, the interior decoration will lead to the accumulation of condensation between the wall and the insulation; on the other hand, the lack of external insulation is a way out of the situation.
Stages of internal insulation:
- The walls are cleaned of old wallpaper or paint.
- The surface is leveled.
- A frame of metal profiles is mounted and secured to the wall with self-tapping screws and dowels.
- Insulation is placed in the frame cells.
- Everything is covered with plasterboard.
- The surface is plastered.
An alternative method of insulation is “warm” plaster; instead of sand, the composition contains materials with increased thermal insulation properties (expanded clay chips, polystyrene foam grains, sawdust, etc.). Has high adhesion and does not require wall leveling. Apply in the usual way.
Black mold
Mold control
Black mold forms on walls and ceilings - microscopic fungi, the spores of which are carried through the air, landing on building materials. In a favorable (humid) environment, spores develop and produce mycelium (mycelium).
Mold control:
- Remove wallpaper and paint from the walls - you need to work in a respirator so that the fungus does not enter the respiratory tract. Working tool – hard metal brush or spatula.
- Treat the surface with an antiseptic - previously actively used: vinegar, baking soda, hydrogen peroxide. Some people still use home methods to combat fungus today. Experts advise using factory-made antiseptic preparations (Fongifluid, Senezh Effo, etc.). They are more efficient.
- After a few hours, go over the wall with a dry brush, remove the decay products of microorganisms, wash with warm water, and dry.
- After 24 hours, apply a deep penetration primer.
- When it dries, apply plaster.
- The final stage is painting or wallpapering. You need to paint with products for wet rooms. Glue is used with antifungal properties.
Causes of cracks
Blistering of the plaster can occur due to incorrect composition of the solution. If unseasoned lime was used, in which there were unslaked particles, then after covering the walls, small swellings may appear on them. After some time, the coating will completely deteriorate. To prevent this from happening, you need to clean off the plaster with bubbles, and then spread a higher quality composition on the surface. Other reasons:
- Cracks may appear when using poorly mixed or greasy solutions. Fatty solutions are those in which there is an excess of astringents.
- Cracks also occur due to surfaces drying out too quickly. To prevent this from happening, you need to prepare the plaster strictly according to the instructions, carefully stirring the composition before applying it to the walls.
- It may come off the wall due to excessive moisture on the wall or an overly dry surface.
- It is also advised to wait until each applied layer dries, and apply the finishing coat to a completely dry wall.
- On a new wall in a built-in building, it is worth using concrete contact before each new layer of plaster, this will ensure adhesiveness, which is absent without preliminary surface treatment.
- You should not plaster walls in an unheated room before frost.
Primer is required
If a master does not prime the walls, arguing that moisture will be poorly absorbed, he simply does not know about the existence of different types of primer materials and the rules for selecting them for surfaces.
Be sure to prime:
- aerated concrete;
- ceramics;
- sand-lime brick;
- foam ceramics.
These surfaces are hygroscopic, that is, they can absorb moisture, it penetrates into microscopic porosities, and the plaster dries out, the adhesion of the materials is disrupted, resulting in cracks.
Types of surfaces that require a primer with improved adhesive properties:
- concrete;
- cement;
- expanded polystyrene.
It is also not recommended to use the old method of preparing walls - pre-wetting. Yes, this saturates certain types of surfaces with moisture and protects wet plaster from drying out, but this is not a universal remedy.
Tools needed to remove previous coating
Considering the most complex, mechanical removal option, the work will require:
- A hammer drill with a shovel attachment or a manual router for concrete work.
- Electric grinder.
- Spatula with sharp edges.
- Hammer.
- Chisel.
- Scraper or wire brush.
- Pneumatic needle gun.
- Step ladder.
Tools for removing old surface finishes
To remove the previous putty from the walls using a chemical method, you need to stock up on:
- A wide basin (preferably a plastic one).
- Paint brush or bath sponge.
- Potato/corn starch, at the rate of 20-30 g (tablespoon) per 1 m2 of surface to be cleaned.
- Copper sulfate in aqueous solution.
- A spray bottle with a wide trimmer opening.
Such an extensive list does not mean that all of the above tools and means will be in demand. However, such a set will allow you to cope with any old putty and in any part of the wall.
The process of dismantling the putty
Moisture in an adobe house
Good evening. Please tell me what to do in this situation. We bought an old house. Heating is stove. Two rooms. The walls below the floor are getting wet. The house is made of clay, lined with white brick flooring. The house itself has no foundation, and the foundation for the bricks is not deep. There is no blind area. The floors in the house are below ground level, wooden. They rot from moisture.
Maxim, Kremenchug.
Hello, Maxim from Kremenchuk!
Judging by your description, the house has a full range of shortcomings associated with its design.
Most likely, the soil under the house and in the immediate vicinity of it is saturated with moisture due to the high standing of groundwater, there may be surface water runoff nearby, or the drainage (if any) and drainage (from the roof) drains are not properly installed.
The wall materials (both clay and white silicate brick) are very hygroscopic, that is, they have a high degree of water absorption.
The partial absence of a foundation under clay walls and a shallow foundation under brickwork only aggravate the situation with moisture coming from the ground.
The absence of a blind area means that rainwater from the roof falls directly into the base of the walls.
Lowered wood floors naturally receive water in full and rot for this reason.
Your most important mistake is in the purchase of such a house. Because it is impossible to fully correct its shortcomings or drastic measures for reconstruction will result in amounts comparable to the cost of the house itself. That is, if they hadn’t bought this house, there wouldn’t have been any problems.
All work to correct the existing situation will be only half-hearted.
I know examples where the owners bought a plot with completely lousy soil, about the same as in your case.
They demolished all the old buildings on it, brought in a huge amount of soil from the side, made an embankment about a meter high, and compacted it. Then they built a huge house on a reinforced concrete strip, also about a meter high.
Today they don’t have any special problems.
If you did this, you most likely wouldn't have them. But all this will cost a very big pretty penny, which, in my opinion, you don’t have.
Otherwise, you can only try to create drainage around the entire perimeter of the house with drainage in the lowest direction.
In modern times, drainage using geotextiles is considered the most optimal. For more details, see the websites on the arrangement of such communications.
Replacing or reconstructing the foundation is unlikely in your case. An old house will most likely fall apart due to such manipulations. Therefore, the following technique can be used as a half measure.
Installation of water drains using gutters along the roof of the house to drain water away from the house.
Make a higher base (at least 0.5 m) like a heap around the perimeter of the entire house and waterproof it.
Make a blind area around the house 0.6-0.8 meters wide, approximately sloping away from the house.
Install drainage drains to remove groundwater from the foundation of the house.
In the house itself, raise the floors by pouring soil to a level above the ground level of the area surrounding the house.
Lay waterproofing with glass cord over the poured soil.
Treat finished floors with antiseptics (if they are wooden).
In the house itself, constantly maintain a thermal regime that does not allow high humidity in the premises.
That is, this is a set of usual measures in such cases.
Only practice will show to what extent it will lead to a positive result.
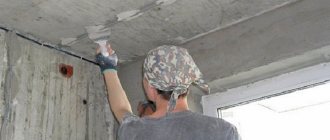
Preparing the surface for repair
Before strengthening crumbling plaster, you need to do the following:
- Take a rubber mallet and gently tap the area where the cracks appear.
- Thin and weakened areas will make themselves felt by shedding a layer of plaster.
- Assess the extent of the damage to the coating, and then make a decision regarding further repairs.
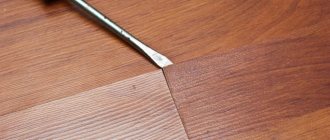
If only cracks appear and very little crumbles when tapped, there is hope to correct the situation without drastic measures. If, when lightly tapped with a hammer, the plaster easily comes away from the wall surface, then it needs to be dismantled.
There is no point in saving such a wall, since eventually collapses cannot be avoided. It is better to completely remove the plaster, prime the wall and apply a new layer of plaster.
Expert opinion
Mezentsev Sergey Petrovich
Residential renovation and finishing specialist
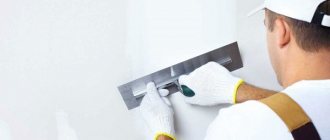
Advice! In order not to waste time, effort and money on remodeling, it is better to immediately perform plastering using reinforcing mesh. It holds the plaster, preventing cracking even when exposed to negative external factors.
Ways to get rid of dampness
What to do to get rid of the problem, you need to decide on your own, taking into account the cause of its occurrence. Sometimes it is enough to ventilate the premises more often; in other cases, redesign of the heating system or radical measures are required.
Getting rid of external moisture
If you know why the base is getting wet, you need to start immediately solving the problem. Ventilation and electric heating will only partially correct the situation. It is better to take the following measures:
- Isolation of the weak area. Before treating a wet spot, you need to find a weak spot through which moisture enters. It is insulated with bitumen mastic. The wet finish will have to be removed, the area dried, a deep penetration primer or antiseptic solution applied, and then the wall plastered or covered with wallpaper.
- Elimination of leaks. This is done by special services. It is not always enough to simply patch a hole. Pipes have to be replaced more often.
- Treating the floor if there is a basement underneath the room. To do this, use a deep penetration primer or insulating solutions that penetrate into the smallest pores of the concrete floor slab and clog them. After this, a waterproof base is laid on the base, and the joints are sealed.
- High-quality sealing of joints between the balcony slab and the wall. In this place, not only moisture penetrates into the room, but also cold.
- Foundation insulation. If groundwater rises more than 1.5 m, moisture penetrates inside the walls. In this case, the structure will become damp from below, in the corners, under the baseboard. High-quality horizontal insulation will help correct the situation.
If you seal the seams in only one apartment, over time the problem will appear again. Joints need to be insulated throughout the house.
Restoring ventilation
If the wall of a brick house gets wet and the ventilation is not working well, then this problem can be solved in several ways. If there is a local malfunction of the structure, you just need to move the cabinet or curtains. To remove a ventilation blockage that is located near the grille, you can use a vacuum cleaner. To properly organize traction in a private home, expert advice is required.
Redevelopment of premises in brick or panel buildings on the upper floors often leads to disruption of air flows. If the draft is not normalized, then slits need to be made at the bottom of the door. This will improve air circulation.
To make damp walls dry faster, you can organize forced ventilation. The device is installed in the bathroom instead of a grille. The same device is installed in the kitchen. The fan is sometimes equipped with a timer and a check valve. The hood is checked every 3-4 months.
Elimination of high humidity
Walls can become damp due to the influence of internal factors. In the absence of insulation and poor performance of the heating system, moisture in the rooms will increase even more. To eliminate the problem, additional or alternative sources of thermal energy are needed.
If plastic windows are installed, there is insufficient ventilation in those places. Therefore, ventilation is mandatory.
Elimination of freezing
Being in a damp and cold room is not only uncomfortable, but also dangerous to your health. There are several ways to deal with the problem. The first of them is stronger heating of the room. However, its disadvantage is the increase in heating costs.
It is more effective to insulate the house from the outside. If polystyrene foam is used for work, then re-insulation from the inside is not used, since the dew point moves closer to the room. Moisture will accumulate under the insulation, which will lead to the development of fungus and mold, which will worsen the problem.
Thanks to external insulation, the dew point is in the right place. This process is expensive but effective. If internal insulation is not required, then correct thermal calculations are important, otherwise dampness will increase and the insulation material will get wet, which reduces its effectiveness. The indoor microclimate is deteriorating.
If the thickness of the walls is insufficient, then the situation can be corrected with the help of an additional layer of cladding. Brick is used for this.
Mold control
Mold poses a respiratory hazard and must be eliminated quickly. To do this, the following procedures are carried out:
- First you need to remove the facing layer. The work is carried out in protective clothing, as well as a respirator, so that dust with microparticles of mold does not get into the lungs. Contaminated areas should be removed using a wire brush or spatula.
- Antiseptic treatment. To do this, you can use improvised means: vinegar, bleach or baking soda. The best option is to use professional products.
- 2-3 hours after treating the wall, you need to walk over it with a dry brush. This will eliminate the breakdown products of microorganisms. After this, the base is washed with warm water and dried thoroughly. Here you can use technical devices.
- After 24 hours, the surface is coated with a deep penetration primer. Several layers of liquid are applied.
- Plastering the base. It is better to choose a material with water-repellent and antifungal properties.
TOP 9 mistakes when painting walls
Painting a surface is not an easy job, which is not without its nuances: the process can be delayed due to the wrong paint, roller, or layer applied at the wrong time. The time of day at which you pick up the instrument also matters. Below are a number of common mistakes, avoiding which you can always make your walls perfect.
Mistake #1: Painting unprepared walls
Minor defects, dust, grains of sand, and brush fluff from a previous painting may appear under the paint and negatively affect the result. All the imperfections will be visible under the layer of paint - all you have to do is either accept it or clean the wall and paint it again. And possible greasy stains will appear, no matter how many layers you cover the surface. Defects will be especially noticeable if you use glossy paint.
What to do: To avoid double work and unpleasant surprises, prepare the wall in advance. Take sandpaper or a special plaster sanding tool and go over the uneven areas and defects. After this, brush off the dust with a brush or broom. Stains can be removed by wiping the wall with a damp cloth and soap.
Mistake #2: Ignoring Primer
Don't use primer before painting walls? Don't be surprised if you end up with an unevenly painted wall or overused paint. The fact is that the primer provides a lower hygroscopicity of the surface, which allows you to save paint. The base also gives the surface “adhesion” to the paint, which improves the painting of walls.
What to do: Choose the appropriate primer for the walls. Apply it with a brush vertically in small stripes, and then horizontally - perpendicular to the first layer. After the base has dried, you can cover the surface with the first layer of paint.
Mistake #3: painting without testing
Choosing a color is a rather complicated process, especially if the shade has to be combined with another tone or pattern. The unfortunate masterpiece will have to be repainted, and so the process can be repeated ad infinitum. The same goes for the shade, which you have to “extract” with your own hands using toner.
What to do: if you are tinting the paint yourself, add the coloring concentrate to the paint a little at a time, thoroughly mixing the contents. To begin, pour a small amount of paint into a small container and add a couple of drops of color – see what color you get. Achieve the desired tone, and then do the same in a larger jar if you like the result.
To make sure the color is compatible with the overall decor of the room, try doing a test paint - apply the paint in an inconspicuous corner and wait until it dries. If the result suits you, let’s get going.
Mistake #4: choosing the wrong tool
Using the right brush or roller is just as important as choosing your paint. And this is not a matter of taste. In order to paint the wall evenly, you need to purchase a couple of rollers and a brush. You will be the first to “roll” the surface, and use a brush to paint corners and hard-to-reach places.
What to do: for the first layer of paint, it is better to choose a roller with a long pile - 1–1.5 cm. It will pick up more paint, which will make it faster and easier to obtain uniform coloring. For re-painting, a roller with a short pile of 6–7 mm is more suitable; it will help you use the paint more economically and will definitely not leave “drips”. Choose a brush with natural bristles - it will not leave lint on the surface.
Mistake #5: applying paint in different directions
If you apply paint vertically, then horizontally, and then all at once, in the hope that the wall will look decent when dry, you are making a serious mistake. All strokes can appear, especially if you are using a brush.
What to do: choose one painting option - vertical or horizontal - the paint will apply evenly, and the painting will not look awkward due to chaotic strokes. When painting in several layers, you can alternate methods, for example, paint the first layer vertically, the second horizontally.
Mistake #6: Applying paint in one layer
When applying paint in one layer, the coloring may turn out to be uneven, and if you want to change the color of the surface radically, you will definitely not be able to finish the job quickly. Even if you change a light shade to a darker one, the first color will show through.
What to do: to get an intense shade, apply two, or preferably three, layers. The first will allow you to distribute the paint over the surface; the second and third - it is better to shade it, even out the color and fill in small irregularities.
Mistake #7: Painting over wet paint
Of course, I want to finish painting faster and enjoy the result. That’s why we often don’t think about the consequences of painting on a “raw” wall. As a result, the undried layer begins to come off and stick to the brush or roller. Oil paint, in turn, can bubble up - you will have to start all the work again, however, after waiting for the paint to dry and sanding the areas with defects.
What to do: Be patient. While the paint dries, do anything else. Pay attention to the instructions on the can, which indicate how long the paint needs to dry completely.
Mistake #8: Not enough paint
This can be a serious problem. Firstly, because during a trip to the store the already applied layer may dry out (after drying, the joint between the fresh and already applied paint will be noticeable). Secondly, it is difficult to choose the right shade if you added the color to the paint yourself.
What to do: the easiest option is to take more. As a last resort, you can return the unopened can to the store or leave it “just in case” - touch up the places where the paint will peel off over time. On cans of paint they always write what area the volume is designed for - pay attention to the numbers. Keep in mind that if you paint the surface in two layers, the area will double.
Mistake #9: Wrong timing for painting
Applying paint in bright sunlight can cause the paint to dry too quickly - even before you have evenly distributed it. The paint may also begin to foam or peel. And if you paint under the light of an electric light bulb, all errors will be barely visible.
What to do: the best option for painting the surface is during the day, without direct sunlight falling through the window. It is better to paint the south side in the morning or evening, when the sun does not shine so brightly.
Barrier to moisture
The walls contain many pores and capillaries through which water penetrates into the inner layers. Poor waterproofing (plaster on the walls or wood does not matter) will not always cause liquid penetration and the appearance of dampness. Moisture can enter through the outer part of the wall, rise or fall along its surface through capillaries and create unaesthetic darkening, wet spots, and contrasting efflorescence.
Hydrophobization prevents wetting of the wall and prevents moisture from penetrating inside. Careful and intensive surface treatment with special water-repellent compounds can protect walls for a long time and even for the entire period of their operation.
It may be necessary to create a boundary for moisture penetration from the outside of the wall (direct influence of precipitation) and from the inside. Condensation and a poorly adjusted ventilation system lead to the development of fungi and mold. Rather than deal with consequences that are difficult to eliminate, it is better to prevent them.
Protection and cleansing
Modern wall waterproofing compositions perform several functions:
- create a protective water-repellent layer;
- promote self-cleaning of the plaster (water and dirt simply drain from the wall and do not linger on its surface);
- have sanitizing properties - they dry out the finishing layers and do not create favorable conditions for mold growth. The coating is vapor permeable, but creates an outer film against dust and water.
Water that penetrates building materials destroys them from the inside: brickwork oxidizes, efflorescence appears, paving slabs with pores filled with moisture crack in winter due to thermal changes. Therefore, how to protect the plaster from moisture and how to treat the wall to prevent its destruction should be carefully considered at the construction stage.
Why does the paint on the wall bubble over time?
Often a change of environment brings with it positive changes in life. To feel comfortable and improve their living conditions, many owners of apartments and houses make renovations.
Photo: retzer-master.ru
Sometimes the interior changes dramatically, but more often they resort to cosmetic transformations of the walls, floor and ceiling. One type of coating, as you know, is paint. And the service life and appearance of the wall or floor depend on how it is applied.
And one of the most common problems after applying paints to a surface is the appearance of bubbles. It is worth understanding why the wall bubbles and how this can be avoided.
Reasons why bubbles form.
- Failure to comply with temperature conditions. The fact is that paint “does not tolerate” overheating. Therefore, it is better to cover the walls with it during the period of least solar activity, that is, in the morning or evening.
- Incorrect application of the composition. Here it is worth remembering that an excessively thick layer or a fast pace of work can “play a cruel joke”. Therefore, you need to apply it carefully, slowly, painting literally every centimeter.
- Excessive humidity in the room or in the painting area itself. This factor negatively affects the outcome of the work. Humidity should be avoided, so first you need to check whether the surface is dry enough and whether the room is damp. And only after that start painting.
- Low-quality materials (with an expired expiration date, for example) should not be used as a dye. This also includes products that were not originally intended for painting surfaces of this type. Otherwise, the paint will not adhere well and will begin to crack and fall off.
How to paint efficiently so that the wall does not bubble?
- First of all, you need to pay attention to the surface that you plan to “ennoble.” It is necessary to “remove” all existing defects and irregularities and clean it of previous coatings. Sometimes, to improve the quality of the canvas, special compounds are used and the walls and floor are leveled.
- Be sure to use a primer. Moreover, it needs to be applied twice, with a time interval of about a day. During this period, it will dry enough so that you can safely continue working. It is optimal to choose a matte or oil base.
- Tools must be clean and well dried.
- The product must be applied gradually, first in a thin layer, then leveling it until it is evenly coated. To achieve optimal results, this is done in several passes.
- Controlling the humidity level in the room is essential. The surface to be treated must be dry. It is also important to maintain a stable temperature and avoid overheating and cold.
These simple rules will help you make repairs efficiently and conscientiously.
Where to start wall repairs during exterior work
Facade painting
The simplest and most inexpensive option for facade repair involves the use of plaster compounds. The technology for their application does not differ from that used for interior work. After plastering, the walls can be puttied and painted. For such repairs, special putty and paint for facade work are used.
The disadvantage of the repair described above is the fragility of the coating. This facade will have to be repainted in a few years.