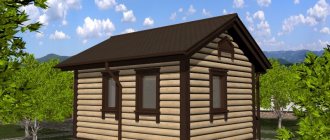
A barn is considered an indispensable outbuilding on a summer cottage. It is convenient to store the tools necessary for working in the garden. In this room you can equip a shower stall and a bathroom in the utility room. If you are not going to use it as an office for work, the exterior of the structure can be decorated quite simply.
Ready-made project of a lean-to shed with a woodshed
The main thing is that the building corresponds to its purpose and is convenient to use. A do-it-yourself barn with a pitched roof is a structure from the category of budget buildings. A summer resident can begin to equip his plot with the most important outbuilding.
Successful examples and options
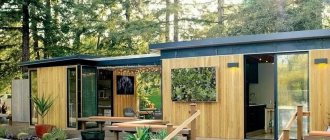
The dark siding of the small building contrasts with the bright greenery and potted flowers.
The optimal solution not only for storing summer cottage equipment, but also a worthy addition to the design of a summer cottage. The compact building does not have an unusual design, but it is convenient to place everything you need for the garden. An excellent option for owners of medium and small plots.
A structure attached to the house will shorten the path from the kitchen to food supplies and from the garden to the necessary equipment. A skillfully organized space will allow you to arrange all the attributes of a summer holiday so that at the right time they will immediately be at hand. And under the roof of a properly equipped barn, they will be preserved in proper form.
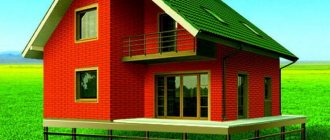
Examples of private houses
There are many supporters of flat roofs among developers. They are attracted by the ease of construction, low cost of work and the possibility of placing a site for summer recreation.
We recommend reading: Sunroof, how to install a sunroof with your own hands - step-by-step instructions A thick layer of snow on a flat roof is not a problem, but additional insulation
The design of buildings with such a roof fits perfectly into the style of minimalism, providing project developers with a wide field for creativity.
Spacious, comfortable and nothing superfluous is the motto of everyone who chooses a house with such a roof. A pitched roof visually weighs down the building, while a flat roof, on the contrary, makes it light and airy.
The appearance of the facade of a one-story house with a flat roof compares favorably with the rather boring variations of the “teremkovy” character.
On it, most often you will not see gutters and pipes, the water from which gets on the walls and spoils the appearance of the finish. Internal drainage is efficient, practical and invisible.
Project
First of all, find a place for future construction: it should be located either on the edge of a summer cottage, or close to the house, and for it you should choose areas that are least suitable for agricultural work.
This can be either a space remote from the house or a heavily shaded place
It is important that it is located close to the main work front: this will allow you to quickly get and remove the necessary equipment. If possible, locate the building on a hill, which will provide additional protection from water and extend its service life.
A barn with a pitched roof will have to fit organically into an existing or planned complex of country houses. The future utility room should not interfere with the passage of transport and your movements around the site. No special agreements are required for the construction of a barn, but the construction must comply with sanitary and fire safety standards.
When you decide on a location, make a drawing on paper or a 3D project on a computer in order to best imagine the dimensions of the future building, divide it into several functional rooms, and determine the arrangement of electrical networks. The optimal size of the structure is considered to be 3x6 - even such a modest area will allow you to place not only a utility unit inside the barn, but also to equip a summer shower or a summer kitchen.
If the area of the site allows, build a larger shed - 4x6 or 4x2. The spacious design will be an excellent solution if you want to house animals or poultry in it. If breeding livestock is not planned, the building will accommodate garden equipment, any functional room such as a shower or kitchen, and pickles will freely take up space on the shelves.
Minuses
- In most cases, an internal drainage system is required to drain water and snow. In autumn, it often becomes clogged with debris and leaves. In winter it freezes and becomes covered with ice. If this problem is not resolved in time, it can lead to undesirable consequences.
- It is necessary to constantly monitor the condition of the hydro- and heat-insulating layer. Their tightness must be perfect.
- If a large amount of snow falls, you will have to remove it yourself.
- When snow melts, leaks may occur.
- Errors in the design and construction of this roof will lead to a series of problems that are quite difficult to eliminate.
Wooden barn
Much more often it turns out that the owner has leftover wood, and he decides to build a wood shed. For such work, at least minimal carpentry skills are required, because you will have to work with both a saw and a plane.
A building made of wood weighs very little; a columnar foundation can serve as its base. To do this, markings are made on the site, transferring the perimeter of the future building to the ground.
Posts are installed at the corners of the barn. Several more supports should be located in the center of the rectangle. The distance between the supports is 80-120 cm (depending on the size of the shed and the type of soil on the site).
The depth of the supports depends on the level of soil freezing in the construction region; on average, it is 40-60 cm. After the trenches for the supports are dug or drilled, wooden formwork is installed in them, a sand and gravel “cushion” is filled in, and metal reinforcement is laid.
Now you need to pour the concrete. After 5-6 days, when the foundation has hardened, you can dismantle the formwork and begin building walls.
First, you need to make the bottom frame of the building from timber. Before laying the wood, the foundation supports are covered with a double layer of roofing felt. At the corners, the timber is connected with metal brackets and checked for level.
Install vertical supports in the corners of the barn, always checking the level. They are fixed with temporary spacers. Taking into account the door and window openings, the entire frame of the barn is assembled from wooden beams.
After assembling the frame, they begin covering the walls. This can be done with boards, moisture-resistant plywood or other sheet material.
Base for flat roof installation
What the ceiling of the upper floor will be like directly depends on the structural features of the ceiling throughout the house. As a rule, it is performed using the same material as the ceiling between floors.
The most common options are prefabricated or monolithic reinforced concrete floors, floors made of profiled sheets with metal support beams.
An option with a wooden floor is also possible. The fundamental difference from the overlap between floors is the presence of laid insulation and high-quality waterproofing.
Roof
When the frame is assembled, they begin to build the roof:
- Calculate the length of the rafters, for which double-sided overhangs are added to the distance between the walls. As a rule, their length is 0.4-0.5 m.
- They make a control rafter leg: take a piece of board, cut it to the required length, try it on and mark the place where the recess for fastening will be.
- Make the required number of rafters.
A pitched roof for a shed will be enough
- The front and rear rafter legs are mounted on the frame and connected with a tightly stretched thread.
- The remaining elements are installed at the marked level. Fixed with nails or corners.
- Secure the waterproofing with a stapler, overlapping 15 cm of one edge of the strip to the other.
- They arrange the sheathing, cut out the roofing material and cover the outbuilding.
Advice. The step between the elements of the rafter system is from 0.6 to 0.8 m. This means that for a 3x6 m building you need to stock up on eight rafter legs.
Next, they sheathe the frame, insert the frames into the window openings and install the door. The building is finished with paint and they begin to decorate the interior: they make shelves, install electricity.
Main design elements
A building with a sloping roof is the simplest to design, calculate, and construct. Its construction requires the least capital and labor-intensive costs. However, if you want to build it yourself, you need to have a certain amount of knowledge. In particular, understand what a pitched roof structure is.
Below is a list of concepts that must be studied:
- slope - an inclined plane along which water flows and snow rolls;
- rafter (load-bearing) system: inclined struts, rafter legs, orthogonal posts;
- sheathing - flooring over the rafters;
- Mauerlat - the basis of the structure, a support for the rafters, consisting of a log hewn from the outside and inside: it is laid along the entire perimeter on the outside of the wall and redistributes the load created by the roof over the entire wall surface, providing additional rigidity).
- ridge - horizontal edge;
- overhangs (pediment) – protruding sloping edges;
- gutter - a narrow channel that receives water for further drainage from the roof;
- water distribution fittings (funnels, drainage pipe system).
Construction of a stationary shed with a pitched roof
A stationary building is a do-it-yourself shed with a pitched roof made of brick, cinder block or light grades of cellular concrete (foam blocks, aerated concrete or gas silicate blocks). Even for such a more solid structure, it is not entirely correct to build a powerful foundation - you can simply lay reinforced concrete blocks on the ground in several rows. The area for laying the blocks is pre-leveled, a sand-crushed stone cushion is made and compacted.
Block foundation
Next, it is covered with waterproofing in several layers, and brick or wall blocks are laid on it.
Construction of a brick barn in stages:
- The corners of the walls, 4-5 bricks high, are laid on the equipped foundation. Then you can lay the walls on a cement-sand mortar. For the floor, wooden logs with a cross-section of 150 x 150 mm are laid on the base in increments of 1 m. Boards or plywood are laid on the logs.
- For doors and windows, dressings are made from tarred wooden beams, reinforced concrete ties or metal channels.
- The back wall of the barn must be lower than the front so that the slope angle is at least 8 0.
- An upper frame made of timber with a section of 100 x 100 mm (mauerlat) is attached to the walls. The timber is attached to the walls by sliding it onto the reinforcement through pre-drilled holes. The reinforcement itself is laid vertically in the wall at the level of the 3-4th row from its top. The beam can also be tied with steel wire laid into the wall during its construction. It is possible to provide an alcove.
- A cantilever frame is assembled on the Mauerlat, the upper part of these racks is sawed off at the desired angle.
- The rafter system is made in the same way as for a wooden shed, according to a template and with the appropriate fastenings.
- A wooden sheathing is laid on the rafter system, which is protected by a waterproofing layer. Metal tiles, corrugated sheets, etc. are laid on top of the waterproofing. The most popular roof is 3x6.
- The walls of the barn can be covered with siding, clapboard or plastered.
- Construction is completed by hanging the doors and installing the windows. The inside of the rafter system is covered with plywood or boards.
Mauerlat with grillage
Device Features
According to the method of arrangement and arrangement of structural layers, experts distinguish two types of flat roofs:
- Classic;
- Inversion.
The classic roofing “pie” is equipped using the following technology:
- a slope is made from cement-sand mortar on reinforced concrete floor slabs;
- lay vapor barrier and insulation;
- lay a waterproofing membrane or roofing felt carpet;
- if the coating is to be used, the waterproofing is protected with ceramic tiles.
Design of a classic flat roof
The main disadvantage of the traditional design is the vulnerability of the outer insulating layer from solar ultraviolet radiation and temperature changes.
Working to solve this problem, engineers came up with the idea of an inversion coating. In it, the main structural elements (insulation and waterproof membrane) are swapped. The waterproofing is hidden under the foam, which is protected from external influences by a ballast layer of gravel or tile trim.
Inversion coating design
The technology of work is changing accordingly. A waterproof carpet made of roofing felt or EPDM membrane is glued to the slab or spread on it, fixing it in places adjacent to the parapet.
The slope in this case is created in one of two ways:
- Mortar screed on the slab;
- Insulation, changing the thickness of its installation.
Installation of thermal insulation on a flat roof
Water intake funnels and pipes are installed at the lowest points of the slope. In addition to them, ventilation is installed to remove water vapor that accumulates in the area of contact between the vapor barrier and the insulation.
When arranging a covering designed for planting plants, the structure is supplemented with a top layer of waterproofing. Drainage layers of gravel are poured over it, geotextiles are laid and a fertile layer of soil is poured.
In addition to roofing coverings laid on reinforced concrete slabs, designs for houses with a flat roof on wooden beams have been developed.
Construction technology in this case may include the following operations:
- Beams are mounted on the walls in increments of 50-100 cm, fixing them to the masonry with anchor pins. The cross-section of the beams depends on the span width, the design load and can range from 10x20 cm to 15x25 cm;
- OSB slabs are laid along the beams, joining them tightly together;
- Spread the waterproofing membrane in 2 layers, carefully gluing the joints of the sheets.
- Thermal insulation is made from durable (extruded) foam, gluing it to the membrane. A slope for water drainage is created by laying insulation in layers of different thicknesses;
- The heat insulator is protected from above with a cement screed reinforced with mesh or tiled.
Roof slope using roof trusses
Extraordinary solutions can be applied to any construction project. For a shed with a pitched roof, such a solution can be considered ready-made trusses of the rafter system - it is fast, safe, accurate and reliable, since the entire structure is assembled on the ground. You can also simply buy a ready-made design.
If we are building a low-budget shed, then this solution will help not only speed up construction, but will also ensure sufficient design accuracy, which means reliability and durability, because it is easier to install ready-made trusses than to make calculations, drawings and mount a roof above the ground.
The main advantage of ready-made trusses from rafter beams is manifested in minimizing lateral loads from the roof on the walls of the barn: thrust forces have a very negative effect on the strength of load-bearing walls of any structure. When using trusses, lateral loads are distributed and absorbed within the rafter system, so the frame row of the barn itself does not experience any weight.
Another advantage of roof trusses is that they are mounted on walls of the same height, which greatly simplifies the entire construction. At the same time, replacing ready-made farms with home-made ones is not difficult, since all manufacturing and assembly work is carried out on the ground. The main thing is to maintain a right angle in a triangular truss.
The hypotenuse of the rafter triangle is the rafter beam, but sometimes the truss is laid on a pre-prepared support. The floor beam in the roof is a long leg of a rectangle, and its short side acts as a cantilever-girder frame assembled from the ends of trusses.
For detailed instructions on roof construction, see the video below.
If you increase the angle of inclination to more than 8 0, then the costs of building materials will increase - timber for the rafter system and roofing. If the angle of inclination is reduced, then the cost of waterproofing will increase, since it will be necessary to lay several layers of moisture-proof coating, as well as additionally protect difficult areas of the roof from rain and snow.
Instructions for performing work
Before making a pitched roof, you need to choose the right lumber for the rafter system and sheathing. In this regard, we will give the following recommendations:
- for a span of up to 4.5 m wide, rafters made of 15 x 5 cm timber are suitable, up to 6 m - from 200 x 50 mm boards, spliced in pairs or lengthwise;
- timber 150 x 50 mm will be used for the wall frame (mauerlat) and the beds;
- cross-section of racks, struts and purlins – 10 x 5 cm;
- the sheathing is made of boards 20-25 mm thick and 10-15 cm wide.
For waterproofing, you will need roofing felt and a superdiffusion membrane, and for laying the finishing coating, metal tiles, corrugated sheets or other roofing material. If we are talking about a residential building, do not forget about insulation: prepare mineral wool of the required thickness (or other insulation) and a vapor barrier film.
Laying the Mauerlat
The strapping beam should be placed on 2 opposite walls, where the rafter legs rest. If it is planned to support the layered system on internal partitions, then a board called a bench is also laid on them. The exception is log and frame houses, whose walls are ready for the installation of rafters.
The technology for laying Mauerlat on walls made of different materials looks like this:
- Studs are pre-embedded into the brickwork, onto which the strapping beam is attached. Before installation, the stone wall is covered with 2 layers of roofing felt. If the studs were not installed, then the Mauerlat is secured with anchor bolts or pulled together with steel strips.
- Before installing the Mauerlat, porous walls built from aerated concrete should be tied with a reinforced concrete belt, as done in the diagram. The studs for fastening are placed into the monolith during pouring.
- In wooden extensions (verandas, terraces) built with your own hands, to support the rafters you need to attach a second board of the same width to the top trim beam of the wall. To install the upper end of the rafter leg, you need to screw a horizontal beam 15 x 5 cm to the wall of the existing building. This operation is demonstrated in more detail in the video below.
Installation of rafters step by step
Before building the frame, you need to determine the actual length of the rafters, taking into account the extensions beyond the walls that form the eaves overhangs. However, the canopies can be extended after installation by nailing boards cut to size to the rafter legs - the so-called fillies. The minimum length of the roof overhang is 300 mm.
Then proceed in this order:
- To increase the internal partition to the height of the inclined plane of the roof, assemble a frame from vertical supports connected at the bottom by a plank and at the top by a purlin. The location of each rack must coincide with the pitch of the rafters that will rest on them. For stability, secure the frame with struts.
- Try the rafter in place and cut it from below at three support points in order to increase the area of contact with the Mauerlat and the beds, as shown in the photo.
- Install the rafter leg and attach it with self-tapping screws to the steel corners. Repeat the operation at 3 points, then move on to the next beam.
- Trim the legs of the eaves overhangs, and then sew them up from the bottom and sides with clapboard. It is more convenient to do this before the roof covering is laid.
If the side gables are not laid under the slope of the future roof, then they should be covered immediately after assembling the rafter system. Otherwise, you will then have to do this work from ladders or build scaffolding. For installation of a truss system for a pitched roof of a large building, see the next video:
Lathing and finishing coating
Before laying the boards on the roof slope, the rafter system is covered with sheets of super-diffusion membrane, which provides protection from wind and moisture entering the attic space. The canvases must be laid horizontally, starting from the bottom, and secured to the upper plane of the rafters with counter-lattice bars with a cross-section of 5 x 5 cm. The membrane should sag slightly between the rafters to drain water, and adjacent canvases should be glued together (the overlap is 15 cm).
The sheathing boards are nailed to the rafters in increments depending on the type of roofing:
- under metal tiles – 35 cm;
- for corrugated board and slate – 50-60 cm;
- Under shingles, bitumen and ceramic tiles, the sheathing is continuous.
The last step is the installation of coating and insulation (if necessary). Thermal insulation of a pitched roof is best done along the ceiling, leaving the unused attic cold. How to properly insulate ceilings is described in our guide.
Some useful tips
- If you plan to make a roof from galvanized iron, then you can do without lathing. For a 3x6 shed, 2 sheets are enough, but they need to be laid with an overlap.
- When covering a shed with edged boards, an overlap of about 25 mm should be made. To prevent unpainted areas from appearing after the wood dries, it is better to paint it before covering it.
- Paint consumption, if applied in 2 layers, is about 15 liters for a barn dimensions of 3x6 m.
- On average, it takes 7 days to build a shed of this type.
- The installation of a single-slope structure requires 30% less money than for a 2-slope structure.
- If one wind direction prevails at your dacha, then the option with a pitched roof suits you more than others.
Building a simple shed with your own hands is a feasible task. The main thing is not to forget to step back the legal 3 m from the neighbor’s fence and 5 m from the road, but there are no other restrictions.
Roofs for extensions
When constructing additional buildings, 2 main types of roofs are used.
Single-pitch
The simplest design, even inexperienced builders can make it. It is good for its reliability, low construction costs and ease of manufacture. The downside is that it is difficult to insulate the ceiling, and sometimes you have to make the interior rooms lower in order to be able to create the required slope of the slope.
Gable
This covering for an extension is more difficult to make - you will have to create a reliable connection to the residential building. To do this, you will need to disassemble part of the roof and change the design of the rafter system. It is best to use it on extensions only if you are building a residential, warm additional building. A gable roof will not make the room lower; it will make it possible to properly insulate the ceiling and minimize heat losses. It is better to entrust the manufacture of a gable structure to experienced builders.
Choosing a location to build a building
The barn is an auxiliary building and does not require special architectural delights, but it must fit harmoniously into the overall picture of the site. There are two optimal options: to build the building close to the house or to move it to the edge of the site.
When choosing a site for construction, there are some important points to consider. It is better to allocate land for a construction site in which the soil is less fertile, and it is not practical to lay out beds on it. There are definitely places on the site where there is a lot of shade and little will grow there, or there is such a topography that there is nothing else to place besides a shed.
It is also necessary to take into account the possibility of convenient access to the building. Ancillary buildings must be located at an optimal distance from agricultural work sites, so that there is no need to carry heavy equipment far away.
There are a lot of options for constructing sheds and I would like to consider the basic and not very complex ones. The main thing when starting construction is to make some drawings and sketches, even if they are by hand, but they need to be done. Without drawings, it will be quite difficult to navigate the site of the barn construction and it will be difficult to determine how much building material to buy.
Two-story extension to a house with a sloping roof
Two-story extension to a house with a sloping roof 6x6:
– The basis of the extension is 150x150 mm timber. – Overall size – 6000x6000 mm. – Floor – tongue-and-groove floor board 28mm, subfloor – edged board 25x100 – Frame base 100x100mm timber
– Floors – wooden beams 50x200mm with a pitch of 60cm – Exterior finishing – softwood eurolining class B, finishing with blockhouse, imitation timber or siding is possible. – Interior finishing – softwood eurolining class B. – Ceiling finishing – softwood eurolining class B. – Roof of the extension – painted corrugated sheet (can be replaced with metal tiles) – Roof type – gable – Doors – frame 80 cm x 200 cm. externally covered with clapboard . – Windows – 75x90 or 60x40 mm wooden – Foundation – screw piles recommended – Treatment of joists and subfloor with a fire-retardant compound. -Externally treated with antiseptic
Additional options: You can also order insulation of the extension. Interior and exterior finishing. Replacement of roofing material. Replacement of windows and doors at your discretion. Roofing and more. The price includes installation on your site. Excluding transportation costs. The foundation is also calculated individually.
A two-story frame extension will increase your living space and keep your home warm. Will decorate the appearance of your home. . The dimensions of the extension can be changed according to your wishes. You can order any extension from our specialists by phone, without visiting the office. All documents will be brought directly to your home. A two-story frame extension is built to order, inexpensively and in the shortest possible time.
Some useful tips
- If you plan to make a roof from galvanized iron, then you can do without lathing. For a 3x6 shed, 2 sheets are enough, but they need to be laid with an overlap.
- When covering a shed with edged boards, an overlap of about 25 mm should be made. To prevent unpainted areas from appearing after the wood dries, it is better to paint it before covering it.
- Paint consumption, if applied in 2 layers, is about 15 liters for a barn dimensions of 3x6 m.
- On average, it takes 7 days to build a shed of this type.
- The installation of a single-slope structure requires 30% less money than for a 2-slope structure.
- If one wind direction prevails at your dacha, then the option with a pitched roof suits you more than others.
Building a simple shed with your own hands is a feasible task. The main thing is not to forget to step back the legal 3 m from the neighbor’s fence and 5 m from the road, but there are no other restrictions.
Terrace or lawn?
The design of the green roof in use
The TN-ROOFING system PIR terrace is designed for pedestrian traffic. The finishing coating here is tiles on adjustable plastic supports or terrace boards laid using a system of wood-polymer logs. On such a roof you can install garden furniture and awnings, create a place for a real resort holiday, and even install a barbecue or decorative fireplace: the structure consists of materials with improved fire safety and a reduced flammability group. In this case, it is enough to follow the usual safety measures to prevent smoldering coals from getting onto the roofing.
There is nothing impossible in turning the roof of a house into a lawn or a small garden. The TN-ROOF GREEN PIR system allows you to lay fertile soil - a substrate - as the top layer of the roofing pie. This design includes a drainage device made from a profiled PLANTER GEO membrane, which prevents waterlogging of the soil.
A green roof is pleasing to the eye, perfectly insulates heat and sound, but, of course, requires maintenance: you need to organize watering, regularly mow the grass, trim the bushes, and fight weeds
The advantage of single-pitch systems
A do-it-yourself shed roof on a barn is good not only because it can be done on your own, but also because it has other positive aspects:
- Minimum consumption of lumber and their availability are one of the main advantages of the design.
- Speed and ease of construction are especially important when building a shed with your own hands.
- The flat roof of the utility block perfectly resists wind loads. It is quite durable and reliable.
- The weight of the entire structure is light, so you can build a barn from blocks, bricks, wood and other suitable materials. Most often, a frame shed is made, since it is quickly assembled.
- To cover the flat roof of a barn, you can use any suitable roofing materials, including the most inexpensive ones (roofing felt, galvanized roofing steel, profiled sheet).
Of course, a single-pitched roof also has its drawbacks, but they are more important for a private house rather than for an outbuilding. So, among the disadvantages are the fact that in such a barn you will not be able to equip an attic, as well as the low aesthetic indicators of a pitched roof. However, we can say with confidence that for a barn all these disadvantages do not matter at all, which is why many projects of temporary and outbuildings are carried out with a shed roof system.
Since the construction of a shed is usually not planned to be made from heavy-duty and massive materials, it is impractical and even dangerous to install a heavy, complex roofing structure on them. If you look at some of the drawings, these buildings are often made of frames. Moreover, the frame of the barn is made of ordinary timber. That is why a light pitched roof for a barn with your own hands is the most suitable option.
Advantages and disadvantages
A flat roof can rightly be considered only one of the types of roofing. At the same time, the solution has its advantages and disadvantages.
Taking a look at the technical characteristics relevant for flat roofs, we can highlight the following main advantages.
- Speed of construction and savings on building materials. Here the main emphasis is on physical savings. The area of a flat roof is noticeably smaller compared to a gable roof structure. Also, there is no need to make a complex rafter system, supplementing it with crossbars, purlins, supports, etc. A minimum of materials and process allow you to sometimes do everything yourself, without turning to specialists. Although it is better not to do this without minimal skills and knowledge in the field of roofing work.
- The roof can be used. A flat base on the roof provides an excellent opportunity to create an additional recreation area there, organize a whole garden or flower garden. Some even make sports grounds and install billiard tables. Although here we will have to complicate the design. And you can’t do it without the help of specialists.
- Installation and maintenance of equipment is simplified. This applies to the installation and repair of antennas, satellite dishes, air conditioning units, ventilation systems, etc.
But we can’t talk only about the advantages. Flat roofing also has several disadvantages. For some they can become critical.
- Snow accumulation. Due to the flat base, during heavy snowfalls a lot of snow will accumulate on the roof. This seriously loads the load-bearing walls and foundation. It can also cause leakage. Thawing and freezing, the ice crust damages the roofing and can cause a leak in the roof. So the snow will have to be removed manually. Here there is a threat to hit some communications with a shovel. So be careful.
- Complex organization and maintenance of the water drainage system. The minimum slope places increased demands on the creation of a drainage system for the house. If the requirements are not met, areas will form on the roof where water will constantly linger. Also, in houses with a flat roof, gutters are more likely to freeze, which is why their performance is reduced to zero. Here you can solve the problem by periodic cleaning, or by installing heating. And this is much more difficult and expensive.
Decide for yourself how critical these pros and cons are for you.
By really looking at the strengths and weaknesses of a flat roof, you can make a final decision about the advisability of creating just such a roof on your house.
How to determine the difference in wall height?
Rafters are the basis for any roof, and they are made from pine and spruce without knots.
Before. How to use beams: They are well treated with antiseptics against various insects, as well as special impregnations that give the wood greater strength, fire and moisture resistance.
The rafter system for a shed roof is called a sloping system, and the first thing you need to do during construction is to calculate the level of difference in the walls of the building that will be needed for the slope.
To do this, let's use a function from trigonometry and open a simple school textbook:
So, the magnitude of the difference of all walls is equal to the width of the garage multiplied by the tangent of the angle of inclination of the barn roof.
Let your garage be 5 meters wide, and the slope you need is 25 degrees. So, we determine the difference in walls = 5, multiply by tangent 25, we get 2.33 m, which means that the front wall of the barn should be exactly 2.33 meters higher than the back wall.
General principle
The load-bearing base of a flat roof in use is a monolithic or prefabricated reinforced concrete slab, the parameters of which (thickness, reinforcement coefficient, etc.) are calculated based on climatic influences and operational loads. Previously, a slope-forming screed was usually installed on top of the load-bearing base to the central drain or parapets, but this slowed down the work, made installation difficult in winter, and in addition, the screed increased the load on the load-bearing base. Today, the roofing pie is often laid on a flat slab, and a special wedge-shaped insulation is used to create slopes
.
When constructing a flat roof, special requirements are also placed on waterproofing, which must create a continuous waterproof layer and at the same time resist dynamic loads and temperature changes well.
In addition, the pie of a roof in use may include vapor barrier, heat insulation, protective, drainage and other layers.
Wooden barn
Much more often it turns out that the owner has leftover wood, and he decides to build a wood shed. For such work, at least minimal carpentry skills are required, because you will have to work with both a saw and a plane.
A building made of wood weighs very little; a columnar foundation can serve as its base. To do this, markings are made on the site, transferring the perimeter of the future building to the ground.
Posts are installed at the corners of the barn. Several more supports should be located in the center of the rectangle. The distance between the supports is 80-120 cm (depending on the size of the shed and the type of soil on the site).
The depth of the supports depends on the level of soil freezing in the construction region; on average, it is 40-60 cm. After the trenches for the supports are dug or drilled, wooden formwork is installed in them, a sand and gravel “cushion” is filled in, and metal reinforcement is laid.
Now you need to pour the concrete. After 5-6 days, when the foundation has hardened, you can dismantle the formwork and begin building walls.
First, you need to make the bottom frame of the building from timber. Before laying the wood, the foundation supports are covered with a double layer of roofing felt. At the corners, the timber is connected with metal brackets and checked for level.
Install vertical supports in the corners of the barn, always checking the level. They are fixed with temporary spacers. Taking into account the door and window openings, the entire frame of the barn is assembled from wooden beams.
After assembling the frame, they begin covering the walls. This can be done with boards, moisture-resistant plywood or other sheet material.
Installation sequence
Now we will tell you how to make a pitched roof with your own hands step by step. As a rule, roof installation begins with the installation of a Mauerlat. The rafters will rest on this beam. If your building is made of wood, then the role of the Mauerlat will be played by the last crown. For construction made of brick or concrete, the mauerlat is made of wood (beam 100x100 mm). In this case, it must be isolated from the walls using a layer of roofing material.
Installation of the rafter system
The most economical option is to install rafter legs on two opposite walls of the building that differ in height. For work you will need a minimum amount of lumber. Step-by-step instructions for installing rafters are as follows:
- after laying the mauerlat beam, a board is placed across it, which should protrude 40-50 cm on both sides;
- on the board they mark the groove for the rafters (the width of the groove must exactly match the width of the rafter leg, and the height should not exceed a third of the height of the element);
- after making the template, the cuts are marked on the mauerlat for each rafter leg;
- After cutting and laying the rafters, they are attached to the horizontal beam using nails or self-tapping screws.
In the case of installing rafters on walls of the same height, it is easier to make triangular trusses made of wood, consisting of rafters, racks and horizontal beams. In this case, you do not need to increase one of the load-bearing walls to the required height, but the wood consumption during such installation increases. However, due to the fact that the truss can be assembled on the ground, the installation process is greatly simplified and accelerated. The truss mounted on the ground is lifted onto the house using winches or other lifting equipment. Otherwise, the process of making cuts in the mauerlat and laying trusses on a horizontal beam does not differ from the method described above.
Often, when installing rafters, it is necessary to use additional spacers, struts or supports. The number of additional elements and the location of their installation depends on the following factors:
- weight of the supporting roof frame;
- tilt angle;
- distances between load-bearing walls;
- length of the rafter leg;
- types of roofing;
- choice of thermal insulation material.
Waterproofing and lathing
Now you can perform waterproofing. To do this, the selected material (roofing felt or polyethylene film) is rolled out across the rafters. The first row is laid along the bottom of the slope, and each subsequent row overlaps the previous one by 0.15 m. The joint of the strips is taped. The waterproofing is attached to the rafters using a construction stapler.
If you decide to make a ventilated roof, then there must be a ventilation gap between the waterproofing layer and the roofing material. To install it, counter battens are placed on the rafters on top of the waterproofing. For these purposes, a beam with a cross section of 0.3x0.4 cm is used.
Let's start doing the sheathing. Depending on the chosen roof covering, it can be continuous or sparse. To make a continuous sheathing, you can use a board, moisture-resistant plywood or OSB. As a rule, such lathing is needed for soft roofing or thin profiled wall sheets. To perform sparse lathing, take a board, which is laid in increments of 0.3-0.4 m. Now you can lay a suitable roofing covering.
Insulation
You can learn how to properly install a pitched roof from the following video:
At the last stage, the roof structure is insulated. The work is being done from the inside of the roof. Thermal insulation material is laid between the rafters so that it fits tightly to them without cracks or gaps. For this purpose, it is better to choose insulation boards with a width slightly larger than the pitch of the rafter system.
It is better to use mineral wool as insulation, since it is denser and will not sag and require additional fixation with ropes. Now we attach a vapor barrier membrane to the rafters on top of the insulation. For fixation we use a stapler. Be sure to overlap the strips and seal the joints with tape.
Roofing and wall cladding
The roof of the barn is pitched
Attach the top portion of the shed frame to the exposed vertical support posts. Pre-prepare cuts in the timber according to the size of the posts. Fix the connections with corners and self-tapping screws.
Traditionally, barns are equipped with single-pitched roof structures. In this case, the length of the wooden posts on one side should exceed the length of the opposite supports.
Lathing for laying soft roofing on the roof
This placement will further contribute to the effective removal of sedimentary moisture from the roof surface.
Arrange the rafters of the roof structure from boards 4-5 cm thick. The length of the rafters should be approximately 50 cm longer than the length of the frame.
In the places where the rafters meet the beams, make cuts first. Lay the rafters on the frame and secure with self-tapping screws. The installation pitch of the rafters is 40-50 cm.
Treat the frame with an antiseptic. Attach batten boards to the frame. Boards measuring 2.5x15 cm are optimal.
Shed roof
A plank roof requires a mandatory waterproofing layer. Traditionally, roofing felt is used for moisture insulation. If you plan to install a more beautiful finishing coating, use polyethylene film for waterproofing.
Choose the finishing coating at your discretion. You can lay metal tiles, corrugated sheets, euro slate, etc.
Construction of a pitched roof
Lining is suitable for covering the walls of a building; chipboard, boards and other similar materials can also be fixed. First, sheathe the front side of the shed, and then line the side and rear walls. Attach the boards without gaps.
Pitched roof design option
If necessary, sand the outside of the boards with an electric planer. Typically, such treatment is only needed when covering walls with boards. Thanks to this, the material will become more attractive in appearance, and rain will linger much less on a smooth surface.
If you wish, you can paint the walls of the shed. Oil and water-based compositions are best suited for painting such buildings.
Painting the barn
Carry out the interior arrangement of the finished shed at your own discretion. If the building is intended to store various kinds of tools and accessories, install convenient racks and shelves around the perimeter. Shelving allows you to make the most of the available space and easily access the things you need.
You can buy racks and shelves ready-made or make them yourself, for example, from boards, fiberboard, leftover furniture, etc.
At this point the barn is ready. All you have to do is connect the electrical wiring to it, if necessary, and install the required devices.
Finished barn
Good luck!
Design features of a pitched roof
There are ventilated and unventilated pitched roofs.
When choosing a specific option, focus primarily on the purpose of the building. Unventilated pitched roofs are usually placed above terraces. In such a situation, it will be enough to tilt the slope by 3-5 degrees. However, in winter, the owner of a terrace with such a roof will have to pay additional attention to cleaning the roof from snow mounds
Ventilated roofing systems are installed on houses, saunas and other buildings that require the creation of a favorable microclimate. To ensure ventilation, it is enough to create a gap between the layers of insulating materials and prepare technological holes at the side ends of the roof. Ventilated roofs last significantly longer than their non-ventilated counterparts.
Single-pitch roofing structures are built on simple rafter systems. The technology for constructing such a roof requires the presence of a mauerlat - this is a support beam fixed to the external walls. The racks of the rafter system will rest on this beam.
Rafters for a pitched roof
The slope of the structure is created due to the difference in height of the walls of the house. If the load-bearing walls of the building have the same height, a pediment is fixed to the corresponding wall (taking into account the required slope direction). Thanks to this simple design, the required height difference will be set.
When choosing the design of a rafter system, it is important to take into account such a parameter as the span length. If the walls on which the rafter legs rest are no more than 450 cm apart from each other, no additional reinforcement of the rafters is done
Otherwise, the rafters are supported with the help of a rafter leg - this is a block, the lower end of which rests on a bench. The latter is an additional supporting element fixed along a wall of greater height. This recommendation is relevant for cases where the span between adjacent walls is 4-6 m.
If the span has a length of 6-12 m, the middle of the rafters should rest securely on a special purlin fixed on the racks. Rafter legs are installed on the sides of such a rack. The previously mentioned bench is located parallel to the supporting walls. The distance between the stand and the wall in each direction can be a maximum of 600 cm.
If the span length is more than 12 m, 2 supports are mounted from the purlin using the support and reinforcing posts. The supports are located no further than 600 cm from the walls. The gap between individual racks should be no more than 30-35% of the total length of the entire span. Use a clamp to secure the posts together.
Rafter legs are fixed between the rafters and the support posts. Each rack is combined with one rafter leg. The racks are fixed in the direction of the load-bearing wall, located at a minimum distance.
Which type of shed to choose for your summer cottage?
Depending on the plans for the future development of the suburban area, the availability of free time and money, the problem of utility room on a suburban area can be solved in several ways:
- Hire a team and build a permanent shed from brick or foam block, with a pitched roof and a basement;
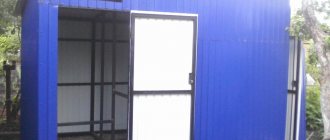
- Pour a concrete foundation for the future building with your own hands, buy a five-ton railway container and install it on your summer cottage instead of a barn;
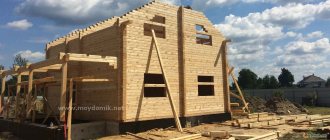
- Build an ordinary barn with a pitched roof, 3x6 in size, from timber and boards, as in the photo.
Of course, experienced summer residents with experience will without hesitation cast their votes in favor of the last option; this is the most balanced and thoughtful decision.
In addition, the construction of stone, prefabricated, panel sheds, as well as the purchase of a container, will require an order of magnitude greater investment and time than is necessary for a wooden building with a pitched roof and a simple foundation. The main thing is that, at considerable expense, there are no tangible advantages over a lean-to wooden shed measuring 3x6.
Optimal design of a 3x6 wooden shed
The most difficult element of a homemade shed is its roof. Choose a pitched roof for your shed, you can’t go wrong. Even experienced craftsmen prefer to install pitched roofs on barns; they are not as beautiful, but easier to build and more reliable in operation. Moreover, you can make a shed roof with your own hands step by step even with minimal construction experience.
The only mandatory condition is the correct orientation of the pitched roof and the entire shed building relative to the wind rose in order to reduce the risk of rainwater flowing under the upper overhang and gables of the roof:
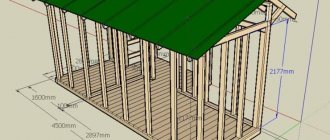
- The design of the barn, dimensions 3x6 m, with a pitched roof is shown in the drawing;
- The construction is carried out on a simple columnar foundation of 12 supports. A standard cinder block is used as the material for the pillars, but it is better to cast the supports from concrete in the formwork;
- The basis of a lean-to barn is a frame made of boards and timber, the dimensions of the structure are 3x6 meters, with a ceiling height of 2 m and the highest point of the rafters of 2.7 m;
- The shed roof is made according to the classical scheme, on hanging rafters with stuffed sheathing boards and a flat roof. As a roofing covering, you can use corrugated sheeting, ondulin, or make a two-layer version from rolled material, for example, roofing felt.
The construction will be very simple and easy; if you assemble the foundation correctly, the wooden frame box with a pitched roof can easily withstand winds of 18-25 m/s. If there are no strong winds in the area in which the shed is planned to be installed, then when building walls you can limit yourself to vertical drains from boards and timber, as in the drawing. For open areas, it is recommended to strengthen the vertical load-bearing supports with side struts, as in the photo.
The same applies to the design of a pitched roof. For a quiet area, you can build a pitched roof without using ceiling beams, but in this case, the upper frame of the walls and the mauerlat will need to be supported with additional vertical supports made of timber. For windy areas, a pitched roof must be reinforced with floor beams and supports in the middle of the rafters.
pros
- The flat roof design provides for the absence of a rafter system, which allows significant savings on building materials.
- The main advantage of a house with a flat roof is the possibility of constructing additional facilities and recreation areas. If you live in a picturesque region, then spending time at such a site is simply unforgettable.
- At first glance, a flat roof requires special care and maintenance, but in reality this is not the case. By arranging this roof in accordance with certain rules and installing electric heating, you can forget about icing in the winter.
- The construction of a flat roof is faster than a pitched roof, resulting in the construction of a house being completed earlier.
- There is no need to carry out additional calculations and design a complex pitched roof. You get maximum space in the premises.
- Carrying out repair work on a flat roof is much easier than on a sloping one.
- A flat roof can be an excellent platform for installing various equipment (air conditioners, solar panels or heat pumps). For those who are not yet familiar with the article about the air source heat pump, you can read it at this link .
Selecting a construction site
Having decided to build a shed on your site, you need to decide on the choice of location, size and design of the outbuilding. Based on the purpose - a mini-workshop, a room for storing firewood, equipment, keeping poultry - a place for construction is chosen.
The future premises should:
- Fits into a complex of existing or proposed outbuildings (garage, bathhouse, gazebo, recreation areas).
- Have easy access.
- Do not occupy space intended for growing garden crops.
- Comply with sanitary and fire safety standards.
The developer can decide on the first three points independently.
According to the norms and rules of individual housing construction, there are certain requirements for placing sheds:
- The room for “living creatures” should be located no closer than 4 m from the border of the neighboring plot,
- For other buildings this distance is 1 m.
- It is advisable to remove the habitat for small livestock or poultry by 15 m from the dwelling.
The barn can be made in the form of an extension - connected with a bathhouse, garage or other outbuilding.
The simplest and most convenient solution for construction is the option of a frame shed or a shed made of bricks or foam blocks with a pitched roof. Cinder blocks are used less often.
Ready-made drawings of sheds with a pitched roof
Video: all stages of construction
A frame shed on your property will always be convenient for storing equipment and old things. Having equipped its premises as a workshop, you can do carpentry and repair work, while your yard will remain clean. Insulated walls, floors and roof will provide comfortable conditions for keeping pets and birds during the cold season.
- Author: Andrey Sokolov
Rate this article:
- 5
- 4
- 3
- 2
- 1
(17 votes, average: 3.7 out of 5)
Share with your friends!
Which type of shed to choose for your summer cottage?
Depending on the plans for the future development of the suburban area, the availability of free time and money, the problem of utility room on a suburban area can be solved in several ways:
- Hire a team and build a permanent shed from brick or foam block, with a pitched roof and a basement;
- Pour a concrete foundation for the future building with your own hands, buy a five-ton railway container and install it on your summer cottage instead of a barn;
- Build an ordinary barn with a pitched roof, 3x6 in size, from timber and boards, as in the photo.
Of course, experienced summer residents with experience will without hesitation cast their votes in favor of the last option; this is the most balanced and thoughtful decision.
In addition, the construction of stone, prefabricated, panel sheds, as well as the purchase of a container, will require an order of magnitude greater investment and time than is necessary for a wooden building with a pitched roof and a simple foundation. The main thing is that, at considerable expense, there are no tangible advantages over a lean-to wooden shed measuring 3x6.
Optimal design of a 3x6 wooden shed
The most difficult element of a homemade shed is its roof. Choose a pitched roof for your shed, you can’t go wrong. Even experienced craftsmen prefer to install pitched roofs on barns; they are not as beautiful, but easier to build and more reliable in operation. Moreover, you can make a shed roof with your own hands step by step even with minimal construction experience.
The only mandatory condition is the correct orientation of the pitched roof and the entire shed building relative to the wind rose in order to reduce the risk of rainwater flowing under the upper overhang and gables of the roof:
- The design of the barn, dimensions 3x6 m, with a pitched roof is shown in the drawing;
- The construction is carried out on a simple columnar foundation of 12 supports. A standard cinder block is used as the material for the pillars, but it is better to cast the supports from concrete in the formwork;
- The basis of a lean-to barn is a frame made of boards and timber, the dimensions of the structure are 3x6 meters, with a ceiling height of 2 m and the highest point of the rafters of 2.7 m;
- The shed roof is made according to the classical scheme, on hanging rafters with stuffed sheathing boards and a flat roof. As a roofing covering, you can use corrugated sheeting, ondulin, or make a two-layer version from rolled material, for example, roofing felt.
The construction will be very simple and easy; if you assemble the foundation correctly, the wooden frame box with a pitched roof can easily withstand winds of 18-25 m/s. If there are no strong winds in the area in which the shed is planned to be installed, then when building walls you can limit yourself to vertical drains from boards and timber, as in the drawing. For open areas, it is recommended to strengthen the vertical load-bearing supports with side struts, as in the photo.
The same applies to the design of a pitched roof. For a quiet area, you can build a pitched roof without using ceiling beams, but in this case, the upper frame of the walls and the mauerlat will need to be supported with additional vertical supports made of timber. For windy areas, a pitched roof must be reinforced with floor beams and supports in the middle of the rafters.
Coating used
In fact, there are several options for what materials can be put on a flat roof.
- Bitumen and polymer-bitumen compositions. This is about the question of what would be most profitable to make your own flat roof from. Financially this is the most affordable option. This includes standard roofing felt, as well as euroroofing felt. These are rolled roofing materials. They are based on synthetic fabrics coated with bitumen on both sides. The result is an elastic and low-temperature resistant material. Acts as good waterproofing. To install it yourself, you only need a gas burner. But the coating is short-lived. Plus, roofing felt does not breathe, vapor permeability is zero. You will have to additionally ventilate the roof. Otherwise, in 1-2 years the insulation will rot.
- Liquid rubber. One of the main advantages is the seamlessness of the coating. And this is important in the context of a flat roof, where water actively accumulates. If you plan to use liquid rubber, then give preference to two-component and highest quality options. Applying the composition is technologically more difficult. If the layer turns out to be uneven, problems may begin after 8-10 years.
- Roofing membranes. These are membranes based on PVC, TPO and EPDM. Their value lies in their ability to let steam out. The most popular membrane is PVC. But it is the most flammable. EPDM is more durable and cheaper, but if mechanical damage occurs, it cannot be restored. The same cannot be said about PVC, which is simply melted with a torch or a hair dryer. Also, the joints on the EPDM membrane will have to be glued separately with special tapes, which is inferior in reliability to soldering PVC-based sheets. At the same time, PVC is afraid of contact with bitumen, ultraviolet radiation, oils and polystyrene foam. The TPO membrane is laid by exposure to hot air. The material is resistant to ultraviolet radiation and chemicals. It can be laid on a bitumen roof or on polystyrene foam insulation without using geotextiles. But compared to EPDM, the service life of the TPO membrane is shorter. As a result, it turns out that PVC is the best choice for a private home among membranes.
Having understood the covering options, it is worth clarifying the roofing pie.
How to build a shed with a pitched roof
The construction of a barn includes several stages:
Selecting a location, leveling and removing debris from the construction site. The shed should not block the driveway or passage.
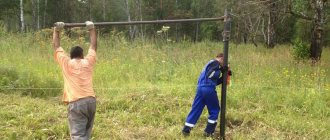
Laying the foundation. It can be made columnar and the frame of the building is installed on it. Depending on the size of the barn, the number of pillars for the foundation also depends. Four pillars must be located in the corners of the future barn and several inside and along the edges of the perimeter. The distance between pillars should not exceed 1.5 meters. The pillars are partially dug into the ground and filled with cement. Formwork made of boards (you can use unnecessary scraps that are suitable in size), 20-30 cm high, is laid on them. In order for the cement to set better and the foundation to be stronger, it is necessary to leave it for 2-3 days and then continue construction.
Frame assembly:
- to extend the life of the shed and to protect it from fire and rot, the boards for the frame can be treated with fire-resistant and antiseptic compounds;
- after removing the formwork, a double layer of roofing felt is placed on the base of the foundation pillars for waterproofing;
— the base of a frame made of timber in the shape of a rectangle is laid on the foundation pillars, its ends are tightened with metal staples;
— vertical posts are placed at the corners of the base, and the entire frame is measured by level (level measurements should be carried out throughout the entire construction);
- in order to form a roof slope (angle 15-20 degrees), the front wall must be built higher than the others;
- for the convenience of further work, door and window openings (if provided) should be prepared in advance;
— logs are laid on the frame and a floor made of boards is placed on them;
— vertical supports and floor beams are installed, which are secured using metal brackets or corners.
Roof. First you need to make one rafter leg, and the rest according to its sample. The length of the rafters should be taken into account as the distance between the two walls and the length of the two overhangs from the walls. The rafters should be installed level (a thick thread is also suitable for this purpose); they are fastened with nails or corners. An overlapping waterproofing film is laid on the rafters, and lathing is placed on it. The sheathing needs to be done more frequently if the roof is covered with a soft roof. Corrugated sheeting and metal tiles can be used as roofing materials. Experienced builders recommend using metal tiles, since, due to their structure, they do not interfere with the sliding of snow and moisture.
Finishing the barn. After all the main work, the barn can be sheathed with plywood, clapboard, or corrugated sheeting. Doors and windows are being installed.
Each owner does the interior decoration of the barn at his own discretion. The walls can be covered with plywood. Build the necessary shelves and racks, attach hooks and hangers. Provide electricity if necessary.
As a faster and less expensive option, corrugated sheets are used as material for building a shed. In this case, it is better to give preference to colored corrugated sheets, since they are painted with protective polymer paint, unlike galvanized sheets.
In order for a barn built with your own hands to serve for a long time, it is necessary to inspect it after each winter for defects and damage and carry out the necessary repairs to the building in a timely manner. Now you know how to build a barn with your own hands with a pitched roof. We hope that our tips will be useful to you.
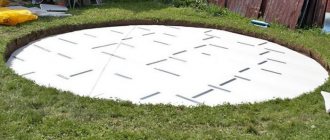
Installation of a flat roof made of monolithic concrete
The first step is to calculate the roof span. If it is 5 m, then 15 cm beams are used. Speaking in professional construction language, this is the “fifteenth I-beam”.
To create a monolithic roof, it is recommended to use concrete grade 250. When creating a concrete solution at a construction site, it is advisable to use a concrete mixer. Otherwise, you are unlikely to achieve the correct consistency of the solution. To obtain concrete for a flat roof, you need to mix crushed stone with 20 mm particles and cement, grade PTs-400.
When calculating the components, adhere to the following rules: for eight buckets of crushed stone - three buckets of cement, 4 buckets of sand, and two buckets of water. If there is not enough water, you can add more, this is not critical.
Insulating a flat roof with foam concrete, watch the video:
Next, the boards are fastened to the lower beam shelves. Roofing felt is laid on the dry surface of the boards. Then, a reinforced mesh of a periodic profile is laid on top. The diameter of this element should not be less than 1 cm. The size of the cells is 20x20 cm.
In order not to carry out repairs to the flat roof, the places where the mesh rods are overlayed are secured using binding wire. An option using glue is possible. Ultimately, the mesh should not slide off when pouring the screed.
For complete coverage with concrete mortar, small pieces of crushed stone are usually laid out at the bottom of the mesh. Thanks to this, a gap of 4 cm is left. It is necessary to differentiate the mesh and the roofing material layer. Pouring is done into the openings between the beams. Let us remind you that their thickness must be at least 15 cm.
After all the steps, the concrete is covered with a polyethylene film. This is especially true if work is carried out at high temperatures. By covering the surface, you will prevent moisture from evaporating from the concrete solution. This in turn will protect the top layer from cracking.
The concrete should remain under the film for at least three days. After the concrete mass has completely dried, add a layer of insulation. Don't forget about slopes. The next step is to create a screed and install the rolled carpet.
Preliminary work
An important step in creating a frame shed with a pitched roof with your own hands is planning future work. Designed drawings help determine the required amount of building material, calculate the approximate duration of the entire process, etc.
For a shed, wood, plastic or metal are usually used. To build a structure of standard dimensions 3x6 m, it is enough to find:
- Wooden beams and boards that will serve to create the sheathing.
- Suitable raw materials for creating a roof
- Materials for waterproofing;
- Substances for creating concrete mixtures;
- Fixing elements such as nails and screws;
- Ruberoid for forming a coating.
After acquiring an approximate list of such materials, you can proceed to the construction of a utility block.
The nuances of covering roofs with heavy materials
The use of hard types of coatings will lead to the fact that the mass of the entire building will have a decent value, but thanks to them it will also allow it to withstand high pressure from precipitation and natural phenomena.
In this case, it is advisable to use metal rather than wood as the covering material. As for the walls, their safety margin should also be increased. The concrete screed must have a reinforced body.
As a positive effect, you will gain greater safety and a longer service life of the entire building compared to soft coverings.
As a conclusion, I would like to say that flat roofs are very rare, but have undoubted advantages over pitched roofs. On their surface you can arrange a sports ground or dot a lawn.
What materials are needed?
After the drawing and design of the future roof have been developed, it will become clear what cross-section of timber should be purchased, what kind of sheathing and roofing material should be.
It is recommended to make the rafter system from wood, and not from reinforced concrete structures or metal profiles. This will reduce the overall weight of the roof and the load on the walls and foundation.
You can use timber from softwood (pine, spruce). Wood humidity should not be more than 20%. The material must have a smooth surface, without knots, delaminations, signs of insect damage and cracks.
You will also need:
- Beam for the mauerlat and purlins – cross-section 200×200 and 50×100 mm, respectively.
- Edged boards - for rafter legs (dimensions 50x200 mm).
- Boards – for sheathing and counter-lattice (section 50×50 or 20×90 mm). To create the sheathing, you can also use a galvanized profile.
- Thick plywood - for fixing and securing rafter joints.
- Insulation (thickness 200 mm).
- Waterproofing and vapor barrier.
- Sealant.
- Metal fasteners for joining the mauerlat and rafters, staples, brackets, screws.
- Roofing covering.
- Fire retardants, antiseptic treatment, impregnation against rotting. Treatment with these products must be carried out 2 times before installation on the roof. Carrying out the procedure after the fact is inconvenient and unreliable, because it will not be possible to process the material in inaccessible places or in some areas from the inside.
Roof of an extension to a wooden house
Let's look at the arrangement of a pitched roof for an extension to a wooden building in stages:
- First you need to determine the angle of inclination and what material will be covered: for example, slate is heavy in itself, and it requires a strong rafter system.
- To arrange different-level structures of a house and an extension, the roof of the latter must be lower than the main roof.
- If the construction of additional space is planned, then the rafter system should be raised above the general structure. If not, then you don’t have to do this. For rafters, choose durable and antiseptic-treated material.
- Fastening is carried out with construction pins or anchor locking of all parts.
- The sheathing is being constructed. If a warm room is provided, then insulation is laid under it, otherwise not. If it is intended to lay soft roofing material, then dense plywood panels are installed instead of sheathing. And the distance between the sheathing boards under the sheet material is determined by the dimensions of the sheets themselves.
- Waterproofing materials are attached directly to the rafters with an overlap. Ordinary roofing felt rolls are well suited for these purposes, but materials treated with antiseptics can also be used.
- Arrange the roof overhangs: they should extend from the walls of the building by about 10 cm, cover them with the necessary material that is in harmony with the general appearance of both the house and the extension.
- Upon completion of installation, anti-wind boards or metal strips are nailed to the ends: the roof will not vibrate from gusts of wind.
Extension to a house with a sloping roof
The arrangement of this type is a little more expensive than the previous options, but the structure itself will be much more functional: under such a roof you can build an attic, additional room, which is especially important for a large family.
The peculiarity of this design is a two-stage rafter system: first, the lower tier is mounted, a frame for the second tier is installed on it, and then everything is assembled under one ridge.
The steps are almost the same as for other types of installation: after installation of the rafters, the sheathing, waterproofing and roofing material are prepared.
Extension to a house roof to roof - installation instructions
Some may think that an extension is a utility room, and there is no need to show much creativity when arranging the roof. But there are also extensions that outshine the house itself with its beauty and functionality. And it is for these reasons that the upper part of the building above them can be different: either single-pitched or multi-pitched.
In principle, an extension is erected not only to expand the living space, but also to equip a summer veranda or kitchen , and therefore a simple lean-to structure is often built over them.
But if you need to add a large room to the house, even larger than the area of the main building, then arranging a broken type of roof will be quite reasonable.
A gable roof is suitable for verandas or summer terraces when you need to expand the main area or create an additional place for relaxation. So the choice of design depends on the functionality of the attached room.
Roof requirements for an extension:
- It cannot be a single structure with a residential building;
- A small indentation from the newly built walls is provided;
- The roofing material is laid overlapping, which ensures water resistance;
- Since the extension will be located below the level of the main building, all precipitation will roll onto it, so the requirements for waterproofing are very stringent.