The topic of the article is “finishing the facade with clinker tiles.” This building material is very popular today. It is presented on the market in a huge variety of sizes, shapes, and decorative contents. Anyone who has already encountered clinker knows well why it is so popular. Therefore, in this article we will talk about clinker tiles, their technical and operational characteristics, the advantages of this material and its disadvantages, as well as methods for finishing the facades of buildings and structures with it.
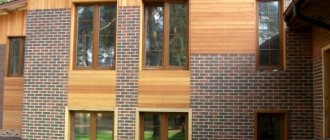
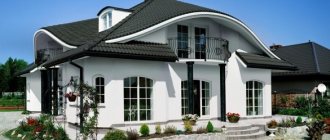
Private house lined with clinker tiles Source all-klinker.ru
What are clinker tiles?
The history of clinker as a material dates back to the 19th century. It was invented in Holland and there it got its name Clinker, which means “ringing”, thanks to the characteristic ringing sound when tapped on the surface. At first, clinker bricks were used for paving sidewalks, but already in the mid-19th century, clinker tiles began to be produced and used for finishing facades. In Holland there is not enough natural stone, which was the impetus for the invention of clinker as an alternative to natural stone.
Appearance of clinker tiles
For the production of clinker tiles, shale-type clays with the addition of coloring oxides and fluxes are used. Clinker is molded using extrusion or dry pressing. You can use different types of clay (loess, basalt, granite, feldspar, etc.). The blanks are fired in a special oven until completely sintered. There are unglazed or colored glazed clinker tiles. The high frost-resistant qualities of the material allow it to be used for cladding facades in any climatic zone. The material is resistant to fungus and mold, does not burn and does not lose its aesthetic and decorative qualities for a long time.
Clinker is the king of window sills
Clinker bricks are available in a variety of colors, and shaped pieces and tiles are most often red or brown.
If these colors do not suit us, we can order other colors from company stores. Tilt and drip We begin making the window sill after installing the window. If we decide on clinker bricks or window sill shaped products, then when installing a window, we must remember that they have a significant thickness and this must be taken into account by adding approx. 2.5 cm to the element thickness. The tiles from which we make the window sill are placed in specially prepared grooves in the window frame. If there are no such grooves, then we insert the window sill under the window frame by 2-3 cm. Before starting work, we attach the board to the wall at the bottom of the window opening using a leveling ruler. This board will be necessary when making a window sill - on the one hand, it will stop the solution from floating out, and on the other, it will serve as a support for the individual elements of the window sill. After the solution has set, the board is removed. It must be remembered that the window sill elements must be laid with a slope of at least 5% (finished window sill shaped products are laid flat because they already have a slope made by the factory method). If the slope is too small or towards the window, the water collecting there will destroy the façade. We must also remember that the part of the window sill protruding beyond the front surface of the wall must have at least 3 cm so that raindrops flow to the ground and not under the window sill. At the bottom edge of the window sill there should be a drainage groove, the so-called “drip”, so that raindrops break off and fall, and do not flow down the wall.
Clinker tiles The base on which the window sill will be installed must be clean, free from dust and dirt. If we lay clinker tiles, they need to be primed with Atlas Uni-Grunt primer emulsion. The emulsion increases adhesion to the surface, improves its elasticity, and also regulates the process of water absorption of the base. Atlas Plus adhesive mixture is excellent for laying clinker tiles. It is characterized by increased adhesion and elasticity, and its great advantage is convenience and ease of use. The solution is applied to the prepared base using a trowel and leveled with it to the level of the previously attached board. The tiles are laid alternately, one next to the other, with light pressure and support on the board. In the seams, which can be from 10 to 15 mm, we place two spacer crosses to obtain the same width of the seams along the entire length. We place plastic wedges between the laid elements and the window frame. After laying the clinker elements, we fill these gaps with acrylic mass. We begin grouting after 7 days. For grouting joints in clinker elements, a special Atlas building mixture is recommended - with clinker minerals.
Brick or clinker shaped products If we decide that the window sill will be made of brick or clinker shaped products, to lay them we need to use a special mixture designed for this type of material. The Atlas building mixture with minerals for clinker is exactly such a product. These are minerals of volcanic origin that limit the appearance of plaque on the surface. This mixture is suitable both for laying bricks and clinker shaped products, and for grouting them. The first stage - masonry - consists of connecting bricks or shaped products using mortar, while leaving space for seams. We grout the joints with the same solution. It begins no earlier than 7 days after the end of the first stage. The finished window sill is covered with film for at least one day.
Select the right mixture We must remember that we cannot use the same mixture for every clinker element. To glue clinker elements, you need a mixture with increased elasticity, for example, Atlas Plus. For bricks and clinker shaped products, it is necessary to use a special clinker mixture, for example, a building mixture with clinker minerals. It should be remembered that if the house is insulated, a special profile must be used when installing the window sill. It is placed under the window sill, which provides it with a corresponding expansion joint from the layers of the insulation system. The use of a profile provides the window sill with density and stability. In addition, the profile has a polyethylene film, which eliminates cracks and damage to the plaster that arise from different thermal expansion of materials.
Application of clinker tiles
The scope of application of clinker tiles is not limited only to the facades of houses. Excellent performance characteristics, a wide range of textures and colors make this material in demand in such areas as:
- Landscape design - here tiles act as the main material for paving paths, terraces, patios, and fences. Clinker tiles withstand mechanical stress and static loads well. Experts say that the platform paved with clinker tiles can withstand the weight of a freight car with cargo.
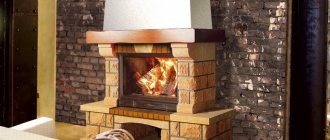
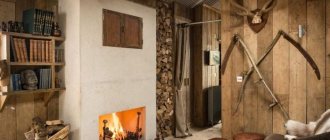
- Interior decoration - the fire resistance of the material makes it the best option for cladding the area in front of the fireplace. Using this finishing material you can decorate your bathroom, thanks to its zero water absorption. This quality allows you to finish swimming pools and saunas using clinker.
- Finishing the steps of the house - due to its resistance to abrasion, cladding the stairs with clinker tiles is considered a good solution.
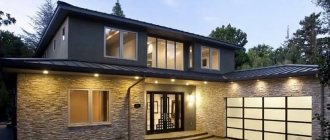
- For the design of facades , clinker tiles provide good sound and heat insulation, do not allow air to pass through to the facade and protect it from wind, rain and snow.
- There is also drainage and lawn clinker , which is a lattice through which grass can grow unhindered. A car can safely drive on such a lawn without the risk of damaging the soil.
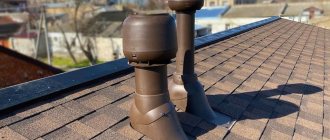
- Clinker is also used in the form of tiles in roofing work.
It is used with equal popularity for both exterior and interior decoration.
Clinker facade tiles are not very cheap - from 1,500 rubles per square meter or from 30 rubles per piece . However, the unsurpassed performance qualities of the material and its attractive appearance at home will more than pay for such investments.
Characteristics and properties
It is not for nothing that clinker tiles are called a material “for centuries”. The tile has high strength and the ability to withstand severe mechanical loads.
- The material is resistant to ultraviolet radiation and precipitation. A similar material - clinker bricks - has more weight, which adds load to the foundation. Today, the use of the latest technologies has made it possible to reduce the weight of clinker, allowing it to be used even for interior decoration.
- The famous and unique brick texture of clinker tiles gives the facade a presentable and beautiful appearance.
- Clinker is an exclusively natural material, therefore it does not emit harmful substances into the atmosphere and is safe for health. The basis of the material is natural clay.
- The long service life of the material - at least 50 years - makes it the best option for outdoor installation. After all, ancient artifacts made of baked clay can be preserved for thousands of years without losing their characteristics.
- The inertness of the tiles to aggressive environments allows it to be used in chemical plants without the need for regular repairs and maintenance.
- Clinker tiles are resistant to frost and not sensitive to mechanical stress. Therefore, facing the facade with clinker tiles in areas with high traffic is the right decision.
- Minimal water absorption due to the exceptionally dense structure of the material.
- In addition, clinker tiles are easy to maintain - you just need to wipe them with a damp cloth from time to time.
Features of installing tiles for the facade
Clinker tiles can be laid on any base - concrete, stone, wood. A perfectly flat surface is a key condition for installing this material. All protruding irregularities and bumps must be smoothed out, and the recesses must be plastered. You should not save time on preparatory work - this will help ensure long and trouble-free operation of the facade.
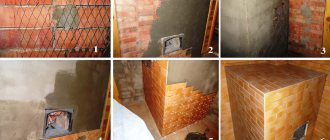
Installation of clinker tiles
Installation of clinker tiles:
- Markings are carried out from the location of window or door openings, which allows you to place whole tiles in visible places, and cut ones - closer to the base and cornice. Laying begins from the corners using special corner tiles, which allow you to get perfectly even corners.
- The adhesive solution is applied to the tiles with a special notched trowel.
- The solution is also applied to the wall in a small amount with the expectation that it will be tiled within 15-20 minutes. If the glue dries out, it may result in insufficient adhesion.
- The rows are aligned along the lace.
- The joints are being grouted. A special solution is applied using a special tool into the tile joints.
- Excess grout is removed with a special brush. Glossy tiles are cleaned with a damp cloth.
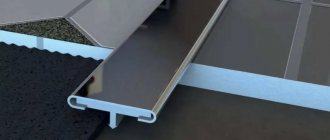
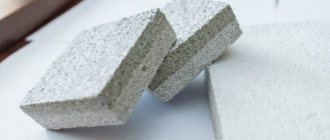
Installation diagram with insulation
Sometimes they use the “dry” method of installing clinker tiles on the facade using special polystyrene foam boards. Such thermal plates are most often used on wooden facades to improve thermal insulation.
Tips for choosing
The wrong choice of finish negates all the advantages of clinker tiles, so the following points must be taken into account:
- Heat-resistant clay does not come in blue or green colors - artificial dyes are not used in the production of clinker , so tiles without glaze do not come in these colors.
- All shades of clinker can be divided into light, dark, yellow, “brick-like” . In addition to the shade, it is worth paying attention to the texture - the surface may be glazed; if there is no glaze, the surface can be smooth, rough, shiny or with additives. Tiles with texture are more expensive, but a wall with such a coating does not always look as impressive as one plate - it is worth taking this fact into account.
- Clinker tiles are made exclusively from natural clay - the mixture does not include polymer concrete, cement or other artificial additives.
- When purchasing clinker, you must choose a product from one batch . If you have to purchase a certain amount of finishing material, then most likely the shade will be different. To get an original masonry, you can buy several boxes of materials of different shades and mix them.
- Some manufacturers sell double plates , which must be broken into pieces along the seam when laying.
- Burnt clay can be drilled well with a diamond-coated drill, the plate can be split using a rail tile cutter or cut with a grinder, and it is better to buy expensive discs, since the clinker is very hard.
- Base clinker differs from ordinary clinker only in its larger size, and its presence in the glaze simplifies the care of the surface , which can be easily washed from any dirt.
- When choosing a material, it is worth estimating the weight of the coating - 1 sq.m. can weigh from 14 to 20 kg.
- The most common tile format is 240x71 mm, 240x65 mm is less common - all other sizes are delivered to order.
- The most expensive raw material is white clay - the price of products made from it is affected by the degree of purification of the raw materials, as well as the higher heat treatment temperature.
The texture of clinker tiles can be glazed or unglazed