Sometimes it is necessary to process a part through a powerful impact on it. For example, sawing an iron bar with a grinder. To do this, you need to first secure it tightly in one place for more efficient work. The best vices in 2022 can handle this task. Such devices are commonly used in many areas of life: jewelry, carpentry, metalworking and automobile workshops.
Any self-respecting owner has a quality vice in his garage or country house. If this is not the case, then you need to solve this problem as soon as possible and purchase a good model. Many people wonder which vice is best to choose, and what they should pay attention to. The answers can be found in this article.
Do-it-yourself workbench for the garage: how to make it correctly
A homemade workbench for the garage is a workbench for performing numerous plumbing operations, electromechanical and installation work. For convenient storage of tools and small parts, the design has drawers and shelves.
The article suggests getting acquainted with the types of workbenches and how to build a workbench for a garage.
Cast iron or steel?
| Material | Advantages | Flaws |
| Steel | First of all, steel is considered to be quite light in weight and at the same time quite durable material. Tools made from steel are quite easy to transport, again due to the lightness of the steel itself. In addition, steel is considered more adaptable to difficult conditions. And with a steel vice, small parts can be processed more accurately. | Steel is a material that is not very resistant to rust. In addition, this material does not like high humidity. It is also worth noting the high price of steel vices due to the ability to work with small parts, which cast iron vices do not have. |
| Cast iron | Firstly, cast iron has always stood out for its hardness and strength to the limit of the possible. Strong shocks and vibrations - cast iron does not care about all this. In addition, it is easier to process medium and large parts on a cast iron vice. Another advantage of the cast iron alloy is resistance to corrosion, or rather, immunity to it. | Huge dimensions and weight typical of cast iron. In addition, static loads have a bad effect on the cast iron itself. |
Each of the two materials has its own pros and cons
What types of workbenches are there?
Three types of workbenches are usually installed in the garage:
- For metal processing or metalworking.
- For woodworking or carpentry.
- Universal - for all types of work in the garage.
The products differ in the material used to make the countertops. For plumbing work, it is made of metal, otherwise machine oil spilled on wooden surfaces will leave oil marks.
In addition, the processing of metal products requires great effort and the use of fairly sharp tools, which can harm the wood.
Do-it-yourself carpentry workbenches for the garage are used for processing wooden parts; they can be made of less strength, which means their price will be lower. The cover for such models can be made of wood or covered with linoleum.
The best option for a car enthusiast is a do-it-yourself universal workbench for the garage. The advantage of such products is the different configuration of shelves and drawers, for storing all kinds of tools, for the work of a mechanic or carpenter.
Excellent appearance guarantees reliable surface coating with powder material, as shown in the photo, for a long time.
What to paint with?
Products for painting bench vices can be like this.
- Hammer enamel. This type of painting leaves behind an attractive appearance of the instrument. But it is worth considering that the paint easily chips under mechanical stress.
- Epoxy paint. Reliable type of painting. It has no cons. A minor drawback is the small color palette of the presented assortment.
- Sadolin paint. Car paint. Before work, the surface should be well primed.
- Set for painting bathtubs. White epoxy two-component paint is suitable for bench vices.
Those parts that are not planned to be painted can be sealed with tape. Some craftsmen advise using soapy newspaper. It also adheres well to the surface. There is no need to paint the threads and those places where some parts move or are inserted. With further use, turning the handle will be quite problematic.
As you can see, it is quite possible to restore a mechanic’s tool at home. Of course, you should not bring the device to a deplorable state. But some recommendations will help restore even those instruments that have not been used for a long time and are covered with a coating of rust.
It is also necessary to observe safety precautions when performing work. It is worth remembering that you should wear a mask and safety glasses when working with paints and sanding tools.
Restoration of a bench vice is presented in the video below.
How to make a metal workbench
Before you build a workbench in the garage, you need to purchase the following tool:
- A grinder with a wheel and a grinding disc.
- Apparatus for welding with electrodes.
- Working clothes and devices for protection against welding.
- Building level.
- Roulette.
- Screwdriver.
- Electric jigsaw for cutting plywood.
- Electric drill.
Materials for work:
- Equilateral profile corners 50x4, 6.4 meters long and 40x4, 6.75 meters long.
- Rectangular pipe 40x60, with a wall thickness of 2 millimeters, 24 meters long.
- Steel strip 40x4, 8 meters long.
- Steel sheet, two millimeters thick, dimensions 2.2x0.75 meters for the manufacture of table tops.
- Tabletop boards, 50 millimeters thick.
- Plywood sheets for drawers and table walls, 15 millimeters thick.
- Guides for table drawers.
- Screws.
- Self-tapping screws for metal.
- Anchor.
- Paint for metal and wood.
Tip: A workbench from such materials will be made in the following dimensions: table - length 220 centimeters, width -75 centimeters. It can accommodate two vices at the ends of the table, sandpaper and other tools.
The procedure for making a workbench with your own hands:
- The existing material is cut out.
To make the frame, a profile pipe is taken, for the stiffeners - a corner, from which the frame of the workbench is formed and the edging of the table top is made.
The guides for the side panels will be made from the steel strip. Brackets for fixing boxes and plywood are also made from it. Plywood is used for the boxes.
- Assembling and welding the frame for the workbench:
- the tabletop frame is welded from two pipes 2.2 meters long and two pipes 0.75 meters long;
- four side legs 0.9 meters long are welded along the edges of the workbench;
- jumpers are installed between them for structural rigidity;
- the structure for the drawers is assembled from pipes and welded to the tabletop;
- their frames are reinforced with stiffening ribs.
- Assembling the frame for the table top. To do this, take two corners of 2.2 meters and two of 0.75 meters and weld them with the shelves up. After 40 centimeters, stiffening ribs for the structure are welded;
- The frame for the device is laid on the pipes of the workbench frame and welded.
- The panel sheathing for the tool is assembled from one corner 2.2 meters long and four 0.95 meters long. Two of them are fixed on the sides and two in the middle of the structure. The tool mounting panel is welded to the table top.
- In order for the do-it-yourself workbench to have good stability, strips of metal are welded into the garage, which will serve as stiffeners. The video shows how to install them well.
- Boxes are made for homemade workbenches for the garage. To do this, blanks are cut from plywood and screwed together.
Tip: The number of boxes is selected according to the wishes of the owner of the product. They can be placed on both sides or with drawers on one side and open shelves on the other.
- The drawer guides are installed as shown in the photo.
- The boards are laid on the tabletop frame.
Tip: Boards should be 2.19 meters long and 245 millimeters wide. But if they are not there, the blanks are laid crosswise, 740 millimeters long. Before laying the boards, they should be treated with an antiseptic, which will protect the material from rotting.
- Homemade metal workbenches for the garage are painted. This will prevent corrosion from forming. Particular attention should be paid to welds. They need to be thoroughly cleaned with a sander.
- The top sheet of the tabletop is attached to the wooden boards with self-tapping screws.
- Boxes are installed.
- Plywood is attached to the side walls, a shield under the table, and shelves.
Main characteristics
When choosing fastening devices, you need to rely on the characteristics of a particular model and take into account the tasks that you plan to perform. The most significant parameters are considered:
- The size of the jaws must correspond to the dimensions of the workpiece. As a rule, the width is indicated in the name of the model itself - for example, bench vice 200 mm;
- Gripping range and depth - these parameters determine how much depth and width the device is able to cover the workpiece being processed;
- geometric dimensions and weight - these characteristics are of great importance in terms of ease of work;
- Strength and hardness of materials - the stronger the material, the better the quality of the tool;
- Availability of expanded functionality - for example, bench vices are equipped with a special mechanism that makes the workpiece processing process more comfortable and maneuverable. Thus, labor costs are reduced and time is freed up for completing other orders. Consequently, workshops can accept more orders, which leads to increased profits.
Bench and parallel bench vices (150 mm, 200 mm, 250 mm)
Today it is customary to distinguish between chair, parallel and manual modifications. The first option involves mounting on the edge of the table, and its main advantage is the possibility of quick installation and equally quick dismantling. If necessary, they can be quickly removed, and such models are easy to store. These tools are also available in various modifications - for example, bench vice 150 mm.
Parallel models are more common and consist of a pair of plates, one of which is fixed, and the second is moved by a screw and a threaded bushing. At the base of such devices there are special holes into which mounting screws are inserted for fixation on the workbench. Devices in this modification are the most in demand (especially parallel bench vices 200mm or 250mm) and are suitable for solving many problems related to the processing of long products.
A feature of manual models is the need to fix the clamp with your hands, which may not be very convenient when performing processing. Devices in this design are also available in different sizes, with the most popular modification being the 200 mm hand bench vice.
Stationary and rotary bench vices
Parallel models have an internal classification, which implies division into the following modifications:
- Rotating devices. The base rotates around its own axis and is fixed in a given position. Thus, processing is much easier. To avoid damage to the workpiece, special covers made of plastic, wood or soft metal are put on the plates. Bench vices are the most popular among consumers;
- Stationary devices. These devices are immovable and can only be locked in one position during installation. Like rotary analogues, these devices are available in different designs, and the 200 mm bench vice is in greatest demand.
How to install a vice on a bench
A vice is a necessary attribute of a metalworking bench.
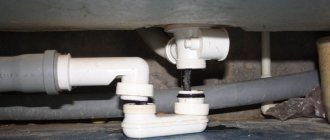
Tip: Due to their heavy weight, they should not be attached directly to the tabletop. Between the metal on the table and the vice you need to put a metal spacer one millimeter thick.
Holes for anchor bolts are drilled in the gasket. The same holes are drilled in the tabletop. The structure is fixed with anchor bolts.
What are the safety requirements for the workbench:
- The structure must be stable, not sway, and not move when little force is applied to it.
- The organization of the workplace should be such that nothing interferes with work.
- All corners and protruding elements must be rounded without cutting edges.
- After finishing work at the workbench, the workplace is cleared of chips, oil and other materials.
- A properly made workbench can withstand a load of up to 200 kilograms.
Using a high-quality workbench in your garage is the key to convenient work for its owner.
What to paint with?
Products for painting bench vices can be like this.
- Hammer enamel. This type of painting leaves behind an attractive appearance of the instrument. But it is worth considering that the paint easily chips under mechanical stress.
- Epoxy paint. Reliable type of painting. It has no cons. A minor drawback is the small color palette of the presented assortment.
- Sadolin paint. Car paint. Before work, the surface should be well primed.
- Set for painting bathtubs. White epoxy two-component paint is suitable for bench vices.
Those parts that are not planned to be painted can be sealed with tape. Some craftsmen advise using soapy newspaper . It also adheres well to the surface. There is no need to paint the threads and those places where some parts move or are inserted. With further use, turning the handle will be quite problematic.
As you can see, it is quite possible to restore a mechanic’s tool at home. Of course, you should not bring the device to a deplorable state. But some recommendations will help restore even those instruments that have not been used for a long time and are covered with a coating of rust.
In case of obvious damage, it is recommended to completely disassemble the product and make a complete repair.
Also, when performing work, it is necessary to observe safety precautions . It is worth remembering that you should wear a mask and safety glasses when working with paints and sanding tools.
Restoration of a bench vice is presented in the video below.
Arrangement of the front and rear vices of the workbench.
Ensuring labor safety.
Proper organization of the workplace as a factor in increasing labor productivity and product quality.
Proper organization of the workplace promotes convenience at work, reduces worker fatigue, increases productivity and satisfaction from the work performed. The concept of “workplace organization” includes the availability of a set of equipment, tools and accessories; convenient arrangement of the material needed for work; storage place for workpieces and working tools; normal lighting with natural and artificial light; sanitary and hygienic working conditions.
An important stage in carpentry and carpentry work is the organization of the workplace, designed to increase labor productivity and product quality while observing safety regulations.
The nature of the operation performed determines the carpenter's workplace, however, during manual processing, the main equipment is a carpenter's workbench.
How to make a simple carpenter's vice for a workbench
A workbench without a vice is nothing more than just a table. A carpenter's vice is a necessary tool for every craftsman. They provide reliable fixation of wooden and metal parts during processing. The design is based on a Moxon vice with two screws - a reliable, budget-friendly and easy-to-manufacture option. In addition, a handmade tool is twice as pleasant to use as a purchased one. Therefore, catch the instructions on how to make a carpenter's vice from wood with your own hands.
You will need Necessary materials:
- 2 pieces of plywood 10 mm thick (the sponge on the workbench is 480 x 90 mm, the second no more than 250 x 80 for the handles),
- Beam 45x90 mm, length 480 mm;
- Drills of various diameters - 1, 4, 8, 10, 12 mm;
- Studs M10x250 – 2 pcs. (I would recommend using all M12 fasteners, but I couldn’t find any driving nuts of that diameter);
- Wood screws;
- Drive nuts M10 – 4 pcs.;
- Ring crowns for wood of various diameters;
- Forstner drill (for lack of availability, I used a 22 point drill bit);
- Wood glue;
- A short piece of steel wire with a diameter of 1 mm.
- Screwdriver;
- Clamp – 2 pcs.;
- Hammer;
- Square;
- Pencil;
- Chisel (not needed if you use a Forstner drill);
- Wire cutters.
Step-by-step instructions for making a carpenter's vice: 1. Measure 10 cm on both sides of the plywood, center and mark the points of future holes for screws.
2. For convenience, we secure the plywood and timber together with a clamp. 3. Drill through the marked points a hole with a diameter of 12 mm. Use a drill depending on the diameter of your studs plus 2 mm. 4. Using a drill, we make 3-4 mm holes for self-tapping screws for further fastening the future fixed part of the vice to the workbench. We place the holes 2 at the edges and 2 in the middle, making a small indent from the edges. 5. To ensure that the heads of the screws are hidden using a metal drill with a diameter of 12 mm, we make small indentations in the holes made. 6. Attach the plywood to the workbench using wood screws. The stationary vise jaw is ready. 7. Next, using the holes for the studs (12 mm) in the plywood as a guide, we drill the workbench itself. 8. Take 2 M10 driving nuts (they are also called mortise nuts) and drive them into the workbench from the reverse side. 9. Take a small piece of plywood, mark and center the diameters of the future handles on it using wood bits. Select the diameter of the handles to suit your hand - I chose 67 and 54 mm. 10. It is necessary to mark 2 large washers and 2 smaller ones with a diameter of 1.5-2 cm. 11. Drill a hole in the middle of each marked diameter, the diameter of which will coincide with the diameter of the guide drill in the crowns - in my case it is 8 mm. You can skip this step and immediately drill the hole with a standard central drill bit for ring bits. 12. Using crowns, cut out the washers and sand their edges with sandpaper. 13. Using a drill equal to the outer diameter of the cage nut (12 vv), we expand the holes in the small washers. 14. In the large washers, we drill small recesses with a 22 Forstner drill so that the caps of the driving nuts can be inserted there without gaps. In the absence of it, I had to make holes with a feather drill and work a little with a chisel. 15. We insert the mortise nuts and drive them into small washers. 16. Screw the studs flush with the nut head. 17. Now you need to lock the threaded connection. Attach both structures with a clamp to a convenient surface. I used a timber for future vices. 18. Using a 1mm metal drill, make holes in the caps of the cage nuts along the thread boundary. The drilling depth is no more than 1 cm. 19. Bite off pieces of steel wire of the same length and insert them into the drilled holes to secure the structure. 20. Lubricate the sides of the washers with wood glue and tightly fasten them together coaxially, securing them with a clamp until completely dry. 21. Using a 3-4 mm drill, make two holes on the inside of the handles on each side of the stud with a depth of no more than 10 mm. 22. Make hidden chamfers for the screw heads. 23. For reliability, secure the parts of the handle with wood screws. 24. Insert the pins into the holes in the large block and screw them to the main part on the workbench. 25. The vice is ready. Watch the video For detailed instructions on how to make a vice for a workbench with your own hands, watch the video.
Fly tying tool
Most anglers prefer homemade fly tying vices to commercial ones. The device itself has a fairly simple design, which allows you to make them in a short time and without special tools at home. The most difficult step in making a vice is the jaws themselves. They are made from rectangular steel bars. Two holes are drilled in the finished jaws for fastening to the yew and one for the adjusting screw. The holes need to be threaded (M6) with a tap.
Next, you need to tighten both jaws with a screw. After tightening, disassemble the jaws and install the clamping screw, and adjust the opening angle to suit you. You need to make a small groove on the jaws for the hook.
The yew support can be made from a T-shaped or L-shaped steel rod. Sponges are welded to the end of one of the workpieces. The rod must be welded to the support, and if you need to make the support adjustable, then a piece of edged pipe is welded to the workpiece, the diameter of which is equal to the diameter of the workpiece. It is recommended to make the length of the support about 20-50 cm high for more comfortable work.
If the vice has become unusable and there is no way to repair it, then you should not immediately buy new ones, but try to make it yourself. Such a tool will serve for quite a long time and will cost several times less.
Vise for a workbench from an old clamp
Antagonizer from instructables.com shared his experience building a bench vise. Further from his words.
When the vise on my workbench broke, I decided to replace it with a new one. But in the store I was unpleasantly surprised by their cost. Depending on the manufacturer, the price runs into hundreds of dollars.
Therefore, I decided to make a vice myself, using only hand tools and using only available materials. I'm showing you how to create a fully functional woodworking vice.
I'm disassembling the clamp
I begin to disassemble the clamp:
- I cut off the locking (clamping) plate from the screw.
- I unscrew the screw.
- I cut off the threaded part at the end of the clamp just before the bend.
I make wooden parts
- First, I cut a piece of board measuring 5.08 x 15.24 cm, which exactly matches the height of the table surface as a mounting base.
The vise itself will be attached to the table leg, and its length will provide more reinforcement.
- I also needed a second piece of 5.08 x 15.24 cm, and a clamping board 60 cm long.
- Next, I mark and drill a hole for installing a threaded bushing and a hole for the screw itself
The higher the bushing is to the edge of the vise, the greater the clamping force, and the lower it is, the greater the range.
- I insert a nut into the hole for the screw and drive it in tightly. When tightening the vice, the nut must be securely fastened.
Additional selection tips
When purchasing a vice, it is very important to pay attention to its key characteristics:
- Area and width of the jaws – the size of the area determines the reliability of the fixation. In general, the larger the better, as long as the dimensions of the tool match its tasks.
- Stroke length – this parameter determines the dimensions of the parts being processed. To increase versatility, it is advisable to purchase models with the longest possible stroke length.
However, as this characteristic increases, the weight and dimensions of the vice increase, which should also be taken into account.
Creating a hinge joint
- I cut two blocks from the base of the pressure board, each 3.8 cm wide and 8.9 cm long.
- I drilled a horizontal hole through the remaining part, 2.54 cm from the end.
- Adding summary blocks. I shorten them to 10 cm, then drill a hole, retreating 5 cm from the top edge.
- I cut grooves to the size of the blocks in the workbench racks.
- I lubricate the parts with glue and connect them.
- I install the bolt, but do not tighten it, checking that the entire mechanism moves freely in the grooves of the blocks.
Assembling the clamp
To prevent the screw from clinging to the workbench, I make a spacer for it.
- To do this, I used a hole saw and cut a 5 cm disc from a 5x10 cm board.
- Then I drilled a center hole equal to the diameter of my screw.
- I lubricated the hole with oil and screwed in the bolt.
In the last photo you can see that I have 2 spacers installed. While using the vice, I realized that there was not enough room for my hands, and I substituted another spacer.
Once the clamp was assembled, I needed to attach it to the workbench leg. To do this, I used 80 mm screws, with which I screwed the vice at 150 mm intervals through the mounting base directly to the workbench leg.
Recovery
After the repair has been completed, the vice must be restored. In order for the tool to take on the proper appearance, it needs to be lubricated and painted. Before lubricating the vice, the surface must be degreased. To do this, use acetone or any other solvent. For lubrication, ordinary lubricating oil is used. You can also use silicone grease or litol with grease. Since the device does not have components that operate under heavy loads, almost any product is suitable for lubrication.
To lubricate the tool, do the following:
- remove the movable legs;
- turn the handle, extend the foot and remove it;
- Clean the screw and the hole in the foot with a brush and degrease again;
- then apply lubricant to the screw in a moderate amount.
Next, you should assemble the vice and turn the handle. If the mechanism runs smoothly, then nothing else needs to be done. If the yews move slowly, then you can additionally lubricate the sliding legs with oil. After lubrication, the bench vise must be left for some time.
I make wedges
I made the wedges from a hardwood pin with a diameter of 25 mm:
- I narrowed the lower part, 38 mm long, to a diameter of 15 mm, then sanded it.
- I drilled several holes with a diameter of 15 mm directly into the table at intervals of 635 mm at a distance of 100 mm from each other.
Final result
The vice is ready. Thanks to this design, I can clamp and process fairly large workpieces. And the presence of wedges allows you to fix entire pieces of untreated wood.
Carpenter's vice for a workbench: do it yourself
It is difficult to imagine the workshop of a home craftsman who often works with wood products without such a useful device as a carpenter's vice. Using this clamping device, which is easy to make with your own hands, you can perform various technological operations with wooden parts.
The design of a carpenter's vice is not so complicated as to give up the idea of making one yourself
How a vice works for carpentry work
The design of a vice for carpentry work consists of the following elements:
- a support, which is also a stationary clamping jaw;
- movable clamping jaw;
- two metal guides along which the movable jaw moves;
- a lead screw that ensures movement of the movable jaw;
- a crank through which rotation is imparted to the lead screw.
Main parts of a vice for a carpenter's workbench
The fixed support of the carpenter's vice is securely fixed to the surface of the workbench, for which long screws or bolted fasteners are used. Many serial models provide the possibility of using replaceable pads on movable and fixed jaws. Such overlays, which increase the versatility of carpentry vices, can be made of metal and polymer materials.
Since bench vies are often used for processing large wooden products, the design of many models includes a spring mechanism that facilitates the manipulations. Such a mechanism, which can also be installed on a homemade carpentry vice, provides preliminary clamping of the part (it is finally fixed using a lead screw). If this mechanism is absent in the design of a bench vise, then the carpenter will have to hold the wooden workpiece suspended for a long time before the movable clamping jaw is brought to it.
Homemade jaw clamp
Foundry qualities
Most people have not seen cast iron or steel in a molten state, which is understandable since cast iron melts at about 2,300°F and steel at 2,600°F, and both are poured into molds at even higher temperatures. People who work with liquid iron and steel often note that they vary greatly in the degree of fluidity and shrinkage.
Cast iron is relatively easy to cast, pours easily and does not shrink as much as steel. This means it easily fills difficult mold voids and requires less molten material. This fluidity makes cast iron an ideal material for architectural or decorative metalwork, such as fencing and outdoor furniture.
Pouring became much more difficult. It is less fluid than molten cast iron and more reactive to mold materials. Steel shrinks more when it cools, which means more molten material must be poured into it - usually into a reserve reservoir called a riser, from which the casting is drawn as it cools.
However, castings usually cool unevenly. The outer areas and thinner parts will cool and shrink much faster than the inner areas and bulkier parts, often creating internal tension or stress that can only be relieved through heat treatment. Steel is much more susceptible than cast iron to shrinkage stresses, and in some situations these stresses can lead to significant internal and/or external voids and possible fractures.
For these reasons, cast steel requires more attention and control throughout the casting process, making production more resource-intensive.