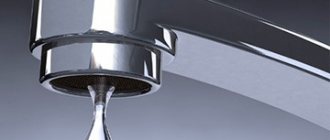
Owners of air conditioners may encounter an unpleasant problem - from the air conditioner water flowed or began to drip.
Drops of water falling on furniture and the floor, or water running down the wall, are unpleasant, to say the least. What to do in such a situation? Let's figure it out.
In most cases, the problem lies in the drainage system and its performance.
A less common cause of “leakage” is freezing of the indoor unit, due to a small amount of refrigerant, simply
a freon leak.
First things first.
Where does water come from in an air conditioner?
When the air conditioner operates for cooling, water is formed in the indoor unit - condensation. Condensation is moisture in the air that condenses (settles) on the surface of the air conditioner heat exchanger, the temperature of which is below the dew point.
The dew point is the temperature of the air at which the vapor (moisture) contained in it reaches a state of saturation and begins to condense into dew.
If the air conditioner is working properly, and most importantly, the installation is done efficiently, then the condensate is safely removed to the outside of the room. This happens by gravity (the drainage is laid with a slope), or by force (when using pumps, pumps, etc.)
Do-it-yourself troubleshooting
Fortunately, you can deal with a number of malfunctions yourself, without resorting to the help of a repairman.
Incorrect settings
If the equipment does not cool the room well, this may be due to two reasons:
- The equipment settings are set to high temperature. In order for the room to quickly fill with coolness, you should choose the lowest one and then set it to a comfortable one.
- The fan option is selected in the parameters. This mode is responsible for the circulation of air masses and does not affect its temperature in any way. In this situation, you need to set the cooling mode.
Expert opinion Dmitry Konstantinovich Levin
When the split system heats the air, it is worth checking whether the heating option is turned on. If yes, you should switch it to cooling mode. This is only relevant for equipment that has a heating function.
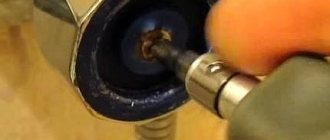
Clogged indoor unit filters
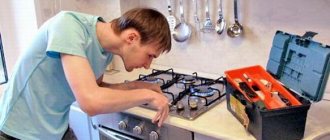
Step-by-step steps for cleaning indoor unit filters.
Clogged indoor unit filters are characterized by a low degree of air mass cooling. You may also notice how the device begins to leak or freeze. This is due to the fact that dust, wool and hair tend to accumulate on the heat exchanger plates, as a result of which the radiator does not release the cold well enough.
Solution: clean the filters. To do this, you need to remove the unit cover, remove the filters and rinse them under running cold water. You can read the factory instructions on how to properly remove the cover.
It is important to note that filters should not be cleaned with hot water: this can lead to their deformation.
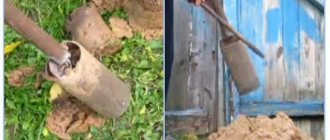
The radiator of the external unit is dirty
In addition to poor cooling, contamination of the radiator of the external unit is characterized by periodic stopping of the compressor. This malfunction is caused by external factors: dust and poplar fluff slow down the rotation of the fan. Due to this, the heat exchange between the condenser and the street air decreases, and along with it, the ability of the split system to reduce the air temperature at home or in the office decreases.
Solution: clean the external unit. A steam generator is suitable for this. However, if you don’t have such a technique, it’s okay, you can use a regular brush.
If the owner of the device lives in a multi-story building, and the external unit is located in a hard-to-reach place, there is no need to risk your life by standing on the indentations of windows and roofs. It is better to use the services of an industrial climber.
Low or unstable power supply voltage
If the external unit of the device constantly turns on and off at intervals of 2-3 minutes, this means that the voltage in the power supply is unstable or too low. As a result, overheating of the rotor winding occurs and subsequent shutdown of the motor by the thermal relay.
Solution: install a voltage control relay; in addition to it, you can install an electrical stabilizer.
Water dripping from a newly installed air conditioner.
If the problem started immediately after installation (several days - a week - a month) - the problem most likely lies in poor-quality installation.
- The slope of the drainage pipeline is not maintained.
The slope is set in a ratio of at least 1cm for every 100cm of pipeline.
At lower values, water can collect, and in the absence of a slope, it can even stagnate in the pipeline, which will lead to overflow of the drainage bath of the indoor unit and water flow along the wall. Solution:
lay the drainage pipeline in compliance with the required slope. - The drain hose has come loose.
The drainage pipeline has a joint with the bath, which can simply jump off/disconnect.
In this case, water simply flows out of the air conditioner into the room. Solution:
this problem can be quickly resolved by restoring the integrity of the drainage system. - If installed “barbarously”, the drainage hose may be damaged or broken. Solution:
eliminating the damage/crack. It would be better to replace the entire drain hose. - Ingress of large debris.
If, during installation, large construction debris (packaging elements, electrical tape, etc.) gets into the drainage system, this leads to a decrease or complete blocking of water flow.
Solution:
Remove debris and pollution from the drain. - Drainage pump malfunction.
If it is impossible to drain condensate naturally, drainage pumps are used.
An example would be situations where air conditioners are located in basements. Solution:
Make sure the power supply to the sump pump is connected correctly. Check the correct operation of the water level sensor (float). In inexpensive pump models, sensors tend to stick. - Polyurethane foam blocks the flow of water.
If polyurethane foam is used to seal/insulate a hole in the wall, it is important to maintain the required volume of foam, which has the ability to greatly increase in volume.
Often, during expansion, polyurethane foam simply blocks the drainage pipeline. Solution:
Remove excess foam to allow water flow.
Upon completion of installation, it is important to make sure that the system is sealed and water flows out freely. Usually this is always checked by installers by pouring 1-2 liters of water through the air conditioner.
If your air conditioner leaks immediately or in a short time after installation, it’s due to installation flaws. You must contact the installer and report the problem. If the installation organization respects its clients and monitors its reputation, the time frame for eliminating “jambs” is 1-2 business days.
Results
First of all, water cannot drip from the outdoor unit. The drainage system is not connected to the external unit. And it's normal if you see water dripping from the thin corrugated tube. If the outdoor unit starts dripping on its own, most likely it just froze and then began to thaw.
But if the indoor unit is dripping, then this is a reason to call a technician. The specialist will conduct diagnostics and find out what is the cause of the leak. It will also select the best option to solve this problem. However, it is necessary to approach the issue of choosing a specialist wisely. Contact a large service center that values its reputation and provides a guarantee for its services.
Still have questions? Ask them in the comments below. If you have experience solving this problem, please share it. Give some useful tips for masters and users. Your recommendations will be useful to many. Good luck!
Source
The air conditioner leaked after several years of operation.
If an air conditioner that has worked faithfully for several years suddenly leaks, the reason lies in the lack or improper maintenance.
- The drain pipe is clogged.
Dust, insects, etc. may accumulate in the hose.
which will lead to a decrease or blockage of water flow. There have been cases where a beetle crawled into the tube while searching for water during a hot period, which subsequently got stuck and blocked the entire drainage channel. Solution:
clean the drainage channel. - Freon leak.
A fairly volatile refrigerant circulates through the freon line - freon, which only needs a microcrack to escape from the refrigeration circuit.
The normalized refrigerant leakage is 6-8% per year, even if the system is sealed. When the amount of freon in the system decreases, the evaporator of the indoor unit freezes. A kind of frost forms, in severe cases a snow coat forms. In this case, the condensate does not flow into the tray, but drips directly onto the blinds, from them into the room. When the air conditioner is running, it often looks like "spitting" water. Water cannot drain into the pan; a drop under its own weight breaks off from the fin of the heat exchanger, falls down, hits the fan of the indoor unit, which throws it out. Solution:
check the air conditioner for freon leaks, refill the air conditioner if necessary. This procedure requires certain knowledge, skills, and tools. Entrust this work to professionals. - Freezing of water in the drainage pipeline.
If you use an air conditioner for cooling, at negative outside temperatures, the water may simply freeze.
An ice plug will form, water will fill the entire drainage and tray, and then flow out of the block. Solution:
a special heating wire is installed in the drainage hose, which prevents ice from forming. It is not included in the standard installation; it must be purchased and installed for an additional fee.
Air conditioner repair prices - why cheap installation is not profitable
Often, the cause of breakdowns due to which water flows inside is cheap and at the same time poor installation. Thanks to it, the causes of malfunctions can be the following:
- The hole made for the tube is not made at an angle, as is customary, but straight, which is why condensation will soon begin to flow inside.
- If low-quality materials were used during the installation process, the tube may break. Also, in a hurry, the master himself can break it.
- Also, poor rolling can lead to a disastrous result, due to which freon leaks, and then, as a result, the heat exchanger freezes. As a result, when the split system is turned on, melted liquid flows and ice falls out.
- The freon line was poorly insulated. This is not only a condensate leak, but also the need for an urgent replacement of freon.
How to clean the air conditioner drain yourself?
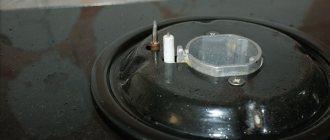
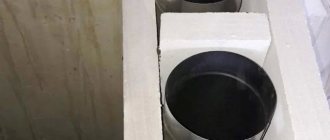
In the indoor unit of the air conditioner, the drainage system, consisting of a pan and a condensate drain pipe, is the most humid place, which also collects all the dust and dirt that gets inside the device.
On the Internet you can find many recommendations on how to clean the air conditioner drain pipe using a wire or cable. This method will quickly get rid of the plug, but the achieved result will be short-lived, and very soon your air conditioner will start leaking again. To properly clean the drainage, you must:
- Turn off the power to the air conditioner by unplugging the power cord from the outlet;
- remove the cover of the indoor unit;
- remove the coarse filters, rinse them well in water and a non-aggressive cleaning agent, such as soap solution;
- removing the main plastic from the indoor unit usually requires unscrewing several screws;
- remove the pan located under the fan turbine, first disconnecting the drain pipe and unscrewing the screws holding it. In some air conditioner models, it is quite difficult to disconnect the pan and to do this, you will have to study the instructions or find the answer on the Internet;
- thoroughly rinse the pan and clean the condensate drain hole from dirt;
- blow out the drainage pipe with a vacuum cleaner; if the blockage is severe, remove it mechanically;
- disinfect the drainage system, pan and filters. This can be done with chlorhexidine, which is sold in every pharmacy;
- Clean the evaporator and fan turbine from dust with a soft brush and vacuum cleaner.
After cleaning the drainage system, reassemble the air conditioner.
Where to buy a replacement
While repair work is being carried out, a portable air conditioner can be a temporary replacement for a stationary product. It can also come in handy at the dacha, or, for example, when traveling somewhere to visit. The best option in terms of price-quality ratio is to purchase from the AliExpress online store. Mandatory long waits for parcels from China are a thing of the past, because now many goods are in intermediate warehouses in destination countries: for example, when ordering, you can select the “Delivery from the Russian Federation” option:
| Tabletop mini air conditioner 1100 W for home, USB charging | Mini humidifier, air conditioner | Desk Fan, Humidifier, Purifier |
| Portable air conditioner, humidifier | Air Conditioner, Humidifier, Portable Purifier for Home | Air conditioner 1100W with timer, cooling/heating, remote control |
Air conditioner maintenance.
An air conditioner is a household appliance that requires special attention - cleaning filters, heat exchangers, and refilling if necessary.
When we buy a vacuum cleaner, we know that effective work is impossible without constant cleaning. The situation is the same with air conditioning, albeit to a lesser extent. We often forget about this or neglect the rules of operation. And we remember this only in the hot heat, when the air conditioner “for some reason” stopped working.
The air conditioner requires periodic cleaning because when it operates, it pushes through itself huge volumes of air that is far from being the cleanest. Indoor air contains dust, hairs, and pet hair. The outside air often contains poplar fluff, which quickly clogs the heat exchanger of the outdoor unit.
Fan
Some errors are indicated by indicators on the device's electronic display. Most often, during such breakdowns, the system turns on for a few seconds, and then immediately turns off.
The following are the main reasons for what is happening:
- Faulty capacitor in the electric motor.
- Breakdowns in the motor.
- Broken fan blades.
In any situation, the problem can be easily solved by replacing the failed part.
The impeller changes in the following sequence:
- Removing the front protective grille.
- Unscrewing the nut that secures the fan.
- The electric motor pulley is released from the impeller.
- Using a new impeller on a pulley.
- The reverse procedure is used when assembling parts.
When replacing a fan motor, it also requires a few simple steps:
- De-energize the system, remove the front protective grille.
- Unscrewing and removing the nut securing the entire fan.
- Disconnect all electrical connections.
- Unscrewing the motor itself, completely disconnecting it.
- Putting on a new spare part.
- Assembling and securing parts using reverse order.
A certain procedure remains the same when replacing the starting capacitor:
- De-energizing the system.
- Disassembly of the outdoor unit.
- Unscrewing the fixing bracket.
- Disconnect all wires.
- Replace with a new starting capacitor.
- In reverse order, the parts are assembled and secured.
The fan repair procedure will require about an hour of free time. The urgency and scope of repairs, the characteristics of the fan itself determine the total cost of the work.
Not spring drops
It happens that water drips from the air conditioner indoors due to the large difference between the day and night readings of the thermometer. When it falls “overboard,” the condensate turns into ice, and in the morning it melts and flows down anywhere. If this is the reason, the sector where the heat exchanger is located needs to be insulated. Glass wool is quite suitable for these purposes. After such work, there will be no more leaks.
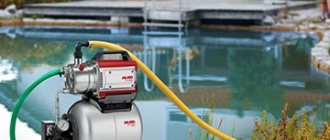
For exclusive owners
Sometimes water is drained using a special pump. This is usually done when it is not possible to lay drainage to the street. For example, if the room in which the air conditioner is installed is located below ground level - in the basement.
In this case, a small pump is placed on the drainage system, which pumps water out of it from time to time. Typical pump problems may include:
- The float chamber is clogged;
- The power contacts have come loose or oxidized;
- There is no contact between the sensor and the pump;
- The air vent tube is pinched, flown off or clogged;
- The pump itself burned out.
To find a solution to the problem, you need to check all the above points.
Broken or broken connections
There is usually a pipe between the drain hole of the tray and the drainage tube. Sometimes it can crack, break off or fly off the tubes. This is a flexible hose that is held on with clamps or latches.
Open the air conditioner cover and look on the right and left sides (depending on the installation option) at the condition of the pipe. If the problem is in it and it is from it that water flows, it needs to be changed.
Solution
Don't look for an original pipe - you'll just waste your money. At any plumbing store or market, buy one of the same diameter and secure it with ordinary plastic zip ties.
If the old pipe was secured with clamps, wrap them or the pipe itself with fum tape. Then put on a new one.
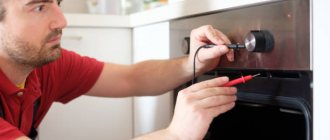
Automatic diagnostics
Factory defects, poor installation and improper operation are the main reasons why the internal parts of the air conditioner fail prematurely. There is practically nothing that can be done about a manufacturing defect; in the other two cases there is a chance to improve.
Inscriptions on the display and blinking lights will help you find out in time that certain problems have arisen.
In an air conditioner, they usually talk about breakdowns of the following nature:
- Broken thermistor, resulting in no additional temperature control.
- Problems with the directional valve.
- Problems inside the fan.
- Voltage surges at the outdoor unit.
- Exceeded parameters related to energy consumption.
- Problems with the cable or circuitry due to communication.
- Lack of overvoltage protection.
- The work goes on both heat and cold at the same time.
- Malfunction in the thermistor of the external part.
- Faulty internal thermistor.
The instructions provide a precise definition for those who are interested in deciphering the appearing codes and designations. This allows you to quickly determine what exactly happened.
But not every code has a decryption for users. Most of the information is handled by technicians belonging to a particular service center.
Compressor and clutch problems
If the radiator on the external unit is clogged with dirt, this part of the structure may overheat. Heat removal becomes more difficult and the load on the device increases. The pressure level in the lines requires a separate check. Excess refrigerant must be released if the reading is higher than normal.
Never rule out the possibility that the fan on the external unit has become faulty. Clogged capillary tubes are another common cause of later problems. Replacing one of the tubes often solves the problem.
There are other signs that indicate breakdowns in this part:
- Compressor failure to start when .
- Presence of oil leaks on the compressor.
- Compressor drive belt creaking.
- Extraneous noise.
- Decreased performance.
Complete compressor replacement and repair are complex operations, so it is recommended to immediately contact specialists.
But noise can indicate both problems in the compressor and malfunctions in the drive. The pulley bearing is most likely the source if the noise is heard even when the device is turned off.
If the compressor refuses to start, they also look closely at several parts of the mechanism:
- Clutch.
- Relay.
- Fuse.
A blown fuse is the easiest to deal with; in case of breakdowns, it is simply replaced with a new one. The electromagnetic clutch is studied next if the previous steps did not produce any result.
As for the compressor itself, there are several reasons for its breakdown:
- Reduced refrigerant level.
- System clogged.
- Complete blockage.
Repairing and replacing a compressor is quite an expensive undertaking, so it is recommended to treat the part with as much care as possible during operation.
When the device turns on and turns off immediately, the reason most likely lies in the sensors - evaporation or temperature. Data from temperature sensors is associated with the operation of the control board. If the system is faulty, there is no information. And the device believes that the current operating mode does not need adjustment for this indicator.
Compressor overheating and shutdown often occur due to fan malfunctions. This usually happens if the rotation speed of the device is less than certain specified parameters.
Dirt and dust may appear in some other parts:
- Dryer filter.
- External radiator.
- Capillary tubes.
In such situations, the compressor stops turning on and working normally.