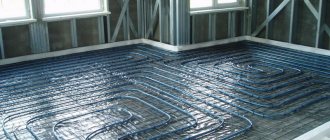
In the electric heating of the IPO structure and mats, there are already fixed steps of the heating elements, which cannot be said about water heating.
Therefore, the number of pipes in the calculation depends on the selected distance between them. We will consider below how to choose the distance between underfloor heating pipes, what are the main parameters and how to calculate everything correctly.
How to determine the area of a room
To do this, use the simplest formula, which is studied in elementary school.
S=a*b , where:
a is the length of the room;
b is its width.
That is, you need to multiply the width by the length.
We recommend excluding the area where you plan to place large furniture. It is completely impractical to heat the floor under the furniture on which the kitchen wall or wardrobe will stand. In addition, reducing the heating area will reduce the cost of purchasing underfloor heating pipes.
A competent approach to insulating a balcony: a calculator for calculating the thickness of the insulator
Reading time: 1 minute No time?
It just so happens in our country that our winters are frosty, autumns are rainy and windy, and even in summer there is nowhere to escape from the ubiquitous drafts. The dream of every owner who has a balcony or loggia is to create a real oasis or recreation area on this, at first glance, unsightly territory. The only question is how to correctly and accurately calculate the consumption of materials in order to plan expenses and not overpay. Especially for our readers, the editors of HouseChief.ru have developed a convenient and visual calculator that will help home craftsmen without special training accurately calculate the required thickness of insulation for a balcony or loggia.
A warm balcony is most often a multi-layer structure that needs to be calculated correctly
Read in the article
How view affects distance
The pitch of water heated floor pipes is also affected by the material, since each has its own thermal conductivity.
The maximum value is for corrugated stainless steel and copper pipes. In third place is metal-plastic, followed by polyethylene and polypropylene.
It turns out that polypropylene has the lowest thermal conductivity. Therefore, it is recommended to use it only in extreme cases.
Logically, it turns out that the higher the heat transfer coefficient, the wider the step can be between laying pipes. And the smaller, the closer the pipes must be laid to each other. Same thing with diameter. If it is large, then we lay the pipes wider, if it is small, then it is denser.
To determine the step based on the coolant temperature, you can look at the table:
Advantages of the system
The advantage of a water-heated floor circuit is its durability when installed correctly.
When arranging a residential building, it is important to pay attention to heating. A comfortable and economical way is to create a heated floor. It allows you to save up to 30% of heat at a ceiling height of 2.5 m and about 50% at a height of more than 3.5 meters. A water heated floor is a complex design, the creation of which must take into account many factors.
The advantages include:
- Heating the entire area of the room. For this, the most comfortable method is used - the greatest heat at the bottom and lower temperatures at head level.
- Lack of strong convection. The heat does not rise to the ceiling level, so there are no unnecessary costs or losses. This also leads to savings.
- No contamination of the system and its hygiene. Dust quickly accumulates on radiators, which can interfere with the operation of the equipment. A water floor accumulates less dirt and is easier to remove.
- Warm floors take up minimal space. Providing maximum heat will not be hampered by furniture and partitions.
- Safety. The design does not harm the environment and human health.
- System availability. All the necessary materials can be found in any hardware store for different budgets.
- Strength. Subject to installation conditions and proper use, the floor will last for decades.
- Self-regulation of the system. It turns on and off when preset temperatures are reached. This also leads to significant savings and no waste of thermal energy.
Comfortable heating can be created only after careful calculations of the heated floor and communications that ensure the movement of the coolant.
How to calculate pipe length
There is a simple formula that helps determine the required length: L = (S / N) * 1.1 , where
S is the total area on which it is planned to lay the water floor. Measured in square meters.
N is the laying step distance.
1.1 - additional pipe reserve for turns.
Also indicate where your manifold will be located and what additional pipe distance is needed to it. And multiply by 2, since you need a reserve of both supply and return.
As an example, let's look at a simple problem with which we will determine the required length of pipe for a room.
Given: 15 m2 area of the room where the water floor will be installed. The distance from the warm floor to the collector is another 3 m. And the pitch between the pipes is 20 cm (it should be calculated in meters, like other parameters, it turns out to be 0.2 m).
We solve: (15/0.2)*1.1+(3*2)=88.5 m. This is exactly the length of the pipe we need for work.
How to make the system work more efficiently
To increase the efficiency of such a heating system, it is worth considering several important aspects:
- Using water flows from the return circuit as an additional source of thermal energy will help reduce the load on the boiler.
- At the design stage, a detailed plan for the passage of the pipeline must be drawn up, indicating the pitch and marking places where floor heating is not required (under large pieces of furniture, household appliances, etc.).
- The total length of one circuit must not exceed the threshold value. This rule will reduce heat loss to a minimum. So, for pipes with a cross-section of 20 mm, the length of the route should be no more than 120 meters, for 16 mm - 100 meters.
- One circuit can effectively heat a room of about 15 sq.m. If the area of the room is larger, it is worth considering the installation of more circuits, and it is advisable to make their length approximately the same.
Note! To ensure the reliability of the heated floor, it is recommended to use only whole pieces of pipe when laying.
Calculate the maximum length of one contour
If we consider heated floors, then they encounter the effect of a locked loop. When coolant circulation is impossible at any pump power. This effect occurs with a pressure loss of 20 kPa (0.2 bar).
It is quite problematic to calculate on your own using formulas, so it is better to use a number of recommendations that have already been developed by experts.
If you have a pipe with a diameter of 16 mm made of metal-plastic or polyethylene, then the loops need to be made no more than 100 m, and to further protect yourself, it is better to increase it to 80 m.
With a diameter of 18 mm, the maximum is taken to be 120 m, and better not more than 100.
With a diameter of 20 mm, the maximum is 120-125 m. Ideally, it should not go beyond 100.
Installation of water heated floors in the house
The coolant in the floor is mounted in the form of a single or double snake or spiral. The total length of the pipe depends on the choice of circuit location. The ideal option is coils of the same size. However, in practice, creating uniform loops is difficult and impractical.
When the flooring is done throughout the house, the parameters of the premises are taken into account. In a bathroom, bathroom, hallway, which occupy a smaller area compared to the living room, bedroom or other rooms, it is difficult to create long coils. They do not require many pipes to heat them. Their length can be limited to several meters.
Some prudent owners bypass these rooms when installing a water circuit. This saves materials, labor and time. It is more difficult to install heated floors in small rooms than in spacious ones.
If the system bypasses such nooks and crannies, it is important to correctly calculate the maximum pressure parameters in the system. For this purpose, balancing fittings are used.
It is designed to equalize pressure loss across different circuits.
Select the preferred styling form
Many different forms of laying heated floors have been developed. The most common and frequently used ones are: a snake (various: regular, double or angular) and a snail.
Some specialists combine 2 patterns in one outline. The edges are laid with a snake, and the center is laid with a snail.
In order not to damage the pipes after installation, it is necessary to stop other construction work in this room until the screed is poured.
Water floor installation technology
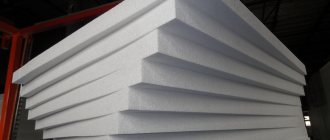
To gain experience in installing a water heated floor, you should try to do it on a small surface area. The pipe system is installed in two ways: cold on a wooden (polystyrene) base and wet in a screed.
The dry method is as follows:
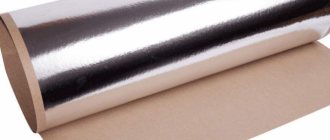
- metal strips are placed on wooden flooring or polystyrene mats, in which channels are created along the width of the pipes;
- pipes are inserted into the recesses;
- then lay a layer of plywood (OSB, GVL, etc.);
- then lay the floor covering.
A more complex, time-consuming, but budget-friendly method is “wet” cement screed. This is a multi-layer structure. It is based on a concrete surface and consists of several levels:
- – thermal insulation;
- – fixing elements (mesh, tapes);
- – tubular coolants;
- – cement-sand mortar – screed;
- - flooring.
In apartment buildings, in order to protect the neighbors below from flooding, waterproofing material is first laid. It is advisable to put a reinforcing mesh on the pipes themselves to reduce the mechanical load. A damper tape is attached around the perimeter of the room and between the contours. It is the boundary between the wall and the floor, different fragments of the heated floor.
Both methods have their pros and cons. Which of them is preferable depends on the individual characteristics of the room, the preferences of the owners, the possibility of attracting craftsmen, or the need to install it yourself.
When installing the pipeline in a screed, the maximum length of the circuit may be greater. Concrete is a cold material. To heat it, a high temperature of the water in the system is necessary. It cools faster than wood or artificial products
When installing a heated floor, it is important to consider all the nuances, including installation technology
Installing a water floor heating system is a labor-intensive and troublesome task. It requires accurate calculations and extremely careful attention to installation. Differences in the heights of the base, errors in the placement of loops, turns, defects in the main parts will lead to ineffective operation of the entire heating element. The maximum length of a water heated floor is determined individually for each house. In order not to make a miscalculation, it is worth contacting specialists. Small costs for consulting a professional will protect you from errors in the operation of the facility and provide the necessary comfort conditions.
Views: 362
Electric water heated floor xl pipe Electric heated floor - pros and cons Infrared heated floor - why it is worth installing Plastic heated floor - device features
One of the conditions for high-quality and proper heating of a room using a heated floor is maintaining the temperature of the coolant in accordance with the specified parameters.
These parameters are determined by the project, taking into account the required amount of heat for the heated room and floor covering.
Which pipe laying for heated floors is better?
The snail shape is ideal for large rooms with a square, circle or rectangle shape. These mainly include living rooms, kitchens, corridors, halls, and living rooms.
When the pipes are laid out like a snail, the heating of the area is as uniform as possible than with a snake. This is due to the fact that supply pipes, which have a hotter coolant, alternate with return pipes, in which the coolant is slightly cooler.
It's not a mistake to line a large room with a snake, it's just that one part of the room will always be a little hotter than the other. This may cause discomfort. For small rooms this is not so critical.
If the laying area is geometrically complex, then use a snake; it will be easier to handle. We also recommend that you draw out the project on graph paper in advance so that you don’t get stuck in your work.
Popular installation schemes
The heating installation consists of a coolant source, a collector, as well as copper and metal-plastic pipes. Each of the elements has features that are taken into account at the design stage. Therefore, the selection and purchase of the necessary products occurs with knowledge of what diameter the pipe has, etc.
In small residential premises, the source of coolant is an electric boiler, central water supply or solid fuel element. We list the main methods of laying pipes for a warm water floor.
Snake
Begin laying the contour along the wall. On the next surface, the contour follows a “snake” pattern, gradually filling the entire floor space. At the end there is a return to the hot water source. This option allows you to warm one half of the floor well with hot water, and the other with cooled water.
Double snake
It is carried out from the wall with a pipe folded in half, i.e. one half carries the hot coolant, and the other (on the opposite side) returns the cooled coolant to the source. The technique of laying the circuit allows you to heat the room as evenly as possible using two pipes with water (hot and cold). Thanks to double laying, the room warms up more efficiently.
Spiral
The technique is able to effectively and evenly heat the entire floor covering. The technique is most often used in rooms where constant floor heating is required.
It is worth considering that the area along the walls will warm up more intensely. However, the spiral circuit allows the use of lower power boilers. Laying the circuit using the spiral technique is somewhat more complicated than the “snake” technique, but thanks to the denser filling of the space, the required temperature in the room is achieved faster.
Double helix
A double helix (scroll) design is used to separate the zones. That is, one part of the room is heated more strongly. In practice, the double helix diagram looks like this:
- From the source of hot water, the pipe is laid in a spiral, but only in that part of the room where enhanced heating is required.
- The outlet from the first coil leads into the second, which covers the rest of the room and exits back to the hot water source.
So one selected part of the room is heated several times more than the second. This scheme is relevant, for example, for children's rooms with play areas on the floor in a specific part of the room.
Is it possible to have a floor contour of different lengths?
Ideally, this is when all the loops are equal to each other. In this case, there is no need to further balance or configure anything.
In life, this is often impractical to achieve, although it is possible.
For example, on one of the floors you need to lay water heated floor pipes. Of the 3 rooms there is a room for a bathroom. The working area of which is only 4 m2. It turns out that the length of the pipeline for this room with all the costs and the distance to the collector will be around 30 m. Is it worth dividing the area of other rooms into 4 meters in order to get the same contour everywhere?
This will be extremely impractical, just like fitting a pipeline from a 20-meter room to a 4-meter bathroom. This is why balancing fittings exist.
There are many formulas, but they are complicated, and not everyone will understand, so it is better to focus on average experience indicators. Let's just give the optimal numbers for the location of the pipeline. Often, for different complexities of objects, a variation in the length of pipes of individual circuits from 30 to 40% is allowed. In addition, you can vary the diameter of the pipes by laying increments, reduce the area of a large room and select the middle one from them. Do not forget to exclude large-sized and stationary furniture from the area of large rooms.
Design of cable heating
The main differences between electric heated floors are heating elements consisting of cables or cable sections. Let's consider the varieties and calculation methods.
A resistive heating cable is a heating element made of a single or two-core cable in a protective screen, with a constant resistance, which is laid over the floor area.
The cable has standard lengths, and therefore resistance and heat generated. The cable length cannot be changed, this will lead to a change in current and malfunction.
Specific power and length
This is the capacity of one sq.m of heated floor. The length of the heating electric cable is selected based on this indicator.
For example, the power of the cable system for proper heating should be about 100-150 W/m2; if the heated floor is planned to be used as the main heating, then 150-200 W/m2 is needed. If we need to heat 10 m2, then we need a cable with a power of 10*100=1000 W.
How many meters of cable is this?
This will depend on its cross section. The thicker the wire, the greater its power, and the larger the installation step will be during installation. A thinner wire will have to be laid at a smaller pitch in order to maintain the selected power density, and accordingly the cable consumption will be greater.
For ease of calculation and installation, electrical transformer transformers are sold in the form of mats rolled into a roll. The cable in them is laid in a snake with a certain pitch and fixed. The width of such a “mat” cannot be changed; as a rule, it is 50 cm. It turns out that the specific power is set by the manufacturer, for example 130 W/m2. The buyer can only select the appropriate heating element area from those available for sale.
Collector connection diagram
The choice of a ready-made mechanical or automatic collector model depends on the characteristics of the heating system.
The first type of control module is recommended to be installed for heated floors without a radiator, the second can be used in all other cases.
Valtec collector groups are the most popular. The manufacturer provides a 7-year warranty on its products. The installation diagram for the liquid circuit manifold is already included in the package of the finished mixing unit
According to the diagram, the assembly of the distribution comb for heated floors is carried out as follows:
- Installation of the frame. The following can be selected as the installation area for the collector: a prepared niche in the wall or a collector cabinet. It is also possible to mount directly to the wall. However, the location must be strictly horizontal.
- Connection to the boiler. The supply pipeline is located at the bottom, the return pipeline is located at the top. Ball valves must be installed in front of the frame. They will be followed by a pump group.
- Installation of a bypass valve with a temperature limiter. After this, the collector is installed.
- Hydraulic test of the system. Check by connecting to a pump, which helps build up pressure in the heating system.
In a mixing unit, one of the required elements is a two- or three-way valve. This device mixes water flows of different temperatures and redistributes the trajectory of their movement.
Shut-off valves and fittings are installed on both pipelines, return and supply, connected to the manifold installation, designed to balance the volume of the coolant, as well as to block any of the circuits
If servo drives are used to control the manifold thermostats, then the mixing unit equipment is expanded with a bypass and bypass valve.
