11/17/2016 master
Repairing the ceiling is quite a responsible undertaking, which, among other things, involves a wide variety of calculations. Here it is necessary not only to calculate the repair budget, but also to correctly calculate how many lamps, especially if spotlights will be used, will need to be installed. To find out, the first thing you need to do is decide what distance between the lamps should be.
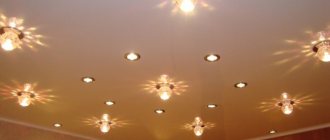
Ceiling lamps
Moreover, such calculations are important not only for creating a general lighting system in the house, but also in production (for example, for security, emergency, etc. types of lighting). Our article will tell you about everything related to this type of calculation.
Why is the calculation carried out?
According to regulatory documentation (SNiP, SanPin), the lighting system in any room must comply with certain requirements, which primarily relate to the level of illumination. Each home or industrial premises must have its own lighting levels, which are implemented by different types of lamps (emergency, general, local, work and other purposes). All indicators of the degree of illumination for various rooms are given in SNiP. An example of the level of illumination that should be implemented in various rooms is given in the table.
Note! The required illumination level is shown in the table at a minimum level. Therefore, a slight upward adjustment is allowed.
Table. Indoor lighting level
Such standards were developed to ensure that people in the premises do not experience discomfort. To determine the optimal level of illumination for each specific room, the calculation must take into account a number of indicators:
- type and purpose of the premises;
- type of lighting (general, emergency, work or other purposes);
- type of lamps, as well as their location (on the ceiling, wall, work surface);
- type of light source. For lighting a home and industrial premises (security, emergency, work purposes), the calculation can use the operating parameters (power, etc.) of incandescent, LED, fluorescent and other types of lamps.
Types of light bulbs
However, it is not enough to know the above indicators. The calculation must also determine how many light bulbs and luminaires need to be used to create the level of illumination required by SNiP standards. And to find out, you need to find out what the distance will be between the lamps used. If you do not make such a calculation, then you are unlikely to be able to create eye-pleasing lighting in the room. Moreover, this calculation is most complex for industrial facilities when organizing emergency, work, general and other lighting options.
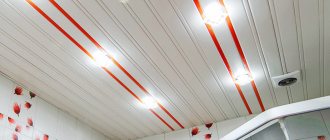
Two-level plasterboard ceiling with lighting
It is worth paying special attention to this important stage and doing everything carefully. It is necessary to set aside the distance from the lowest corner, moving down, the distance should correspond to the distance to the lowest level of the ceiling. Do the same by securing the plasterboard structure to the side rails. Then secure the corners along the perpendicular edges of the lower ceiling and the vertical inner wall. Putty the joints.
The only drawback can be considered the dust emitted upon contact with plasterboard sheets, which is harmful to human health. In general, the double ceiling will look very impressive and will become the main decoration of the interior, and a backlit solution will add sophistication. You will need a couple of profiles - UD and CD.
UD is a guide profile mounted both on the wall and on the ceiling, as well as at the fastening point of the side, if it is present in the center of the structure. CD is a more rigid, load-bearing profile from which the lintels and racks are created; the plasterboard sheet is attached to them. Fix the plasterboard sheets in the center by hanging corners and crosses. Make a skeleton to attach the drywall to.
Such fittings can be used for profile ties.
The most popular option with spotlights
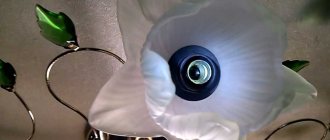
Today, the most popular ceiling lighting option is spotlights. Most often, such lamps are used in homes and offices, as well as public buildings. A spotlight is a small lamp into which one light source is screwed (LED, halogen and fluorescent light bulbs).
Note! Very often, spotlights are used for illumination in suspended or plasterboard ceilings.
Spotlight on a suspended ceiling
Moreover, the technical characteristics of the lighting device allow it to be used in absolutely any room of the house (living room, bedroom, and even in the bathroom or kitchen). These are quite simple lamps in their design, when used, calculating and determining the distance between them will not be very difficult, unlike similar actions with lamps used in production (for organizing general, emergency and other lighting options). At the same time, do not forget that in addition to spotlights, you can use other lighting devices:
- pendant and ceiling chandeliers with different numbers of bulbs;
- industrial lamps;
- office lamps, etc.
In each area of human activity, lamps used to create emergency, general, work and other lighting options will differ in different technical characteristics, as well as dimensions and placement methods. Therefore, the calculation of the illumination level and the distance between the lamps used will be based on various parameters. But since industrial premises and the organization of various lighting options there (emergency, security, etc.) are a separate topic, we will focus in more detail on the most common option - spotlights. Using their example it will be easy to demonstrate how such a calculation should look.
Materials and accessories
To install and connect spotlights, you will need the following materials and tools:
- long nose pliers;
- construction tape;
- stationery knife;
- a regular screwdriver and with an indicator;
- wire stripper;
- wire VVgng 3x1.5 mm2;
- perforated mounting tape;
- electrical clamps;
- perforator;
- thermal rings;
- dowels
You need few tools, most of them are available to every home owner. Some materials will have to be purchased, but these costs are small.
Making an embed for a lamp
Embeds for spotlights
At the very beginning of the installation of lamps, an embedded is made. There are ready-made products for such purposes:
- universal;
- for a specific diameter.
In universal products, a hole is cut in accordance with the diameter of the lantern. After that, still below, the body is fitted to it in order to avoid sudden problems when stretching the ceiling fabric.
The largest distance between the bottom edge of the profile and the base ceiling is measured. This is necessary in order to cut the perforated tape to the required length.
Next, you need to bend the cut paper tape, giving it a U-shape. The dimensions directly depend on the diameter of the lamps used. Next, the tape is attached to the mortgage using small self-tapping screws (“bugs”).
Instead of mounting tape, special adjustable type stands can be used. They are tougher, but less versatile.
After assembly, the entire structure is attached to the main ceiling. Holes are drilled using a hammer drill, according to the previously made markings, and the embedded platform is screwed using dowels.
Connecting the cable
Wiring for spotlights
The VVGng marking power cable is laid before stretching the fabric in accordance with the route for placing the spotlights. The minimum cable cross-section is 1.5 mm2. It is impossible to use less even with light loads.
At the location of the lighting device, it is necessary to leave a supply of cable in the form of a small loop (this will be cut later). This loop should go down to a level of at least 10 cm from the finished ceiling.
Terminal blocks and piercing clamps
The cable loop is cut in half, the protective insulation of 10 mm is removed from the wires and they are connected back through the terminal block. The remaining free terminal will serve to connect the power cable from the light spot itself. This type of connection is called parallel.
If you use piercing clamps instead of terminal blocks, you do not need to cut the cable loop. When using them, only the upper protective sheath is removed from the cable, the internal conductors remain intact. They must be inserted into the piercing clamp, into its upper part, and the device must be snapped into place. Integrated knives automatically pierce the insulating layer, forming a reliable contact. The wires to the light spot are connected to the bottom of the clamp using the same method.
After mounting the terminal blocks, the entire group of spotlights is connected to the power cable. After this, the presence of voltage at the end contacts is checked using a screwdriver with an indicator.
Installation of thermal ring
The thermal ring protects the ceiling from overheating and allows you to carefully cut a hole for the lamp.
After connecting the cables, you need to install a thermal ring of the required diameter on the canvas, using special glue for this. These rings are made of heat-resistant plastic. It is able to withstand temperatures up to +90 degrees for a short time.
The thermal ring has two main functions:
- protection of the canvas from the temperature effects of lighting devices;
- mechanical protection - before making a hole in a suspended ceiling for a spotlight, be sure to glue a thermal ring; it will not allow the fabric to separate at the cut points.
The glue is applied evenly around the entire perimeter of the ring. There should be no un-glued areas. There is no need to move your finger along the ring while pressing it to the ceiling; due to the glue, it may move to the side. A simple squeeze is enough.
Then, using a stationery knife, the canvas is carefully pierced and a hole is cut inside the ring.
What parameters affect calculations
In order to correctly carry out the calculation to calculate the distance between any lamps (even for security and emergency plans) on the ceiling, you must first evaluate their design features.
Spotlight design
The spotlight has a built-in housing that easily fits into structures with a suspended or plasterboard ceiling. Note! The design of the plasterboard or suspended ceilings themselves for different rooms (bedroom, bathroom, etc.) will be installed according to the same principle. Thus, if the room has a suspended ceiling structure, then installing a spotlight in it will take a minimum of time and effort. It is also worth noting that such lighting devices come in two types:
- built-in;
- invoices.
If built-in models require a suspended ceiling structure, then surface-mounted spotlights can be mounted on absolutely any surface, which makes them universal. It is precisely these lamps that can be found today in many public spaces, as well as at production and industrial facilities in the role of general, work or emergency lighting.
To place such a lamp, you only need a standard set of fasteners that will come with it. At the same time, do not forget that the very location of the lamps on the ceiling may be different. Here everything depends on the purpose of both the premises and the lighting system as a whole or its individual elements. This aspect must be taken into account in your calculations. Options for the location of lighting fixtures may be as follows:
- at equal intervals from each other. In this situation, they will create general and uniform lighting, preventing the appearance of shadows and poorly lit areas in the room;
Uniform placement of lamps
- zonal. This involves a concentration of lighting fixtures for better and more complete illumination of a specific area.
Note! In production, such a placement scheme is used to illuminate the work area or the place of each worker, and in the house - to visually delimit the space of the room, as well as for decorative purposes.
Zonal placement of lamps
It is these placement options that the calculation should be based on.
Two-level plasterboard ceilings with lighting
Ceilings made of gypsum plasterboard have completely replaced other types of floor finishing.
In recent years, you can often see two-level plasterboard ceilings with lighting in apartments. Having figured out the installation and studied examples of installing profiles, it is possible to make such a design with your own hands. The shape of the ceiling system can be either the simplest, consisting of rectangles or squares, or the most bizarre, made in the form of various curves and ovals. Before you do everything yourself, it is important to calculate and purchase the necessary materials, prepare tools and components so that nothing distracts you from the process.
It is worth noting that the work is not as simple as it seems, so it is better to invite a partner who is competent in repairs.
Optimal solutions
Determining the distance between installed luminaires for each specific case must obey the following rules to create the optimal level of illumination:
- the distance between adjacent rows of lighting fixtures should not be more than 1 m;
- the distance from the wall to the lamp of the outermost row should not exceed 60 cm;
- the above requirements are relevant for rooms with a ceiling height of 2.5 m.
Lamp placement diagrams
These requirements were developed on the basis that at this height there will be an intersection of the cones of light that will be created by all lighting installations installed in the room. It must be remembered that the installed lamps should not fall on the frame elements. Also, when determining the distance between adjacent lamps, you need to rely on the material from which the ceiling is made. For example, if there is a suspended ceiling, the calculation is carried out based on the fact that per 1 sq.m. such a surface should receive lighting rated at 20 W.
Installation of a two-level structure
You need to start work with the first frame, then attach the second tier to it, while simultaneously doing the electrical wiring.
All work on installing the ceiling takes place in several stages:
- preparation of ceilings;
- marking the ceiling for the base of the frame made of profiles;
- installation of frames alternately, first of the first level, then of the 2nd;
- fixing drywall sheets and finishing them.
First of all, you need to decide on the ceilings. If there is a layer of loose plaster on them, it must be removed. There is no need to do anything else to prepare the surfaces.
Then the height of the corners of the room is measured. The beginning of work is the corner with the smallest height, this way the horizontal of the ceiling will be preserved, markings begin from it.
For profiles, a horizontal line is marked on the walls with a coated cord, and points are placed on the ceiling - places for hanging. Then profiles are installed around the perimeter; they must be leveled along the entire length of the room.
If not only the corners, but also the walls of the room are uneven, first of all the leveled parts are made horizontally, and the profiles are also mounted. The spacing of the structure is 60 cm. If the ceiling is fairly flat, then you can only install an outer box around the perimeter of the room, with a shelf for lighting.
If the ceiling is made double, then the lighting is usually mounted at the lower level, in a special niche made.
The width and brightness of the luminous flux depends on the shape of the shelf, the height of the side or its absence, but it is most often directed upward, so you should not limit yourself to LED indoor lighting. It is possible to install additional spotlights. This will help increase the illumination of the room and zone the space.
For additional lighting, the wiring is mounted in special cable channels. The wires are routed either to sockets or to junction boxes.
The assembled frame is covered with sheets of plasterboard. All joining seams and places where self-tapping screws are screwed in are puttied, allowed to dry and sanded. Before finishing the final cleaning, this procedure is carried out a couple more times, achieving an absolutely flat surface.
Having understood the intricacies of installing load-bearing structures, fixing gypsum boards and connecting lighting, you can get an exclusive ceiling option in the room.
The actual calculations
Schematic representation of the room
Determining the distance needed to install lighting fixtures on a ceiling (regular, suspended or plasterboard) comes down to figuring out how many lamps will need to be installed in the room (bedroom, bathroom, etc.). From this alone the distance between adjacent lamps will be calculated so that they can all fit in the room. Thus, for the calculation we need to know:
- type of lamps installed in the room;
- the power that the lamp has;
- the total area of the room in which the selected light bulbs and fixtures will be placed.
Knowing these three values, you can already make a competent calculation of the distance that should be between the selected lighting fixtures. But do not forget that before the calculation it is necessary to calculate such a parameter as the number of lamps themselves. The algorithm of actions in this case is as follows:
- find out the power of the lamp;
- Next, measure the area of the existing room (multiplying the length by the width);
Note! If the room has a non-standard shape, then special formulas must be used to calculate its area.
- Next we multiply the area by the power. Let's remember this number;
- then we find out its light emission in the device passport;
- after this, you need to divide the light emission power by the figure we got by multiplying the area of the room and the power of the lamp.
The resulting number (can be rounded up) will reflect the number of lighting fixtures that need to be installed in this room. Calculating the distance between the lighting installations themselves is quite easy. To do this, you need to know that the lamps on the ceiling should be placed evenly. When zoning a room, some of the light bulbs can be placed a little more closely. By maintaining the sequence of calculations, you will be able to independently carry out all the necessary calculations correctly and without any problems and ultimately obtain an accurate figure. In this case, the error in your calculations will be minimized.
Installing a second level on a plasterboard ceiling
Creating a two-level plasterboard ceiling with your own hands is done in two stages. First, the frame of the first tier is manufactured, which is sheathed with plasterboard sheets. And already on it, without finishing it, they build a second level. Example of installation of direct suspensions In the case of a low second level or its installation on a ceiling, you can do without vertical end posts.
In this case, a plasterboard blank is sewn to the guide profile attached to the ceiling. Next, a second guide is mounted to its lower part, into which the horizontal frame posts will be inserted. Scheme of installing a plasterboard ceiling in two levels. Another option for the second level is installing a box with a niche for hidden lighting.
But this problem can be solved simply by “releasing the edge of the drywall sheet beyond the frame. After laying the wiring, they begin covering the base of the second level. The tools for assembly are those that were used in the manufacturing process of the first tier. However, you need to purchase material after planning and calculating the size of the future second tier. Despite the apparent complexity, making a single-level plasterboard ceiling is quite simple. Make a frame from profiles, sheathe it, and then finish the ceiling with putty. What to do when you need to make a second level of plasterboard ceiling?
Types of lamps by consumption
Designers recommend using energy-saving lamps and LEDs. They have a number of advantages: they last a long time, do not get hot and do not dazzle. However, these light sources cannot be used for all rooms.
If the lamp is made of durable, high-quality metal, then you can use an incandescent lamp. This would make sense in a year-round greenhouse where warmth is needed or in a basement.
220 V
Incandescent lamp. The glass bulb contains a spiral that heats up and produces bright light when current is applied.
Lamps are divided into types:
- painted, mirror, matte bulb;
- power – 25-150 W.
Matte or painted lamps are inserted into lamps in the bedroom or a separate area of the room for decoration.
The advantage is low cost, easy installation.
Disadvantage: it gets hot and breaks down quickly.
Energy saving
Halogen, fluorescent, LED light sources.
Halogen lamps are used as additional lighting for one area of a large room or as illumination of an object.
Indicators: power – 1-20 W, light output 15-22 Lm/W, operating life up to 4,000 hours.
If a halogen lamp is dirty, it will quickly fail.
Luminescent - have different shades of light. Are there any markings? in which the letter G denotes a design with pins, E – thread.
Characteristics: light output 40-80 Lm/W, power up to 80 W. Operating life up to 40,000 hours.
LED light source. It is based on a semiconductor crystal. The downside is that over time the crystal doesn't shine as brightly.
Characteristics: power up to 30 W, light output 120 Lm/W, operating life up to 50,000 hours.
The disadvantage is the high price.
Sagging of the canvas
In some cases, after installation, suspended ceilings may sag after a certain period of time. Therefore, you should think in advance how much the suspended ceiling is lowered during installation, as this is very important. Reasons for sagging may include factors such as:
- Poor quality of fabric.
- Installation by unscrupulous workers.
- Violation of installation technology.
- The moldings on the walls are not installed correctly.
If the tension structure is installed using all technologies using high-quality fabric, the sagging will be insignificant. It will be visually invisible; in percentage terms it is equal to one percent of the length of the room along the diagonals.