Not everyone knows about the features of bathroom lighting, what the pitfalls are and how to properly ensure safety. First of all, protection from moisture is very important in this room. And it is not surprising, because such a lamp is, first of all, an electrical device, the operation of which is associated with certain risks. And the humidity level in the bathroom is always high . Moreover, even in the case of high-quality modern repairs, it is not possible to overcome excessive humidity, so the contacts must be protected so that the lamps are safe, durable and functional. So, today we will talk about lamps for the bathroom, consider their types and selection criteria, and also do the installation yourself. But first things first.
Spotlights for the bathroom
Note! Lighting fixtures for the bathroom must be waterproof - there is no place for ordinary light bulbs and primitive sockets. But the average consumer, alas, does not always understand all these subtleties. As a result, for a room where temperature/humidity changes are constantly observed, and steam is often more like a curtain, ordinary lamps are purchased. Except that the power is greater, and the dimensions are smaller. However, this approach is fundamentally wrong!
The bathroom is a room with high humidity levels
Mistake 1. First beauty, then safety
When choosing light in the bathroom, use the principle of safety first, then everything else. No matter how beautiful the sconce is, it is not suitable for the bathroom if its protection index against moisture and dust is 0.
IP index on the packaging, photo example
Index of protection of the lamp against dust and water
The IP index consists of two numbers - IP 44. The first number (from 0 to 6) is the degree of protection against the ingress of solid particles (dust), the second (from 0 to ― protection from the ingress of liquid. The higher the number, the higher the protection. See the value on the packaging, lamp body or in the product characteristics in the online store.
The more IP a bathroom fixture has, the better.
Decoding the IP index for luminaires on the diagrams
Bathroom luminaire placement area based on IP
The choice of IP index for a lamp depends on where you install it - that is, on the location area.
- zone 0 - moisture enters directly by stream (bottom of the shower stall, bath screen, etc.);
- zone 1 - moisture often splashes (the wall of the shower stall, walls near the sides of the bathtub, etc.);
- zone 2 - moisture splashes infrequently (60 cm from the sides of the bathroom, behind the shower doors, etc.);
- zone 3 - moisture enters very rarely or never (near the ceiling, etc.).
From here it becomes clear that the sconce near the mirror should have a min IP index of 44, and the built-in lamp in the bottom of the shower should have a min IP index of 67.
Safe and unsafe zone for placing a lamp in the bathroom, taking into account the IP diagram
Mistake 2. Not taking into account the furniture arrangement plan and bathroom interior
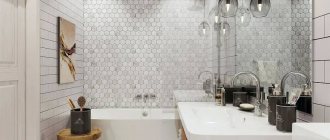
It doesn’t matter whether you select lighting in the bathroom at the renovation stage (which is best) or in a finished apartment - do it taking into account the arrangement of furniture, total area, layout and color combinations. So, it is immediately clear how much working light is needed, whether there is a risk of dark corners, etc. For example, in a light bathroom with glossy tiles and an area of 8 m2, 4-5 ceiling built-in lamps (main lighting) and two sconces on the right and to the left of the mirror (working lighting). And in a bathroom with dark tiles, an area of 4 m2 and a sink in the corner, you will need more task lighting precisely because of the non-standard layout.
Non-standard bathroom layout with a sloping wall, photo example
Standard small bathroom layout
Before buying bathroom fixtures, think about the following:
- non-standard shape and area of the bathtub;
- interior color, whether there are reflective surfaces or more matte ones;
- and how much work light, main light or decorative lighting is needed;
- personal needs (are there elderly people in the house, a mirror in the bathroom instead of a dressing table, etc.).
Plastic panels
One of the popular materials used for finishing ceilings is polyvinyl chloride (PVC) panels. They have their advantages and disadvantages, but the main advantage is that they allow you to embed light sources. We’ll talk about how to do this and how to arrange the lamps in this article.
Plastic is an inexpensive type of finishing for ceilings. Installation of PVC panels does not require special skills, and anyone who owns a tool can install a plastic ceiling at home with their own hands.
The range of PVC panels makes it possible to choose products to suit your taste, harmonizing with the interior of the room. The choice of plastic coverings is wide; they are available in various types:
ceiling-mounted, lightweight and elastic, but requiring careful handling during installation; wall, hard and heavy; glossy, varnished; with thermofilm decor; textured like wood, marble, etc.;
Plastic panels are made in various sizes, take this into account when purchasing materials
An important advantage of plastic is its moisture resistance; it can be easily washed by any means. Installation of plastic panels is carried out in bathrooms and toilets; they are used to decorate loggias, verandas and saunas
Plastic options are available with a beautiful coating and texture, and the panels will decorate even an expensive interior.
Plastic panels
PVC boards differ in how they decorate the surface with a pattern. Simple and economical - white, smooth, without a specific pattern and plain. Coating options of other colors and textures are available, which are applied in two ways:
- transferring the ornament from the thermal film base to the PVC panel, this method is simple and economical;
- direct printing, allowing you to obtain a high-resolution design with a rich color gamut. It is done on special equipment.
Mistake 3: Using only one light source
Usually the third error follows from the second. They installed a light in the bathroom, but didn’t think about the nuances.
Main and task lighting in the bathroom
Ceiling lighting (chandelier, lamps) provides general diffused light, which is convenient for taking a bath, but it is not suitable for shaving or applying makeup. Look at the picture below. Overhead light creates shadows on the face and highlights imperfections. Two wall lamps on the right and left or above the mirror will correct the situation (read about bathroom sconces here).
Main and task lighting in the bathroom, what is the difference?
General lighting is light that is evenly distributed over the entire area.
Working lighting - light near functional areas.
Power of bathroom fixtures: formula
The power of the lamps in the bathroom is the brightness of the illumination of the entire space. To correctly calculate the power, use the formula - type of light bulb (power consumption from the table below) * room area .
Formula for calculating the power of bathroom fixtures
*Lumen measures how much light you get from a light bulb. The more lumens, the brighter the light. The norm is 300 lumens per square. Read more about light bulbs in the following. point.
In practice it looks like this:
Bathroom area - 8m2
The power consumption of one incandescent lamp is 20 W.
8*20=160W - this is the amount of power needed to create comfortable lighting and 160 W - this is the total power for all lighting fixtures in the bathroom. That is, there are 4 of them, then 160/4 = 40 W - the power of each lighting device, if all of them have incandescent lamps.
Please note that results will vary for halogen, energy saving and LED bulbs. Use the formula we provided and you will quickly determine the necessary indicators.
IMPORTANT: The power calculation formula is suitable for bathrooms with ceiling heights below 3 meters. If the ceilings are higher, multiply the resulting power by 1.5. This is necessary because high ceilings “eat up” the light.
Example of dim lighting in a dark bathroom
An example of bright lighting in a bright bathroom
Design ideas
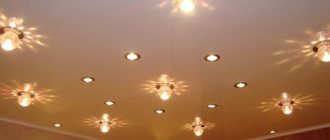
A popular design option is the starry sky. The composition is created using miniature light bulbs that imitate twinkling stars or entire constellations in the clear night sky. This method of lighting allows you to create a romantic atmosphere in the room.
Original double models, the light from which can fall on two different objects at once, will organically fit into a modern interior. Certain objects need exactly this distribution of light flux so that it attracts more attention.
Lighting fixtures also come in a variety of shapes. There are products stylized as a square, triangle, circle or hexagon. The design features of the mounting hole depend on the configuration of the light source.
The photo shows a kitchen with a suspended ceiling decorated with double point models.
Models with white matte or black coating are able to organize an interesting light supply. White lighting fixtures on a white ceiling will contribute to the visual expansion of the space and add laconicism to the atmosphere. Black lamps represent a bolder solution that ideally complements an unusual Gothic or strict modern interior.
For a room designed in a classic style, you can also choose suitable products. The lighting market includes devices decorated with a wreath with voluminous crystal petals, models with faceted glass shades, designs with a silver, gilded body or a carved bleached base.
Lamps with a metal frame, decorated with decorative inserts made of colored glass, look very stylish. This way you can achieve an interesting glow, give the interior a special zest and add magic to the atmosphere.
The photo shows spotlights in the ceiling design with an imitation of the starry sky in the living room interior.
Mistake 4. Not paying attention to the type of light bulbs in the lamp
There are several types of lamps: halogen, incandescent, fluorescent, LED, etc. It is the light bulbs in the lamp that determine how long they will work, how bright the lighting will be, etc.
| Lamp type/criteria | Incandescent* | Halogen** | Luminescent*** | LED**** |
| Safety | — | + | + | + |
| Electricity consumption | — | — | + | + |
| Price | from 42 rubles (+) | from 67 rubles (+) | from 350 rubles (-) | from 260 rubles (-) |
| Life time | up to 1000 hours (1.5 months) (-) | up to 2.5 thousand hours (3 months) (-) | up to 10 thousand hours (more than a year) (+) | more than 50 thousand hours (6 years) (+) |
| Brightness | — | + | + | + |
| Conclusion | + | ++ | +++ | ++++ |
* Incandescent lamps do not like humidity. Being very hot, it will burst if a few drops of water get on it. It flares up quickly, but produces a weak luminous flux. The incandescent lamp is the most power-hungry of all, but also the cheapest.
** Halogen lamps in terms of price/quality ratio are the most affordable and convenient option. They give a warm, diffused glow. They get hot, but not much. And they do not consume as much electricity as incandescent lamps.
*** The fluorescent lamp is completely safe in humid conditions. It produces a powerful luminous flux, but flares up in about 2 minutes, so it works better in combination with other types of lamps. It works silently.
**** LED lamps are the most economical of all. But due to voltage surges, they “clack”, creating unpleasant sounds. The downside is the high price.
A universal option for lighting in the bathroom is a combination of halogen and LED bulbs.
IMPORTANT : Halogen light bulbs for suspended ceilings must be covered with paint or a special coating on the reverse side. Thus, the platforms will not show through and create unsightly shadows in the stretch ceiling (see photo below).
Halogen light bulbs in the bathroom, photo example
LED light bulbs in the bathroom, photo example
TIP: Pay attention to the color of the halogen and LED lamps. Halogen ones give a warm light, while LED ones give a bright, white light.
Glow of halogen and LED light bulbs in the bathroom
Types of lamps
Halogen – suitable for low-mounted recessed luminaires.
Halogen Philips H7
These lamps save energy. Their service life is 3-5 times longer than that of conventional ones.
It is not recommended to install in lamps without protective glass.
LED lamps have an aesthetic appearance and a strict design. These lamps are compact and have low energy consumption. Suitable for miniature models. Its service life is 10 times longer than that of conventional lamps.
LED bulbs
Mistake 5. Choosing bathroom fixtures without taking into account the height and type of ceiling
Recessed ceiling lights for small bathrooms
Such lamps are distinguished by the fact that almost their entire body is located under a suspended or suspended ceiling. Only a decorative trim peeks out from the outside. They look minimalistic and do not press on top, so they are suitable for small bathrooms with low ceilings.
Recessed ceiling lights for small bathrooms
Recessed ceiling lights in the bathroom interior
Surface-mounted lights for medium-sized bathrooms
The overhead model is not built into the ceiling, so it takes up more height than built-in models. But despite this, there are also compact overhead lamps that will fit a standard ceiling and will not take up much space.
Surface-mounted lights for medium-sized bathrooms
Overhead lamps in the bathroom interior
Wall lights for functional areas
For example, wall spotlights above a mirror create accent task lighting. Here, too, it is better to adhere to the principle: small bath - compact lamps, and vice versa.
Wall lamp above the mirror in the bathroom
Wall sconces to the right and left of the mirror in the bathroom
How to install it yourself?
To begin with, it’s worth deciding on some important points regarding electrical wiring.
- The voltage should be low - 12 V.
- The distribution box should be located outside the bathroom.
- It is important to minimize the number of high voltage cable connections.
Approximate installation diagram of a spotlight with a transformer.
Now let’s take a look at the step-by-step installation instructions.
Step one. To begin with, a “garland” is mounted from electrical wiring, to which the spotlights themselves will be connected in the future.
Connection diagram for recessed lamp
After all the wires have been laid, the suspended ceiling is installed. Next, holes are carefully cut out in it corresponding to the diameter of the lamps and the wires are carefully routed out and connected to the terminals of the lamp
Step two. It is necessary to make holes in the ceiling in the right places for the lamps. For cutting, the example uses a diamond-coated hole saw. A crown is installed on an electric drill or screwdriver. After applying the markings, you can begin cutting out holes in the appropriate places.
The location of the lamp is marked
Drill or screwdriver bits
A hole is made
Step three. The diameter of the crown is selected as accurately as possible, otherwise the hole will not fit the lighting fixture. By the way, crowns are bought in sets, and therefore you need to choose an option that matches the diameter of the lamp body.
We turn off the electricity at the installation site. To do this, in the electrical panel, it is necessary to switch the circuit breaker levers to the “Off” state, usually this is the position in which the lever is pointing down
Step four. The wire laid earlier is removed from the hole to connect the lighting fixture.
Getting the power wires
Step five. Instead of traditional sockets, the described lamps have a terminal connector (usually included in the kit), which is a pair of wires that must be connected to phase and neutral. Good insulation is very important here.
Wires are fixed in the terminal block
Power wires are attached to the terminal block
Step six. After this, the lamp itself is installed. Its clamping antennae are unclenched and held, then a wire is threaded through the middle and the device is inserted into the cut hole. Then, when the antennae are released, the lamp will automatically fix itself in the required place. All you have to do is fix it.
Prices for LED lamps
LED lights
Spring fastenings on the body
Spring fasteners bend
The light fits into the installation hole
After this, you need to remove the cartridge from the niche, which we have already connected to the power wire
Step seven. The lamp is secured with an expanding locking ring. It must be removed from the device before installing the lamp.
Expanding retaining ring
Step eight. The lamp is inserted and checked for functionality (just press the switch).
Lamp installation
Step nine. If everything is in order, then the device is finally fixed.
The fixing ring is installed in the groove
It is important to do everything carefully, carefully and in full accordance with the manufacturer's instructions.
Important! When installing the lamp, do not touch its surface with your bare hands, then it will last you much longer
Video – Waterproof lamp “Phillips”
Mistake 7. Buy a chandelier/sconce with a dark shade and pattern
The material of the lampshade or floral shades can eat up the light power and convey the color of the light incorrectly. For example, a lampshade made of dark, light-retaining material reduces the level of illumination, which is most inconvenient in the bathroom, while many decorative details leave a shadow. Therefore, check immediately in the store how overly designer and decorative models transmit light.
Unsuccessful sconce for the bathroom, photo example
A successful example of a sconce for a bathroom, photo example
Mistake 8. Not paying attention to the material of the lamp
Even the most fashionable metal sconce without a protective layer will eventually become covered with red spots. And models made of glass and plastic will last much longer. Such materials are not destroyed by moisture and detergents, and in the long run save time and money. If you still cannot do without metal materials, check the composition for the presence of a reliable powder coating (protective layer).
Unsuitable material for bathroom fixtures
Suitable material for bathroom fixtures
Mistake 9. Confusing decorative and main lighting
A sconce with a colored lampshade and an LED strip on a plasterboard ceiling will not replace the main lighting. The light from a colored sconce near the mirror will distort the reflection, and the LED strip will only create a relaxing atmosphere. Therefore, divide all lighting into three groups: basic (chandelier, ceiling lamps) to wash the floor, task (wall lamps near the mirror) to apply makeup and decorative (LED strip on the steps or ceiling) to leisurely take a bath.
Decorative lighting in the bathroom
Decorative lighting in the bathroom
Basic lighting in the bathroom
Main lighting in a spacious bathroom
pros
Installing a spot device brings a number of positive aspects to equipping a room:
- compact arrangement of light fixtures;
- the light weight of the models does not weigh down the ceiling;
- the ability to locate the source in the required places;
- long-term operation of the lamp and the ability to reduce the number of replacements of used lamps;
- appliances of different shapes and colors transform the bathroom interior;
- in rooms of different sizes, lighting does not destroy the overall perception of the room;
- for high-quality work you will need a step-down transformer, an electrical network with 220 V;
- the issue of safety in the design of the lamp comes first;
- the use of LED lamps reduces energy consumption.
Small dot models visually enlarge the room. They look especially good in apartments built during the Soviet era. Here chandeliers and lampshades will only steal the space. In a room with a large area, a tandem of halogen fixtures with traditional lighting fixtures looks appropriate. Halogen spotlights for suspended ceilings in the bathroom are installed to visually increase the space (the ceiling rises, the walls move apart).
Bathroom lamp layouts: real examples
Lamps in a dark bathroom with an area of 4 m2 and ceilings of 2.9 m
Project by designer Yulia Chernova
General lighting : 4 built-in spotlights - 2 above the sink, 1 above the bath, 1 above the toilet.
Working lighting : LED lighting around the perimeter of the mirror.
Layout of four lamps in the bathroom, real photo example
Lamps in a bright bathroom with an area of 6.5 m2 and ceilings of 2.9 m
Project "Côte d'Azur", CO:interior
General lighting: 6 spot built-in ceiling lights - 2 of them are accent lighting above the bathtub, 2 above the shelf in the niche, 2 on the sides of the bathroom so that there are no dark corners.
Working Light:
2 accent sconces above the mirror, 2 spotlights on top in the shower stall.
Layout of ten lamps in the bathroom, real example
Layout of ten lamps in the bathroom, real photo example 2
Children's room
A children's room is an ordinary room for you, but for a child it is a whole world. This is a bedroom, a playroom, and a work area all at once. Therefore, it is most logical to delimit specific zones with spotlights. The work area, where the child will do homework, read, draw or write, as well as the play area should be very well lit - this is where as many spotlights as possible should be concentrated. They can be placed, for example, at an angle. This option is also suitable for the living room, where the emphasis is, for example, on the recreation area. But in the place in the baby’s room where the bed is, there may be fewer light bulbs.