When renovating a bathroom, it becomes necessary to move old or install new plumbing fixtures. In these cases, installation of water sockets for faucets in bathrooms is required. These fittings make it easier to place or replace faucets. You can connect the device yourself.
A water outlet is a specially designed fitting.
At what height should water sockets be installed?
Using plumbing in a bathroom or toilet should not cause discomfort to all family members. It is for this reason that before carrying out installation work, the optimal height of water outlets is determined - equipment designed for connecting plumbing fixtures to water supply and sewerage pipes. How to determine the height of device placement yourself? What parameters need to be taken into account additionally? Are there standards for the location of water outlets? The answers follow.
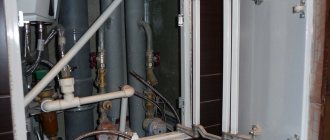
Equipment for connecting the mixer to the water pipe
What not to do
It is strictly forbidden to use extension cords in bathrooms, especially those of dubious manufacture. Not only are they in no way protected from moisture, most of them do not have a grounding contact, and the cords are made of wire with a small cross-section.
Do not connect the grounding of the outlet to water supply and sewerage pipelines, heating radiators and building fittings.
The bathroom, as mentioned above, is a room with high humidity, where the effect of high voltage electric current is especially strong.
The cost of any mistake in connecting electrical equipment can be quite high, so you need to strictly follow the recommendations and not hope that nothing bad will ever happen.
Source
Selection of water sockets
Before you begin to consider the rules for installing water sockets for connecting various plumbing equipment, you need to find out what devices are produced and what they are intended for.
Water sockets for kitchens and bathrooms can be classified according to three criteria:
Types of water sockets
Depending on the number of outlets, water sockets can be:
Double solid water socket
Double water socket on a relief strip
What materials are they made from?
To make water sockets for a bath or kitchen, the following are used:
Double water socket made of polypropylene
Methods for attaching water sockets
Another parameter taken into account when choosing is the method of installation of plumbing equipment. Attaching water sockets to pipes can be done:
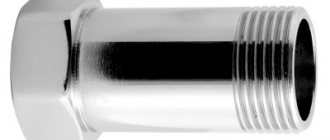
Threaded fitting
Fitting fixed with a collet
Soldered fitting
Moisture protection
On sale you are unlikely to find electrical appliances made specifically for the bathroom; and if you find it, then most likely it’s just a marketing ploy. Existing electrical appliances with moisture protection are intended not only for bathrooms, but also for the street and other wet places.
They are divided according to two criteria: power and the number of connected devices.
Let's figure out which ones we need, depending on their power. If you plan to connect powerful equipment, such as a washing machine or heater, then you need to opt for electrical outlets with a capacity of 16 amperes or more
This is important, since a less powerful one may simply not withstand it, and then both the wiring and the connected equipment will be damaged.
If you do not plan to connect powerful electrical devices, but intend to use only simple curling irons or razors, 8 amperes will be enough.
Connection types
The classification of water sockets by connection type is the most extensive
It is directly related to the options of materials used to create the fitting, but these are only details of the range of manufacturing companies, so it is worth paying attention to the types of connection with the main pipe
They can be self-locking, crimp, threaded or even pressed. Each type of connection has many features that make them more attractive from the point of view of operation and installation. They are most obvious in the example of crimp water sockets.
At the heart of their connection is a special bushing, the so-called collet. It has a cylindrical shape and is clamped between the outer and inner parts, due to which it provides the necessary tightness. The undoubted advantages of this connection:
• Relatively low cost.
• Recyclable.
An older connection option is threaded. Its main disadvantage is the need to comply with operating conditions, since an alternate increase and decrease in the temperature of the water passing through the water supply can significantly reduce the tightness of the connection.
On the other hand, there are many advantages:
• Easy to dismantle and reuse.
As for press water inlets, they have a more serious drawback.
They cannot be installed without special equipment, and in addition, such a connection is non-separable, so it will not be possible to dismantle and re-install such a fitting. They are connected to the supply water supply by soldering, which is the main difficulty in using them
At the same time, they are quite inexpensive, versatile, compact, and most importantly, durable.
Important: polypropylene and PVC elements are incompatible with each other, and when soldering they will not provide a tight connection. The last, but sooner to appear option is self-locking fittings
The last option, but sooner appeared, is self-locking fittings.
This version of water sockets is a complex design with a connection based on internal rings, including toothed ones, which are responsible for connecting the elements.
Their main advantage is the trouble-free repeated installation and dismantling of the product, as well as its reuse.
What comes first, the walls or the floor?
Actually, this doesn’t really matter, what matters is how the floor meets the walls. Here you should be guided by your own preferences and convenience. You can lay out the walls without the bottom row, that’s exactly what I do, or you can lay out the floor from the beginning. When the floor is laid, you need to trim the wall tiles of the last, bottom row. It is important to trim so that there is sufficient clearance between the floor and wall tiles for grouting. If there is no gap and the entire corner seam cannot be reliably sealed with jointing, moisture will get into the corner and mold will grow.
The last step is to lay the bottom row of wall tiles, each tile is cut or stands in its entirety. Naturally, you need to calculate the rows so that the bottom one is smaller or equal to the height of the tile.
What is the advantage of matching the bottom row to the floor, and not vice versa, floor tiles to wall tiles? The fact is that various irregularities in the cutting of the tiles will be less visible on the wall.
See also: “Laying tiles on the floor with your own hands”
Standard rules for installing water sockets
What are the rules for installing water sockets for a shower, for a sink or bath faucet, for a toilet, for a washing machine or dishwasher? What is the optimal installation height for equipment? Let's take a closer look.
Bath
In accordance with SNiP 3.05.01-85 the following standard applies:
Recommended bathtub faucet installation parameters
Sink
Water outlets for a standard sink (85 cm from the floor and 20 cm height) are installed:
Standard parameters for placing water sockets
Other equipment
Water outlets intended for other equipment are located at the following heights:
How to determine the depth of placement of water sockets yourself, watch the video.
It should be noted that the recommended parameters are average values and can be changed by the plumbing installer depending on the user's preferences.
Basic Security Settings
Depending on the type of walls and where the washing machine is located, select the appropriate type of wiring:
- If the walls are wooden, lay the wiring openly or externally in cable ducts and corrugated pipes.
- If the walls are made of cinder block or concrete, they often give preference to internal wiring in the walls.
The last option can be considered safer.
Calculation of cable cross-section
If we consider the machine as a consumer of electrical energy, you need to lay a cable of a suitable cross-section. The electricity consumption of a washing machine depends on its operating mode, the power of the heating elements and motor, and the presence of a spin cycle. Within 0.5 - 4 kW. The average household washing machine consumes about 2-2.5 kW of power.
This means that in most cases, the cross-section of 2.5 sq. which has already become standard for socket groups will be suitable. mm.
RCD and machine power
In conditions of high humidity and temperature, the likelihood of electric shock increases. To avoid this, install
RCD
. To protect the wiring from the results of a short circuit, an automatic switch (so-called circuit breaker) is installed.
RCD
selected with a trigger current of 10-30 mA, this value is also standard for protecting people from electric shock,
RCD
with a response current of 100-300 mA are used as fire protection.
The circuit breaker must be selected based on the actual electricity consumption of the washing machine. In the case of equipment with a power of 2.5 kW, you need to calculate the current consumption, here:
I=2500/220=11.36A
From the standard size range, we select the closest one in the direction of increase, that is, 16 Amperes. But for circuit breakers there is such a parameter as the time-current characteristic - it determines the performance when switching off. It is sometimes called the automaton class or the trigger class. For equipment with electric motors, and they often have starting currents tens of times higher than operating currents, a class C machine is suitable.
That is, you need to buy it at an electrical goods store
RCD
10 or 30 mA and circuit breaker "C16". In addition, you will need an outlet. It is worth considering that it is better if it is single.
Attention:
Do not connect other powerful devices such as a hair dryer to the outlet while the washing machine is turned on - this will lead to an overload of the wiring and contacts and as a result they will melt.
In the modern electrical goods market there is a range of waterproof electrical installation products. Among them you can find sockets. They differ from ordinary ones in that the holes into which the plug is inserted are covered with a spring-mounted cover so that when nothing is inserted into the socket, its front panel is covered with this cover. This design reduces the likelihood of moisture getting inside and, as a result, short circuits and electric shock.
This is interesting: How to choose and hang a bracket on the wall for a microwave oven
Outlet height of water and sewerage pipes
Depending on the slope angle of the sewer pipe:
At what height is the sewer line for plumbing fixtures installed?
For a wall-mounted toilet 160-190 mm (depending on the manufacturer and model), local fitting will give the most correct answer.
If, for technical reasons, the sewer outlets for the bathroom (shower stall, toilet) are made higher, then under the bathtub (shower stall, toilet) you can make a podium to the required height. This podium can also play a decorative character.
Cold and hot water is discharged at a height of:
Distance between water outlets:
The bathtub is mounted at a height of 600 mm, the washbasin is 850-900 mm. These sizes can be changed and depend on the height of family members. And they drag along with them the adjustment of other sizes (output of water outlets).
And do not forget also that the floor level in toilets and bathrooms should be 15 - 20 mm below the floor level in adjacent rooms, or the rooms should be separated by a threshold.
It is advisable to purchase all the plumbing before the installation of plumbing communications begins. This will simplify the plumber’s task and also reduce the risk of mistakes.
Do I need to plaster the walls under the tiles?
The answer here is clear - you need it, unless, of course, you want a Ravsha repair. Of course, it is possible to lay tiles on uneven walls fairly well, but this will take much more time and nerves than plaster. And you will need much more tile adhesive.
In addition to leveling the plane, it is highly recommended to align the planes to each other in the “correct” geometry - 90 degree angles. After all, the bathtub and tiles have the “correct” geometry by default and will not fit into the “wrong” one.
A self-respecting tiler always plaster the walls in the bathroom independently, to suit himself. This allows you to take full responsibility for the quality of tile laying. After all, it’s no longer possible to blame bad plasterers for your shortcomings.
See also: “Plaster is the basis of a good repair”
Why are water sockets needed?
The water socket allows you to connect the water supply to the necessary equipment in the bathtub. On average, no more than four such outlets can be installed in one room. This device transfers water pressure from a common pipe to the shower, faucet, or any other plumbing fixture that is connected to it. Water outlets must be used for the following reasons:
But this equipment must be installed in accordance with SNiP standards, otherwise it may lead to a malfunction of the plumbing or the outlet itself.
Design Features
For the installation of modern water supply systems, metal-plastic pipes and fittings are often used. This material is non-corrosive, durable and easy to install and maintain. For such systems, connecting elements appropriate for their intended purpose are selected: tees, press connections, etc. Polypropylene, polyvinyl chloride and other pipes are no less popular; fittings for them are also available in a wide range.
Different types of pipes are used for water supply; fittings for them are plastic or metal
As for the water socket, it acts as a fastening of the outlets of the water supply system to the wall and connecting them to the taps. A special feature of this element is that its design includes a fastening strip and an adapter fitting (socket). The fastening bar is usually made of steel due to its higher strength compared to similar samples made of metal-plastic or plastic. On this part itself there is a connector in the form of a coupling. On one side there is a thread for connecting a water supply hose or mixer, and on the other side it is connected to the water supply system.
Classification
Parts for connecting household appliances and showers are divided according to several criteria. Classification by purpose:
- for heating systems;
- for cold water supply;
- for hot water supply.
Separation by number of connection holes:
- Single - only one line can be connected to them.
- Double solid water inlet.
- Double parts, the holes of which are located on one strip at a distance from each other.
- With three or four holes.
Separation by fitting material:
- Made from stainless steel. Withstand pressure of no more than 20 atmospheres.
- Made from PVC. Suitable for installation on cold water supply systems. The coolant temperature should not exceed 40 degrees.
- Made from polypropylene. Water sockets for metal-plastic and plastic pipes are used to connect cold and hot water supply pipes.
- Made from galvanized cast iron. Cheaper than products made from pure stainless steel, however, if the protective layer is damaged, rust will begin to appear at the site of the damage.
- Brass, bronze. Practical, inexpensive. Suitable for hot and cold water.
When installing water sockets, the material from which they are made plays an important role. For example, you cannot combine parts made of PVC and polypropylene. This is due to the fact that they are incompatible for soldering.
Standards and regulations for the installation of water outlets
Each device and equipment installed in the bath has its own standards. You need to study everything in order to install water sockets correctly.
For bathroom
If you follow building codes, sockets near the bathroom should be installed as follows:
This ensures a safe distance from all equipment to the outlet to avoid moisture getting into it. It is necessary to comply with these standards and even slightly inflate the actual results with the required ones.
For the sink
The standard height of the sink from the floor according to standards is 85 cm. Other standards are provided for this equipment:
It is very important to consider the separation between cold and hot water pipes. If these details are mixed up, the water supply may stop flowing as usual.
For shower
Showers and baths differ in operating conditions. That is why the installation of water sockets is not subject to the same standards. Installation of such devices in a shower stall requires compliance with the following rules:
For washing machine
In order for the water outlet to function as usual, all requirements must be met, including the distance from the walls and floor to the equipment. SNiP provides the following conditions:
Other equipment
Water outlets are also required for other installed equipment. The standards for them are as follows:
| Plumbing | Distance from floor (minimum) |
| Floor standing toilet | 17 cm |
| Wall-hung toilet | 22 cm |
| Kitchen sink | 60 cm |
| Heated towel rail | 100 cm |
| Hygienic shower | 70 cm |
These standards must be observed during installation so that the plumbing fixtures remain suitable for use.
Thus, to install water sockets in the bathroom, compliance with SNiP standards is required. Following these rules will help you correctly install appliances and sockets that supply cold and hot water. Each plumbing equipment has its own standards, which must be carefully studied before installing a water supply device.
Where to start laying tiles
As stated above, it is best to start installation from the bathtub level. If the bathtub is level, the first row stands on its edge, and if the edges of the bathtub are not level, all the same, visually the row will look like it is made of a whole tile, despite the fact that somewhere the tiles are sawed off at the junction with the bathtub.
From the beginning you need to mark yourself. The lowest point is located on the horizontal edge of the bathtub, taking into account that the tile will fit into the plastic corner (see above) or take into account the height of the curb (if the bathtub is installed level). From the found point, horizontal lines are laid along the perimeter of the entire bathroom/WC - this is the bottom of the first row. It is very convenient to do this operation with the help of a laser level and a cord breaker; if you don’t have a laser, you need to take a good bubble level.
Actually, you can then proceed with installation. To hold the tiles from below, along the entire perimeter, it is necessary to screw guides from a profile or rule to the wall. It is also useful to mark the subsequent rows of tiles around the perimeter; it will be easier to navigate when laying. When the tiles are laid from the starting horizontal line to the top, you should take on everything below the starting mark. Twist the guides lower.
In my version, you should not lay the lowest row, which is adjacent to the floor. In almost the final result, all the tiles lie on the walls, except for the bottom row, which, among other things, still needs to be trimmed (the fact that before laying you need to carefully estimate the entire layout, I think it’s not worth mentioning?).
Sockets in the bathroom: general requirements
In the bathroom, sockets are often used to connect a washing machine, hair dryer, electric razor, illuminated mirrors, heated towel rail and other household appliances. Devices are installed in accordance with the standards specified in GOST. The room is divided into zones - there are 4 of them, from 0 to 3. Installation of sockets is allowed only in zone 3, the devices are waterproof with a class of at least IPx4.
Installation height from floor
The height standards at which sockets are installed are 0.9 - 1 m from the floor surface. But there are no strict rules, and installation is guided by ease of use. Some modern documentation establishes norms that are radically different from generally accepted standards. When planning apartment buildings, a height of 40-45 cm from the level of the concrete slab is selected (the result is 30-35 cm above the floor). The PUE requirements indicate a maximum distance of 1 m, so electrical sockets can be installed lower, but for the bathroom it is recommended to install them at least 0.3 m from the floor. Ideally, the distance is 0.5 above the floor level.
Installation standards and placement rules
The bathroom is divided into 3 zones:
According to PUE standards, sockets can only be installed in the third zone. It is better to place the distribution box outside the bathroom.
Power
Sockets differ in the current they are designed for. There are two types of appliances used in the bathroom:
Sockets must have grounding and a waterproof screen.
How is the degree of moisture protection determined?
The degree of protection against moisture is the most important indicator for sockets that will be installed in the bathroom. The moisture and dust resistance class is marked as IP and 2 digits. The first digit determines the degree of protection against dust and solid particles, the second - against moisture. For bathrooms, products with class IPx4 and higher are used - this means that the outlet is not afraid of splashes of water coming from all sides. The device must have a cover and curtains on the contacts.
Grounding
Like any consumer of electricity, the washing machine must be grounded. Equipment manufacturers provide for connecting the washing machine to an outlet with grounding contacts, which we usually call a Euro outlet.
The grounding contact in the socket for the washing machine must be connected to the corresponding terminal of the apartment distribution board or to the grounding bus.
In apartment buildings, the grounding condition is controlled by the energy supply organization. In private houses, the residents themselves are forced to do this.
Distance between pipes when connecting a mixer
Before installing the mixer, pipes with cold and hot water are installed, and the outlets are supplied to the place where the mixer is attached. At this stage, you should know the distance between the pipes when connecting the mixer; this parameter should be selected based on SNIP standards and usually it is 15 cm, with a deviation of 1.5 cm in both directions.
The size of the pipe connected to the mixer is half an inch, and based on this parameter, if necessary, you should take care of additional adapters. Installing a faucet in a bathroom, shower or kitchen has its own characteristics and nuances that should be paid attention to even at the initial stages of pipe installation.
Installing a faucet in the kitchen
When installing a faucet in the kitchen, as a rule, the pipes are laid open and are not walled up in the wall, so it is not so important what the distance between the pipes is on the faucet; it can be easily adjusted if necessary. If the pipes are mounted into the wall, in order to avoid the use of additional elements and adapters, it is worth taking care of the distance between the pipes in advance so that the installation of the mixer goes without unnecessary problems. It is worth buying the mixer in advance and installing the pipeline based on the given dimensions.
Installing a faucet in the kitchen
Installing a faucet in the shower
The most suitable for these purposes are faucets designed specifically for showers. Until recently, in this role they used one mixer for both the sink (pictured) and the shower, which did not require large expenses.
Installing a faucet in the shower
A distinctive feature of this type of faucet is the absence of a bath-shower switch, which gives a more modest size of the product. Recently, there has been a tendency to use special mixers that allow you to reveal the functions of the shower at 100%. Installation of such a mixer can be done openly or some parts can be hidden during the installation process for a more aesthetic appearance; it is worth noting that with hidden installation, when repairing the mixer, problems arise with access to failed parts. Shower faucets designed to connect special shower heads or hydromassage elements are becoming increasingly popular.
Pipe distance
The distance between the pipes of the mixer in the shower during hidden installation is selected especially carefully, since the complexity of installing the mixer itself will depend on this. When installing the mixer, you should take into account the height to which the mixer should be raised. Also, you should not ignore the height at which the shower head is located, which affects the quality of the mixer. Before purchasing a mixer, check all the necessary indicators with a sales consultant.
Installing a faucet in the bathroom
Often, when installing a water supply system to connect a faucet in a bathroom, the pipes are walled into the wall, this saves space in the bathroom. With this type of installation, the distance between the pipes for the faucet in the bathroom plays a big role.
A small error when installing the mixer can be eliminated with the help of eccentrics that come with most mixer models. After setting the required distance between the pipes for the mixer using eccentrics, all the necessary elements are connected.
When choosing a faucet, pay attention to the weight of the product; as a rule, faucets made of silumin are cheaper and lighter in weight than brass ones, but they are usually inferior in quality. When installing the mixer, it is necessary to wrap tow or full tape on the threads of the products, this will prevent leaks during operation of the product.
Advice when installing the mixer: tools for work, if possible, should be wrapped with electrical tape or other materials to prevent damage to the surface of the mixer. When dismantling an old mixer, you should be careful not to damage the threads on the fitting connected to the water supply, which can lead to unnecessary costs.
Varieties
The classification of water sockets is based on a number of criteria. Let's look at them in a little more detail.
1. Scope of application. According to this criterion, water sockets are:
- for cold water supply;
- for supplying hot water;
- for heating.
The last two types of water sockets are similar in many ways.
The situation is different with cold water supply systems. They are created using fittings for metal-plastic pipes made from a plastic mass that does not lose its strength properties at a temperature not exceeding +30۫С.
2. Material of manufacture. Water inlets are made from:
- galvanized cast iron;
- brass and bronze;
- of stainless steel.
Water inlets are made from steel, brass, bronze, PVC, polypropylene, and can also be combined
In addition, advances in the field of polymer technology have created the prerequisites for the production of similar elements from PVC or polypropylene. This was mentioned above.
3. Configuration and shape of connectors. According to this criterion, water sockets are of the following types:
- with a short or long strap for fastening;
- with three and two holes for fastening;
- single and double.
What are the best sockets for the bathroom?
There are a large number of types and types of bathroom sockets. They are grouped into classes.
Built-in
Based on the type of installation, built-in and surface-mounted products are distinguished. Built-in sockets are used in spaces where the main focus is on the interior. Built-in devices do not have protruding elements and are invisible to the eye; they are mounted directly into the wall at the stage of installation or repair. Installation of such devices is difficult; you will have to drill a hole in the wall.
Invoice
Overlays are attached to the wall surface. Such devices protrude from the wall and have a protective coating. The advantage of overhead sockets is ease of installation:
With cover delivery note
Overhead sockets with a cover are a reliable and safe type of device for the bathroom. The cover additionally protects the electrical outlet from moisture getting inside. The disadvantage of such sockets is less strength. For this reason, it is important to choose a proven device.
Triple internal
Triple internal power outlets are used to connect multiple devices at the same time. Before purchasing such devices, you need to know their maximum power in advance. Based on the obtained value, a socket is selected. Requirements for moisture resistance and tightness are also mandatory. The product is mounted on the wall.
Closed for cabinet
Closed sockets for cabinets are an option for hidden installation of devices. Most often they are mounted at the bottom of a hanging cabinet. A hole of the required size is cut out in the bottom of the cabinet, and a hidden socket is installed inside. Then everything is secured, wires are run and connected. An additional shelf is installed on top that will hide the wires.
With lid over sink
In the first zone above the sink you can place electrical appliances with protection of at least IPx5. In this area, water heating elements must be installed using a three-core cable with grounding. The installation of conventional sockets in this area is prohibited; special waterproof devices with a cover are required.
Installation
In the design process, to determine the location for sockets, first of all, you need to decide on the material from which they will be made and the type of products, since this will determine the further procedure.
Depending on the plumbing fixtures planned for connection and the location of their attachment, various types of fittings are used:
The installation of a water socket itself can be:
The hidden installation method involves installing pipes and the water socket itself in grooves. In this case, only the outer part of the threaded fitting protrudes from the wall. Metal water sockets are not suitable for this installation method, since stray currents will arise at the points of their contact with concrete or cement, causing oxidation of the metal.
After selecting water sockets and purchasing all the necessary materials, you can begin the installation process, which will consist of several mandatory steps.
Marking
Polypropylene pipes in grooves are always laid with a certain margin. Subsequently, they will be trimmed to the level of the horizontal markings.
After completing the welding work, the pipes are removed into niches, after which, in accordance with the developed project, vertical and planar markings are made on the wall:
Preparing the pipeline for soldering
Upon completion of a set of preliminary measures, marking and cutting of polypropylene pipes, the final fitting of all elements is carried out. Once again, it is necessary to check that all threaded elements are in place, with a permissible deviation not exceeding 5 mm.
Note! If one of the pipes turns out to be shorter than the other, it can be extended. To do this you will need: a piece of pipe of the same diameter with a length margin of about 5 cm, a polypropylene coupling of the required cross-section and proper welding experience. The strength characteristics of such a connection will be practically not inferior to a solid pipeline.
Spike
Any elements made of polypropylene are connected using a special welding machine. For one-time soldering work, it is not necessary to buy a tool; it is not cheap, so a good solution would be to rent the device, or invite a specialist who will not only perform this part of the work efficiently, but also provide a guarantee for his services.
The operating principle of the welding machine is to strongly heat the ends of the polypropylene elements. For this purpose, the pipe is placed on a Teflon nozzle, preheated to 200-250 degrees. At the same time, the coupling is inserted into another nozzle. The elements are held in this position for 3-4 seconds.
We recommend that you read: Which heating is better and how to install it in a private house
It is not recommended to overexpose polypropylene, since when overheated, it can form voids during jointing, which negatively affect the strength of the contact point.
The heated elements are removed from the device and tightly connected to each other. In the first 5-10 seconds, minor calibration of the structure is allowed. During this time, the water socket must be aligned in height and along the axis of rotation.
Having placed the structure in the proper position, it needs to be fixed for a while (usually a few minutes are enough), after which you can safely release it.
Cooled polypropylene forms a strong and durable joint. It is not recommended to use the water supply until all elements have cooled completely. This can lead to the formation of microcracks and reduce the service life of the structure.
Calibration
After completing the welding work, the finished pipeline must be securely fixed in the thickness of the wall. The final position of the water socket will depend on the finishing material:
The position of the water socket is considered normal when its plane exactly coincides with the plane of the wall finish, or is recessed a short distance (5 mm or less). Protrusion of the structure outward will make it impossible to accurately install the mixer, since there will be a gap between the reflectors and the wall.
Final check and sealing of seams
At the end of all stages of work, the system must be checked. To do this, all loose threaded connections are closed with plugs and water is supplied to the system at the operating pressure level. After 10-20 minutes, the pipeline must be carefully inspected for leaks, paying special attention to the joints.
If the structure has passed all tests with honor, you can begin sealing the grooves and final wall cladding.
Installation
Installation of sockets in the bathroom from scratch should be done based on the recommendations:
The following tools will be required for installation:
Then the installation process begins. Conventionally, it is divided into 4 main stages:
If a built-in socket is installed, then at the first stage you need to make a hole in the wall along the diameter of the box. After which it needs to be installed on a plasterboard wall using special screws and the wires connected. Installation of an additional outlet is carried out according to a similar algorithm, but with a slight difference. There are 2 ways to connect the cable:
The remaining steps are the same as for the initial installation. When installing additional equipment, it is necessary to make additional holes in the facing coating; for this purpose, specially designed drills and crowns are used.
When installing, follow safety precautions:
If you follow simple installation rules, you can connect the outlet in the bathroom yourself without much effort.
Sockets can and should be installed in bathrooms.
The choice of outlet is made taking into account the devices connected to it and their total power. For small household appliances: curling iron, razor, you can use 8 A sockets. For powerful devices, such as a washing machine and water heaters, you will need 16 A sockets. By observing the above installation and installation requirements, any person without special knowledge and skills can independently connect the device.
Possible problems
Let's go over again the issues that, if ignored, can lead to problems with the outlet. In order for the washing machine in the bathroom or kitchen to work properly and for a long time, it is necessary that the socket:
was connected to a dedicated line;
had a circuit breaker and an RCD on a separate wiring at the input;
located in the appropriate humidity zone, preferably in the third, although placement in the second is also allowed;
placed at a safe distance from places where water is used, and in the case of the kitchen, also at a distance from the hob or stove;
installed in a place that is easily accessible for use;
had a grounding loop, and the grounding wires were connected to the corresponding terminals in the contact group;
with installation on a two-wire network it was with added grounding (in extreme cases, without it at all, if it was impossible to wire it). At the same time, it is strictly forbidden to install grounding with access to water, gas, sewerage or heating pipes;
the nominal characteristics coincided with or had a margin relative to the operating parameters of household equipment.
The requirements and restrictions described above are quite easy to implement even with the help of completely independent arrangement and installation of the outlet. However, it is important to follow them.
And lastly, all work should be carried out only on a completely de-energized network. In this case, it should be de-energized at the introductory central circuit breaker. This is a basic electrical safety rule.
Source