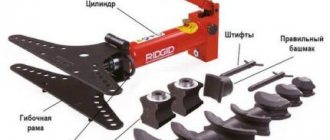
The kitchens of apartments, especially those built during the Soviet period, are distinguished by one feature: a large number of communications located in plain sight and spoiling the overall impression of the interior of the room. These are heating pipes and gas communications, “decorated” with various valves and metering devices. The corrugated air duct of a kitchen hood also does not look very aesthetically pleasing. During the renovation process, it is advisable to hide them, while simultaneously improving the ergonomics of the kitchen. For example, in the box above the kitchen shown in the photo, made of plasterboard, you can also place additional lighting. Is it really possible to do it yourself?
Hood duct and grille with non-return valve
The first is that instead of corrugation, a plastic pipe is taken (for example, d-125mm), and through one or several bends it is led into the hole in the ventilation duct.
In this case, a certain division is made in the hole itself under the ceiling. An entrance to the pipe is mounted on top, and a small rectangle is left below through a grate with a valve for natural inflow.
Moreover, the grille should be at the bottom, and not at the top. Otherwise, the air flow from the hood will blow upward and lift the so-called non-return valve.
Although, of course, if you have a more advanced valve design - a circle or rectangle with an offset axis, and not simple strips of polyethylene, or there is a solid partition, then you can safely install it as you want - on top, side, bottom.
However, in fact, this whole structure often does not work as intended. When you turn on the exhaust unit and create pressure, a small part of the dust still seeps through the cracks and micro-holes, after which it safely ends up in your kitchen on the dining table.
No check valves are 100% effective. The bulk of the air, of course, goes outside, but the gradual formation of dust inside the apartment is a fact.
And even when the hood is turned off due to the reduction in the diameter of the original hole, natural ventilation through narrow grilles will be much worse.
Everything can be done much better.
Pipes for hoods: tips and recommendations for choosing
When choosing pipes for an air duct, most consumers are primarily guided by aesthetic considerations, which is quite justified. Therefore, before purchasing, it is recommended to determine exactly how the box will be mounted: outside or behind furniture, behind a false wall or above a suspended ceiling.
A shiny corrugated pipe definitely spoils the interior of the kitchen, so if we are talking about an open arrangement, then most often they choose smooth plastic pipes, which can be painted in a color that matches the design of the ceiling or walls. A rectangular or square pipe for the kitchen fits most beautifully into an open interior. A round hood is a less successful option in aesthetic terms, but it creates minimal resistance to air flow, minimizing noise.
If we are talking about a hidden installation method, then it is better to give preference to a corrugated metal pipe. It is much easier to install since it does not require the use of adapters and corners. If it is necessary to overcome an obstacle on the way to the ventilation duct, such a pipe can simply be bent. However, masking corrugated products will require additional costs. In addition, if access to the air duct is required, then the entire secrecy will have to be dismantled.
Shapes and sizes of ventilation pipes: selection rules
The diameter of round ventilation pipes must correspond to the cross-section of the outlet pipe on the kitchen hood. It should be remembered that it is round boxes that create minimal resistance to air flow. As for the shape, a straight pipe is optimal, but sharp corners when installing air ducts are not allowed.
Plastic pipes with a round cross-section can have a diameter in the range of 10-20 cm
The ideal length of the air duct should be no more than 3 m. If this figure is higher, then the fan must be of maximum power. The diameters of the corrugations used in domestic ventilation are 10, 12.5 and 15 cm.
The standard sizes of plastic pipes for square and rectangular ventilation are as follows: 8x8, 10x10, 12.5x12.5, 5.5x11, 5x12, 6x20.4 and 9x22 cm. Diameter plastic pipes can be 10, 12.5, 15 and 20 cm.
How to calculate the minimum dimensions of a plastic pipe
The cross-section of square and rectangular plastic ventilation pipes must be equal to the cross-sectional area of the round hood pipe. If the diameter is narrowed, system performance will deteriorate, the fan will be overloaded, and the noise will increase. As a result, vibration will occur and the fastenings will weaken. The minimum cross-sectional size is allowed only when a powerful fan is installed in the hood, but it is not used to the maximum.
Correctly selected pipe size affects the quality of the hood
It is best to take a pipe whose cross-section is slightly larger than the diameter of the pipe. If the diameter of the pipe significantly exceeds the cross-sectional area of the fitting, this will entail additional costs and problems with its camouflage.
There is no need to calculate the cross-sectional size of the hood duct. It should be equal to the diameter of the outlet pipe. If the hood has a certain power reserve, but is not used at full capacity, then the cross-section can be slightly narrowed. The formula will help you calculate its minimum value:
Smin=Sр*(Qр*Qmax), where:
Smin – minimum cross-section; Sp – pipe cross-section specified in the product passport; Qр – volume of air to be removed; Qmax is the maximum indicator of the volume of air to be removed; it is indicated in the hood’s passport.
Qр is calculated using another formula: Qр = Vkitchen*12*1.3 m³. Vkitchen is the area of the room. According to sanitary standards, 12 is an air exchange rate, that is, the air in the kitchen should change 12 times per hour. 1.3 is the coefficient of power loss in the air duct and ventilation shaft.
The size of a plastic pipe can be calculated using a special formula
How to install a kitchen hood with your own hands
Installing a hood over a stove is actually not difficult if you have minimal plumbing and repair skills. You need to start with the electrical part.
Electrical connection
A regular outlet is suitable for connection. But if there are no power points near the installation site, then you need to do the following.
It is necessary to bring the electrical cable to the markings for the hood, simultaneously hiding it in the wall. This must be done in the following sequence:
- First, find the nearest electrical box. From it to the planned installation location of the hood, make a channel using a hammer drill and a special blade.
- Place the new cable into the cavity created.
- Turn off the power supply.
- Using a screwdriver, carefully pry off the round cover of the junction box. Inside this cavity there is wiring. Determine the “phase” using a tester screwdriver, “zero” will be next door. It is to these terminals that you connect the new cable, for example, using a terminal block.
- Install the overhead socket for the hood and insert the bare ends of the cable into its contacts, secure them.
- Assemble the socket. Now you can turn on the power supply.
Grounding for ventilation is usually not used.
How and at what height to install the hood body
Typically, a forced ventilation device is placed above the stove directly on the wall. Most often, two points of support are enough. As a rule, an installation and operation manual is included with the purchased hood.
The optimal height above a gas stove is about 80 cm (above an electric stove, 70 cm is enough). You need to retreat this amount from the slab and draw a horizontal line with a pencil. This is where the bottom surface of the hood will be. Starting from it, you can mark the holes for hanging.
It is enough to use a tape measure to measure the distances from the bottom wall of the device to the marks for fastening to a vertical plane. The same values must be noted on the wall.
Next, drill holes, hammer in plastic dowels, screw in screws and hang the device body on them.
The process of attaching such a product is simple. The housing is screwed with self-tapping screws to the top wall of the wall cabinet in four places. When the door closes, he will remain invisible.
But such devices always have a flat panel with filters at the bottom. She should just stay in sight. Most often it has a retractable part and backlight.
Markings for securing the housing are made according to a template, which must be included in the set of documents for this hood. Check availability when purchasing.
Air duct installation
Basic installation rules
The air duct must be stretched as much as possible when it is being installed. To cut plastic, you first need to measure its length and mark it with a marker. Then you should cut it with a knife.
Before connecting the air duct to the hood, you need to carry out a sealing process. After which you need to secure the air duct itself with a clamp.
After these operations, the startup and testing of the ventilation system begins. If you do this not with your own hands, but with the help of a specialist, then you will pay more than 1000 rubles for installation and connection.
Are there any mistakes when installing plastic air ducts? Yes, and the main one is this: the air flow in a spiral is not taken into account. This mistake can result in rapid wear and tear of the ventilation equipment.
To avoid this mistake, just consult with the seller and take a plastic air duct of a slightly larger diameter.
Connection rules for all types of pipes
Recommendations:
- The duct must be carefully sealed at all joints.
- The system must contain a minimum number of adapters, turns, and narrowings - they lead to a decrease in efficiency.
- The boxes must be securely attached to the walls and ceilings using special clamps. If the boxes are moving, the system will vibrate, the noise level will increase and the seal will be broken.
Rules for laying the air duct from the hood to the ventilation shaft opening
For proper installation of the air duct, it is necessary, if possible, to select the shortest path from the hood to the hole in the ventilation shaft. If the air duct is too long, you need to consider another possible way to remove polluted air - for example, to the street.
The shape of the air ducts should have a minimum of turns. Each 90° rotation of the channel reduces the extraction efficiency by 10%. If possible, it is necessary to smoothly rotate the pipe using two 135° bends or different-angle bends (see 6 in the figure). You cannot turn the box at an acute angle - this will completely stop the movement of air in the pipeline.
If the length of the air duct is too long, it is necessary, with the help of specialists, to recalculate the power losses in the air duct and the required fan power.
Features and nuances of do-it-yourself installation
Installing ventilation pipes from a hood is a simple task, quite feasible for a home craftsman even with little experience. If you carefully follow our advice, the installation of ventilation ducts will go without problems.
Required tools and materials
To complete the work you will need:
- Drill.
- Screwdriver.
- Hacksaw or grinder.
- Sealant.
- Boxes, bends, adapters of the required section.
- Check valve.
- Ventilation grille for connecting ducts to the ventilation shaft.
Indoor air duct installation
To install the boxes, it is necessary to carefully mark and measure the entire route of the system. The grate on the hole in the shaft is dismantled, and if necessary, the shaft is cleaned of dust, soot and cobwebs.
After installing the exhaust equipment, connect the box to the exhaust pipe. All joints are coated with sealant. Heat-resistant sealant is not needed - the temperature of the exhaust air is not too high.
Then the system is assembled by inserting individual elements into one another. The pipes are shortened to the required length by cutting with a hacksaw or grinder. The box is fixed to the wall using special holders or clamps. The distance between fastenings is no more than 500 mm.
To install the system, only industrially produced pipes, adapters and connectors are used - there is no need to reinvent the wheel, the industry produces fittings for any geometry of ventilation ducts and transitions from round to rectangular pipes.
After installation of the system, it is tested:
- If a leak is detected, coat the gap with sealant.
- If rattling occurs when the system comes into contact with any structures, in this case it is necessary to lay a gasket made of polystyrene foam or polyethylene foam.
Thermal insulation of pipes in the attic
Water must not enter the air ducts. If water gets in, the fan will quickly fail. In order to prevent moisture from settling on the walls of ventilation pipes and ducts, it is necessary to provide insulation. For this purpose, slabs of polyurethane foam or mineral wool are used. The insulation is covered with roofing felt or fiberglass on top and secured with wire.
How to hide pipes from the kitchen hood
There are several options for hiding pipes:
- Covering suspended ceiling structures.
- Route through kitchen cabinets.
- Laying over cabinets and covering with a decorative screen.
- Painting or decor to match the color of the walls and ceiling.
- Closing with decorative boxes.
Covering with a screen that imitates a wall, for example, made of plasterboard.
When installing boxes behind a false wall or suspended ceiling, you should take into account the fact that disassembling and cleaning or repairing the system will not be easy - you will have to disassemble the wall or dismantle the ceiling structures.
Installation of a hood without a duct
Circulation-type hoods are more compact than flow-type hoods, and their installation is simpler. A hood without pipes is simply attached to the wall or suspended from the ceiling (if the stove is placed in the middle of the kitchen on the island).
Principles of operation of forced ventilation systems
Ventilation of kitchens has become a prerequisite for the normal functioning of the premises. In general, a kitchen exhaust system has the following elements:
- engine;
- fan;
- filters;
- pipes.
Diagram of the forced ventilation system in the kitchen
The engine powers the fan, which supplies contaminated air flows to the filters, where fat and burning particles are retained, then the flows enter the box - the pipe system for ventilation. There are two types of operation of exhaust systems:
- circulation;
- in-line.
The circulation system involves taking contaminated air with the help of a fan, passing it through several filters, where smoke and grease first settle, and then the air flow itself is filtered, and returning the purified air back into the room. This is an expensive system, it is difficult to operate, since there is a frequent need to wash and replace filters.
They resort to using such an air purification system most often in cases where the connection to a common ventilation duct is complicated (relevant for apartments) or the external ventilation outlet is on the facade of a private building. Systems with in-line cleaning are very popular, when dirty air, after passing through a filter, is discharged outside. These systems have several advantages:
Forced ventilation systems are divided into two types - circulation and flow
- more effective air purification;
- easy care;
- affordable price.
But such a system requires the presence of a ventilation duct. Consequently, the installation becomes somewhat more complicated, where the placement of the common ventilation duct will be of great importance. In addition to solving technical problems, there is a need for the right design choice: a kitchen with a ventilation duct should be cozy and aesthetically pleasing.
Plastic shaped elements
Ventilation systems from the hood to the shaft have different geometries and topologies due to individual approaches to kitchen layout. Therefore, special elements are provided to implement almost any configuration of a plastic box.
Ventilation ducts are straight air duct elements of rectangular or round shape. Their standard length is 0.35; 0.5; 1; 1.5 and 2 meters, however, you can cut off a piece of the required size yourself using a hacksaw or grinder.
If you need to get a straight section more than two meters long, then it is mounted using several fragments of standard length using special connectors for plastic channels.
In this case, there is no increase in the length of the section due to the size of the connector.
Another necessary element is the elbow, which is used to rotate the air duct at an angle of 90 or 45 degrees. For rectangular boxes, elements for changing direction horizontally and vertically are distinguished.
To turn at angles not multiples of 45 degrees, use the so-called multi-angle elbow. Depending on the required angle, one side of the connector is cut off.
Shaped elements: 1 – rectangular channel; 2 – round channel; 3 – connector for round channels; 4 – vertical elbow; 5 – horizontal elbow; 6 – unequal-angled knee
To change the shape of the box from round to rectangular (or vice versa), special adapters are used.
Their use, as a rule, is due to the difference in the shape of the ventilation ducts with the outlet hood funnel or the hole in the overhead grille. They can be either straight or angular in shape.
The most common transition options on sale are:
- from a diameter of 100 mm to a size of 110x55 mm;
- from a diameter of 100 mm to a size of 120x60 mm;
- from a diameter of 125 mm to a size of 204x60 mm.
If it is necessary to switch to another size of a plastic box without changing its shape, then reducers are used. For round options, there is a special universal adapter that can be used to connect all standard sizes.
For structures with complex topology, tees are provided, with the help of which air flows from several hoods, for example from the kitchen and from the bathroom, can be connected towards the exit.
They can be rectangular, round, or combined shapes.
Shaped elements: 1 – flat channel connector; 2 – round elbow; 3 – straight adapter; 4 – corner adapter; 5 – round gearbox; 6 – rectangular gearbox
The elements of the box are fastened to the wall using holders. Since plastic structures are lighter than metal ones, their installation is not a difficult task.
These factory-made parts are inexpensive and fit well into the interior of the room, so the use of home-made structures is impractical.
The wall trim or grille is attached over the hole in the wall leading into the ventilation shaft or to the street. The grille, if necessary, may contain additional slots for natural ventilation.
In this case, it is necessary to provide protection against the penetration of the air flow generated by the hood through these openings back into the room.
To prevent the occurrence of reverse draft when the hood is not working, a check valve is used. It can be integrated into the plastic duct connector, or its function can be performed by the louvers of the ventilation grille.
In the absence of such a device, air may enter the room from the street or from a ventilation shaft.
Shaped elements: 1 – universal round gearbox; 2 – round tee; 3 – rectangular tee; 4 – round holder; 5 – rectangular holder; 6 – cover for round channels
Examples
The basic diagram for installation in country houses and dachas is ventilation with natural air circulation. It is suitable for brick and wooden buildings, as well as expanded clay concrete structures. As a rule, designing just such a scheme prevails in the construction of apartment buildings. If you purchased an apartment in a Khrushchev building, then be guided by the fact that there will be natural ventilation.
Natural air exchange is based on the phenomenon of pressure difference in the air column. The ventilation system is easy to install and operate, does not depend on the availability of electricity, and does not require the installation of expensive equipment. However, the system depends on weather conditions, in particular wind, and temperature indicators, since natural circulation requires that the temperature in the room be higher than outside. Otherwise, air movement stops.
In the age of developing technologies, many people use forced ventilation. It can be partially automated, when the equipment is used only to pump air into the building, or, conversely, to remove fumes outside, or fully mechanized, which involves the use of fans at both stages.
Since the ventilation shaft in the kitchen usually has a larger diameter, all flows rush towards it. In windy weather, this powerful channel can “overturn” a smaller one in the bathroom, forming a reverse draft, that is, a cold wind will begin to blow from the toilet. In this case, proper installation of forced supply ventilation is necessary.
A glazed balcony or landscaped loggia also requires a ventilation system. There are several options for its arrangement. First of all, it is natural due to opening the windows, but during the cold period this is not always convenient. Some window manufacturing companies build ventilation holes into them to provide micro-ventilation. More often, owners install a hood that allows condensation to escape.
A supply and exhaust circuit is necessary for installing ventilation in a room without windows, for example, a storage room. In particular, for safety reasons, many technical premises require to be equipped with a forced system (garages, boiler rooms, boiler rooms, warehouses).
The ventilation complex in the case of a mixed scheme is a system of pipes, some of which draw in air from outside, others remove exhaust air outside the building. The influx is provided by a convector, which additionally heats, filters and disinfects the flow from the street with ultraviolet light. In order to prevent the forced air from expelling heat from the room during the cold period, we developed a special heat exchanger - a recuperator, which is designed to use the temperature of the outgoing flow to heat the incoming one.
Air duct cross-section and basic principles for its selection
The cross-sectional size of the air duct is selected depending on the cross-sectional size of the exhaust pipe. This parameter of the ventilation device is indicated in the technical data sheet. The cross-section of the box is also determined depending on how intensively the air purification device will work. Since standard standards have not been developed in this regard, an average indicator is used, calculated using a special formula. If the kitchen is small and you do not plan to turn on maximum speed in constant mode, you can use a box with a cross-section that proportionally decreases in the direction from the hood to the stove.
The selection of the cross-sectional diameter of the box should be made as carefully as possible, and preferably under the guidance of a specialist. An unprofessional and incorrectly selected value can lead to negative consequences and a significant reduction in the life of the hood. At the same time, experts note that a value greater than the required one will cause additional financial costs and distort the kitchen design.
Recommendations for choosing an air duct
Experienced specialists give a number of tips to make it easier for owners to choose products for arranging a ventilation system. Some of them:
It is best to buy products in branded stores or specialized retail outlets. In addition to the product, the kit should include instructions for use, as well as a warranty card.
If such documentation is missing, it is better to refuse the purchase. It is necessary to take into account the design of the products so that they fit organically into the interior of the room. The manufacturer is of no small importance. It is advisable to choose high-quality branded models. No need to focus on low prices
Of course, a high-quality and reliable ventilation system will be quite expensive, especially if good materials are used. However, you need to understand that high-quality models will serve for many years without complaints. Products must have sufficient performance. If the ventilation system is weak, the hood will not be able to cope well with its main task, so the exhaust air masses will remain in the room.
In addition, when choosing the components of the ventilation system, you need to take into account the main functions of the kitchen hood. The latter must meet the following characteristics:
- An attractive appearance is important so that the device fits organically into the interior, complementing it.
- Low noise level during operation.
- The ability to quickly and to the required extent remove foreign odors.
We invite you to familiarize yourself with a kitchen hood without a ventilation outlet (25 photos): models without an air duct
Price remains a significant selection criterion for homeowners; aesthetics and performance characteristics of ventilation ducts fade into the background. Flexible corrugation definitely wins here; it is much cheaper than other options, and fittings are not needed.
We will offer our recommendations on how to choose a ventilation duct for your hood:
- There are two types of channels suitable for external installation: plastic and metal.
The former are cheaper, but look worse; they are better hidden above cabinets or behind decorative cladding. On the left in the photo is the installation of a ventilation duct behind plasterboard sheathing, on the right is the gasket inside the furniture - For hidden installation, you can use any air duct: corrugated, PVC, galvanized. If you don't care about the noise level, use a cheap aluminum hose.
- In a country house, summer kitchen or veranda with a stove, connect the hood with a corrugated pipe. Plastic in such rooms quickly becomes dirty, and it is quite difficult to remove the yellowness.
- If an apartment has undergone expensive renovations, you cannot save money and spoil the interior. Match the steel frame, fittings and grille to the color of the hood. Stainless steel is perfect for a nickel-plated surface, and copper for a golden surface.
Exhaust air is removed through a pipe, which may differ in the following characteristics:
- by material;
- diameter or dimensions of the sides of the box;
- section shape;
- flexibility.
Pros and cons, scope
Plastic air ducts are perceived negatively by many, as they are not sure that plastic does not emit harmful substances during operation. Poor quality plastic may be unsafe, but even household appliances contain so many plastic parts that this consideration seems irrelevant. For example, in a kitchen hood with filters, most of the components are made of plastic. And here are the most difficult operating conditions - high temperature, large amounts of fat, evaporation of chemically active substances.
Even open laying of plastic pipes does not spoil the appearance
In general, experts recommend installing plastic on exhaust ventilation ducts. There are no restrictions here. But for the inflow, you need heat-resistant ones made of special plastic. Especially if the inflow is heated or recuperated.
Where can I use it?
Another reason why plastic ducts are not recommended is fire service concerns. There have been cases where permission to use gas equipment was not signed if the ventilation was made of plastic. But it was a frame house, and there the requirements are different. If in doubt, it is best to check with your local fire inspector. In general, there are recommendations in regulatory documents.
Extract from SNiP 41-01-2003
According to SNiP 41-01-2003, paragraph 7.11, plastic air ducts can be used in low-rise residential, public, administrative and industrial buildings of category D. They cannot be laid in basements, undergrounds, attics and technical floors, in rooms with regulated fire safety conditions.
Advantages and disadvantages
Plastic air ducts have both supporters and opponents. Their main disadvantages:
- Flammability. Everything is clear here. Only metal air ducts do not spread fire. Although not all plastics burn and spread combustion, such materials with “reduced” flammability are expensive. Therefore, plastic air ducts are allowed only in one-story houses.
- The accumulation of a static charge, which leads to the accumulation of dust (it can flare up again). In fact, much more dust accumulates in corrugated areas. To reduce its amount, it is necessary to install a plastic air duct after completing “dusty” construction work and install filters that catch most of the dust. In addition, plastic ventilation pipes are treated with a special compound. It forms a film on the surface that prevents the accumulation of static charge.
- With low quality workmanship, thin walls or a large cross-section, gaps may form at the joints due to changes in geometry. This can be fixed, but there is such a drawback.
These are the disadvantages of using plastic ducts. There are more than enough advantages:
- Easy installation. The presence of fittings and shaped elements allows you to create a system of any configuration. Plastic is easy to cut and weighs little.
- Due to the perfectly smooth walls, the air encounters less resistance.
- Easier to ensure tightness. For reliability, the joints can be coated with sealant.
- Modern plastic air ducts are joined using end-to-end joints without overlaps, which reduces resistance to air movement.
- Low noise level. With a capacity of up to 100 cubic meters per minute, air movement is almost silent.
- Not subject to corrosion.
Overall, plastic ductwork is not a perfect solution, but the ease of installation and good performance outweigh the disadvantages. In general, experts recommend installing plastic on exhaust ventilation ducts. There are no restrictions here. But for the inflow, you need heat-resistant ones made of special plastic. Especially if the inflow is heated or recuperated.
Also, when selecting, you should proceed from the operating conditions. For example, it makes sense to use a plastic air duct for an exhaust ventilation duct from wet rooms, since galvanized ones are susceptible to corrosion, and stainless ones are very expensive.
Modifications of the telescopic hood box
The assembly of the telescopic hood box is similar to the standard design. The main difference is the order of assembly. Initially, the top plane and side parts are mounted. The size of the structure is carefully adjusted to suit the hood and, if necessary, tightened.
At the last stage of making the model, the lower part is fixed
It is important to make a hole for the corrugation before fixing the lower horizon. After assembly it is quite difficult to carry out carpentry work
The functionality of the device is based on a retractable element that allows you to use the hood during cooking.
The device must take into account the main parameters, ensuring practicality and ease of operation of the device. It is not advisable to use plastic as a supporting structure material; it can only be used for decorative purposes. The box will reliably hide visual imperfections in the elements of the exhaust device. Proper manufacturing and assembly will ensure the aesthetic appearance of the exhaust device and add decorativeness and completeness to the interior.
Types and materials for the production of plastic pipes
There are several types of modern plastics:
- Polyvinyl chloride (PVC).
- Polyurethane.
- Polypropylene.
Each has its own advantages and almost all have one single disadvantage.
Use of polypropylene pipes for ventilation of an industrial building
Polyvinyl chloride (PVC)
This is the cheapest, lightest and most durable option, easily processed both industrially and at home. Under normal climatic conditions, it is practically eternal and harmless: it decomposes, if not hundreds, then certainly decades, so that ventilation ducts and various products made from it will outlive the house itself.
But there is one strict limitation in use. This plastic contains chlorine, and the decomposition temperature of PVC (160-180°C) is lower than the plasticity temperature (200-220°C). Therefore, it cannot be formed using a torch and, especially, used where relatively high temperatures are used.
Round polyvinyl chloride (PVC) ventilation pipe
During decomposition, chlorine compounds and, first of all, HCl will be released. This gas with moisture forms hydrochloric acid itself, therefore it is dangerous for the eyes and respiratory tract, although in all other respects it is simply unpleasant or almost invisible.
Thus, polyvinyl chloride is an ideal plastic for ventilation, partially excluding the kitchen, water heater, fireplace and those places where temperatures above 120 ° C can occur (this is considered to be the “upper limit” for human safety).
Rectangular flat PVC pipes for arranging air ducts
Polyurethane
This plastic differs little from PVC, but can easily withstand temperatures up to 280°C. At higher temperatures, decomposition begins with the release of nitrogen compounds, which is many times more dangerous than chlorine compounds.
Its relative disadvantage is its high cost, but it combines two seemingly incompatible factors: ductility and wear resistance. The ductility of polyurethanes exceeds the resistance of granite and steel to fracture stresses. The finished polyurethane product can be bent an infinite number of times - it will not crack and will retain its original shape as soon as the tension is removed.
Polyurethane is ideal for household temperature parts, especially where shifts and distortions are possible: coupling rings, all kinds of pipes and areas where there may be high household temperatures.
Polyurethane hose for installation of exhaust ventilation systems
Polypropylene
This plastic is ideal for molding. Already at 180°C it is amazingly flexible, so any pipe can be twisted even just in hot steam, and can be bent at any angle with a torch. At the same time, it is durable, and at high temperatures it does not emit anything dangerous (impurity dyes or special additives can be dangerous). It is in the middle price category, but sufficient to make from it not only components of plastic ventilation systems, but also heating radiators.
Polypropylene is a relatively expensive but universal safe plastic.
Ventilation pipes and components made of polypropylene
Ledge in the corner of the kitchen
Most often in kitchens, especially in older houses, there are various protrusions. They are mainly found in the corners of work areas, although there are other options. Behind the ledge you can hide a ventilation duct, a fireplace or a niche in an adjacent room.
For some reason, the presence of these protruding elements is considered a disadvantage. Our man is looking for an opportunity to knock out a ledge or hide it. But is the “box” in the corner really ugly? At all. There is no need to hide it ashamedly!
Ventilation projections are found in residential buildings not only in the post-Soviet space. However, the West is not “ashamed” of this detail and does not try to hide it by hook or by crook.
Before fooling this element, think: is the game worth the candle and does it make sense?
Some difficulties may arise when decorating a corner kitchen if the ledge is located in the working corner. But a solution is always found, no matter how complex the “riddle” may seem.
How to plan a corner cap with a lip? How to use a ledge in the corner of the kitchen and make it invisible if it still confuses the owners? Let's consider several options for solving these problems.
Corner furniture
If the ledge is deep, it is better to break the corner of the cabinet in this area. At the same time, the set does not look like a single whole, but the interior does not lose anything. The two-component design looks quite organic. In this case, the ledge is designed in the same way as the walls in the room or like an apron in the work area.
If the protrusion is shallow, there is no point in dividing the headset in half. It is better to bypass it with the lower level of the furniture, that is, combine the sides of the corner with the tabletop, creating a kind of bridge. This bridge can be very narrow, and the lower façade is purely decorative.
As for the top row, it is usually torn. You can leave wall cabinets on only one side of the work area or abandon them altogether - this will make the kitchen brighter and visually simpler. The main thing is that there is no shortage of places to store things. If there are not enough cabinets and cabinets, it is hardly advisable to abandon the top row of cabinets.
In an area without cabinets, you can place shelves with the width of the protrusion - this will visually align the wall and make the protruding element less noticeable.
If you don’t want to break the top row, you can go around the ledge with it, partially covering it. In principle, there is nothing complicated here. It is only that one of the top wall blocks must be shaped and/or sized to match the box configuration. To make the protrusion even less noticeable, you need to cut it to match the walls and apron.
Deciding on the sizes
The cross-sectional dimensions of the air duct must correspond to the outlet of the exhaust equipment. If the diameter of the pipe is smaller than the mating hole, the system will produce excessive noise, and the hood motor will operate under increased load conditions. The combination of these troubles will create uncomfortable conditions for the user and lead to rapid failure of the expensive installation.
The standard sizes of openings in domestic exhaust systems are:
- 90x90 mm;
- 126x126 mm;
- diameter 100 mm;
- diameter 120 – 125 mm.
IMPORTANT! If you choose an air duct whose configuration differs from the shape of the outlet, you will also have to purchase adapters - elements designed to move from a square to a circle (or vice versa)
Types of exhaust ducts: advantages and disadvantages
When choosing a kitchen hood pipe, you need to consider the following parameters:
- Material cost;
- Pipe diameter and its compatibility with the hood and ventilation shaft;
- Possibility of installation of the structure;
- Technical characteristics of the pipe - noise insulation, resistance to pollution;
- Appearance of the product and the possibility of its camouflage.
Having decided on these points, you can easily come to the choice of the most successful ventilation pipe option for the kitchen hood.
In this section we will look at the types of kitchen hood pipe materials used as an air duct. Each material has its own advantages and disadvantages, which can affect the choice of buyers.
Plastic air ducts for exhaust hoods
Plastic air duct pipes have a rigid structure and a smooth surface. They can be made in the shape of a cylinder or rectangle. A round section is more preferable in this case, since it creates better traction inside the pipe. However, rectangular models fit better into the interior and can be hidden behind a kitchen set.
When installing plastic pipes, you should take care of purchasing adapters and clamps, as well as hermetically sealing all parts of the structure. Working with the material of the air duct itself is not difficult - the pipe can be cut with a simple knife.
A plastic ventilation duct in the kitchen has a number of advantages:
- Resistance to dirt and ease of cleaning both inside and outside the product;
- Neat appearance. If necessary, you can paint the structure to match the kitchen or disguise it;
- Low noise levels;
- Resistance to external factors - humidity, heat, mechanical damage;
- Long service life - 10 year warranty.
Among the disadvantages of such systems are:
- High price compared to other materials;
- The complexity of the installation process and the need to purchase components for connecting the pipe.
Corrugated air duct
Corrugated pipes made of lightweight aluminum are often used for hoods. Outwardly, they resemble a soft metal accordion. Such models are sold in the form of lengths that can be stretched to the desired size - so this material is very profitable. It is also worth noting that the corrugation can be laid under any bend, if this does not interfere with the draft inside the air duct for the kitchen hood.
The advantages of a corrugated air duct can be determined in several points:
- Ease of installation - the pipe can be cut anywhere and easily connected with a special fastener;
- No corners in the pipe that can block air flow;
- Low cost.
There is also a significant disadvantage of using corrugated metal:
- Unattractive appearance. In most cases, in a home kitchen you will need to mask such an air duct;
- Rapid contamination of the internal parts of the pipe - dirt accumulates in the folds of the corrugation;
- When stretching an accordion, it is impossible to return it to its original appearance.
Calculation of duct diameter
In addition to the material from which the pipe is made, the key point in its purchase and installation is the calculation of the required diameter of the product. The air vent must be tightly and hermetically connected both to the hood and to the opening of the ventilation shaft of the house, where the polluted air will be discharged.
Incorrect calculation of the pipe diameter can lead to reduced efficiency of the hood and air duct in the kitchen. The noise levels will increase, the load on the joints of the structure will increase and the efficiency will decrease. This can also lead to complete breakdown of the exhaust system, as a result of which it will have to be replaced.
Therefore, the installation of an exhaust duct should begin with selecting the exact diameter of the ventilation pipe. To do this, you need to calculate the dimensions of the hood pipe (it is indicated in the instructions for the device) and the diameter of the home ventilation duct. Ideally, the cross-sectional size of the pipe should exactly match the outlet openings of the ventilation elements. If the air duct is smaller in size, you will have to buy parts for the connection and ensure complete tightness of the system.
There are standard dimensional grids for ventilation pipes of different shapes:
- For models with a round cross-section, the minimum diameter is 8 cm, the maximum is 30 cm. The dimensional grid step is 1 cm, so the buyer can easily select a pipe of the desired diameter. Air ducts with diameters of 180 and 200 mm are most widespread in everyday life.
- Rectangular ducts have a more modest dimensional grid. They are designed mainly for built-in T-shaped hoods. The most popular sizes are 5x10 cm and 8x15 cm. To install such structures, you will need adapters.
Causes of blockage and procedure for restoring the ventilation duct
Canal blockage can occur for the following reasons:
- increased dustiness or humidity in the room;
- incorrectly selected channel section;
- lack of fresh air flow, resulting in stagnation;
- discrepancy between throughput and calculated values for a given system;
- improper assembly of joints, as a result of which the smoothness of the inner surface of the channels is disrupted;
- insertion of an additional channel without carrying out calculations that violated the efficiency of the system.
To restore the ventilation duct, you must perform the following steps:
- make sure the ventilation equipment is in working condition;
- check the condition of the shaft for blockages and remove them;
- replace filters, clean meshes;
- start the system and search for leaky areas;
- If there is irreparable damage to the channel, replace the entire section or repair it locally.
When installing a box over a kitchen unit, it is recommended to use materials with high moisture resistance and excellent aesthetic properties. Many choose materials similar in external finishing to the headset.