Despite the fact that cement and PVA have been combined for a long time, many people are interested in why they add PVA glue to cement mortar? The main goal of this procedure is to make the concrete solution as effective as possible. The fact is that the resulting adhesive composition gives the concrete plasticity, allowing it to set in a short period of time.
Properties of PVA glue
PVA glue is a sticky mass of a snow-white hue, the consistency of sour cream, without a strong odor. This mass is created on the basis of polyvinyl acetate emulsion.
Classification of adhesive composition by purpose:
- Office;
- Furniture products;
- Construction products.
Depending on the purpose, each type of glue contains its own additives. The adhesive is not waterproof, but can withstand low temperatures and is not toxic. From an environmental point of view it is absolutely safe.
The adhesive is not waterproof, but can withstand low temperatures and is not toxic.
Advantages of a simple composition
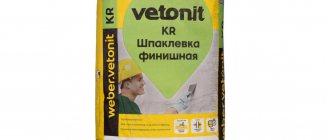
Wall finishing with putty
PVA-based putty, universal for use, has many advantages:
- low cost;
- naturalness;
- does not contain harmful substances;
- faint odor disappears as it dries;
- does not require special work skills;
- smooth surface and white color;
- high adhesion;
- availability of self-production.
The popularity of putty created on the basis of PVA lies in its versatility. There is no need to buy separate compounds for different surfaces. It is stored dry for a long time without access to air, or rather moisture. Suitable for finishing most building materials:
- tree;
- brick;
- aerated concrete;
- Styrofoam;
- drywall;
- Chipboard and MDF;
- plaster on various bases;
- paint, including oil paint.
When prepared, the putty, due to the dispersed state of PVA, forms a homogeneous mass, suitable for 12 hours when stored in a closed container. There is no need to stir it further. The finished putty does not settle and does not delaminate.
Application of PVA in construction and repair work
PVA glue is used in the following works:
- As a primer before plastering and wallpapering;
- For gluing wallpaper;
- In the form of an elasticizing ingredient with strengthening characteristics in the composition of plaster based on cement, gypsum, etc.;
- As an adhesive with universal functionality.
PVA glue is used as an adhesive with universal functionality.
Budget renovation option for retirees
Finishing walls with PVA-based putty
PVA-based putty has a slight odor, characteristic of glue. After drying it disappears. All components are natural and harmless. There are many recipes for making it. Each manufacturer has developed its own formulations. They include natural substances, fibers and polymers. For dry mixtures, the amount of water is indicated on the packaging and the proportion should be maintained.
Elderly people tried out various options in the practice of small repairs. Some add liquid soap, others add a solution of household or washing powder, and even fabric softener, gypsum, and lime in amounts up to 10%. All this is done with the aim of increasing plasticity and preventing the homemade putty from chipping after drying.
Chalk and PVA glue remain unchanged in the composition of the putty. The surface is smooth and white. Wallpaper and paint do not require lightening of the base. Decorative patterns and patterns can be applied without leveling the background tone. Diluted PVA glue is used as a primer.
What kind of PVA glue can be added to cement mortar?
In order to improve the quality of concrete, it is important to choose the right adhesive. Since this kind of work requires a lot of mortar, when planning to add PVA adhesive to the cement mortar, it is necessary to take into account that quite a lot of glue will be required. The best solution would be to buy the mixture in a 1 kg plastic container, so that unused glue can be closed and stored until it is needed again.
Having decided to mix cement with PVA, which has a wide range of applications, it is worth using a universal adhesive composition marked MB, because its structure is homogeneous and its viscosity is moderate. Most often, PVA is added to concrete to create a putty or primer mixture. Since there are containers of 1-30 kg, the glue is selected taking into account the scale of the planned work.
Most often, PVA is added to concrete to create a putty or primer mixture.
Necessary equipment
Before plastering the walls, it is recommended to prepare everything you need to complete the work. The kit looks like this:
- trowel or ladles;
- rule;
- grater and grater;
- construction level;
- lighthouses;
- a shovel and a container of a suitable size for making a batch (for large volumes of work, it is allowed to use a concrete mixer);
- buckets;
- spray bottle for moistening walls;
- fishing line or cord;
- hammer, chisel, brushes.
How to properly add PVA to cement mortar. Proportions, rules and nuances, mixture recipes
Many people are interested in how much PVA is needed for concrete? There are no exact calculations, only approximate ones regarding the required proportions. The maximum permissible limit of adhesive agent in the composition is 20%.
For tiles you will need a ratio of 1 to 5 (adhesive mixture and cement), but for screed you will need 5-12% glue. The question remains, how much PVA to add to the plaster solution?
Plaster recipe:
- The recommended cement powder M400 is mixed with sand 1 to 3.
- Then water is poured into the concrete composition so that a creamy mass is formed. Since the glue has a viscous consistency, when pouring it into the prepared mixture, it will be difficult to mix the composition, so you must first add water.
- After this, glue is added to the resulting mass, in a ratio of no more than 70 g of gluing agent per 10 liters of sand and cement.
- For a ten-liter solution, 200 g of plasticizer is added, thereby providing the solution with high moisture resistance, which will allow it to be used in wet rooms.
Basic proportions:
- The usual addition is 0.5 liters of adhesive per 2-3 buckets of diluted mixture;
- Concrete mortar for floor screed involves the use of: Portland cement - 100 kg, sand - 200 kg, small crushed stone - 300 kg, alkali-resistant dye - 5 kg, adhesive agent - 20 kg. Water is added 0.45-0.55 W/C;
- The cement mixture intended for laying tiles on walls looks like this: cement in powder form and sand 1 to 5 without the use of water;
- You can tidy up old concrete screeds with a mixture of cement, sand and polyvinyl acetate emulsion, the proportion of which will be 1: 3: 0.5 plus 4% epoxy resin with a hardener. Adding water is necessary so that the solution acquires the consistency of a thin dough;
- For plaster you will need Portland cement with sand 1 to 3, then PVA is poured into the finished mass. For 10 l. solution 50-70 g. glue.
The maximum permissible limit of adhesive agent in the composition is 20%.
Rules for applying cement-sand plaster indoors
Before applying cement-sand plaster, a beacon system is installed. They can be metal or plastic; in the latter case, they can be left inside the hardening mixture. Their purpose is to serve as guidelines for subsequent leveling of the mixture.
When installing beacons, you must adhere to the recommended values: installation height in relation to the surface, distance between adjacent beacons. Most often they are placed directly on the mixed solution.
The wall is moistened and “sprayed” with quick, precise movements using a trowel: the solution is literally thrown onto the wall.
Next step: leveling. The following tools are usually used: a wide spatula.
A primer must be laid between the layers of DSP. The finishing layer is sanded in a circular motion.
What properties does adding PVA to the solution give to concrete?
PVA is often added to the concrete mass; this procedure can improve the characteristics of leveling solutions. In the concrete mass, PVA and a plasticizer that fills the voids eliminate the formation of cracks during the hardening time period, reduces the setting time with brick and concrete, making the surface more durable.
Thanks to the use of PVA, the solution acquires the following properties:
- Viscosity and elasticity;
- Becomes more durable when hardened;
- The strength of the surface as a whole increases;
- Adhesive qualities are enhanced;
- The application process is simplified.
The use of PVA in damp rooms is prohibited, especially in the presence of hot steam, for example, in a bathhouse, sauna, bathtub, swimming pool.
In the concrete mass, PVA and a plasticizer filling the voids prevent the formation of cracks during the hardening time period.
Functions of cement-sand plaster
A cement-sand mixture, or CSP, makes it possible to level the surface: eliminate cracks, chips, potholes and gaps between the brickwork. This solution has good adhesion; it adheres to aerated concrete blocks, bricks and concrete surfaces.
Various types of mixtures with different additives are produced, which allow the use of a cement-sand mixture for leveling facades and interior surfaces, including those with high humidity, such as swimming pools and bathrooms.
Interesting! Cement-sand mixture is used in the repair of unheated and commercial premises, which makes it a universal material.
Plastering technology suggests that application can be done using two methods:
- manually in two layers with a layer of special primer
- mechanical
Features of using cement mortar with the addition of glue
When purchasing a product, first of all you need to make sure that the glue is intended for construction work, because it is forbidden to add stationery or furniture products to concrete. It's all about the additives that make the glue suitable for specific materials.
Thus, a construction product with 50% polymer additives is ideal for cement mixtures. However, this is not the only nuance; it is also necessary to take into account the ratio of cement to emulsion, and the ratio depends directly on the purpose. For example, for a mortar when installing tiles and screeds, the amount of emulsion will be different, because the required properties of the composition are very different.
Another feature of using this adhesive mixture is that the gluing process should not occur in damp rooms, because this gluing agent perfectly absorbs moisture, which can lead to destruction of the layer. Despite the fact that PVA can withstand temperature changes, experts advise not to use it when the room temperature is below +7°C.
Before adding PVA to the concrete mixture, the emulsion must be mixed with water 2 to 1. Moreover, under no circumstances should water be poured into the glue; it is the emulsion that must be added to the water.
The gluing process should not take place in damp areas.
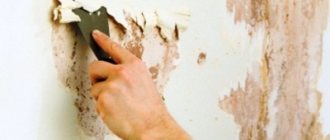
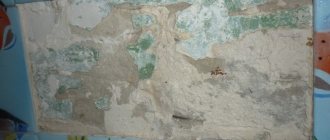
Preparing walls before applying plaster
Owners of cement walls will have the best luck, as this minimizes preparation. It will be enough to remove dust and possible construction debris from the surface. No primer is required, both materials adhere well to each other.
With a brick wall, everything is somewhat more complicated and depends on its condition. Smooth brickwork will only require a primer to prevent liquid from being drawn out of the cement-sand mortar. Then apply a coating up to 3 cm thick.
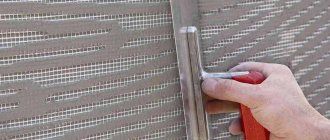
Uneven brickwork will require the application of a rough layer of cement-sand plaster, reinforcing mesh and a leveling layer. You will also have to beat off the protruding parts of the mortar that was used to adhere the brickwork.
Wood and other surfaces that do not adhere well to cement-sand mortar will require a metal mesh to continue work.
When adding PVA is not recommended
According to experts, the use of gluing agents in building masses is not always advisable. In what cases should you stop using PVA:
- Working process outdoors at temperatures less than +10°C;
- Add to gypsum mixtures as it is not necessary;
- Carry out work in rooms with high humidity, in the presence of warm steam, for example, in a sauna, dining room, bathroom, swimming pool. This is due to the fact that these premises will require waterproofing and appropriate finishing, based on polymers, which cannot activate the process of a chemical reaction with water pre-mixed with the cement composition.
It is not recommended to add PVA to gypsum mixtures, since this is not necessary.
What affects the strength and hardening time of plaster
The application process and the primer between layers should not be ignored if you want to get a truly durable and durable coating. Under no circumstances should you try to dry layers of plaster using any artificial methods or heating devices, as this may cause cracking. Drafts in the room where repairs are being carried out can lead to the same disastrous result. Curing time is affected by humidity and temperature.
In addition, the cement-sand mixture must be promptly removed from the construction bucket, trowel, rule, screwdriver attachment and other tools that are in contact with the mixture. This will help to avoid frozen “pebbles” getting into the plastic fresh mixture.
Finally, cement-sand plaster is by no means the final option for finishing a room. It would be correct to cover it with putty or other selected materials.
Cons of adding PVA
Considering the many advantages associated with the use of PVA in the construction and repair sector, however, glue also has its moments. The main disadvantages of using an adhesive:
- Restrictions in use due to high reaction speed;
- High consumption level;
- The use of the product when added to concrete can reach 20%, in contrast to modern plasticizing mixtures, which, despite minimal consumption, give no less effective results.
To minimize disadvantages, experts recommend:
- Make sure that the product’s expiration date has not expired;
- When starting work, you need to thoroughly stir the adhesive;
- It is necessary to avoid working with adhesive when the room temperature drops to +10°C or below;
- It is allowed to use only PVA-MB or a dispersion of the same adhesive;
- Be sure to adhere to the ratio of glue and other ingredients in the solution.
It is allowed to use only PVA-MB or a dispersion of the same adhesive.
We display beacons
How to properly plaster a wall with cement mortar? Masters recommend setting up beacons. This is done as follows:
- the wall is checked for vertical evenness;
- guides of appropriate length are prepared;
- at a distance of twenty to thirty centimeters from the corner area, a line is drawn from the ceiling to the floor, and mortar slats are thrown along it in increments of fifty centimeters;
- According to the applied markings, the rail is installed.
The remaining beacons are placed in a similar way, the distance between which should be slightly less than the length of the rule. As a rule, the pitch varies from 150 to 160 cm.
Can I use a different glue?
Undoubtedly, the most preferable option for construction work is the use of universal PVA, which is marked MB. In this case, it is prohibited to use adhesive for household office purposes.
The following adhesive products can be used in addition to PVA when creating cement mortars:
- Latexcol;
- Inter Plast AT.
These drugs belong to specialized additives based on polymers.
Latexkol is a product made from latex. The main area of application is the creation of an adhesive composition for tiles. The product must be diluted 1 to 1 with water. It has properties absolutely identical to PVA.
The main area of application is the creation of an adhesive composition for tiles.
The inter Plast AT plasticizer consists of modified water-based surfactants. This tool allows you to significantly save on cement in the solution, while the strength and reliability of the foundation only increases.
This product allows you to significantly save on cement in the solution.
PVA glue has qualities that allow it to be used as one of the key additives to building mixtures for a variety of purposes. At the same time, this mixture, thanks to its characteristics, improves the surface, making the structure more durable for a long time.
Number of layers
Plastering walls is carried out in three stages, each of which uses a solution of a certain consistency. And each such mixture has its own name - spray, primer and covering.
Splash
This is a creamy solution, somewhat runny.
Its purpose:
- form a layer with high adhesive characteristics on the wall;
- cover large wall defects, such as seams between bricks, wide cracks, chips, gouges.
Prepare a solution with plenty of water. Apply with a thickness of 2-5 mm. The process is carried out with effort. That is, the mixture is taken into a trowel and thrown with force onto the surface being processed. The movements must be sharp so that the throwing speed creates pressure on the defects, which would be completely filled with the material.
Priming
This is the thickest layer - up to 5 cm. The plaster itself is a dense solution with a low water content. It is this that is aligned with the beacons. That is, they fill the space between the profiles with the mixture and pull it out from the bottom up, making wave-like movements from side to side.
If the difference in the plane of the wall is large, then the soil is applied in several layers. But leveling the surface is usually carried out only after the entire space has been filled with material.
The beacons are removed after the soil has dried. The grooves remaining in their place are filled with plaster mortar.
Covering
This layer can be attributed to the final formation of the plastered wall. After applying it, the surface becomes as even and smooth as possible. Therefore, the mixture is made almost liquid.
Apply the solution with a trowel, and use it to level the surface in a circular motion, distributing the material evenly. It is important to prepare the mixture correctly here. Application thickness – no more than 2 mm.
Each previous layer must be thoroughly dried before applying the next one. The applied mixture must acquire a certain strength in order to withstand the weight of the next applied layer.
Conclusion
By doing the putty yourself, you can save money and be confident in the good quality of the material. Don’t be afraid to experiment, all the mixture recipes I’ve given are very simple and it’s impossible to make a mistake.
If you have any questions, ask them in the comments. So I say goodbye, and good luck to you in your endeavors!
Hello! Interested in the proportions of materials for putty (PVA, chalk, fine sawdust
Arseny, here are the recipes for homemade putties:
To make putty for linoleum, you need to mix ground chalk (120 g) with crushed sawdust (20 g) and add linseed oil or drying oil until a thick, homogeneous mass is formed. You can add a dye to this mixture that matches the color of the linoleum.
For wood, ground chalk is replaced with PVA glue.
When making putty, lead sulfate is required to be added to an aqueous solution of glycerin (water - 50 ml, glycerin - 50 g). Stir until smooth. The mixture hardens quickly, so it must be used immediately after preparation.
Specifications
The thermal conductivity and strength of a material depend on density . In their pure form, without any additives, the solutions are heavy; in the solidified state, their density is 1600-1800 kg/m3. The result is a durable coating, suitable even for floor screed. Due to high density, high thermal conductivity. Gypsum is porous, and plaster has a thermal conductivity coefficient of 0.9 W (m*K).
The walls in the room must absorb excess moisture, removing it outside so that condensation does not form. Therefore, when choosing a material, vapor permeability is taken into account. For cement mortar this figure is 0.09 mg/mhPa.
At temperatures up to +25 degrees, a layer two centimeters thick takes on average fourteen hours to dry. With a larger layer, of course, the drying time also increases. To be sure, it is recommended not to touch the plastered walls for a whole day.
You also need to pay attention to the consumption of plaster. Dry CPPS are cheaper than gypsum, but their consumption per square meter is higher. Usually the packaging indicates how much material will be needed to create a layer for one square meter.
Making your own mixture for smooth leveling before painting
PVA based putty
Our aunties brought us chalk and CMC. Vadik and I bought PVA glue ourselves. Instead of talc, we were provided with baby powder. Then we explained that the quality of putty is influenced not only by the proportional amount of components, but also by the quality of chalk grinding, the purity of talc and others. Therefore, we forced our aunties to calculate for us the ratio of these components to obtain a mixture with the given characteristics:
We putty the walls with our own hands
In addition to the main substances, ready-made putties contain various plasticizers, antiseptics and a number of other components. All additives improve the quality of the material. The cost in the store is slightly higher than homemade putty.
For those who want to make the composition themselves, I will suggest some points. Mix the dry ingredients first, then add the liquid. Dilute the CMC with water until it becomes sour cream. It, like talc, should not be more than 10% of the total weight, excluding water. As a result, you should get a mass similar in consistency to homemade sour cream.
Main Ingredients
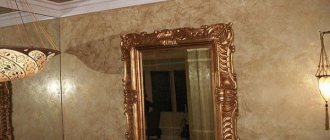
Decorative plaster differs slightly from conventional compositions, since in order to create some relief it must remain plastic for a long time. In addition, after the layer is completely dry, it should be durable and reliable.
It is very important that the exterior finish is easy to clean from dust. Before making decorative plaster with your own hands, you need to find out what are the main ingredients of the mixture and what are they used for?
The base can be putty, and PVA glue can be used as a binding ingredient. It allows the solution to remain plastic for a long time, which allows you to achieve the desired texture or pattern. The filler can simply be a pigment that will color the composition in the desired color. Solids:
- marble pieces,
- quartz sand,
- granite chips
- synthetic elements.
These ingredients are added in the smallest quantities.
Putty is a highly malleable material, similar in texture to clay or dough, and is commonly used in home construction and renovation as a sealant or filler to fill holes and small cracks.
PVA glue is one of those few things that is difficult to replace - both on the construction site and during renovations. It improves the physicochemical properties of solutions and gives them better viscosity. Plasters made with this glue become more flexible. When added to dry mixes, the PVA construct acts as a modifier, improving their processing properties and improving adhesion to various surfaces.