Tile is often used to finish surfaces in the kitchen and bathroom. Over time, the quality of the adhesive layer deteriorates and decorative elements begin to fall off. The question arises about how to glue the tiles in the bathroom to the wall if they have fallen off. You can perform a partial restoration with your own hands by properly preparing the surface.
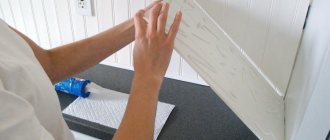
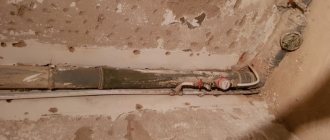
Loose tiles in the bathroom.
Reasons for old tiles peeling off
The reliability of tiles does not guarantee the durability of the entire finish.
During installation, the master may overlook many points:
- The presence of voids between the tile and the load-bearing surface - if this figure is more than 10 percent of the entire joint area, then the tile collapses;
- Uneven load-bearing base - mainly concerns installation on a skewed wall;
- Poor adhesion - occurs due to the lack of minor roughness on the supporting base (for example, walls can be wooden or plastic);
- Poor quality work with glue - implies both the choice of a cheap adhesive composition and the lack or excess of its volume when applied;
- Overmoistening - occurs due to poor-quality seams or the use of a low-quality adhesive mixture;
- Mechanical loads indicate improper use of furniture, shrinkage of walls, or intensive repairs in the adjacent room.
Checking the supporting base and the backing layer of the tile allows you to find out what caused the collapse or displacement of a separate fragment of the entire finish. If mold and moisture are detected, the ventilation system will have to be updated.
The displacement of the tile indicates incomplete shrinkage or tilting of the surface of the supporting base. The voids are an excuse to strip off the old layer and apply a fresh adhesive mixture.
Results
The most effective way to eliminate peeling on tile cladding is to do everything possible to prevent this from happening. To do this, it is necessary to exercise maximum care when choosing a suitable adhesive composition. The same applies to the implementation of tile laying technology: all recommendations regarding operating temperature and base preparation must be carefully followed. In cases where tile peeling does occur, use one of the above-described methods to eliminate the problem.
3.3/5 — (7 votes)
Required Tools
Fragmentary wear and tear on the tile trim can easily turn into a major overhaul. Therefore, it is recommended to fasten fallen tiles quickly.
To do this you will need the following tools:
- Toothed, cap, regular and rubber spatulas;
- Rubber mallet;
- Chisel;
- Level;
- Paint brush;
- Mounting crosses;
- Sandpaper of different grain sizes;
- Brush and rags;
- Containers for working with the solution.
If corner tiles collapse and possibly crack, you will have to use a tile cutter. But before you take on the machine, you need to purchase tiles of the required series or the most similar analogue.
It is quite possible that you will have to wipe off the hardened layer of glue with a brush attached to an electric drill or hammer drill.
Repair of cracks, sinks and chips on ceramics
Ceramics tend to crack, and impacts are especially dangerous for it.
It is better to repair these damages immediately, without waiting for them to become clogged with dirt. Repairs are made by puttying or grouting with automotive putty. The puttyed areas are covered around the perimeter with masking tape and sanded with water using waterproof sandpaper (first No. 360, then No. 1000). The repaired areas are washed and, after drying, painted over with color-matched enamel.
If the sink or chip is large, you can drill it out along with the mortar using a drill with a core bit. Then, using a device called a “ballerina,” cut out “patches” of precisely selected diameters from the tiles and glue them with tile adhesive to the drilling sites. Seal the seam of the patch around the circumference with auto putty and paint over it.
—>
Selecting consumables
In particular, we are talking about a substance that will be used to adhere the tiles to the wall-floor surface.
Today there are quite a lot of such consumables:
- Silicone sealants;
- Liquid Nails;
- Bulk solids;
- Cement mortar (not to be confused with adhesive mortar, which is prepared from bulk substances).
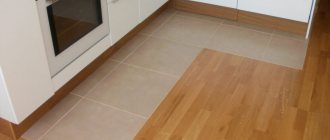
Cement mortar is a budget option, so it is suitable primarily for the restoration of flooring inside industrial and commercial premises.
Bulk compositions are an analogue of cement mortar. Their composition includes stabilizers and glue for fast and high-quality adhesion. Silicone sealants come in a gel or paste state that quickly hardens after application. The second advantage of such compositions is a high level of tightness.
All that remains is to choose products from recognized brands (eg Ceresit, Knauf, Unis). Liquid nails are the same silicone sealants. However, due to the small volume of the so-called. nails are used pointwise.
This approach saves mixture consumption, but degrades the quality of the clutch. However, for adding individual pieces of tiles, liquid nails are a suitable solution.
Restoration of old tiles
There are two types of fallen tiles - solid and cracked. Instead of the latter, it is recommended to use a solid analogue. The fact is that cracked tiles always have pores due to lost tile particles.
If this does not discourage installation, then you will have to:
- Create a form or supporting base for balanced joining of fragments with each other and their subsequent fastening to the wall;
- Clean each fragment from the reverse side;
- Clean and smooth the surface of the sections.
Working with solid tiles is quick. However, the grippy material behind it must also be removed. This is done by wetting the underside with warm water for 3-4 hours.
If the adhesive is difficult to remove with a brush, then instead of water you should use a 15% solution of citric acid or a 5% solution of acetone. You can also use either a household brush or fine-grained sandpaper to remove glue.
At what temperature should I lay tiles?
There is an optimal temperature range for laying ceramic tiles: for example, the best result can be obtained if work is carried out at a temperature of 18-24 degrees , but this does not mean that this cannot be done in other conditions, it’s just that the result will be worse the lower or higher the temperature from "ideal". If it is too low , the glue will take a long time to dry , and if it is high , the moisture will quickly evaporate, preventing the glue from setting .
Therefore, it is important to create an optimal microclimate in the room where work is carried out: in winter it is necessary to heat it using different heating methods, and in summer such work should be carried out in the morning or evening, when the temperature drops slightly. As for using an air conditioner to create the desired temperature, this solution to the problem should be abandoned due to excessive drying of the air in the room.
However, ensuring the optimal temperature for the process of laying ceramic tiles is one thing, but the further conditions in which the room will be operated are completely different. Therefore, for rooms where low temperatures are observed (dachas and other unheated buildings), it is better to use frost-resistant tiles. It is characterized by low porosity and low water absorption. Therefore, tiles made of granite, porcelain stoneware and clinker tiles are ideal for such rooms.
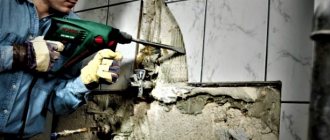
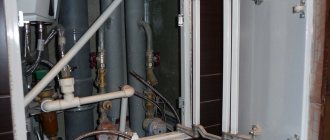
Preparing the base before laying new tiles
The surface of the walls or floor must also be cleaned of the remaining mixture.
This can be a primer, putty or hardened adhesive:
- When preserving the seams, it is necessary to carefully beat off the old grout with a chisel and mallet;
- Next, you will have to check the reliability of adhesion of adjacent tiles (if, when pressed, the fragments move, then it is recommended to clean the gaps and fill them with sealant);
- The next step is to clean the hardened dry mixture on the surface of the supporting base using a spatula, brush or sandpaper;
- Next, the surface is leveled with putty, cleaned of construction contaminants, degreased with a 10% soap solution and primed.
Some putty mixtures include a primer. The latter promotes reliable adhesion of the tiles.
If the load-bearing surface will be subject to fungal mold, it is recommended to add a fungicide to the primer solution. The primer can also be applied in two layers if the base tends to absorb moisture.
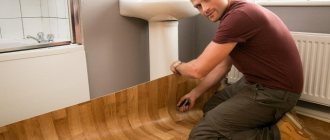
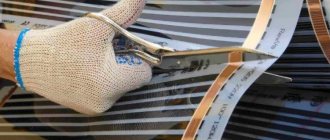
Several ways to install tiles on wood using glue
By Max
Last updated
Apr 27, 2021
The main task of the quality of tiling wood is that the choice of masonry technology and adhesive composition corresponds to the requirements of working with a certain initial coating. What kind of adhesive should you choose for tiles on wood to ensure the integrity of the ceramics under any load? Let's look at different options for a wooden base in order to choose the right adhesive composition for high-quality cladding.
Is it possible to glue
Is it possible to glue tiles to wood? The clear answer is yes! Strength and the result of perfect gluing are ensured by additional work that improves the adhesion of the solution and the integrity of the structure itself. And the choice of tile adhesive for wood depends on the external state of the working field and the conditions of its maintenance.
Instructions for laying new tiles
The period of complete drying of the primer lasts up to 36 hours. If the base absorbs moisture, then 2-3 hours after applying the primer it is recommended to apply a second similar layer.
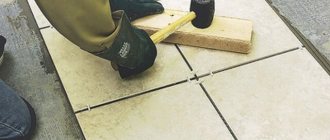
After the finishing layer has dried, you can begin installing the peeled tiles:
- First you need to prepare a working solution in a container, then let it sit for 15 minutes (silicone sealant and liquid nails are applied in a ready-made state);
- Next, using a spatula, a solution is applied to the center of the back side of the tile, after which the latter is distributed over the entire tile (if the fragment does not belong to the pendulum row, then the mixture is applied directly to the base);
- The next step is to level the layer and create grooves in it using a regular and comb spatula, respectively;
- The tile is carefully inserted into the empty opening and easily pressed with hands from four sides;
- Mounting crosses are inserted into the seams.
To position the tiles correctly, you must also use a level. When using sealants and liquid nails, the working substance is distributed over the entire surface of the tile or base, depending on the row of finishes. To do this, it is enough to apply the viscous substance in several places and rub it with a sponge or a regular roller.
Grouting joints
Cement mortar takes the longest to dry. But if an adhesive mixture or sealant was used instead, the drying period is reduced to 12 hours.
After the working mixture has completely hardened, you can begin grouting the joints:
- First, you need to clear future seams from crosses and residues of the mixture (to remove the latter, use a toothbrush or a stationery knife);
- Next, the empty tile seams are wiped with a damp sponge;
- The next step is to apply the grout mixture to the edge of the rubber spatula;
- Using smooth movements, apply the grout to the seams until they are filled;
- After 40-50 minutes, the dried grout remaining on the surface of the tile is removed with a damp sponge.
The sponge should be soft and cellulose. The absorbed grout must be constantly removed into a container with water to keep the sponge clean.
Otherwise, grout particles may leave scratches on the tiles.