Putty mesh is necessary for high-quality repairs of any complexity. When plastering walls, most often the surface remains uneven, and the mesh allows you to remove roughness. It greatly simplifies the process of finishing the premises. A flat wall will ensure high-quality repairs and will not require additional costs. The artist can choose painting or reinforced mesh to achieve the desired result.
Features of reinforcing mesh
Before using paint and varnish coatings, you need to achieve a perfectly smooth wall surface. This determines how strong the base will be, whether cracks and other defects will appear on the walls, the appearance and duration of operation. The main role in this area is played by the painting mesh. It protects the finish from detachment and deformation, as well as from adverse external influences.
The painting mesh is moisture-resistant, withstands temperatures well, and is non-toxic. It can be used with a large number of materials, such as drywall, concrete and others. The material is impregnated with a polyacrylic compound to maintain its strength and enhance adhesion to the surface.
For finishing work, reinforcing meshes made of polymers and fiberglass are used. They are light in weight and therefore easy to use. If the plaster is applied in a layer not exceeding 2 millimeters, you can do without a mesh. Their use is necessary with a layer of 2 to 5 millimeters.
The material must be well secured. This can be done using nails, dowels or self-tapping screws, depending on the surface you are working on. Otherwise, the plaster may peel off or become deformed.
Advice from the experts
- A lamp located below will help to detect wall defects so that the light glides across the surface.
- When cleaning walls from old wallpaper, they need to be moistened with hot water. This way the previous layers will move away from the surface faster.
- If there was mold on the wall, these areas should be treated with white before wallpapering.
- It's easy to check where old plaster is coming off the wall. To do this, you need to tap the entire surface with a hammer. Areas with a ringing sound indicate a problem.
- Before starting all work, the surface must be treated with a deep penetration primer to avoid shedding of the material. The primer can be applied with a roller or brush. As soon as the primer has dried, you need to start plastering. There is no point in pulling, because... A primed surface that becomes dusty over time has no advantages.
When leveling walls under wallpaper using plaster, you need to focus on the properties of the surface in each specific case and choose the most suitable material.
Source
Main types
Painting nets are divided into types depending on the size of the cells. For small cells, the softest material is used. The following types are distinguished:
- wide fiberglass grille;
- serpyanka;
- cobweb mesh.
Wide fiberglass mesh
The design has a cell size of 2 by 2 mm. It has anti-corrosion properties and a shock-proof effect, and is resistant to alkalis. It withstands moisture and temperature changes well. Most often produced in a width of 1 m.
This type of painting mesh is used for finishing ceilings and walls. Due to its properties, it protects surfaces from cracks and other deformations during subsequent work, since the structure withstands mechanical stress well.
Serpyanka
The main properties of the product are identical to the previous type of painting mesh. Serpyanka differs in width. It varies from 4.5 to 25 cm. The length can reach up to 20,000 cm. In some cases, one of its sides has an adhesive layer.
Serpyanka is widely used when working with drywall, for processing corners and joints and corner reinforcement of putty. With its help you can strengthen the slopes on windows and doors. Well masks surface deformations and possible cracks.
In what cases is it used?
If all the planes in your house are relatively flat and the repairs are supposed to be purely cosmetic, light leveling with a mixture not exceeding one centimeter in thickness can be done without strengthening. However, if your home is new and may shrink, or in cases where the mortar will be applied thicker, it is better to use strengthening bases.
If the applied composition will be applied to a thickness of more than three centimeters, the use of reinforcing materials becomes a mandatory part of the work. Without reinforcement, in this case the plaster will no longer hold on and will fall off.
However, to obtain a better result when leveling surfaces even with a small leveling thickness, a polymer painting mesh for the ceiling is often used. It is somewhat thinner than the metal used when working with thick layers of mortars, but it significantly strengthens the surface and prevents the formation of cracks in the coating.
Peculiarities
Puttying is the last stage of finishing work before applying paint and varnish products. The quality of the work performed determines how long the repair will last, whether the walls will have an attractive appearance, as well as the strength and strength of the foundations. First of all, puttying is done to make walls and ceilings even and smooth, and to seal cracks. The painting mesh plays a major role in this. It is designed to hold the finish and prevent it from peeling off. The mesh also protects against deformation and has an anti-shock effect.
The reinforcing mesh has the following properties:
- fire resistance;
- moisture resistance;
- tolerates temperature changes well;
- non-toxic;
- wide range of applications (concrete, fiberboard, chipboard, brick and other materials).
Tensile strength depends on the thickness of the material and the size of the cells. The more stable it is, the higher the quality of the material. Modern meshes are produced already impregnated with a polyacrylic composition.
This is done in order to:
- maintain the strength of the material;
- do not tolerate the effects of alkalis;
- increase the adhesion of the canvas to the surface;
- don't get hurt.
For plastering, painting nets based on fiberglass or polymers are used because they weigh little. They are used when the thickness of the plaster layer is 2-3 cm; if the thickness is less than 2 cm, then reinforcement is not necessary, since the layer can hold itself. For layers greater than 5 cm, painting nets are not suitable, but some experts apply several layers of reinforcing fabric. It is not enough to simply place the reinforcing material in the plaster layer; it must be fixed to the surface. For concrete walls, dowels are used, for wooden walls, nails or screws are used. This is done to ensure that the plaster does not come off the wall due to poor fastening.
There are three types of painting mesh, which differ in mesh size:
- reinforcing putty network;
- serpyanka;
- cobweb mesh.
For reinforcing mesh, the main criteria are the cell size and fiberglass density. If the cells are small, then the mesh is soft. When choosing fiberglass, you need to focus on the type of surface. A mesh with thick threads is suitable for facade decoration, and with thin threads - for interior decoration. Fiberglass is resistant to mechanical stress, temperature changes, and high humidity. Also, the reinforcing mesh is lightweight and does not rust. If you ultimately just need to paint the walls, then this type of mesh is well suited. First, you need to completely reinforce the surface of the walls using a putty network. For this purpose, it is better to take a mesh with a cell size of approximately 5x5 mm, so that the plaster is better fixed. Cracks should not appear on a high-quality reinforced wall.
Serpyanka also consists of square-shaped cells of different sizes, but it most often contains an adhesive base. Supplied in rolls up to 20 meters and narrow in width. Ideal for fiberboard, chipboard, plasterboard, cement and other materials. With its help, defects and cracks are eliminated, the surface of ceilings is leveled, and walls become smooth. To reinforce wall joints, you can purchase a special corner made of mesh, which will simplify the task and help you putty everything well. Gossamer mesh (fiberglass) is perfect for large surfaces, as it comes in a wide roll. Fiberglass increases the adhesion of plaster because it is a non-woven fabric obtained by pressing. Cobwebs are mainly used to reinforce ceilings.
Technical justification for putty reinforcement
Leveling mixtures with fine filler are intended for finishing walls and ceilings. The solution is used to fill small cracks, scratches, pores and chips, and also smooth out planar unevenness of the base. In this case, the permissible application layer often does not exceed 3 mm. Paying attention to this limitation, doubts arise about the need to use a mesh for puttying walls with ceilings.
The purpose of reinforcing materials for leveling coating is as follows:
- reduction in the coefficient of thermal expansion;
- increasing resistance to mechanical load;
- increased tensile, compressive and tensile strength.
The listed functions are considered both in relation to plaster and putty. A thin layer of fine-grained mixture is more subject to various types of loads, as it is formed immediately before decorative finishing. This takes into account not only external factors, but also internal ones. For example, a rough foundation can:
- consist of blocks or individual sheets, boards, planks;
- adjacent to adjacent planes with gaps;
- be covered with old plaster, which explains small cracks or brittleness.
Among other things, heavy wallpaper can be glued on top of the putty, which promotes peeling of the composition, and repeated painting with any absorbency can reduce the strength characteristics of the material. This explains the appearance of cracks.
As a result, additional strengthening of the putty is still necessary. For this, you can use adhesive primers; they help increase the peel strength of the coating. Moisture-resistant primers reduce the absorption capacity of dry residue. There are also special additives that are added to the working solution before application. But craftsmen more often use reinforcing mesh to putty walls and ceilings because of its versatility. The material simultaneously performs several tasks, which has a positive effect on the durability of the leveling layer and the budget of the owner of the object being repaired.
Application
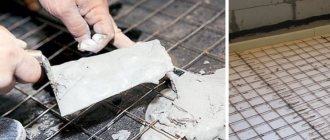
Before using the reinforcing fabric, it is necessary to cut it into fragments, and these fragments should be laid on the first layer of plaster. It is also important to overlap the mesh pieces. The reinforcing fabric is stretched across the plaster from the center to the edges. It is important to watch the edges of the canvas so that it does not peek out.
The puttying process using painting nets is almost the same for all types:
- it is necessary to prime the plastered surface;
- Apply the putty layer only after the plaster has completely dried;
- using a spatula, lay the painting mesh on the undried layer of putty;
- apply another layer of putty.
When using serpyanka, first you need to clean the joints and prime them, and after drying, apply serpyanka. After all these steps, a second layer of putty is applied and leveled.
There are two ways to apply serpyanka:
- Attaching the mesh to a surface on which glue has been previously applied. For better fixation, press the serpyanka well to the surface. After the mesh is attached, you need to apply another layer of glue, and after complete drying, apply putty. This method may reduce the quality of the finish;
- A putty layer is applied to the surface, and a mesh is placed on it. Immediately after attaching the mesh, it is necessary to apply a second layer of putty.
With fiberglass, all work is done using a roller. First, glue is applied to the surface with a roller, then fiberglass is applied so that the strips overlap each other by 50 mm. To level the mesh, you need to run a roller over it. Before using the spider mesh, it is necessary to prime the surface.
Necessity
Previously, shingles were used to ensure surface strength and long-lasting plaster. It was made from wooden slats nailed to the base. Now on the construction market there is mesh for plastering. They vary in color and material. They serve for better adhesion to the surface, there is no peeling of the applied layer from the rough base for a long time, there are no cracks after the solution dries. After applying the material under the plaster and drying the solution, decorative finishing is applied without fear that defects will appear underneath.
Grinding
After completing all the steps to reinforce the walls, it is necessary to carry out finishing putty and sand the surfaces. The final putty is carried out in the same way as the main one. The main thing is to wait until the layer with the painting mesh dries, otherwise the coating will not stick. The thickness of the finishing putty should be approximately 1-2 mm. After drying, you can proceed to sanding. Sanding is carried out to ensure that the walls are perfectly even and smooth, because the appearance of the room depends on this. In addition, paint or wallpaper does not hide defects, but emphasizes them. If the surface is uneven, the wallpaper may peel off or wrinkle. To achieve evenness of the walls, sanding is carried out several times in a well-lit place so that small defects are clearly visible.
After completing the putty, you cannot proceed to sanding earlier than a day later ; you need to wait until the putty layer is completely dry. For sanding, use fine sandpaper or a sanding sponge. It is necessary to run it over the entire surface to remove all protrusions and irregularities. If there are large depressions, they must be filled with putty. When choosing sandpaper, you need to look at its grain size. At the very beginning of sanding it is better to use coarse-grained sandpaper, and at the end to give smoothness - fine-grained sandpaper.
Grinding is carried out in several stages, but the technology is the same - small areas of the surface are processed with rotational movements from top to bottom. During the process, the grit of the sandpaper changes. Typically, fine-grained sandpaper is used at the last stage. For hard-to-reach places, use a sanding sponge or you can try folding sandpaper several times. In addition to sandpaper, you can use an abrasive mesh. Its main difference from paper is its high wear resistance; it is less clogged with dust, but also higher in price. If you have a grinding machine, the grinding process will greatly speed up. Moreover, the quality of work will improve. Sandpaper is also attached to the machine and the surface is processed.
After sanding the walls, you need to completely clean all surfaces from dust and dirt. To consolidate the result, the walls are primed again.
How to properly glue the painting mesh, see the video below.
Why is this necessary?
Previously, no one leveled the walls before gluing wallpaper. The only thing that was done was to cover the walls with newspapers using PVA glue, which slightly masked surface imperfections. Another option is pasting over old wallpaper. Even now in apartments of old construction you can find such puff pastries from previous wallpapers.
However, this method will not be able to hide all the irregularities. Moreover, defects will be visible if you glue wallpaper directly onto plaster or concrete (read how to glue wallpaper on walls here). Even gluing to drywall requires preliminary work, regardless of what wallpaper is chosen. The following will stand out on the paper web:
- any depressions;
- small tubercles;
- differences in levels between layers of plaster.
If the paper is too thin, then they can not only be felt by running your hand, but also noticed visually. On thicker vinyl or non-woven fabric, small irregularities will not be emphasized as much as on paper. But there are pitfalls here. Pasting such wallpaper onto an unprepared surface will, over time, cause the material to begin to peel away under its own weight. First, voids will appear under the canvas, which will then only grow.
Mesh for painting
When carrying out repair work in the house yourself, it is not advisable to skip the process of puttying the walls. A layer of plaster most often leaves the surface uneven and rough. Ideally smooth walls are a prerequisite for many further finishing works, in particular for applying paints and varnishes. Painting and reinforcing mesh for putty help achieve the desired result.
Purpose of reinforcing mesh
All imperfections of the plaster layer are eliminated by applying putty. Gypsum putty, unlike automotive putty, does not have sufficient strength and is susceptible to cracking after some time. When the bases on which polymer putty is applied are not indestructible (walls of a recently built brick building; joints and corner bends of plasterboard, gypsum fiber sheets and cement-bonded particle boards; joints of reinforced concrete slabs in panel houses; wooden floors, etc.) , then there is also a possibility of cracks appearing.
In order to prevent the occurrence and expansion of the territory “damaged” by cracks, a reinforcing grid for putty is used (another name is a painting net). A mesh is made from fiberglass, previously impregnated with polyacrylic dispersion. When the repair is completed, it is naturally not visible: it is fixed in the leveling layer. The use of reinforcing mesh counteracts vibration and prevents deformation of finishing layers under mechanical loads.
The flexible lattice will also prevent the putty layer from falling off if the technology for preparing the mixture and the process of its application were violated.
How to use
The reinforcing capabilities of painting grids are maximized when they are placed inside the processing layer intended for leveling. The probability of crack formation decreases in proportion to the approach of the mesh to the outer layer of the surface. Technological process for reinforcing the putty layer:
- Prime the plastered wall.
- After the primer has hardened, apply the putty base.
- While the putty is wet, place a fiberglass mesh on the wall and press it into the solution with a tool (trowel).
- Cover the network with an additional layer of putty, leveling it with a wide spatula.
When the reinforced layer has hardened, it is time to process it with a sanding mesh or sandpaper. In order to achieve an ideal aesthetic effect, a finishing compound is applied to the second layer of putty, which, after hardening, is sanded with fine-grain emery cloth. A completely flat plastered wall is coated with a finishing primer, after which it has hardened, painting can begin.
The technology for using mesh with an adhesive layer on drywall is somewhat different:
- The joining boundaries are expanded, cleaned and primed.
- Serpyanka is glued to the frozen joint.
- Putty strokes are applied with force so that the mass squeezes through the mesh and fills the space between the sheets of drywall.
- Without interruption, apply the second layer of putty, gradually leveling it with a spatula.
After sanding the surface and making sure that the primer has completely polymerized, you can begin painting and wallpapering.
The web is also initially glued to the primed surface: the glue is spread with a roller, the strips of fiberglass are leveled and pressed with the same adhesive roller. The putty mixture is applied after the glue has completely hardened. The following steps are identical to previous finishing technologies: sanding and priming.
Note! The next mesh for puttying fiberglass walls should overlap the previous one by at least 5 cm.
In order to reinforce the putty layer at the outer corners of the openings, you can use a specially designed corner with attached fiberglass. The corner forms an auxiliary barrier against careless chipping as a result of severe mechanical damage by a person carelessly leaning on these areas. Internal corners are often reinforced with a standard grille or fiberglass.
Grinding
The concept of “reinforced network” is defined, but among building materials there is also a grating for grouting the putty layer. The product is based on woven glass fiber in a large checkered pattern. An abrasive is attached to the mesh itself with glue (a common type is silicon carbide), which is why the type of mesh is called abrasive.
Advantages of the product over sandpaper:
- Efficiency . After the puttying is completed, it makes sense to sand the surface - an abrasive mesh will cover a larger area three times faster than sandpaper.
- Easy cleaning process. The emery quickly becomes clogged, and attempts to clean it are futile. Just hit the mesh a few times and the clog will fall out on its own.
As you can see, painting and fiberglass meshes for reinforcing the putty layer are useful building materials for finishing. Thanks to such products, you can securely fix the putty on the surface and get smooth walls.
Installation of painting mesh on walls and ceilings (2 videos)
Representatives and properties of painting meshes
Today, fiberglass-based wall mesh is used. They are made from molten quartz glass using the drawing method. They turn out special and dense.
Painting mesh
The best painting mesh for putty , which has 2x2 mm cells. It is used everywhere by specialists to strengthen the layer.
In addition, the mesh has the following properties:
- resists alkalis and rust;
- will last a long time;
- weighs little, but at the same time makes the putty stronger;
- helps the finish easily withstand changes in temperature and humidity.
Mesh in rolls
Rolled painting mesh is also suitable for strengthening and reinforcing putty and waterproofing layers, giving strength to walls, and preventing the appearance of cracks.
Another type of mesh is serpyanka. This is a representative of a painting fiberglass mesh with square cells, which is produced in rolls in a narrow strip with glue applied. Serpyanka is used as:
- material reinforcing the joints of fiberboard, chipboard and other sheets;
- sealing corners inside and outside, as well as cracks;
- leveling surfaces.
Fiberglass mesh will become an indispensable assistant in rooms with uneven walls. With its help, you can repair all defects, making the surface even and smooth for subsequent work.
Fiberglass
The web mesh is produced in the form of a non-woven material, which is obtained by pressing randomly placed thin fibers. Thin and porous, it is used where thick is not suitable.
For example, when vapor-permeable gypsum putty is applied, it has difficulty adhering to reinforced concrete slabs.
With the help of fiberglass glued to the slabs, the adhesion of gypsum putty is increased. This reinforcing mesh for putty is good for finishing large areas because it is produced in wide rolls.
Working with polyester mass
The subsequent processing of walls with mesh directly depends on the quality of the putty on the walls. For this, builders often use a polyester mixture, which can be purchased in specialized stores. It includes substances that have a positive effect on the durability of the coating. At the same time, the total cost of construction work increases slightly.
Using putty mesh
To figure out how to properly putty walls, you need to know that the reinforcing qualities of the mesh will appear better if you place it inside the leveling layer, preferably closer to the edge. In this case, cracks are unlikely to appear.
Working with paint mesh
The process of puttying on a painting grid looks like this:
- you need to treat the surface with a primer;
- when it dries, apply the first layer of putty;
- Reinforced fiberglass mesh is placed on the wet layer and pressed in with a spatula;
- A second, thin layer of putty is applied on top of the mesh, which is leveled with a wide spatula.
When the reinforced layer has dried, it is sanded with sandpaper or sanded with a mesh. All dust is completely removed from the walls and floor. Then, in order to achieve perfect leveling, another very thin layer of primer is applied, which, after drying, is also treated with fine-grained sandpaper. The next step could be coloring. For more information about the process, watch this video:
Using serpyanka
Puttying walls with mesh on glue looks a little different. It is used to cover joints and corners. When working, you should consider some factors:
- joints need to be cleaned, embroidered and primed;
- after the joints have dried, a serpyanka is placed;
- Next, you need to apply putty to the joint using pressing movements to completely fill the cells and gaps between the sheets;
- then the second layer is covered and leveled with a spatula.
The surface must dry thoroughly, it is cleaned, painted or wallpapered.
Application of web mesh
Working with fiberglass involves gluing it onto a primed surface. The surface is coated with a roller, the web strips are placed and pressed down with the roller.
The edges of the strips overlap by about 5 cm. After the glue has dried, putty is applied as usual, then the surface is sanded and primed.
At the outer corners, a corner is used, to which a sickle is welded. This way you can protect the putty from mechanical damage.
Fastening technology
The technologies for carrying out work with each option have an identical algorithm: preparing the base, fixing the canvas, covering the surface with a solution. However, each case has its own nuances.
Preparatory stage
Before leveling the base, preparatory work must be carried out. The surface must be clean, “healthy” (free from mold, mildew and rust), and durable. The putty is applied in a thin layer, so it is also important to fill large differences, pores, cracks, and gaps in the seams with plaster mortar in advance. Only a couple of types of paints stick to oil stains, which forces you to use a degreaser. Finally, the walls and ceilings are impregnated with adhesive primer. For wet rooms, options with antiseptic additives and water repellents are considered.

