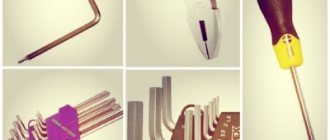
When making an important decision to level a ceiling or wall with plasterboard, you should study all the intricacies of the work. One of the important points is the choice of screws for profiles and drywall. They have distinctive differences in technical specifications as well as functionality. Screws for drywall and profiles are sold on the construction market and in supermarkets. But how do you find out what kind of screws are needed to fasten gypsum board sheets?
Installation Basics
Now there are 2 methods of installing windows, which differ in the type of fastening unit and the method of fixing the frame to the window opening. This is installation with and without unpacking. To install a window
, it is wiser to choose the 2nd option, since it is simpler, does not require special skills, and the work does not take much time. In addition, it helps to avoid errors during installation and makes it quite easy to configure all the fittings.
Installation without unpacking does not imply removing the bead and dismantling the glass unit from the frame. The structure itself is attached to anchor plates. The principle of forming such fasteners is shown in Fig. 1.
Before installing a new window, you must select the correct plates themselves. They come in two types: universal and designed for a specific model. That is, they take into account the requirements of a specific profile system. As a rule, such anchor plates come complete with complex, non-standard structures.
Figure 2. Layout of anchor plates during installation.
Specialized fasteners differ from universal ones in that they are equipped with ears. These elements are installed in the groove of the frame profile and fixed with self-tapping screws. Universal plates do not have special ears. They are simply secured with bolts.
For the installation of window structures, experts recommend choosing bolts of type 4.525. Their body must be equipped with a metal drill. Since the self-tapping screw is attached to a reinforced structure, another type of fastening may not fit or will not fix the plate very securely.
Classification
All plates that are widely available are divided into 3 basic types , each of which has design and functional differences:
Rotary. They are a composite structure of two steel elements connected to each other by crimping to form a hinge.
Parts can rotate in one plane.One of the parts of the plate is fixed to the frame, and the second can move, which provides a degree of freedom and the possibility of play during installation.
Rotating plates are used for stone walls made of bricks or foam blocks, since the movement of the window prevents delamination and loss of strength of part of the structural element.
- Fixed. The simplest and most inexpensive products are a standard perforated steel plate. When the element is fixed to the wall and plastic profile, a rigid seal is formed, which ensures the static position of the window in the opening.
- For fixing to wooden windows. It is one of the varieties of non-rotating plates. The difference between this fastener is that it is fixed to a wooden frame using sharpened ruffs that hold the steel part using friction.
The types of plates listed below may vary in length, thickness, weight, presence, number and diameter of holes for self-tapping screws.
Reference. The cost of parts depends on the amount of metal used in their manufacture, as well as the complexity of production of the element.
Rotary
Composite rotating elements allow you to achieve the following results when installing a double-glazed window:
- Movement of the window structure during installation, which ensures more accurate positioning of the window in the body of the opening during fixation and foaming.
- Possibility of moving the place where the frame is attached if there is a seam or other difficulties when fixing the plate to the outer wall.
- Compensation for movement due to temperature changes during window operation.
The rotating plate is almost never subject to deformation with loss of structure and local compression of the stiffener when external force is applied.
Fixed
The simplest external elements for attaching a window frame to the ends of an opening in a stone, brick or wooden wall. A number of technological and design requirements are imposed on non-rotating elements:
- The presence of bends and stiffening ribs provides increased rigidity of the elements, which prevents the development of plastic deformations under load.
- Several holes of different diameters for self-tapping screws with different dimensions.
- The presence of elongated perforation elements allows for play of the plate before fixing it in a static position, which ensures the versatility of its use.
Note! All fastening elements are subject to a single requirement for the presence of a coating that prevents the development of corrosion, which significantly increases their durability during window operation without the need for major repairs.
Difficulties associated with bolt-on installation
A few more reasons why you shouldn’t bother with bolt-on mounting when installing it yourself, but prefer plates. In order to attach the anchor bolt, it will be necessary to drill a hole in the PVC window frame. As a result, depressurization of the glass unit chamber is possible.
As a result of the fact that during drilling, the reinforcement of the system may be disrupted, problems are observed in the future when the window system freezes. As a result, excessive moisture formation occurs inside the room and mold appears on the surface of the slopes.
When fixing a PVC window with bolts, depressurization of the double-glazed window may occur.
If you lack experience and do not know the properties of the material from which the structure is made, it may happen that it will stretch if installed incorrectly. It will be almost impossible to correct the geometry of the window frame.
There are still positive qualities to attaching plastic windows to anchor bolts:
- reliability of fastening of the structure - in order to dismantle it, it will be necessary to carry out the reverse order of work that was done during installation;
- after fixing the window system, there is no need to carry out additional work, as happens with fixation with polyurethane foam: time for hardening, leveling, cutting, finishing;
- the structure can begin to be fully exploited immediately after it is installed;
- This connection method is reliable and durable, and fastening materials in the form of bolts are widely available and have an affordable price.
Self-tapping screws with press washer for window
When installing windows, press washers have a number of advantages:
- Universal installation without certain difficulties.
- Increased contact area with the structure, which improves connection reliability. The area of the clamping part can reach 11 mm. This is an excellent option for flat materials with a larger area.
- There are two types of configurations - with a pointed tip and in the form of a drill. In most cases, during installation you can do without creating a hole; the self-tapping screw is screwed in independently.
- Various lengths - up to 7.5 cm.
- Galvanization. The color coating of the fasteners allows you to choose a model to match your design without disturbing its aesthetics.
Difficulties associated with bolt-on installation
A few more reasons why you shouldn’t bother with bolt-on mounting when installing it yourself, but prefer plates. In order to attach the anchor bolt, it will be necessary to drill a hole in the PVC window frame. As a result, depressurization of the glass unit chamber is possible.
As a result of the fact that during drilling, the reinforcement of the system may be disrupted, problems are observed in the future when the window system freezes. As a result, excessive moisture formation occurs inside the room and mold appears on the surface of the slopes.
When fixing a PVC window with bolts, depressurization of the double-glazed window may occur.
If you lack experience and do not know the properties of the material from which the structure is made, it may happen that it will stretch if installed incorrectly. It will be almost impossible to correct the geometry of the window frame.
There are still positive qualities to attaching plastic windows to anchor bolts:
- reliability of fastening of the structure - in order to dismantle it, it will be necessary to carry out the reverse order of work that was done during installation;
- after fixing the window system, there is no need to carry out additional work, as happens with fixation with polyurethane foam: time for hardening, leveling, cutting, finishing;
- the structure can begin to be fully exploited immediately after it is installed;
- This connection method is reliable and durable, and fastening materials in the form of bolts are widely available and have an affordable price.
Basic principles for selecting fasteners for working with metal profiles
To ensure a strong connection, high-quality fasteners are needed. When choosing them, it is recommended to take into account the following criteria:
- Color. All products in one box must be the same color. This ensures that the batch is made from the same raw material and has a uniform coating, resulting in the same strength and corrosion resistance.
- For a rod, the head diameter and thread pitch must be the same for one batch.
- Sharp and drill ends must not have nicks or other defects.
- The cap should have a symmetrical slot; asymmetry indicates a defect.
- Factory-manufactured products are marked.
Polyurethane foam
Polyurethane foam-based polyurethane foam is used to fill the seam between the frame and the opening. Once in a humid environment, under the influence of oxygen, the contents of the cylinder after a certain time form a solid, durable porous material that reliably fixes the window structure in a given position.
Using polyurethane foam, the window block is fixed in the opening
Polyurethane foam differs in seasonality of use: winter, summer and all-season
When installing PVC windows, it is important to use foam that has a low expansion coefficient - this will avoid deformation of the structure or disruption of its orientation in space
Due to the vapor permeability of this material, moisture escapes and the formation of condensation indoors is eliminated. And to protect the window structure and slopes from excess moisture, a special self-expanding tape is installed to cover the installation seam.
Tools and materials
To install slopes made of sandwich panels, you must have the following tools:
- screwdriver;
- Bulgarian;
- metal scissors;
- stationery knife;
- roulette;
- level;
- goniometer (small);
- marker (pencil);
- gun with polyurethane foam;
- liquid plastic;
- masking tape.
Material to be used:
- Sandwich panels according to the dimensions of the slopes.
- “P” and “F” shaped plastic profile.
- Bracket for fastening slopes.
- Self-tapping screws.
Manufacturers and prices
Choosing screws for fastening drywall today is not so difficult. When you have definitely decided on their type, you can trust the following popular and trusted manufacturers:
- Ferdinand Bilstein – price 107-280 rubles.
World of Electronics, OOO – price 90 rubles.
SIC – price 120 rubles. Toptul – price 70 rubles. Orsha Tool Plant - price 90 rubles. Tomsk instrument - price 87 rubles.
The process of attaching drywall sheets is very responsible. All work must be carried out correctly and efficiently. The appearance and service life of the installed structure will depend on this. It is impossible to carry out full-fledged drywall fastening without self-tapping screws and guides. These two elements are considered the most important. But in addition to their correct installation, you also need to select suitable parts from a wide range.
Average prices in the Russian Federation
Self-tapping screws for PVC windows are sold in every construction market in the country in a wide range from different manufacturers. Average price for 1 kg of metal hardware , as of August 2022:
- Fittings – 300-350 rubles.
- Fittings and repairs – 280-350 rubles.
- With a countersunk head and a drill tip - 500-550 rubles.
- With semicircular heads - 450-500 rubles.
- With a press washer – 500-700 rubles.
- For window frames – 800-1200 rubles.
When purchasing products from 100 kg or more, the wholesale price offered by the manufacturer applies. Thus, for installation organizations, the hardware used in the manufacture and installation of PVC windows is much cheaper than for retail buyers.
The process of attaching a window to plates
The first step is to fasten the anchor plates in increments of no more than 1 meter. In order for the frame to maintain a stable position, the fastening elements relative to the corners of the frame should be located at a distance of no more than 25 cm.
The distance from the plates to the corners must be at least 25 cm
It is important to remember that the distance from the border of the window structure to the opening must be at least 2 cm. If this condition is not met, recesses must be made in the surface of the opening to accommodate fasteners
To do this, the plates are installed on the frame, then it is installed in the opening.
On the surface of the wall, use a pencil or chalk to mark the future location of the fasteners. Then the frame is removed and in place of the marks, using a chisel, a recess is made into which the plate should fit and be tightly fixed. This will allow you to subsequently effectively mask the plates when finishing the slopes.
At the next stage, a window structure is placed in the opening and its position is leveled using wooden blocks prepared in advance. Their thickness should not exceed 3 cm and their installation occurs only horizontally, while vertical alignment occurs, which is controlled using a level.
Vertical alignment is done by level
When the position of the frame is leveled, you can begin to secure the plates using 6*40 dowels on a concrete base or with self-tapping screws in other cases.
Gaps are sealed using polyurethane foam
To avoid frame distortion, the plates are secured in order. First, fix the lower left corner, then the right, monitoring using a level. The top plates are secured last. At the final stage, the seams are sealed using polyurethane foam.
Window installation. Scheme of work
1. Prepare the window.
- The protective film of the window is removed from the outside of the product. Under the influence of sunlight and precipitation, the protective film can become embedded in the profile. Therefore, the film must be removed from the outside at the very beginning of installation work.
the frame is covered with an external vapor barrier - PSUL (along the outer surface of the frame). PSUL - vapor-permeable tape will not allow the polyurethane foam to escape when processing gaps to the outside, protecting not only the appearance of the structure, but also the polyurethane foam from environmental influences - precipitation, ultraviolet radiation and wind, which destroy the foam. The degree of compression of the tape should be at least 25% of its full expansion.
anchor plates are attached to the window block (window frame).
2. Window installation. (2 photos alignment, window fixing)
- the frame is installed in the opening (attached on 4 sides of the frame in increments of 70 cm, while the distance from the corner of the window frame to the first fastener should be no more than 15 cm);
leveled (using a level or plumb line, the windows are aligned in compliance with the required installation gaps within permissible deviations - up to 1.5 mm per meter, but not more than 3 mm for the entire length of the product. The difference in window diagonals should not exceed 8 mm);
is fixed and secured.
3. A low-tide diffuser tape is attached to the outside of the window opening.
Diffusion tape is a waterproofing, vapor-permeable tape made of membrane-type synthetic non-woven material. The tape has two adhesive strips on one side. One strip is intended for attaching the tape to the translucent structure, the other is for attaching the tape to the wall slope. The use of waterproofing tapes provides reliable protection of the mounting foam from moisture on the street side and ensures the removal of moisture from the foam to the outside.
4. Fittings are adjustable
5. Gaps foam. (3 photos of foamed gaps and foamed, view of a fixed window)
Filling the mounting gap with mounting foam should be done with the window block fully assembled and finally secured, and the completeness and degree of filling of the mounting gap should be monitored (the mounting foam is applied along the entire perimeter of the window frame, taking into account that this mounting material increases its volume up to 3 times) .
6. Vapor barrier tapes are applied. Indoors, the seam is treated with a special tape that has vapor barrier properties (made from aluminum foil). Width: installation gap width plus 30mm or more.
7. The ebb is attached. The ebb molding is designed to protect the lower part of the window opening and the mounting seam from the effects of rain, snow, and ice. When installing the drip sill, one mandatory condition must be observed: since there are special drainage holes on the outside of the window frame that cannot be blocked, it is necessary to ensure that the lower edge of the window frame is not recessed relative to the outer edge of the window opening. With this arrangement of the box, the ebb will fit firmly under the window from the outside. The flashing is installed under the window to avoid water seepage at the connecting seam of the flashing and the window frame.
Upon completion of window installation, the protective film must be removed from the frames and sashes. Under the influence of sunlight and precipitation, the protective film can become embedded in the profile.
The warranty on the assembly seam in accordance with GOST R 52749-2007 is at least 5 years. (photo by guest)
Any deviations from GOST requirements provide serious savings, but lead to loss of quality for the Customer.
The most common “saving” is the usual foaming of the seam without steam and waterproofing the seam. This installation is 2 times cheaper! Installation of plastic windows is a responsible process, which significantly determines how trouble-free their operation will be. Of course, this operation must be performed by experienced professionals; only in this case can it be guaranteed that the windows will fully comply with all technical specifications.
Types of products and their features
For some reason, all the reviews on the network are written about only one mounting option. Meanwhile, two types of structures are used, which differ markedly in principle of operation and design. Let's deal with this aspect first.
Type 1 – classic window anchors
First, let's look at their design; under the photo and drawing all the components of the product are described:
Tact looks like a standard frame anchor
- The cut steel bushing is made of galvanized steel; it has protrusions in the upper part that prevent the element from rotating when fastening it, and in the lower part there is a groove into which a special nut fits. When tightened, the sleeve expands and thereby achieves strong fixation of the anchor in the surface;
- The threaded screw is inserted into the bushing, thanks to which the fastening is made. The head is made for a PZ3 slot, which allows you to work with a powerful power tool. Length may vary depending on the size of fastener you use;
- A special cone-shaped nut is screwed onto the screw; it has special protrusions that are inserted into the slot of the sleeve. When tightened, the nut is pulled towards the head and wedges the sleeve until it securely fixes the anchor.
The protrusions on the nut should be located in the grooves of the sleeve in order to open it well
Type 2 – window anchors for hollow structures
If you need to fix windows in structures that have voids, then the classic option may not be suitable; you need an improved solution that will ensure strong fixation in both hollow and solid bases. Let's look at the design features:
This option differs significantly in the method of fixation in the surface
- The sleeve differs in that the cuts in the lower part are not located at the very end, but indented from it. The result is a system similar to butterfly dowels, when when fastening the protrusions move apart, which can perfectly fix the fastener in hollow material. The photo clearly shows and understands the principle of operation of this version of anchors;
- The stud used is the same as in the version above, with the only difference being that it may have a longer threaded part. This is necessary so that the anchor can be tightened until the fasteners are firmly fixed in the void;
- The nut in this case is not cone-shaped, but flat, since it should not wedge the bushing, but tighten it.
Fasteners for PVC structures
Plastic structures are installed using anchors, self-tapping screws (in some cases with dowels) or anchor plates.
Anchors
This type of fastening is available in two versions: a classic anchor and an anchor for hollow materials.
- Classic anchor. Consists of an outer galvanized sleeve, a Phillips screw and a bushing. The principle of operation is as follows: initially the screw and part of the sleeve screwed onto it are inside the sleeve, which expands when the screw rotates in a certain direction, thus fixing the anchor in the seat. A regular anchor is great for fastening in dense materials (brick, concrete, cinder block).
- For hollow materials. In general, this anchor is similar to the classic one - the differences are in the design of the sleeve and the sleeve, which now does not expand the sleeve, but deforms, squeezing along the axis (deformation is possible thanks to special slots). When twisted, part of the anchor significantly increases in diameter, which allows it to be fixed in loose environments. In dense materials, such fasteners also hold up well.
Advantages and disadvantages of anchor plates
An alternative to anchor plates are dowels that can support not only large windows, but also doors. But this option has a number of disadvantages:
- the unpacking method is difficult even for experienced workers; an error in the work may result in a crack in the glass;
- unlike anchor plates, it is unrealistic to mount dowels alone; help is needed;
- This option is costly in terms of effort and time.
- Using an anchor plate has many advantages:
- no need to disassemble the window structure;
- the attachment location can be adjusted;
- easy to level the window;
- there is no need to damage the integrity of the window;
- easy dismantling;
- reliability and durability.
Rice. 10. The use of anchors is preferable to the use of dowels
The only drawback of anchor fastening is considered to be its low ability to withstand heavy structures, but this problem can be corrected by using polyurethane foam. As you can see, the use of anchor plates is a priority and convenient.
Repair screws for window installation
Repair screws are often confused with hardware screws. Let us highlight the key features of this group of household hardware:
- Due to the increased diameter, these self-tapping screws can even be used for fastening complex structures. For example, if, when installing fittings, the threads of hardware break off, choose repair screws, which will solve the problem;
- excellent for fastening plastic because they have high strength;
- There are grooved protrusions on the inside of the head that ensure secure fastening. This design prevents arbitrary unwinding of the self-tapping screw;
- rounded top part of the hardware. The head cuts into the surface as much as possible when the self-tapping screw is perpendicular;
- the most popular sizes are 25 and 38 mm.
Repair screws are easy to install into the structure of a plastic window. You don't need any additional tools. You can install it in the hardware in the hole left over from the old fasteners. If there is no hole in the structure, there is no need to make one specially. When screwing in with a screwdriver, it is better to first mark the place of screwing in with a drill.
Self-tapping screws for attaching the starting profile to the window frame
To attach the starting profile to the window profile, 3.5*11 screws (bugs) are usually used. They can be either with or without a drill. It would seem like a small thing. But it is the choice of the self-tapping screw tip that will ultimately determine not only the ease of installation, but also the quality of work. When tightened, a self-tapping screw without a drill pushes all the plastic of the starting profile outward from the drilling area, due to which a rather high and hard tubercle “grows” on the reverse side. It will inevitably interfere with the tight fit of the starter to the window profile. To remove the tubercles, you will need to spend time unscrewing the screws, cutting off all the protrusions and re-attaching the starting one. And if you leave everything as it is, there will be a gap. Using a self-tapping screw with a drill allows you to solve this problem. Although the plastic squeezed out with a self-tapping screw will still end up on the back side of the starting one, but in much smaller quantities. There will be no more accumulation of plastic around the hole, because most of it will come out in thin shavings to the top and will be pressed by the head of the self-tapping screw to the inside of the starting profile.
Preparing the opening
When performing window installation work, you always have to devote some time to preparing and restoring the opening. This problem is especially relevant when replacing window units in old buildings due to extensive damage to dilapidated structures. In a good way, for a high-quality solution it takes two to three days, which is simply impossible in residential premises. Quick-hardening cement-based compounds and polyurethane foam in combination with sheet insulation come to the rescue.
After dismantling the old window, the opening must be freed from moving, crumbling particles and protruding elements of the old internal slopes. All surfaces are cleaned of dust, dirt, and oil stains. Loose areas should be secured by filling with a waterproof binder.
Large voids formed when replacing window blocks, for example, between rows of facing and load-bearing brickwork, are sealed with dense insulation, and all through holes are foamed.
In addition, it is necessary to remove sagging mortar, repair cavities and chips on the internal surfaces of the quarter that exceed 10 mm in height
Such attention to this section of the opening is explained by the fact that a hermetic tape seal will be placed here
Measurements for Quarter Windows
We measure the horizontal shortest distance between the quarters. Then you need to add one and a half centimeters on each side. This is the width of the finished window. Vertical measurements begin from the bottom of the opening, and to the beginning of the upper quarter. This is the actual height of the future window. The window sill and ebb are measured in the same way as the window sill and ebb measurements for windows without a quarter. You should end up with several numbers:
1. height of the future window;
2. width of the future window;
3. the length of your window sill;
4. the width of your window sill;
5. optimal ebb length;
6. optimal width of the ebb.
If your living space is not new, and you have not yet removed the old window, then the measurements are the same as for a new house. The only difference is that you replace the window opening with the outer measurements of the window frame.
Features of mounting plates
Design and varieties
The most common window fastening options
Window structures made of wood, aluminum or metal-plastic profiles can be installed in two ways - with or without unpacking (that is, removing the glass unit).
For an inexperienced specialist, removing a double-glazed window without damaging it, and then installing it back correctly is a non-trivial task, therefore, when doing the installation yourself, it is best to do without unpacking.
When installing on anchors, it is necessary to remove double-glazed windows from all blind parts
In order not to damage the frame and not waste time on healing the glass unit, you should use special plates rather than anchors to install the structure. This plate has a fairly simple design:
Scheme of using such fasteners (sectional view)
- Material: galvanized steel. High-quality products are coated with a multi-layer anti-corrosion coating, making them virtually rust-free.
- Dimensions - approximately 150 mm in length (there are longer ones for installation in deep openings) and 25 mm in width.
Standard part made of galvanized steel: 150x25x1.5 mm
- Metal thickness - from 1 to 2.5 mm. Standard products are made of 1.5 mm steel, and this is quite enough to securely fix standard windows in the opening. Mounting plates from 2 mm are used when fastening heavy structures made of multi-chamber profiles, large-sized frames and for high-rise installation.
There are two types of plates for fastening window structures:
Universal products that are suitable not only for windows
- Universal. These are simply perforated strips of metal. They are used for wooden windows, and for PVC products, and for other purposes.
- Specialized. They are usually equipped with latches, the configuration of which corresponds to the configuration of the protrusions on the PVC profile. In this case, they are fixed not only through the use of fasteners, but also by hooking onto the profile.
Specialized models with gear mounting for increased reliability
Example of use when installing a wooden pole
The second type is more reliable, so if possible, try to use it.
Terms of use
The mounting plate for PVC window blocks provides less rigidity of fixation compared to an anchor. On solid structures this is not so noticeable, but in windows with large and heavy sashes the difference will be quite obvious. To compensate for this, you must strictly follow the rules for using plate fasteners:
We snap the part onto the profile and fix it with a self-tapping screw and drill
- Fixing the plates on the profile. The part must not only be snapped onto the frame, but also additionally secured with a self-tapping screw with a diameter of at least 4 mm and a length of 25 mm (with a drill). The self-tapping screw is twisted so that the drill fits into the reinforcing profile.
Optimal placement of fastening points - at least every 700 mm
- Correct placement. On the sides, the plates are installed at the top and bottom, at a distance of about 200 mm from the corners. In the upper part, the fasteners should be placed either strictly in the center or opposite the impost. The optimal pitch for installing plates is 500–700 mm.
- Bend angle. To ensure contact with the opening, the plate is bent not at a right angle, but at an acute angle. This minimizes lateral movement of the frame and increases fixation rigidity.
Properly curved parts should look something like this photo
- Fastening to the opening. Each plate is fixed in the opening using one or two plastic dowels with a diameter of 6–8 mm. The dowel is driven into a pre-drilled hole, and its wide neck should press the metal part to the plane of the opening. Final fastening is accomplished using a tapered locking screw.
Fastening to the opening is carried out using dowels after pre-drilling
Such fasteners are used to fix the part
How to attach the suction cup so that it holds?
How to firmly attach the suction cup to the tile?
Alcohol is best for degreasing. After such manipulations, just press the suction cup tightly against the tile, and it will remain in the place you want. If you need to move the product, wet the tile next to the suction cup. It will glide easily on such a surface, but you won’t have to peel it off.
What is the best way to lubricate the suction cup?
The easiest way to attach the suction cup to the glass is to use something sweet that contains sugar. We suggest you take regular Coca-Cola, just regular, not Zero or Light. The regular one has quite a lot of sugar. Wet your finger with it and lubricate the suction cup.
How to attach Velcro?
How to attach: instructions
- First, degrease and wash the surface. ...
- Degrease the Velcro surface as well.
- If the suction cups come with mugs with a sticky side, do not neglect them: they will make the attachment stronger.
- Place the suction cup on the cleaned wall and apply maximum pressure.
How can you soften the filter suction cups in an aquarium?
“Old rubber products can be restored to softness and elasticity by immersing them for 20-30 minutes in a weak solution of ammonia. You can immerse the rubber product for 1-2 hours in clean kerosene.
How do suction cups work?
A suction cup is a device or organ used for attachment to solid surfaces. ... In a simple case, the suction cup, under the influence of an external force, is flattened on a flat surface, and after the deforming effect disappears, it restores its shape due to its own elasticity.
Where is the best place to install a DVR?
Where should I attach it, dear one? Still, the best place to mount the DVR is the “patch” around the rearview mirror or directly behind it, without compromising the rain and light sensors. There and only there the device is able to do its job without interfering with the car's security systems.
Selecting window fasteners
Fastening elements used in the installation of PVC structures must meet the following requirements:
- Ensuring rigid fixation of the plastic window in the opening, taking into account wind and shock loads. Taking into account the impact of wind is especially important when installing blocks on the upper floors of buildings. Impact loads on the structure are most significant in large opening systems.
- Compensation for temperature loads resulting from seasonal changes. For example, in winter the profile bends into the room (1-2 mm per linear meter), therefore, the fastening should allow the structure to move by this amount.
What determines the choice of fasteners?
When choosing a fastener, first of all, they look at what the opening in which it is planned to install a plastic window is made of. Openings are constructed from brick, concrete, decorative stone, wood, metal, cinder block, shell rock or light porous materials (foam concrete, aerated concrete and others).
The second important factor is the type of structure and technical features of the installation. Balconies, loggias, entrance doors, hallways and windows are installed from PVC profiles.
Supporting Consoles
They are made in the form of profile metal plates with holes, which are used for fastening the profile on one side and the anchor on the other. The use of supporting consoles allows the installation of large-format window structures with complex configurations and heavy weight.
Supporting consoles are used when installing large-sized window units
The material used to make the supporting consoles is coated with a layer of zinc, so they are resistant to moisture. An example of a single cantilever is a flat rod bolted to a wall. Its height can be adjusted.
Review of fasteners for plastic windows – which one to choose?
There are many fasteners on the market, but it is their diversity that is perplexing. Different sources praise this or that fastener, but here, as elsewhere, each has its own characteristics, advantages and disadvantages. Let's consider each of them in order, and tell you why this or that element is used.
Anchor or anchor dowel.
The first professional mount, very reliable. It consists of three elements: a threaded screw, a sleeve (this is the top layer) and bushings inside. When screwing the screw, the bushing expands the sleeve and the fastener is securely fixed.
But there is also a drawback: the fasteners are fixed so securely that sometimes removing them back is very problematic. Of course, when installing plastic windows you don’t think about this, and someday you may also change them, or if suddenly they are installed out of level and you need to reinstall them, problems will be obvious. And according to experienced installers, sometimes a drill can simply get into the reinforcement and another hole needs to be drilled. You can turn the entire structure into an ugly state.
One more thing: it is quite difficult to fix in houses with multi-layer walls, it will simply fall through the wall and the spacer will not be secured. For example, the P-44 series of panel houses has an air layer with insulation inside, into which it is simply impossible to anchor it.
The dowel size varies from 100 to 200 mm, thickness 8-10 mm. You choose the size based on the distance from the frame to the slope you have. The anchor is installed on the inside of the structure under the glass. The thickness of the frame is usually about 4 cm, plus it must enter the wall at least 4 cm, that is, 8 cm is already occupied. If the distance from the frame to the slope is 2-3 cm, then you can take a 110 mm anchor; if it is 5-7 cm, then 150-160 mm.
Dowel or screw for concrete.
An ordinary screw is also a reliable fastening, but unlike the previous one, it is quite easy to dismantle and remove if necessary.
Disadvantage: the same as with the anchor - impossibility of fastening in houses with walls with insulation.
The size range of the dowel is approximately the same - 100-200 mm length, 8-10 mm thickness. Choose the same length as the anchor dowel.
Anchor plates.
The latest creation of window fasteners. There is a lot of controversy about reliability, but leading companies use them. By the way, they can be rotating (the long part turns at a large angle) and non-rotating.
The installation process is approximately as follows: a plate is fixed to the end part of the window, and its other part is fixed to the wall using a regular plastic dowel (5-8 cm long).
Advantages:
- The frame is not drilled through, as happens with an anchor or dowel.
- If there is rebar or other obstructions in the wall, it will rotate to the place where there is none, and there is no need to drill a second hole.
- Again about P-44 and multi-layer walls: this is practically the only fastening option for such houses. There are also houses in Russian villages made from what was there. Their contents are unknown to the owners themselves, and the plates help us here too.
Flaws:
Conventionally, everyone blames the fact that the fastening to a small and narrow plastic dowel is unreliable, and they rave about some kind of wind load, which is not true.
The window is 90% supported by polyurethane foam.
If you do not plan to foam the window, but use other insulation, such as mineral wool, then they are definitely not suitable for you. And if foam is applied to your frame from all end sides, across its entire width, then there is no reason to worry that the structure will not be securely fastened or will fall out.
The dimensions of the plates are also from 100 to 200 mm, but they are mounted on the outer edge of the frame, so plates of 120-130 mm are usually sufficient for any home.
Also keep in mind that there are different products for different manufacturers of plastic profiles, and their widths are different (Rehau has theirs for Rehau, KBE has theirs, and so on). In large cities, finding what you need is not difficult, but for residents of small cities it is recommended to order this fastener together with the window, since you simply may not find what you need.
Technical parameters of self-tapping screws: how do hardware differ?
If we turn to the international classification of self-tapping screws, their parameters determine the number of turns per inch, length in inches, diameter.
The diameter is determined by a one- or two-digit number. The higher its value, the larger the size of the screw. For example, screw #6 is larger than screw #4. Self-tapping screws for wood and metal sheets are also indicated with a single or double digit number. Sometimes the marking is presented in the form of a fraction.
Threads per inch are sometimes confused with thread pitch. To understand, the pitch is the distance from one thread to the next. In the inch series, this is the number of complete threads per inch. There are self-tapping screws with coarse and fine threads. Their features:
- less risk of breakage when cutting large threads;
- Rough thread is not easy to damage during transportation;
- there is a list of materials that are best used with large threads;
- fine threads are better suited for cutting thin and hard materials;
- thin threads are better for adjustments;
- Self-tapping screws with fine threads are more durable when stretched.
The length is measured from under the head of button, tongue and groove, flange, hex, flat, round, end, and anchor hardware. The length value includes the height of the head in such types of fasteners as flat and oval.
Installation of plastic windows on an anchor
Everything related to the installation of plastic windows on anchors can be boiled down to the following: the anchor fastening system implies a through hole in the window frame, which undoubtedly violates its integrity, resulting in depressurization of the profile chambers.
In addition, the anchor is driven into a brick or concrete wall, and, as already mentioned, passes through the profile of your plastic window, coming into contact with the reinforcement of the profile system inside.
The result of such interaction can be icing and freezing of the double-glazed window, and as a result - its fogging, in addition, there is a possibility of flowering of the slopes. The second concern when installing PVC plastic windows on anchors is the possibility of stretching the window profile structure if it is not installed carefully.
After the installation is completed, returning the frame to its normal position will be quite problematic.
In addition to these disadvantages, it is important to highlight, perhaps, the main advantage of anchor installation - high reliability of fastening and quick readiness of the window for use, this is especially convenient when installing balcony blocks
Screws for fastening in concrete
In everyday life they are called turboprops, dowels or even self-tapping screws for concrete. They have sufficient holding forces that allow them to be successfully used when fixing PVC windows to the wall.
Advantages
- reliable fastening in durable materials;
- accessibility of dismantling to make adjustments or replace parts.
Flaw
It cannot be used with a non-uniform structure of multi-layer walls due to the presence of voids with heat-insulating inserts in them.
Size selection
The length of the dowel, as well as the anchor bolt, is influenced by the size of the gap between the window frame and the opening in the wall.
Installation of plastic windows - choosing fasteners
Modern plastic windows have excellent technical characteristics and, subject to operating rules, are able to perform their functions for many years without breakdowns. However, all the advantages of translucent structures can become useless if errors were made during their installation, for example, inappropriate fasteners were used.
Quite strict requirements are imposed on fasteners for installing windows, since during operation the products are subject to strong, varied loads. A poorly secured window can fall out of the opening from a strong gust of wind or from accidental pressure on it from the inside or outside. In addition, incorrectly selected fasteners can cause a violation of the tightness of the window system, a source of cold air and street noise entering the room. Let's look at the most common types of fasteners and evaluate their advantages and disadvantages.
Starting profile and other elements for mounting PVC panels
Plastic panels are a universal material for finishing walls, ceilings and slopes in rooms. For high-quality installation, additional accessories are required - fillets, corners and profiles for PVC panels. This is a whole set of components used for fastening and enhancing the aesthetic component of the decorative coating, made from the same material as the main elements - polyvinyl chloride (PVC).
Content
Characteristics and classification of accessories
Before installing the panels, you should decide on the format and number of additional accessories. When calculating, the following is taken into account:
- condition and finishing of surfaces combined with the mounting plane;
- length, width and height of the room;
- method of installing panels on a working plane.
If only one wall is planned to be finished in a room, then the process of installing a decorative coating begins with the installation of a starting profile for PVC panels. Finishing work covering all vertical surfaces eliminates the need to install this element at the beginning of installation. It will be used for the panels of adjacent walls that form the corner transition.
If the room height is more than three meters (the maximum standard panel size), the addition of “height” is made using a connecting element. If the length and width of the area being designed also exceeds the standards of the product range of plastic ceiling plinths, interlocking connections will be needed to cover the joint line.
Depending on the installation method (on the frame or directly on the wall), external and internal corners for PVC panels are selected.
Main auxiliary accessories:
- starting profile, another name is the end element;
- connecting profile;
- end element with corner;
- external and internal profiles-corners;
- rolling (90 degrees) and universal angles for PVC panels;
- ceiling plinth (fillet).
It is worth considering all the advantages and disadvantages of each of these elements.
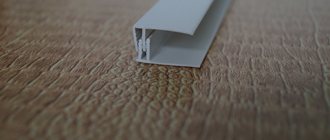
Start profile
In cross-section, this element represents an unfinished Russian letter “P”, that is, its hidden side is larger than the front side. This format simplifies the installation of the profile on the frame using self-tapping screws and the subsequent insertion of the main decorative element (panel) into the fixing flap.
The end element has good longitudinal flexibility, which makes it possible to compensate for existing deficiencies of adjacent surfaces without damage.
- If installation is carried out on a frame, the profile is fixed in the position of maximum abutment to the adjacent walls, then the forming element of the decorative coating is inserted into it until it stops, maintaining the absolute level at the best possible level.
- Installation on a wall surface using adhesive or foam requires a slightly different approach. The starting profile is installed on the outer joining end of the panel. A binder is applied to the working surface of the main coating element (in a zigzag), capturing the profile. The panel is installed in its final position on the wall, and the end element is immediately carefully adjusted in accordance with the topography of the abutment surface.
The starting profile provides unique opportunities for designing a decorative canvas made of plastic panels. This element can replace ceiling and floor plinths. In rooms with limited volume and large contents, such a device provides a number of tangible advantages. For example, in standard bathrooms of apartment buildings, where the density of installation spaces is calculated in centimeters, the absence of an additional volumetric element that forms the angle between the wall and the floor allows you to install a washing machine or laundry basket close to a vertical surface.
Connecting element
The connecting profile externally looks like two connected end elements with a common internal partition. Used in structures whose linear dimensions exceed the standard length of PVC panels.
When installing on a frame, it is necessary to install an additional metal profile or wooden beam along the joint line. The connecting profile is fixed on it on both sides with self-tapping screws and a press washer. The panels are inserted into the mounting grooves. When finished, the decorative surface is a solid canvas with a plastic strip running along the joint and hiding the joining seam.
Profile with corner
This element in cross-section resembles the letter F. In fact, this is a starting profile, the visible part of which is designed as an inner corner. It is used as a final detail in the design of corner transitions.
It can be used instead of a starting profile if it is necessary to cover a significant gap formed at the junction with an adjacent wall. However, it does not have the flexibility of its analogue and is suitable for work only on perfectly flat surfaces.
External and internal corners
Already from the name itself it is clear that these accessories are used to design internal and external corner joints of PVC panels. They are fastened to the frame using double-sided jointing with self-tapping screws. They create a perfectly straight line for the decorative framing of corners, but on the condition that the surfaces meet strictly at an angle of 90 degrees.
If the working surfaces at the junction form an obtuse or acute angle, the use of these elements is not relevant, since the ends of the panels will not be able to fit into the groove due to distortion and compression, or a gap will form between the outer part of the profile and the surface of the panel. In any case, aesthetic integrity will not be achieved.
Rental and universal corner
The rolled angle has a rigidly specified side position during molding, which is 90 degrees, and a standard length of three meters. These indicators determine and limit the use of the element in places where mounting surfaces meet at right angles.
The universal plastic corner is supplied to the retail chain in rolls, in the form of a tape with a central fold groove. This element accepts any angular shapes specified by the room configuration. Corners of both types are mounted on completed internal and external corner joints of panels, using appropriate adhesives.
Ceiling plinth
The ceiling plinth is mounted on a suspended frame on three sides, leaving the final part open. This is dictated by the practical impossibility of installing the last panel by performing several operations simultaneously:
- slam the lock with the previous element that forms the ceiling;
- fix the transverse ends of the panel in the mounting grooves of the fillets located on opposite walls;
- insert the free longitudinal edge of the panel into the groove of the plinth limiting the working plane.
Only after the installation of the decorative ceiling structure is completed is the missing fillet fragment installed. To do this, the part that forms the receiving groove is carefully cut off, and the plinth itself is glued to the ceiling and wall.
Possible uses
The use of additional accessories when decorating a room with plastic panels allows you to create combined interior zones. Using the connecting profile, it is easy to make a color transition. The starting element allows you to effectively emphasize the boundary between the plastic coating and any other material (ceramic tiles, wallpaper, painting).
In rooms with high ceilings, thanks to the joining profile, you can create three-level zones, where the upper and lower parts can be made of similar elements, and the middle row is highlighted with a colorful panel with a pattern corresponding to the purpose of the room.
The end element is convenient for decorating the final part of the canvas made of PVC panels. In the kitchen, such combinations are especially relevant in the work area, where the “apron” is made of tiles, and the rest of the wall surface is covered with plastic. Decorative coverings that combine plastic panels mounted directly on the wall and wallpaper glued to the upper half of the working surface look great. In this case, the starting profile serves as an elegant miniature border.
With the help of additional accessories, you can realize any design fantasies.
Geometric and technical characteristics of window screws
| Standard size | 3.9 x 13 | 3.9 x 16 | 3.9 x 19 | 3.9 x 22 | 3.9 x 25 | 3.9 x 32 | 3.9 x 35 |
| Length L, mm | 12,3-13,7 | 15,3-16,7 | 18,3-19,7 | 21,3-22,7 | 24,3-25,7 | 31,3-32,7 | 34,3-35,7 |
| Length of threaded part Lt, mm | 8,6-9,8 | 11,6-12,8 | 14,6-15,8 | 17,6-18,8 | 20,6-21,8 | 27,6-28,8 | 30,6-31,8 |
| Height of the top edge of the head U, mm | 0,8 | ||||||
| Slot depth Q, mm | 2,03-2,53 | ||||||
| Head diameter A, mm | 7,14-7,50 | ||||||
| Thread pitch P, mm | 1,3-1,4 | ||||||
| Outer diameter D, mm | 3,75-3,91 | ||||||
| Inner diameter d, mm | 2,76-2,92 | ||||||
| Drill diameter Dp, mm | 3,05-3,20 | ||||||
| Head height H, mm | 2,4-2,5 | ||||||
| Drill length T, mm | 4,5-5,5 | ||||||
| min breaking moment, Nm | 1,5 | ||||||
| Hardness* of core, HV | 240-425 | ||||||
| Surface hardness*, HV | 560 min | ||||||
| Nominal weight 1000 pcs., kg | 2,30 |
* Hardness is the ability of a material to resist impacts.
Installation rules
A standard window requires at least five plates. One plate is fixed in the central part of the frame, and two on both sides: one at the top and one at the bottom. In this case, you should retreat 20 cm from the border of the frame.
To install a standard-shaped window, 5 plates are enough
Installing windows without unpacking involves fastening the frame with anchor plates from the outside of the window opening. In this case, there is no need to remove the glazing bead and glass unit. When unpacking, fasteners are provided through the frame with preliminary disassembly of the window system into its component elements: sashes, double-glazed windows.
Fastening with plates is appropriate for use on windows of medium and small size, most often these are standard windows of residential buildings and apartments. Large window systems (more than 4 square meters) are attached to anchor dowels through the frame, since the weight of such a structure is significant and the plates will not support it.
Door frames are also secured using anchor dowels. In professional circles among installers of metal-plastic structures, this installation method is considered the most reliable, but it has some disadvantages:
- This type of installation is difficult even for professionals. There is a high risk of damage to the glass unit when removed from the frame;
- This type of fixation by one person is often not possible;
- This is a labor-intensive method that takes considerable time and requires appropriate skills.
When installing windows on dowels, there is a high risk of glass damage
If you want to install the window yourself using this method, you will need to buy 10*132 mm dowels. Among the tools, you will need a powerful hammer drill - this device is professional and expensive equipment that is rarely used on the farm, so it is not advisable to purchase it for the installation of one or two windows. You can look for a company that rents out construction equipment; usually hammer drills are the most popular product.
By installing the window on plates, all these problems will not have to be solved. You just need to buy the plates themselves.
How many self-tapping screws are needed to mount the structure?
Fasteners are often used when assembling a metal frame under sheets of drywall. Their number depends on the design features. In the standard version, the step between the metal profiles is 60 cm, in the reinforced version - 40 cm. The number of jumpers must also be taken into account.
Let's carry out the calculation using the example of a wall measuring 3*4 meters. To increase rigidity, jumpers are used, installed at a distance of 50 cm from each other.
The distance between the profile elements is 40 cm. To install one sheet, you will need 4 elements and 6 jumpers of 40 cm each. The distance between the fasteners is 25 cm. For 1 profile you will need: 300/25+1=13 pieces. For the frame you will need 13*4=52 pieces. Per sheet of drywall: 52+6=58 pieces.
This is an approximate amount.
More accurate calculations are made per 1 square meter. The quantity must be divided by the sheet area: 52/3 = 18 pieces. For the entire wall area you will need 12 square meters. meters*18=216 pieces. Consumables must be taken in reserve, so the estimated need is 250 pieces. < Previous Next >
Mounting features
When installing, be sure to pay attention to the raw materials from which the partitions are made. Walls are often concrete, wood or brick. Each material has its own characteristics, so the installation technology adapts to the characteristics of the opening
Tree
It is prohibited to install window units in partitions made of wood. Under the influence of weather conditions (temperature, humidity), log houses or frame structures are deformed, which will cause damage to the profile. If you fix the frame by unpacking, then changing the structure of the building will push out the fasteners. The loose screws will gradually come out of the wood and remain inside the glass unit.
Installation of anchor parts on woodSource okon-sp.ru
Installing windows on plates is the only correct solution, even for heavy and multi-tiered blocks. The profile will be protected from deformation by an additional frame made of wood, which is placed in the opening. When installing on anchor parts, leave 3 cm of free space between the box and the partition. The gap is then insulated with jute and hidden under the platband.
Plastic window sills are installed using traditional technology. If a wooden model is needed, then first install a natural horizontal structure, then proceed to fixing the additional frame. The bottom profile rests its entire surface on the wood part. Empty spaces are foamed with a polymer mass, which, after crystallization, strengthens the fastening. After drying, the remains are cut off and the joints are puttied.
Concrete
Strong material is very difficult to drill. In standard high-rise buildings, partitions are more susceptible to drilling than in country houses. Holes in the concrete for the anchor plates are made with a hammer drill with a ten-millimeter nozzle. Minimum depth – 40 mm. For reliable fixation of parts, professionals advise using screws with expansion dowels with a diameter of 6 mm.
Traditional mounting optionSource vse-okna24.com
When installing heavy plastic windows on a loggia, you will have to use a combined installation technology. Metal fasteners will not withstand the weight of the structure; the concrete wall and ceiling will easily crumble. First, the screws are screwed into the lower corner of the frame, then the profile is placed on the steel parts.
Aerated concrete
The material consists of cement and sand. Due to the porous structure, during the installation of plastic windows there is a danger of painting the wall or loosening the fasteners. Before installation on aerated concrete, a spacer made of wood is placed under the frame. After completion, fill the gaps with construction foam.
Novice installers are often too lazy to drill holes, so they only screw the anchor plates with screws. Due to the poor quality of fastenings, the structure sags under axial loads. When working with porous structures, be sure to use self-tapping screws with dowels.
Plates in loose blocksSource zen.yandex.ru
The mounting parts are attached to the frame with fasteners 1.9 cm long and 4.8 mm in diameter. From the edge of the opening to the window, leave a depth of 8-12 cm. If the outer part is to be insulated, then the structure is placed towards the outside to the thickness of the insulating material. To complete the installation, the anchor plates are screwed to the slope with self-tapping screws and dowels. There are 2 elements for each part.
brick wall
If the partition is made of new material, then installation difficulties will not arise. Installing plastic windows on bricks is easy to understand even for novice installers. In openings with vertical voids, fasteners are fixed in the interblock seams. The contractor must control the immersion of the screwdriver.
Difficulties arise when working with old walls. If the opening is partially destroyed or low-quality raw materials are used, drilling for anchor plates becomes more difficult. The drill bit may get caught in a masonry joint and become dislodged. To minimize the problem, drilling is carried out exactly in the middle of the block.
Features of anchor parts in the wallSource skdomaks.ru
For reliability, professionals advise combining unpacking and metal fastener technologies. The side parts of the blind sections are fixed with screws and dowels, parts with movable doors are placed on plates. The top is installed on anchor mechanisms, the bottom on mounting spacers and foam.
Metal carcass
Window blocks are attached to the structure using metal parts. The installation technology depends on the thickness of the frame to which the profile is fixed. If the parameters of a square steel pipe are 2 mm, then the anchor plates are screwed into a press washer with a drill. It is better to first punch through stronger walls with a tool and then fix them.
How to determine which ones are needed?
The choice of high-quality self-tapping screws largely determines the safe, long-term and comfortable operation of the window opening filling element.
Before purchasing self-tapping screws, you need to pay special attention to the following nuances :
Preliminary measurements of the parts to be connected to select hardware of the optimal length and diameter.- Selecting a self-tapping screw head. For moving elements of the sash, fastening elements with hidden heads are required, which form a single plane with the metal surface of the fittings.
- When attaching vertical and horizontal profile elements to each other, self-tapping screws with press washers or round heads are required to prevent pressing through the soft structure of the PVC product.
- All hardware must be made of high-strength steel; the jaws on the head must not wear off when tightened.
- The best solution would be to buy self-tapping screws with a galvanized coating, which prevents corrosion and destruction over time.
- The thread on the surface of the product must be uniform, without scoring, the tip of each self-tapping screw must be sharp, without bends.
If a consumer has doubts about the quality of a self-tapping screw at a retail outlet, it is recommended to purchase a small quantity to check its strength, and then order the bulk.
It should be noted that a self-tapping screw cannot cost less than the steel itself from which it is made. If the price for 1 kg of products is too low, such hardware is most likely made of low-quality material.
How to attach plastic windows to brick?
Brick is a good material for building buildings. But attaching PVC windows to brick is sometimes problematic. What exactly is the difficulty?
If you use a frame dowel, then it is better to drill holes in the frame for this dowel not in advance, but locally. This is necessary in order to get the anchor directly into the middle of the brick, and not into the mortar between the bricks. Of course, no one does this (by the way, neither do I). After all, this is a waste of time.
It is advisable to choose the frame dowel as long as possible (minimum penetration into the brick is 6 - 10 cm). If the brick is hollow, then use the 202nd anchor.
You can use anchor plates in brick if you are sure that the brick is not hollow. But even solid brick can be of poor quality. And it will be very difficult for a non-professional to attach the plate into it.
What it is
An agreement is concluded with them, which states that the installation of plastic windows must be carried out in accordance with GOST.
Requirements and recommendations
If craftsmen are hired for the work, they install the products according to the standard. By law, all templates are respected. But often, each individual case is discussed.
To install
If a worker performs a procedure according to all the rules, then he must maintain appropriate documentation.
GOST for PVC windows 30971 talks about the following standards:
- filling the assembly seam;
- size of the gap between the profile and the opening;
- the dimensions of the opening itself;
- installation of the structure;
- general installation rules;
- correct maintenance of documents;
- guarantee.
When performing work, all of the above standards are observed.
To the window opening
According to the requirements, the window opening must be completely level. Most often, this is possible if the structures are installed in a new house.
Replacement may be difficult. The thing is that the opening transforms over time. It is affected by temperature, wind and other natural conditions.
During dismantling, you may find that the plaster has crumbled and the bricks have been chipped. In order to comply with all standards, it is necessary to prepare the opening for subsequent manipulations.
To the assembly seam
Its standards consist of two main rules. First of all, it must be resistant to external influences. The connecting part of the structure has its own characteristics: heat and sound insulation, water resistance.
According to standards, the seam is divided into three parts:
- interior;
- central;
- outer.