How much irritation, headache, and inconvenience causes water that appears on the floor near the toilet! We wonder: what could be leaking in the simplest form of plumbing? We think: is this a serious breakdown or a minor violation? And when we find that the gasket between the tank and the toilet is damaged, we call the plumbers. It is so?
With our help, you can easily deal with the problem yourself. We will introduce you to the specifics of using gaskets of different configurations. Independent home craftsmen who are not afraid of any work will find here a detailed description of the procedure for laying and fixing the seals located between the toilet and the cistern.
The valuable tips we offer will help novice plumbers. The article outlines the principle of replacing the gasket, touches on technical nuances, and gives recommendations to ensure a successful result. Photos and videos are a good help to facilitate the perception of information.
Functions of a sealed toilet seal
A replaceable gasket between the cistern and the toilet provides a tight seal, preventing water from leaking out during flushing, creating a threat of flooding to neighbors. If your tank is leaking, an urgent replacement is required. Over time, this part can dry out and crack, which reduces the tightness of the gasket under the tank.
Leaks appear gradually. Under the influence of water, the rubber seal between the tank and the toilet continues to deteriorate. To avoid consequences, the old gasket must be removed and a new one installed in its place.
Prevention
It is customary to install polymer studs on modern plumbing kits. In terms of fastening, they are, of course, inferior to metal ones, but they also have their advantages. The main advantage is the material’s resistance to corrosion, because metal bolts are guaranteed to rust over time, and the tank leaks because of this.
Preventive measures also include regular inspection of the toilet and all its mounting elements. If you notice faults and wear of parts in time, you can avoid a number of unpleasant moments, such as leaks.
To learn how to fix a leak in a toilet, watch the following video.
Types of plumbing gaskets
Gaskets for the cistern and toilet can be sealing or shock-absorbing. Products of the second type are sometimes used in more expensive models of plumbing fixtures, thanks to which the upper and lower parts do not touch each other. Rubber or silicone can be used to make accessories, and various forms of sealed gaskets are also provided:
- Round. The most common variety. They are distinguished by increased thickness; white or black rubber is used for production. Sometimes you can find cheap foam rubber pads, but their actual service life does not exceed 3 days;
- Oval. They were actively used in the production of old types of equipment; modern devices are rarely equipped with them. Such seals were made of dense rubber, functioned for a long time, but required a lot of force to press the seal during installation;
- Trapezoidal. Another rare variety. A significant drawback of the trapezoidal gasket between the tank and the toilet is the use of connecting screws. The advantage is durability and high reliability of fixation;
- Universal. Its outer side has a smooth texture and a round shape; an equilateral hexagon is cut out from the inside. The area adjacent to the toilet elements has a wave-like shape. Guarantees reliable fixation even with low bolt tension.
Type of connecting part
Toilet design.
Sometimes the breakdown is caused by external faults. This is especially true for those in which the flush cistern is connected to the neck of the toilet using a rubber cuff, which dries out and cracks after a certain period of use. This part cannot be repaired, only replaced.
The toilet cuff is a sealed connecting piece. The main task of this part is to connect the toilet with a pipe that drains domestic and household wastewater into the sewer system. This part is produced in various sizes and can be either straight or eccentric.
The cuff consists of two cylindrical surfaces that are joined together. Their longitudinal axes can be shifted relative to each other. This eccentricity is needed when its outlet and the inlet pipe of the sewer pipe do not coincide with each other. For various installation options for the toilet, a long connecting part and a short one are produced.
Stages of toilet installation.
Another type of connecting part is a corrugated cuff. The versatility of this part manufacturing option lies in the possibility of using it in particularly complex toilet installation options. The corrugation allows you to perform the necessary maneuver on the area of the bathroom, installing it at any angle, and also allows you to move the toilet to a place convenient for you. The main thing to remember when using corrugation is that the required slope must be made.
It is very easy to detect water leakage from under the cuff or directly through it. To do this, you need to place one palm under the connecting piece, and with the other hand simply press the tank release mechanism. If water spills into your palm, it means the cuff has become unusable. It would be good if it was simply pulled off the neck of the toilet by a lopsided one. Fixing such a leak is quite easy. To do this, you need to position and support the tank with some kind of stand and then tighten the nuts of the screws that connect the toilet and the shelf. After this, we pull the cuff back into place. For a more reliable fixation, you can secure it with wire.
When to change the gasket
Gaskets that are placed between the tank and the toilet do not have a dimensionless service life. Due to constant contact with water, it gradually wears out, and therefore the gasket needs to be replaced. The following signs indicate the need to install a new seal:
- Water is leaking from under the storage tank. Make sure that moisture accumulated on the surface of fastening and insulating elements does not condense;
- Cracks are visible on the surface of the gasket. Through them, water penetrates outward, gradually expanding the resulting passage;
- Loss of elasticity - checked by feeling. The rigid element is not able to provide sealing.
Types of sealing products
Known types of sealing products differ both in their configuration and in the size and material from which they are made. Each of these signs has its own characteristics.
Seal shape
In accordance with this feature, toilet cuffs are divided into the following groups:
- oval, resembling a regular ring;
- trapezoidal seals;
- cone products;
- gaskets of complex multi-circuit configuration.
Toilet O-rings are the most common type of seal used to connect the bowl and cistern.
They are used in most classic old-style designs. In modern models, gaskets of a more complex shape, resembling a truncated cone, are usually installed.
Recently, trapezoidal seals, which look like a triangle with cut off corners, have become increasingly common in foreign-made products.
In addition to the shape of the cuffs, all of them are characterized by another important property that determines the performance characteristics of the product. It involves classification according to the type of material used in the manufacturing process.
Material
Based on this feature, all known samples of seals are divided into the following types:
- elastic cuffs, which are among the most popular and cheapest products;
- silicone blanks, characterized by increased elasticity and higher cost;
- polyurethane seals, which are the most expensive in their class.
Rubber cuffs are easy to produce and have a relatively low price. This comes at the cost of poor wear resistance and the need for frequent replacement. In contrast, expensive polyurethane products are very elastic, retain their shape well and have a long service life.
How to change the gasket between the toilet and the tank
The gasket is replaced in two stages.
Stage 1: dismantling the plumbing
Before you begin disassembly, you need to turn off the water supply. Next, the following actions are performed sequentially:
- Removing the cover. On some models, to do this, you need to unscrew the lock, which has a built-in drain button;
- all water is removed from the tank;
- in the internal space the water supply pipe is turned off;
- the locknut securing the siphon is unscrewed;
- remove the bolts securing the tank to the toilet, if any;
- The tank is mounted on the toilet shelf. The container is carefully removed from it so as not to break or damage the surface.
Older toilets often used metal bolts. They are susceptible to corrosion, making dismantling difficult. If it is impossible to unscrew a rusted bolt, you need to use WD-40 liquid, which can be used to remove the rust. A similar result can be achieved through the use of kerosene.
Stage 2: Install the gasket
After the storage tank is dismantled, the following actions should be performed:
- eliminate the outdated gasket;
- Before installing a new one, you should prepare the base. It is cleaned of dirt, scale, and other foreign substances, and then dried with a rag;
- a new seal is installed to replace the previous one;
- to achieve the required tightness, the surface of the gasket is lubricated with silicone sealant;
- The tank is reinstalled and secured with screws. The fastener must be tightened carefully - excessive force may damage the housing;
- connecting all fittings inside the tank using a locknut;
- installing a water supply hose.
Once finished, you need to wait a few hours for the sealant to go through the polymerization process and ensure complete sealing of the joint. Additionally, you can foam the gaps remaining between the tank and the toilet. Some time after installation, you should check the condition of the toilet.
Installation of an electric heated towel rail
The main advantage of an electric heated towel rail is ease of installation. Like any wall-mounted electrical appliance, it needs to be hung on the wall and connected to the power supply. All that remains is to turn on the device itself and use it for its intended purpose.
An important requirement is compliance with electrical safety rules
Such a device should be connected only through a so-called “automatic machine” or RCD - residual current device. If the socket for connecting the device will be installed directly in the bathroom, be sure to use a special device protected from moisture.
This socket is mounted in the thickness of the wall and has a special cover. In addition, the electrical appliance must be grounded.
It is believed that the option with an electric heated towel rail is not economically profitable compared to water models, as it increases heat bills. However, the power of such devices is not so great, as is the electricity consumption.
This is quite enough to dry wet terry cloth, but it does not cope very well with the role of a bathroom heater.
The choice is yours!
Temporary troubleshooting
Sometimes a problem is discovered at the most inopportune moment. Delay may result in a serious accident or create inconvenience due to the cessation of normal operation of the bathroom. In this case, the only option is to temporarily repair the damage. There are several ways:
- Cut a miniature strip of fabric and soak it with oil paint. With the help of an assistant, lift the cistern while he wraps a strip of fabric around the damaged part. To improve the result, you should tie a rag with twine, then lower the tank and install all the internal elements. You can turn on the water only after the paint has dried;
- Use a rubber band. It can be purchased at 24-hour pharmacies. Its length, width and thickness should be 1 meter 5 and 1-2 millimeters, respectively. Having stretched the tape, you need to use it to wrap the damaged gasket. Fixation is carried out using rust-resistant copper wire.
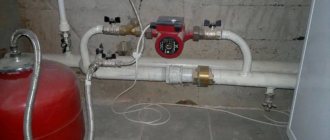
Supply of water supply and sewer pipes
The main condition when connecting a tank to water pipes is reliability. This is due to the fact that it will be very difficult and problematic to eliminate a leak if one occurs - you will have to remove the wall cladding and the entire structure.
The material for the connection is chosen to be reliable; for this purpose, copper or propylene parts are used. Tow and paint are used to seal the pipe. It is undesirable to use flexible hoses; they are not very reliable. In some cases, it is allowed to use quick-release parts - American ones.
Connecting to sewer pipes is much easier. Installation of the installation to the drainage system is done using ordinary sewer pipes; it can be purchased together with the toilet on the website https://aquacity.com.ua/catalog/kaphel/floor_tiles. The connection is sealed using sealing paste. Slopes and turns are installed only with 45-degree bends so that water has the opportunity to flow into the sewer pipe.
After completion of installation and connection to the water supply and sewerage system, the entire mechanism must be tested. It is imperative to check the tightness of the connections, any leaks, loose fastenings and similar faults must be eliminated. Only after a thorough check of the serviceability of the system is the structure sheathed with plasterboard.
How to choose
When it comes to choosing and replacing a gasket, many people get confused, since you can find many different parts in a plumbing store. They can be made of rubber, silicone or polyurethane, and come in different shapes and lengths. Often there are identical products with the same dimensions from different manufacturers. To ensure that the selected sealing element meets your expectations, you need to follow several rules:
- the product must be made of an elastic material that is sufficiently soft and elastic;
- the shape must correspond to the toilet model on which the new gasket will be installed;
- The seal must be free of defects. Sometimes sellers offer customers parts that are already dry and unsuitable for use. Make sure there are no cracks or sagging on the gasket.
Remembering the product in your hands before purchasing is the best way to evaluate the elasticity and flexibility of the product without risking damage to it. If you are not sure which part you need, dismantle the toilet, remove the old gasket and bring it to the store as a sample.
If you are making a choice between a cheap domestic or expensive imported gasket, think about the ratio of quality and price. More expensive seals can last longer and be of better quality, although they will cost more.
Nuances of installing seals
There are usually no special nuances for installing gaskets between the flush cistern and the toilet bowl. The exception is rare models of plumbing fixtures that are far from the standard configuration. As a rule, the seal is inserted (placed) inside the landing recess intended for it in the mating area.
After that, the drain tank is carefully placed at the installation site so that the holes for the mounting hardware on the tank and the bowl stand are aligned. It is important here not to displace the gasket from the seating area when installing the tank.
It is somewhat easier to mount the filling tank on the toilet bowl stand when gaskets of the M60 and KK100 types are used. This rubber seal fits with a slight tension onto the fastening nut of the drain mechanism. Therefore, the risk of displacement of the M60 (KK100) gasket during installation is practically reduced to zero.
Step-by-step instructions for disassembling the drain tank for repair work are given here. In the article we recommend you will find many valuable recommendations.
Tank-bowl intermediate gasket
Some models of household toilets are made to connect the filling tank with the toilet bowl through an additional intermediate gasket. If it is included in the plumbing kit, the easiest way to install it is by first attaching the mounting screws to the threaded rods.
Intermediate seals traditionally have “ears” with holes through which the mounting screw rods pass. If you install the intermediate seal in place, aligned with the mounting holes, and then try to install the tank, the gasket can easily be moved out of place. Therefore, simply attaching it to the screws simplifies the installation procedure.
Screed torque
It would seem that there is nothing simpler than tightening the connection parts with screws after all the manipulations with the gaskets. Meanwhile, the fastening procedure also has its own characteristics. The nuts should be screwed onto the threads of the bolted studs evenly, by about 2-3 threads, alternately applying the action to the bolted joints.
The dismantling and reinstallation procedure is also carried out if the tank does not hold water. Those. if it is necessary to replace the fittings responsible for drawing and draining water from this plumbing container.
The tightening force must be calculated correctly. There is no need to retighten bolted connections when the gasket is already securely tightened. Moreover, re-tightening is not recommended for connections where polypropylene screws are used. And to ensure guaranteed reliability, it is reasonable to replace plastic fastening accessories with metal products.
Testing the installed gasket
The procedure for testing gaskets (checking the reliability of tightness) is a mandatory part of the installation. The test does not require any special metalworking procedures.
After completing the installation work, it is enough to fill the toilet tank two-thirds with water by briefly opening the shut-off valve. In this condition, the plumbing fixture should be carefully inspected in the area where the sealing rubber is located. The first test is considered passed if no obvious water leaks are detected.
The second test will take some time - at least half an hour. It is necessary to fill the tank to the full level (the limit level of the drain mechanism) and keep it in this state (for half an hour or an hour).
Then take a piece of toilet paper and thoroughly wipe the areas of the toilet close to the area where the gasket is installed. Similar actions must be performed both on the top side and below. Is the paper dry? In this case, you can put the plumbing into operation.
If, after the second check, the toilet paper becomes damp (even partially), these symptoms indicate a poor seal. You shouldn’t rely on “maybe” here. The correct solution is to redo the installation of the filler tank and correct the installation of the sealing gasket. In this case, it is desirable to determine the causes of the leak.
It often happens that water on the floor next to the toilet is not at all the cause of its leak. This is the tank “sweating”. We advise you to familiarize yourself with the reasons for the appearance of condensation on its surface and with methods for eliminating unwanted moisture.
The principle of complete tightness
Why is it necessary to ensure complete tightness of the system when installing the filler tank to the toilet bowl? The requirements are explained simply. Even a small leak leads to the formation of pockets of dampness. And dampness is the optimal environment for microbial growth.
A slight (unnoticeable) water leak contributes to the formation of water stone. This substance has a negative effect on rubber - it deforms individual sections of the gasket. As a result, the operation of the device results in emergency leaks. Such accidents can occur at any time, including when home owners are away.