The thickness of the screed under a heated floor, water, is a parameter on which the safety and stability of the floor heating system depends. It should be such that the elements of the heating system are invisible, the surface is evenly heated and lasts for more than one year. We asked specialists from the Miralex company to tell us how to calculate the thickness of the screed, taking into account the type of soil, materials used, maximum permissible load with video and photo examples.
The efficiency of the heating system depends on the thickness of the screed Source i0.wp.com
Installation process
The entire installation of a water heated floor in a private house consists of several basic processes.
By doing each one correctly, craftsmen are rewarded with warm water floors in a private home that work reliably for up to 50 years. All work consists of:
- design;
- insulation;
- pipe laying;
- finished floor screeds.
Each part has its pitfalls. You need to get to know them better.
Creating a Project
When installing a water heated floor with your own hands, you should correctly calculate the boiler power. If there is a lack of power, the water will not warm up enough, which will affect the quality of heating. Power is usually taken 15-20% more of the total power consumption.
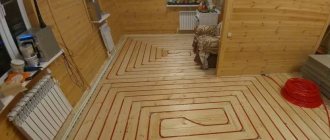
Each water pipeline is made as a single pipe. To calculate the length, you must first draw all the contours on paper. Their laying diagram and the place of attachment of the collector are indicated.
A correctly drawn up diagram will help with the installation and calculation of equipment and components
Insulation of water heating
In order for the heat to warm the house, and not the ground or ceilings in the neighboring apartment, various insulation is used for underfloor heating, which is laid on a prepared, level base. Differences in height cannot be higher than 5 mm. The system will heat incorrectly and not for long.
Insulation for water heated floors comes from various materials. Application must be justified by location, ambient temperature and type of substrate.
The most popular insulation materials are:
Expanded polystyrene. It is used when insulating the first floors on the ground or in a cold basement. This insulation for underfloor heating has a high density. Available in various thicknesses. The more thermal insulation is needed, the thicker the slabs are used.
Expanded polystyrene is a dense and heat-resistant material. Mineral wool is used in conjunction with wooden coverings.
Profile thermal insulation is the most modern insulation for warm water floors. It is extruded polystyrene foam with a laminated coating and grooves or bosses that help subsequent pipe laying. The only disadvantage of the heat insulator is its price.
Thermal insulation for water heated floors is available in the form of slabs. Their installation usually does not take much effort or time. All seams or joints must be taped with foil tape to prevent moisture from getting into them and reduce heat loss.
Each component of the underfloor heating pie is important
A waterproofing layer is placed on top of the insulation to protect it from moisture or aggressive environments (concrete, cement). It is also recommended to cover the insulation with a foil layer for better reflection and distribution of heat. In practice, this only works for wooden floors. When pouring concrete, it's just a waste of money. When using profile plates, all these steps are omitted.
Pipe laying
Might be interesting
For installation of water heating, copper, metal-plastic and polypropylene pipes with a diameter of 15-20 mm are used. The diameter of the pipe depends on the size of the room and the weather in the region.
For installation, two schemes for laying water heating pipes are used:
- Snake diagram. This is when the pipe is laid out in a uniform snake over the entire surface of the room. With this layout, hot water is first obtained, then it gradually cools, and the cooled water is returned to the return line. Recommended for use in sanitary areas (bath, toilet), corridors and small rooms where the length of the circuit is small.
- Snail diagram. For large rooms, it is recommended to lay out the pipes in a spiral, starting from the middle. The result is an alternation of pipes of different temperatures. Heat is distributed evenly. The hottest pipe is located along the outer wall to compensate for the outside cold.
Heated water floors in the form of a pipeline laying diagram
Each circuit is laid using a single pipe. All bends are made smooth. The distance between the underfloor heating pipes is 7-20 cm. The distance from the wall is 5-7 cm.
Thermal insulation of the base
Before installing the heating system, it is necessary to insulate the base. The thermal insulation layer will protect the water circuit from heat loss going into the basement or foundation of the house. The following is used as insulation:
- Styrofoam;
- extruded polystyrene foam;
- foil-coated backing.
The listed materials are characterized by high strength to mechanical load, resistance to moisture and temperature changes. The thickness of the insulation is 30-50 mm, it is laid on a layer of waterproofing polyethylene film. The canvas is laid overlapping on a clean, dry base; it will protect the insulation from getting wet. Thermal insulation boards are laid end to end, the joints are coated with glue or blown in with foam, the excess of which is cut off.
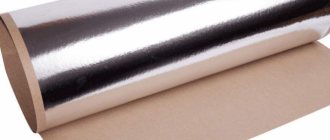
Penofol or a similar sheet of reflective insulation is placed on top. A layer of aluminum foil is directed upward, this will reflect the bulk of the heat back towards the room. The joints of the foil insulation are taped with special tape. Penofol will protect the insulation from the aggressive effects of concrete. A metal reinforcing mesh is laid over the thermal insulation. This element evenly distributes the high load from the water circuit system and the concrete structure.
Brief description of the “pie” and the tasks assigned to the screed
Screed for heated floors
Why do you need a screed:
Firstly, to protect water pipes from damage;
Secondly, for uniform heat transfer on the floor surface;
Thirdly, for heat and sound insulation from the lower levels of floors.
First, let’s list all the “classic pie ingredients.”
So - materials for a warm water floor
Down up:
- On the base of the floor there is a concrete screed;
- Waterproofing (if necessary based on the proximity of groundwater);
- Insulation. It is needed to prevent (reduce) heat loss into the ground, unheated subfloor or ceiling of the neighbor below. Usually this is expanded polystyrene with a density of 40 kg/m³ and higher or a basalt slab of special “floor” grades. Insulation thickness – requires calculation based on a number of conditions;
- Thick polyethylene film, two layers;
- A water pipe laid on a reinforcing mesh and secured to it with clamps. In those places of pipes where expansion joints pass, corrugation is put on;
- Concrete screed, for example, is an excellent and affordable option;
- Substrate. Its material depends on what the finishing coating will be (under tiles, laminate, parquet, etc.);
- Finish coating.
This is a "classic pie". Depending on the specific situation, the “filling” and technology change.
What does the thickness of the screed depend on: On the design features of the room and the customer’s intentions, of which the main ones are:
- a) characteristics of the floor (soil, floor slab, etc.);
- b) finishing (floor) coating materials;
- c) expected surface loads;
- d) coolant temperature and required air temperature in the room.
How to increase the sound and heat insulation properties of a floor using a screed
When constructing a floating screed, various materials are used as a base, which is filled with mortar, to improve the characteristics of the room - increasing thermal insulation and reducing noise.
Diagram of a floating floor structure using hydro-soundproofing materials
The role of the cement-sand layer, in addition to creating a strong, even base for the finishing material, is also the ability of the structure to dampen low-frequency noise that occurs during vibration. To improve the performance of the room, the screed is laid on the following materials:
- Foamed polyurethane foam in sheets or polystyrene foam, which can dampen noise and increase thermal insulation in a room.
- For insulation in the form of mineral wool and other coatings similar in level of rigidity.
- On dense basalt insulation.
Soundproofing structures
All of the listed materials have the ability to simultaneously provide thermal and sound protection in a room.
general information
In the process of making semi-dry screeds, dry ready-made mixtures have become more often used, which make the work easier and more convenient. A mesh made of steel material or fiberglass is selected as a reinforcing substance. To reduce the load on the floor and improve the strength characteristics, purchase fiberglass.
The concrete mixture dries much faster due to the small amount of water. The average period is 5-6 days. These figures are approximately 5 times faster than pouring a “wet” screed.
The semi-dry version of the subfloor installation can be done both on concrete floor slabs and on a wooden base. The room where the installation is carried out, as well as the subsequent floor covering, will not play a role. The main thing is that the technology is followed at all stages.
It is worth noting that the thickness of the semi-dry screed is determined very carefully. The height of the finished cake is influenced by certain factors.
On the ground
The filling technology will be the same regardless of the type of land and where exactly the groundwater is located. To work, you will need concrete grade M300 (or higher) and reinforcing mesh.
Before pouring the screed, the earthen flooring is leveled and compacted. Medium-fraction crushed stone or gravel can be used as the first layer of backfill. A second layer of sand is laid on top.
Each layer of bedding is compacted using a vibrating plate or manually.
Then the base for the rough screed is covered with waterproofing. These can be specialized materials or thick polyethylene film.
A subfloor 5-10 centimeters thick can be poured onto the finished base.
Pouring technology
Preparing for work
Before you start pouring it yourself, you need to prepare the room. Please note that the air temperature in the apartment during work should range from + 5 to + 25 degrees Celsius. Naturally, the base must be cleaned of debris and dust. Otherwise, the solution may lie unevenly and have poor adhesion to the surface. Try to eliminate all gaps in the base. If necessary, perform a rough curl of the base.
The solution should be poured only after all the contours of the heated floor have been laid and its performance has been checked.
During preparation, it is necessary to take into account the possibility of expansion of the concrete mixture under the influence of temperature changes. To avoid cracking of the solution after drying, it is necessary to arrange expansion joints. To do this, you can use a special damper tape or rigid insulation, the thickness of which is at least 1 cm. Such an expansion joint should be made to the entire depth of the screed.
The photo shows the installation of damper tape in front of the screed. Expansion joints are also installed in the passages between rooms
Pouring a heated floor should only be done after careful preparation of the base. Before using the composition, do not forget to check the system for operability and absence of defects.
What is needed to arrange a screed?
For work you will need the following materials:
- Cement mortar or dry mixture.
- Reinforcing mesh or reinforcing compound.
- Waterproofing.
- Insulation.
- Fastening elements.
- Container for stirring the solution.
- Construction mixer or drill with a special attachment.
- Spatula for leveling the mixture.
- Tiles or other finishing material for finishing the surface.
The reinforcing mesh should not have too small cells. Tiles under warm floors are used most often. Naturally, it is also necessary to choose this material correctly. You can lay it with your own hands, following the work technology.
Filling Features
A warm screed is installed in several stages:
- Laying a waterproofing film, the thickness of which is usually 250 microns. The canvases are laid with an overlap (20 cm) on each other, as well as with an allowance for the wall. Secure all joints with reinforcing tape.
- Installation of insulation. This is also done with your own hands. It is better to use a special material with an aluminum reflector that will direct the heat upward.
- Attaching the damper tape. It is fixed at the edges and also divides a large area into parts.
- Laying the mounting grid. It is on it that the heated floor elements are mounted.
- Installation of level beacons. They will allow you to pour the solution correctly and evenly.
- Preparing and pouring the mixture. The composition must be diluted as indicated in the instructions on the package. Otherwise, it may turn out too liquid or too thick.
- If necessary, the layer can be reinforced with reinforcing mesh. It prevents damage to the screed after drying. A mesh is required if the layer is thick.
- After a day, the dried composition will need to be covered with polyethylene and left for 7 days.
If you are pouring a water heated floor, then there should be pressure in the pipes at this moment.
Within a couple of weeks after pouring the mortar, you will be able to lay the tiles.
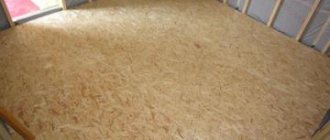
Wood flooring systems
Wooden systems are quite popular, due to their environmental friendliness, affordability and ease of installation. A convenient option for most users is modular dry heated floors, which include OSB or chipboard blocks. The blocks have special channels designed for pipe installation. A wooden dry water heated floor is easy to install, and its elements are standardized.
High-quality processed wood is used as inter-tube boards. The dimensions of the boards may vary, but standard products have a cross-section of 21x120 mm or 28x120 mm. You need to select the sizes of blocks or boards depending on the distance between the pipes. In any case, the materials will be laid on top of the logs in such a way that the existing grooves allow pipes to be laid according to the chosen pattern.
A wooden system of dry heated floors can be laid in different ways, but there is always a certain number of requirements for the base:
- Laying of logs is carried out in a certain step, the size of which depends on the floor covering used. For tiles, a step of 30 cm is suitable, and for other coatings, the laying step can be increased to 60 cm.
- There must be a waterproofing layer under the thermal insulation. Typically, a waterproofing polyethylene film of sufficient density is used, but if desired, you can use another material with similar characteristics.
- High-quality installation of heated floors in wooden houses requires the presence of good thermal insulation, which is located in the space between the joists. The easiest way to work is with thermal insulation boards made of mineral wool or expanded polystyrene. The latter option is preferable, since polystyrene foam can withstand moisture without problems. Mineral wool, when wet, loses its properties.
- On the installed joists you can build a subfloor, which must be securely fixed and have a height difference of no more than 2 mm per 1 m2. However, there is no particular need to create a subfloor, but without it, some difficulties may arise with the installation of a heated floor.
The main methods for arranging a wooden dry heated floor are as follows:
- A “floating” structure that does not have a rigid connection to the base. For this design, ready-made fiberboard blocks with pre-made gutters are suitable. These modules are laid on top of the joists, the space between which is filled with heat-insulating material. A metal strip is placed on the fiberboard and pipes are attached. The distance between the pipes and their diameter can vary depending on what kind of heat transfer the finished structure should have. If necessary, you can supplement the system with a layer of hydro or vapor barrier. In the case of soft finishes, a supporting sheet with a thickness of at least 22 mm is required so that the structure can withstand loads. In addition, the laid slabs will serve as a distributor and accumulator of thermal energy. Modules for a floating structure can also be used when laying heated floors on a flat base.
- In the second version of the system, inter-tube boards are used instead of modules. Their length may vary, but the width and thickness must be the same so that the structure can be laid out with the required pipe laying pattern. The boards can be laid on any leveled base, but it must have heat and waterproofing layers on it. With proper installation of such a structure, the thermal expansion of the materials will be completely unnoticeable.
- GRANAB system. Such a heated floor without a screed in a frame house is initially designed for installation on top of any base, regardless of their alignment (for more details: “How to make a heated floor in a frame house, which option to choose”). The key feature of this underfloor heating system is the modules mounted on height-adjustable legs. After laying out the modules, wooden blocks for laying pipes, metal elements and the pipes themselves are laid out on top of them. Further installation technology looks as usual.
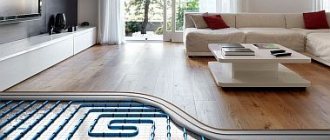
Water heated floor screed:
The underfloor heating system connected to heating pipes is a structure made of metal-plastic pipes, laid and fixed on a metal reinforcing mesh and filled with concrete mixture, no less than 30 mm above the top edge of the pipes. This thickness of the screed reliably protects the pipes from mechanical damage and allows you to lay any finishing material on it, including porcelain stoneware, laminate, parquet, linoleum and other materials, except floorboards. To lay a floorboard covering, a warm floor is installed using a different technology.
Excessively thick screed and flooring made of slab stone, porcelain stoneware, mosaic tiles have a high heat capacity, heat spreads evenly throughout the floor, retains and releases heat for a longer time. But the main disadvantage of a thick screed is that it takes more time to warm up and costs more fuel. How then to install a warm floor under tiles and a thick screed, you ask? You will find the answer to this question in the article - heating cable for heated floors under tiles, in which we examined step by step the entire process of installing a heated floor system under tiles with a thick layer of screed.
A screed that is too thin is economical in terms of consumption of materials, it heats up faster, but it can overheat, and the heating will occur in stripes according to the configuration of the laid pipes, and the temperature difference will most likely lead to cracking of the screed itself and the floor covering. To avoid this in the future, you can initially arrange a semi-dry screed with a minimal amount of liquid. Once we already discussed the pros and cons of this type of screed - dry and semi-dry floor screed - the pros and cons of both types, I advise you to read.
Therefore, when calculating the thickness of the screed, it is necessary to take into account the diameter of the pipes, the pitch of their installation, the temperature of the heating water, the type and material of the finishing coating. This can best be done by specialists based on their own experience and knowledge, but still, for residential premises, the thickness of the screed cannot be higher than 100 mm, as this takes away important centimeters from the ceiling height. In this case, the height of the screed above the pipes ranges from 20 to 50 millimeters.
Manufacturers' recommendations
HENCO
German manufacturer. It is worth paying attention to the demands of such pedantic Germans. Preferring a clear calculation and specific numbers, we recommend a screed thickness of 45 mm. This coincides with the majority opinion. Detailed recommendations here.
KAN
German manufacturer. The recommended thickness of the screed is 45 mm above the heating pipe, but not less than 65 mm from the thermal insulation material. Using especially durable materials when pouring the screed, the thickness can be reduced to 25 mm. You can read more on the manufacturer's website.
REHAU
Builders' favorite material. The manufacturer has developed its own standards for quality and work performance. According to the regulations 45 mm. – this is the thickness of the minimum screed. Do not neglect the maximum figure - in residential premises it is 61 mm, for industrial floors 92 mm.
Features of installing a rod infrared floor
This type of heated floor consists of rods that are connected to each other by flexible wires. When current is passed through the rods, they generate heat. This type of heating can self-regulate the temperature, so it can be used without a thermostat.
Installation sequence of the rod infrared floor:
- creating a laying scheme;
- preparation of the base;
- laying thermal insulation;
- preparing the location for the sensor;
- laying out the strips and connecting the cable according to the drawn up diagram;
- fixing the strips to the base using mounting tape;
- installation of a thermostat;
- connecting the sensor and cable to the thermostat;
- connecting the thermostat to the network;
- system testing;
- pouring screed;
- laying tiles.
For such a floor, the best finishing coating is ceramic tiles; it is laid in a screed, the thickness of which should be more than 2-3 centimeters.
On wooden floors
To fill a wooden house, you need to perform the following steps:
- Carefully inspect the covering (replace damaged joists, and turn over partially damaged joists);
- Add support beams (if the logs are installed in increments of 40 cm);
- Recess the nail heads into the boards by 2-3 mm (otherwise they will later tear the insulating film);
- Seal the gaps at the junction between the walls and the floor with thin boards (they are removed after pouring, which ensures ventilation of the base and does not allow it to rot);
- Eliminate deep and small cracks;
- Remove debris and dust, sand the base if necessary;
- Prime wooden surfaces (this will ensure their moisture resistance);
- Cover the bottom of the wall with damper tape (10-20 mm thick and 2-3 times thicker than the screed) to cut off its surface from the cement;
- Ensure waterproofing of the base using an intact polyethylene film (its individual parts are overlapped by 10 cm, the overlap on the walls is 20 cm, all tears and punctures are sealed with tape).
Option for installing TP on wooden logs
Acceptable dimensions for different types of screed
Based on the thickness of the screed, rough coatings are conventionally divided into:
- Thin - from 2 to 7 cm.
- Thick – from 7 to 15 cm.
Layers less than 2 centimeters are usually made from self-leveling compounds and are not classified as screeds, but as self-leveling floors. And a thickness of more than 15 centimeters is more of a concrete floor with reinforcement.
Design features of screeds for heated floors
Features of arranging a thin floor screed
Thin screeds are used in rooms where there will not be strong point loads when using the floor. Usually these are kitchens, living rooms, bedrooms and other living rooms. Here a layer of 20–50 mm will be sufficient. For corridors and bathrooms, 50–70 mm are already recommended.
Such screeds are poured and leveled literally in one day. Then you still have to wait several days for the concrete to set. But the work itself of preparing the base and mixing the solution, as well as pouring the mixture, is carried out as quickly as possible.
Consumption of sand concrete per m2 of area
Features of arranging a thick screed
Thick screeds are used in areas with higher mechanical loads on the floor covering. Often they are poured not so much to level the floor, but to provide a reliable foundation for this or that equipment. And in fact, it is always a concrete mixture reinforced with steel rods. Gypsum solutions are of little use here.
Thick-layer floor screeds are installed in:
- utility rooms;
- in-house boiler rooms;
- garages;
- baths, etc.
In this case, the time required for pouring the concrete solution and the wait until the floor is ready will increase. A thick layer of concrete takes longer to gain hardness than a thin layer. At the same time, you still have to spend time carefully strengthening the concrete layer with reinforcement. Without it, such a screed will certainly crack when it hardens and will quickly become unusable.
How to calculate the amount of material for different types of screed
How to calculate pipe length
Traditionally, in calculations it is assumed that 5 m of pipe is enough to heat 1 m² of floor (see plate above). The nominal distance will be 200 mm. Based on this ratio, you can calculate the nominal length of the entire pipeline: multiply the total area of the room by 5 and round up.
For corner rooms with one window, it is better to increase this length by 20% (1.2), with two windows - by 30% (1.3). For the northern regions of the Russian Federation, it is necessary to multiply the resulting length by another 20% (by 1.2).
For example, for a corner room with an area of 20 m² with two windows and in a cold region of Russia, the length of the pipeline will be:
This calculation uses the total area of the room without deducting the area of large pieces of furniture. This is done because the air above the sofas (and even cabinets) also needs to be heated; part of the heat is spent on heating the furniture itself. If you calculate based on the reduced area, the room will be cool, but in a small room filled with furniture it can simply be cold.
When purchasing, you need to add a small margin for turns and inaccuracies (6%, or a coefficient of 1.06) and double the distance from the collector to the room.
Determining the maximum length of one contour
The maximum length of one circuit should under no circumstances exceed 100 m - otherwise the pump simply will not push the coolant into the circuit. And it’s better to divide a hundred-meter circuit into two - heating will improve, and if there is excessive heating, you can always adjust the heating of each circuit using a three-way valve in the manifold assembly.
Limit layers
There is a maximum height of the screed above the water-heated floor, above which there is no longer any need or usefulness. A large amount of time will be spent pouring, but the efficiency of the underfloor heating system will suffer to a large extent. After all, the entire resulting “pie” will have to be heated constantly.
The greatest thickness can reach 150 mm. Much will depend on the purpose of the room where the work is being carried out. Moreover, in this case, the device is mainly made of a monolithic structure. The height of the screed for a water-heated floor also serves as a foundation. Greater thickness should be provided for certain types of premises, such as garages, parking areas, etc.
It comes to the maximum thickness of the fill in a situation where the soil at the base is very problematic. After all, warm water floors are most often installed in private buildings. Otherwise, the entire structure will be destroyed. A lot of money will be spent, but there will be no results. In the process of preparing the solution, only high-quality materials should be used, since the entire structure is created for a long time. It’s better to spend money once than to spend money later on labor-intensive repairs.
To somewhat reduce costs in this case, it is best to knock down the protrusions on the base as much as possible, and additionally arrange backfill for leveling. But this must be done before installing a warm water floor. In the future, it will be much easier to carry out all stages of installing a water heated floor.
If the pipeline circuit is located in a thick screed, operational problems may arise due to prolonged heating of the subfloor. A lot of resources will be spent on this. There will be no benefit from using the system. This suggests that you must first properly arrange the subfloor in order to lay the pipes without consequences for their integrity.
Types of plasticizers, features of their use
Plasticizers (surfactants) are surfactants. Surfactants are produced in liquid or powder form, with antifreeze additives and reinforcing polyamide fibers.
During the development process, the composition is endowed with properties that modify and improve the quality of floor screeds:
- Ensuring the plasticity of the solution;
- Increasing the degree of mechanical strength and moisture resistance;
- Improving surface smoothness;
- Elimination of possible damage to electrical devices by corrosion.
Laying a heated floor with your own hands, using strengthening active substances in the screed, makes its use comfortable and safe.
Sometimes modern plasticizers for screed are classified as environmentally friendly products.
But still, do not forget that they contain chemicals that have the property of changing the structure of the concrete mixture.
Therefore, in the process of preparing screeds for electric or water floors with your own hands, it is recommended to include in their composition the amount of additives corresponding to the information indicated on the packaging.
Some manufacturers of surfactant additives for cement-sand screeds, in order to get ahead of competitors, keep their composition and recipe for their preparation secret.
In addition to unknown individual components, plasticizers include the following ingredients:
- Concentrated sulfuric acid (strong oxidizing element);
- Phenolic production waste (phenolic resin, water);
- Concentrated sodium hydroxide solution;
- Defoamer, formaldehyde and water;
- Plastic reinforcing fibers (present in some surfactants).
Liquid plasticizers are added to the dry mixture: at the rate of 1-1.5 liters per 100 kg; Before use, shake the substance thoroughly and pour in simultaneously with water as mixing progresses.
Powdered - take at a ratio of 1:2 (surfactant/water); mix thoroughly, let stand for a couple of hours (the further mixing procedure is the same as with liquid).
Optimal screed thickness
How thick the floor screed should be, its type, and the required mixture composition depend on the following factors:
- the presence of unevenness and differences in height of the base base;
- what exactly the mixture is poured onto (on the floor slab, on the insulation layer or on the pipes - in the case of a heated floor);
- what kind of coating the surface is being prepared for;
- characteristics of the room (floor load, humidity, temperature, etc.).
Basic base
The more significant the unevenness and height difference, the thicker the layer of mortar is needed. For minor defects, the minimum thickness of the floor screed will be 20 mm. If you have to deal with large differences (more than 60 mm), then there is no need to talk about the minimum thickness. In this case, it makes sense to make a solution from a mixture of coarse sand, cement and water; its height will vary from 100 to 150 mm.
Advice! If you want to save on concrete mix, use expanded clay or crushed stone as a partial leveling.
If you think that you can determine the unevenness of the floor “by eye,” then do not be fooled: your eyesight may let you down. It is better to use a special level for this.
Classification
There are 3 types of screed depending on its thickness.
The first type is a thin subfloor. To fill it, self-leveling mixtures are used, which allow you to create a layer of up to 20 mm. In this case there is no need to use reinforcement.
The second type is a screed up to 70 mm high. In this case, reinforcement from metal mesh or reinforcement bars is necessary.
The third type is a layer of maximum thickness up to 150 mm, which is a monolith with internal reinforcement.
Composition of the screed mixture
For unevenness and height differences of less than 20 mm, it is better to use self-leveling mixtures, with which you can achieve an even and thin layer. After drying, you can immediately lay the floor covering on it. Self-leveling mixtures spread over the floor independently, without human intervention. They include:
- gypsum or cement;
- fine sand;
- plasticizers that improve quality indicators;
- glue;
- pigments.
Attention! The minimum and maximum thickness of the screed of a certain composition are indicated on the packaging by the manufacturer. Self-leveling floor is a type of self-leveling mixture that is applied to a concrete base or cement-sand fill.
This composition is used as a topcoat or as a thin layer of screed from 2 to 20 mm
Self-leveling floor is a type of self-leveling mixture that is applied to a concrete base or cement-sand fill. This composition is used as a finishing coating or as a thin layer of screed from 2 to 20 mm.
Advice! For a self-leveling floor, the recommended thickness is no more than 20-30 mm: otherwise, it may crack over time.
Concrete remains an indispensable material for rough pouring due to its relative cheapness. SNiP recommends the following mixture composition:
- sifted sand;
- cement;
- gravel or crushed stone (fraction size from 5 to 15 mm);
- water.
Today, very often, instead of crushed stone, lighter fillers are used, which also have thermal insulation properties. The most common of them are expanded clay and expanded polystyrene (pellets). The first is used only as a component for pouring the subfloor, and the second is used for finishing. The height of laying the mortar is in the range from 30 to 50 mm and is used in cases where there is a need to remove irregularities whose size is more than 20 mm.
For significant differences (more than 60 mm), sand concrete is used, which contains coarse sand instead of ordinary sand. The height of such a layer ranges from 100 to 150 mm.
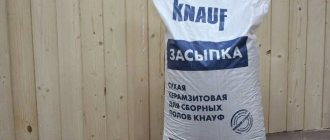
In order to speed up the process of repairing the floor and in the presence of significant damage to the base, a dry screed is very often produced, which includes materials that do not require drying for a long time. It includes a layer of backfill material, for example, expanded clay, and on top of it there is sheet material (chipboard, plywood, GVLV). If necessary, hydro-, heat- and noise insulation is carried out. The thickness of such a “pie” can be 35-60 mm.
Total thickness of finished subfloor
Recommended thickness of each of the layers that make up the warm water floor cake. The order of arrangement of each of the layers is shown in the diagram below:
The subfloor must be smooth and durable. The thickness of each layer placed on top of the subfloor, in order from bottom to top, will be as follows.
A layer of insulation 30-90 mm thick made of fibrous polystyrene rigid boards. They must be strong enough to withstand the high load of subsequent layers, and therefore the material density is chosen to be at least 35 kg/m³. The thickness varies depending on how cold the crawl space is. If there is a heated room below the floor, then a layer of 30 mm will be sufficient, and if the floor is laid on the basement floor of a private house, then it is better to place a layer of insulation with a thickness of at least 90 mm.
Multifoil 3 mm thick is laid on top of the thermal insulation. Its main function is to waterproof the next layers of the floor. If the waterproofing layer has already been laid on the rough concrete floor, laying multifoil is not required.
Reinforcing mesh 100x100x4 mm or 150x150x4 mm serves to increase the strength of the screed, which, when reinforced, becomes more resistant to tensile loads. For the convenience of laying pipes according to the diagram, they can be fixed at the desired points on this grid.
The pipe is laid according to one of the diagrams shown below. These circuits are called "coil" and "helix". The first is classic and suitable for any room, while the second is not recommended for use on wooden floors and is most effective for rooms that require particularly intense heating. The permissible distance between pipes is from 10 to 30 cm. The presence of joints inside the floor is unacceptable; the pipe is laid in one piece, the ends of which go into the collector. The average layer thickness is 20 mm.
Before moving on to the screed, we need to talk about the damper tape. It is pre-laid around the perimeter of the walls in order to avoid creating unnecessary stress on the walls. The fact is that the concrete screed, when heated from the heat of the pipe, will expand and create pressure on the walls, and to prevent this, it must be fenced around the perimeter with a special “spring” material. The minimum thickness of such a tape is 5 mm, the optimal is 10 mm.
As a result, taking into account all the described requirements for the arrangement of a water-heated floor screed, the thickness of all layers and a separate concrete screed will be as follows:
- The entire floor is 80-135 mm, taking into account the thermal insulation layer and the thickness of the concrete layer
- The thickness of the screed is 50-65 mm, depending on the selected layer height above the surface of the pipes.
The influence of screed height on system operation
Before starting installation, it is worth figuring out what thickness of the screed is considered optimal. This indicator depends on:
- heat capacity of the floor;
- uniform heating;
- lifetime.
The thin layer heats up quickly, starting to warm the room, but soon the high temperature causes the concrete coating to begin to crack. This is especially noticeable in the locations of pipes. Heating above normal levels deteriorates the finishing floor covering. Extra centimeters above the water circuit will require more energy to heat. There will also be difficulties in adjusting the system. The advantage of a volumetric screed is significant heat transfer, which lasts for a long time at a comfortable temperature in the room.
In addition to the accumulation and distribution of heat, the screed performs a protective function in relation to hot water pipes. Insufficient circuit coverage will result in high loads and shorten its service life. Protecting the water system is especially important if you plan to install heavy furniture in the room.
The minimum thickness of the screed should exceed 6.5 cm; it is recommended for tiles that are not afraid of overheating. The optimal pipe filling size is 10 cm. This parameter is provided for underfloor heating systems in residential premises. For industrial buildings or warehouses, the maximum concrete thickness can reach 20 cm.
The size of the layer depends on the diameter of the pipes; if you calculate from the surface of the contour, then the figure without taking into account the thermal insulation cake will be 2-5 cm. The installation technology allows for the exclusion of the metal mesh from the cake under the contour and its replacement with fiber in the solution. In this case, the thickness of the screed above the water heated floor pipes increases, the minimum mark is 4.5 cm. Compliance with the recommended values will ensure uniform heating and safe use of the heated floor.
Semi-dry coating
Today, many people prefer dry mixture for laying screed. It is less problematic to pour than a cement-sand mixture. This installation method has its own characteristics. The semi-dry mixture is considered stronger than ordinary cement. After pouring, the drying period is much shorter, which makes it possible to finish laying heated floors faster.
Experts say that the material does not crumble or collapse under the influence of heat emanating from the pipes. It is easier and more convenient to work with this type of mixture.
Before laying the semi-dry mixture, you should carefully prepare the base. All debris is removed, the base is laid with a vapor barrier material. If there are deep cracks or depressions, it is recommended to fill them with a viscous cement solution. Rolled materials are laid with an overlap, and it must also overlap the walls. The seams are treated with special tape. The semi-dry mixture is poured onto the finished base.
The mixing proportions that should be used are indicated on the packages of the semi-dry mixture. The consistency of the material should not contain a lot of water. If you squeeze it in your hand, you get a dense lump. Moisture should not flow down your hand. In this way, they check that the ingredients of the mixture are mixed correctly. Very often, fiber fiber is added to the dry mixture to make the coating even more stable. The fiber is well distributed throughout the structure in all directions.
The minimum thickness of the screed will be 4 cm. Its height also depends on the method of laying the pipes themselves and what material they are laid on. The floor and its maximum height can reach 20 cm. If the base for pouring has significant unevenness, the height must be raised significantly. In general, the thickness will be at least 4 cm and no more than 20 cm.
The coating may be destroyed by improper drying methods. Just because you can walk on the floor does not mean the grout is truly dry. A liquid cement-sand mixture 4 cm high takes at least a month to dry. The mixture prepared from dry materials dries within several days, depending on the height of the coating. In order for the material to harden correctly and without cracking, the surface should be moistened with water and covered with film. As a result, the base will not sag, will dry well and will not crack.
The size of the water coating depends on the type of fill and the characteristics of the base. The more significant irregularities on the surface, the higher the structure will be. This happens due to the application of several layers - this is a necessity to achieve the zero level.
Based on experience, experts say that the relative total height of the warm water coating is 10-15 cm, taking into account absolutely all materials used, including the floor covering.
What should it be: requirements
According to building codes and regulations (SNiP), the minimum thickness of the floor screed is 20 mm. In everyday life, such a minimum is rarely installed. It increases significantly if you need to hide equipment located on the subfloor. Thus, the thickness of the screed when installing a warm water floor should be determined taking into account the basic parameters of the pipes.
It is well known that the layer of mortar above the heating system should not exceed 40 mm. With a greater thickness, the installation of a heated floor is ineffective, since the bulk of the heat received simply will not reach the consumer. The internal layers of the screed will heat up, and the floor covering will receive virtually no thermal energy. The simplest calculations show that the thickness of the screed for a pipe diameter of 25 mm should be in the range of 50-70 mm. A standard screed consists of several components or layers.
The order of installation from bottom to top is as follows:
- waterproofing;
- thermal insulation;
- fittings;
- warm floor;
- screed
Different heated floor designs require different screed layers.
In some cases, the subfloor is first leveled with a thin screed; sometimes the solution is laid directly on the insulation. Its thickness should not be less than 2 cm. The layer is given 1 month to dry, and only after it has completely dried can you begin installing the heated floor, subsequently covering the installed communications with another screed.
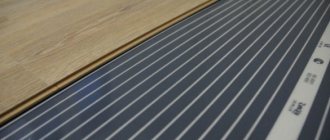
An electric heated floor requires a low screed, especially if film heating was chosen. Infrared film is ideal for installation under laminate, carpet and linoleum.
If you plan to cover the floor with tiles, you should use a heating cable. In this case, you will need a less thick screed than when creating a water floor.
Heating pipes in a screed
Good day to all! the miracle builder poured the screed for me in a new building. good, I didn’t immediately put the floor covering on - the area was worn out and I saw that in one place the pipes (rehau insulated) were lying almost on the surface of the screed. I plan to use Lenolium as a floor covering. What to do?
- let it be as it is
- pour in more leveling coating (probably 5 millimeters)
- unscrew the screed and remove the pipes below (but this is the worst option, I wouldn’t want to)
RAV4, there must be at least 20 mm of screed above the pipes. So leave everything as it is
Mazayac wrote: RAV4, there should be at least 20mm of screed above the pipes. So leave everything as it is
Mazayac, in this place now it is at most 3-5 mm. (
RAV4 wrote: I am planning to use Lenolium as a floor covering. What to do?
1) leave everything as is 2) pour in more leveling coating (5 millimeters, probably)
The third option, of course, is unsuitable, so either 1), but 2) is better. The second option is better. because, judging by the photo, you still need to level the screed anyway. Yours is too clumsy, but you need a smoother one under the linoleum.
Mazayac wrote: there should be at least 20mm of screed above the pipes. So leave everything as it is
Sorry, but we're probably talking about different things. Or we generally look from the point of view of different Galaxies.
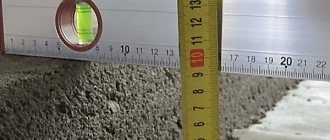
If you want specifics, the thickness of the screed, not interrupted by underfloor heating pipes, should have a minimum thickness of 55 mm with a soft finishing coating or 50 mm with a hard finishing covering.
With mandatory CORRECT reinforcement with steel mesh with 50503.5 mm cards with mandatory knitting of cards with knitting wire. Also, with additional insurance against cracking of the screed - using microfiber.
P.S. It turns out that the screed above the TP pipes should have a thickness of at least 50 mm, provided that the screed is reinforced with high-quality reinforcement.
Therefore, it is not clear what hypothetical 20mm you were talking about.
Hydraulic calculation of heating systems. Heat calculation (calculation of insulation) of houses and apartments. Contacts in profile.
RAV4, you need to leave it as is, for the screed the working thickness is at least 35-40 mm. Therefore, hiding it under a smaller layer will not help; there will still be a crack along the pipe
Inch1964, yes, confused with the minimum thickness of the floor screed.
Above pipelines - at least 45mm, without reservations about reinforcement. SP 29.13330 clause 8.2. The answer really hasn’t changed - leave everything as it is.
Mazayac wrote: Above pipelines - at least 45mm, without reservations about reinforcement. SP 29.13330 clause 8.2.
quote: clause 8.2. ". . The thickness of the screed for covering pipelines (including in heated floors) must be at least 45 mm greater than the diameter of the pipelines.” Without reservations about reinforcement and the fact that this is the thickness of the Mazayac pipes, I’m shocked! - It must have been said somewhere that this is the thickness ABOVE the pipes! -and where? ..However, the answer to the TS question is the same - leave it as is
master.msk wrote: Therefore, hiding it under a smaller layer will do nothing, there will still be a crack in the pipe
How can this not work? The author wants linoleum on top - the madam in stiletto heels will pierce both the linoleum and the corrugation at once! And the crack - to hell with it. The pipe must be carefully removed and placed in a layer of mixture with a strength of at least 20 MPa. And the screed must be checked for this condition; if it is weaker, a layer of pouring material with a strength of 20 MPa must be checked. Not even if - since the screed is rough and has flaws - the linoleum will show all the jambs 100%. Therefore, there are no options, first 3, then 2.
BV wrote: no options, first 3, then 2.
Why didn’t anyone ask how thick the shank is? There's probably nowhere to drown there.
Gray, Maybe there is an overlap over the wiring cables, plus I see it near the leg. Beacons made of a 27x28 guided profile, not pulled out. This quality of screed will definitely not work under linoleum.
BV wrote: no options, first 3, then 2.
Why didn’t anyone ask how thick the shank is? There's probably nowhere to drown there.
Gray, 6 centimeters there
Hitgher wrote: Gray, Maybe there is an overlap over the wiring cables, plus I see it near the leg. Beacons made of a 27x28 guided profile, not pulled out. This quality of screed will definitely not work under linoleum.
Hitgher, the overlap is unlikely, this place is about half a meter from the wall and only a madman would pull wiring through it. although anything is possible)
The previous speaker seemed to have received answers. I thought that maybe I could ask my own questions right away, also about the heating pipes in the screed.
- It seemed to me that the best candidates were a normal PP or Rehau Staff. Or something else?
- If we talk about Rehau, then with a collector system you can do it sort of without connections in the screed. But won’t these metal corners of 90 degrees of the lower supply to the radiators be in the screed? And again, why not make different systems in the apartment, which means the water supply is also rebuilt, and these are also fittings in the wall?
- Polypropylene will be cheaper, but there will definitely be fittings in the screed and walls, which means then the collector system is not so needed, which is even cheaper, but the same question remains - how reliable are the connections? One friend says that if the PP is soldered, then well crimped and does not lose pressure or leak, then nothing will happen to the soldering, but with any fitting and for crimping, the connection may lose reliability over time. Is this true or is this only typical for metal-plastic, and this does not happen with Rihau?
- Is 20 pipes enough for batteries?
And most importantly, suddenly we have experience, we have a heating manifold and there are meters, and the heating pipes will be under the screed, so there is a very strong desire to do, if not heated floors, then at least draw a route, with slight deviations, so that some of them are heated then separate places, such as the floor in front of the sofa and tiles in front of the kitchen work area. But it seems that PP can be simply screeded, but for rehau it is assumed that the pipe should be corrugated and thermally insulated. But then it won’t heat at all? Or will it only fit in a corrugated version? Or can a Rihau stack be used for heated floors and can it be placed in a screed without corrugation or thermal insulation? Also the question is, given that this is a heating pipe and not a full-fledged heated floor, will it be too hot? And if you turn the tap down slightly so that it’s not so hot, then there won’t be enough for the battery? Or maybe the direct line to the battery is insulated, but the return line is not? Or maybe it’s just that insulation comes in different thicknesses and degrees of insulation, and you just need to choose one so that the impact isn’t so great? But then how can we at least estimate this?
In general, it’s clear that the topic is either not interesting, or people who would have something to say about it don’t come into it
Road Runner, if you even google the device of a water heated floor, the complete failure of this idea will immediately become clear.
Road Runner wrote: we have heating in the manifold and there are meters, and the heating pipes will be under the screed, so there is a very strong desire to do, if not warm floors, then at least draw a route, with slight deviations, so that some individual places are heated, such as the floor in front of the sofa and tiles in front of the kitchen work area.
There are many reasons why you should not try to make a warm floor from transit lines to radiators. More precisely, physically it is possible. But it will be bad and there may be bad consequences. It is not possible to explain all these reasons with text in a forum topic.
So, it is correct to do either transits to radiators or water heated floors. Or both, but with separate pipeline systems.
Filling the floor contour with mortar
In principle, the screed is poured over a warm floor, like any other. If problems arise, it is when installing beacons, since the base underneath them “plays”, and without a certain skill it is quite difficult to bring them to the same level. The distance between them should be such that the rule by which the alignment will be carried out protrudes beyond the boundaries of the parallel beacons by 25 cm. If the tool is 2 m long, the step between the beacons should be 1.5 m.
Screed thickness for heated water floors
Table. We explain all the installation details.
Steps, photo Description Step 1 - drilling holes for dowels You start by drilling holes for fasteners along pre-designated lines. If, as in this case, you have foam plastic under the pipes as insulation, take dowel-nails measuring 8*120 mm. That is, their length should be selected in such a way that, having passed through all the layers, the fastener can enter the rough base. Step 2 - Installing Dowels Before inserting the dowel into the hole, you need to put a washer on it. It will not allow the dowel head to fall into the foam. Step 3 – driving nails into the dowels. Using light blows of a hammer, hammer in the dowels, but not completely. The height to which they should be hammered still needs to be determined. Step 4 - determining the level of driving the dowels. The easiest way to do this is using a laser level. Make a horizontal mark on the walls, and then transfer the mark to any available tool: a chisel, a screwdriver, or, as in this case, a hammer
If you put masking tape on it, you can mark it with a pencil, and then use the tool as a template. Step 5 - determining the mark of the top of the beacon installed on the dowel. Now you need to determine the mark of the top of the beacon when installing it on the dowel. Note! It would seem, why do this if the profile size is already known? This is due to the configuration of its cross-section. As you can see, the head of the screw falls into the recess, and the height of the beacon is no longer 10, but 8 mm. Step 6 - Determining the difference between the finished height of the screed and the height of the beacon Move the previously made floor mark to these 8 mm below, and drive the dowels along it. Step 7 – final driving of the dowel Hit the nail until the mark on the template matches the laser line. Step 8 – installing the beacon on the dowels Next, place the beacon on the dowels and check the mark again. Step 9 - laying out the mortar under the lighthouse Having made sure that the marks match, you can lay out the mortar along the row of dowels, removing its excess so that the heads of the screws are visible. Step 10 - installing the beacon profile on the solution Install the profiles by adding the solution so that the beacons are recessed in it. Step 11 - removing excess mortar Remove excess mortar with a trowel. Step 12 - pouring the screed After the solution on the beacons has hardened, you can begin pouring the main screed
First, fill the space between the beacons with a trowel. Step 13 - leveling with the rule And then, installing the rule (with the wide side) on two parallel beacons, remove the excess mortar, achieving a perfectly flat surface. Note! The next day, when the screed has hardened, it is necessary to thoroughly clean it of deposits. If the finishing coating is rolled (linoleum, carpet), the surface will have to be wetted and ground. As an option, you can make a thin layer (1-2 mm) of self-leveling floor.
Prices for self-leveling floors "Starateli"
Self-leveling floors "Starateli"
As you can see, it is not enough just to know what the thickness of the heated floor screed should be - you also need to try to ensure that it is uniform over the entire area of the room. We hope that our instructions helped you understand this issue and make the heated floor perfectly flat.
Sequence of work
Before the screed, waterproofing, insulation and water-bearing pipes are laid. Be sure to reinforce the surface with metal mesh
It is important that each twig is at least 3 mm. The fittings should be at the bottom, and pipes are attached to it
But there are experts who prefer to place the mesh above the water pipes for optimal load distribution. This will allow enough heat to escape from the concrete layer.
The waterproofing layer is applied over the rough screed using roll or liquid waterproofing. Next, they begin to install the insulation layer. Typically, dense polystyrene is chosen. The slabs are stacked compactly due to the presence of locking devices on the sides. The screed for heated floors is poured with concrete of such a consistency that it is easier to level. The solution is mixed by hand or with a concrete mixer. It uses 1 part cement and 4 parts sand, which is pre-sifted. Also add enough water to knead the dough-like mixture and a plasticizer for elasticity.
To make the screed strong, it is recommended to add fiber to the solution, which consists of synthetic fibrous materials.
Pouring the floor with mortar Source couo.ru
It is important to install it at the same time. You can’t fill one area and then do the rest a few days later.
If you do this, cracks will appear in the future.
You should check the condition of the pipes; when the concrete hardens, there will be no access to them. Test the system by connecting the operating water pressure and check for leaks during the day. If smudges appear, they must be eliminated and only then proceed with filling.
Types of screeds
- Wet. It is made on the basis of cement mortar.
- Semi-dry.
- Dry heated floor. This option has become used very often, as it eliminates the appearance of dirt and problems with the contacts of the electric version of the heated floor. In addition, this option allows you to lay tiles or other finishing material the very next day. Naturally, such a screed must be properly arranged.
These options have their advantages and disadvantages.
However, you need to choose a screed taking into account the characteristics of the room, the design of the heated floor, as well as the time allotted for repairs. Which one is best suited in your case is up to you to decide. Date: September 25, 2022
Types of screeds used
There are three types that are suitable for installing a water heated floor system. Each of them has advantages and disadvantages.
Dry
The presented species is considered common, consisting of expanded clay. The base material is foamed with vermiculite, polystyrene foam or perlite. Convenience lies in self-installation, since it is enough to scatter the dry screed and level it. The surface is covered with a sheet of plasterboard or chipboard
An important condition here is the use of only moisture-resistant material
The advantages include simple and quick installation, good sound insulation. Workers have the opportunity to lay out a finished floor the very next day. The use of this variety reduces the load on the slabs by 2 times.
The disadvantages boil down to the possible appearance of mold, which occurs due to the ingress of water. A dry screed cannot withstand a large load - this is explained by the use of chipboard and gypsum boards. Therefore, it is not recommended to install additional partitions. Owners of apartments and houses note the presence of characteristic rustling sounds when walking during the first time of use.
Wet
Water-heated floors are usually placed on a wet screed. This is a cement-sand mortar or concrete mixture, which is diluted in accordance with the proportions of the purchased products. The work requires accuracy and attention, so self-installation is not always undertaken. Suitable for floors with ceramic or stone finishes. Requires precise surface leveling. Otherwise, finishing will be carried out with errors and geometry violations.
The benefits are as follows:
- This type is stronger, so it is recommended to use it when constructing additional partitions in the room.
- Can be used as a finishing coating indoors. After it is completely dry, it is enough to paint the floor in the desired color.
- High sound and thermal insulation.
The disadvantages include the laboriousness of the process and the large weight of the resulting layer. Therefore, it is not recommended to use the presented type of screed in panel houses. They have weak floors, and heavy weight can lead to cracks in the wall. They also note that it takes a long time to dry, which significantly complicates the process.
Semi-dry
A semi-dry screed is not much easier to lay than the wet version, since here you will need a pneumatic blower, a mixing machine and a grinder to work. The mixture is presented in the form of a sand-cement composition, which is difficult to level over a large area. With self-installation, you can do without additional equipment, but only if small areas are being repaired. Otherwise, laying out the floor evenly will not be possible at all.
The advantages of the semi-dry variety are the following factors:
- The light weight of the cement mortar ensures safe living in an apartment building.
- Finishing can begin after 2-3 days, since during this time complete drying is achieved.
- Moisture resistance, good sound and thermal insulation.
The only negative aspect is the need for additional equipment for repairs. If you can rent it, then there shouldn’t be any problems with the semi-dry screed.
Purpose of damper tape and expansion joints
To prevent the concrete from destroying the walls when heated, damper tape is laid along the edges of the room.
Insulation around the perimeter of the room (damper tape) is needed to compensate for the thermal expansion of the concrete mass and reduce heat loss through the walls. According to the standards, the thickness of the protective layer in this place is at least 5 mm and corresponds to the height of the screed pouring. The latter is made of non-hygroscopic polyurethane foam, along the perimeter of which protection is made in the form of expansion joints. The use of insulation on the walls of the house is considered mandatory, while an expansion joint is used only in the following cases:
- the total area of the room exceeds 35-40 m2;
- the length of its sides is more than 8 meters;
- the geometric dimensions of the room satisfy the ratio a/b > 1/2, where “a” and “b” are the lengths of adjacent walls.
The room is divided into small sections, after which additional expansion joints are made on each of them. The layout of the heating circuit pipes is calculated so that their number per seam is minimal. The optimal option is when only two threads pass through it (direct and reverse). It is also important that the pipe is laid through the seam with a slight bend and placed inside a corrugation at least 30 centimeters long.