The gas stove is as popular today as ever - in cities, villages, and dachas. Its advantages are a long service life, low cost of use, and the ability to work where there is no centralized supply of gas or electricity. Many housewives value gas stoves for the speed of cooking. However, it is necessary to remember that gas is an explosive substance. Gas stove malfunctions can lead not only to property damage, but also to death.
The best solution when gas equipment breaks down is to call a specialist. In large cities, repairing gas stoves is easily done at home. It has proven itself to be excellent in Moscow and St. Petersburg. Its employees quickly travel to any area and professionally handle slabs of any type.
It is more difficult for those who live in remote areas. In this case, you must contact the nearest service center. At the same time, you need to know what the main malfunctions of gas stoves are and the reasons for their occurrence. In some situations, it is quite possible to deal with a breakdown on your own.
In most cases, repairing gas stoves requires special knowledge, experience and equipment.
Additional Information
It is not prohibited to use classic household methods, such as soda, vinegar, citric acid or alcohol.
To clean a gas oven, you can use store-bought and folk cleaning products.
Use a regular foam sponge, or a soft washcloth or cloth. Apply products only with a creamy consistency, distributing them evenly over the enamel. To completely remove adhered grease and stains, leave for 1-2 hours so that the product removes all dirt and germs from the surface of the gas stove. Next, remove the burners and soak them together with the cleaning agent in water for 1-2 hours.
Afterwards, rinse everything off with a damp sponge, wipe with a cloth and replace the dry burners.
Please note: Follow safety precautions when using the stove and do not panic if you smell gas. Just turn off the gas pipe valve and try not to stay in the apartment until specialists arrive
Adviсe:
Do not turn the gas knobs to full power, as if the gas supply is too powerful, the flame may come off the burner, thereby releasing carbon monoxide into the air. Do not leave a switched on gas stove unattended. Monitor the quality of the equipment; if you see a yellow flame, the oven in the gas stove does not burn, or any other problems arise, call specialists in a timely manner. Do not allow liquid to splash onto the surface of the stove, as this may extinguish the fire and cause a gas leak. Check your gas water heater. Pay attention to whether the hood is working. It is very simple to determine this; you need to bring a burning match to the chimney, hold it for a while, if the flame is drawn in, it means the hood is working properly
If the flame burns as usual or deviates to the side, then the water heater cannot be used.
It is necessary to periodically monitor the operation of the oven.
Handles don't turn
A fairly common problem is the inability to turn on the equipment due to the fact that the fuel supply knobs do not turn. There may be 3 main reasons:
- Adhered grease and dirt make it difficult to turn;
- the grease on the faucet has dried out;
- element failure.
You can fix the problem with contamination and lack of lubrication yourself, but if you do not know the design of your device and what lubricant is best to use, then it is better to call a specialist.
If the handle turns with great difficulty, then you should not try to turn it by force; perhaps a small object has gotten between the body and the plug, which interferes with the movement of the rod. The defect can be eliminated by disassembling the device, and in order to avoid such an annoying phenomenon in the future, it is necessary to carry out preventive measures.
Sometimes the opposite problem occurs when it is not possible to light a fire due to turning the handle 360°. This usually happens on devices during long-term operation. The reasons are loose seats in the handle, unscrewed screws of the tap holder, disconnection of the stem and stud. Such problems can be eliminated by replacing parts and returning them to their original positions.
Safety rules for stove repairs
When inspecting and repairing the stove, you must follow simple safety rules - turn off the fuel supply, turn off the electrical power, and children and animals should not be left in the room. Upon completion of work, you should make sure that the burners are burning evenly and that the connection between the stove and the gas pipeline is tight.
In the event of a serious breakdown, it is undesirable to carry out repairs yourself, without the appropriate experience. In this case, it is better to call a specialist from an organization with which an agreement has been concluded for servicing gas equipment.
For unauthorized interference in the gas supply system, liability is provided for, specified in Article 9.23 of the Code of Administrative Offences. The fine will range from 10 to 30 thousand rubles.
If a fire or explosion occurs due to the fault of the owner of the equipment, charges will be brought against him, in accordance with paragraph 6 of part 3 of Article 158 of the Criminal Code of the Russian Federation. The amount of penalties for illegal actions: from 100 to 500 thousand rubles. Punishment for this offense is also provided in the form of imprisonment for a term of up to six years or forced labor for a term of up to 5 years.
How to properly clean the surface and parts of the burner?
This procedure can be carried out in several ways. Use one of the options below so as not to waste a lot of time and do everything right.
Method 1
- Check if the stove has cooled down.
- Remove the burners from it.
- Disconnect the divider.
- Clean the holes of the divider with a needle or thin knitting needle.
- Take a bowl or small container.
- Fill it with hot water and detergent in a ratio of approximately 10:1.
- Immerse the disassembled burners in the solution for 15-20 minutes (if the contamination is strong, you can extend the soaking time to 2 hours).
- After the allotted time has passed, put on gloves.
- Take a kitchen sponge with an abrasive coating and use the rough side to remove dirt from the parts.
- Clean the gas passages of the burner using a toothbrush.
- Rinse several times with warm water to remove any remaining detergent.
- Wipe dry with a napkin or towel or lay out to dry.
- Assemble the burner parts.
Important! When cleaning, do not use metal scrapers or brushes, as they may leave scratches and thereby damage the surface of the burner.
Method 2
- Remove the dirty burner from the stove.
- Take it apart into separate parts.
- Take a small saucepan.
- Pour 2 tablespoons of 9% vinegar into it.
- Add 1 cup of cold water to the bowl.
- Bring the solution to a boil.
- Lower the burner into it for 25-30 minutes.
- Wait, then put on gloves.
- Clean the burner using a soft kitchen sponge.
- Rinse several times in warm water.
- Wipe dry with a cotton towel.
- Assemble the burner parts.
Important! Instead of vinegar, you can use regular baking soda, which also effectively removes stains.
Method 3
For express cleaning without soaking, Milam-gel is suitable - a product that is sold in specialty household chemical stores. Use it this way:
- Remove the burner from the stove.
- Apply a small amount of Milam gel to the surface of the burner.
- Leave for about 5 minutes.
- Clean with a sponge or brush.
- Rinse thoroughly.
- Rinse the burners with warm water.
- Dry or wipe the burners with a towel until the moisture is completely absorbed.
If you have a faulty electric ignition
Almost all devices are now equipped with it, which has a positive effect on ease of use. Let's first define how electric ignition works and works.
Electric ignition consists of four parts:
- transformer (unit) operating from a 220 V electrical network;
- electrical wire leading from the transformer to the ignition mechanism;
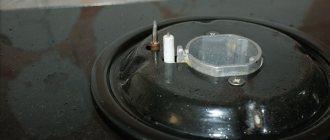
- ceramic candle;
- ignition button located on the control panel, next to the rotary switches.
The mechanism of electric ignition is as follows:
- When you press the button, the circuit closes;
- The transformer generates the current for the spark;
- The pulse is supplied through the wires to the gas burner;
- The ceramic candle produces a spark and the burner ignites.
It is noteworthy that the candle fires on all burners without exception, however, only the one that receives gas is ignited.
It is very important to ensure that the network always has one voltage - 220 V. To protect your stove, you can buy a household voltage stabilizer, which will protect you from unexpected current surges
Otherwise, short circuits and unstable operation of the network negatively affect the electric ignition and can cause breakdown. If your hob exhibits the following malfunctions, then the problem is with the ignition:
- you turn on the button, but the ignition does not work;
- one or all spark plugs spark;
- you release the button, and the ignition works.
You turn on the button, but the ignition does not work
The first and most common reason is contamination of the mechanism button and/or burner with dirt and combustion waste. Cooking food entails splashing fat and food all over the stove, so this problem is not uncommon. Clean the ignition button, wipe the burner, clean the nozzle with a needle or any other thin stick, wait until everything is dry.
One or all spark plugs are sparking
If the spark plugs on all burners sparkle orange or yellow and operate intermittently, then the problem may be a faulty electric ignition unit. It needs to be replaced, but doing it yourself is extremely difficult. The block is located in the middle of the panel; it needs to be disassembled and the contacts disconnected, so it is better to trust professionals in this situation. To be sure that the problem is in the transformer, do the following:
- in the dark, with the lights off, turn on the ignition button;
- if a spark appears on all burners of the color described above (yellow, orange), the unit definitely requires replacement;
- if the spark is blue, the unit is working.
If the integrity of the spark plug is damaged or its rod is oxidized, it will spark orange or yellow intermittently. This is solved by replacing the faulty spark plug. However, such problems are quite rare and this is due to the design of the candle itself. It is a steel wire, one millimeter thick, encased in porcelain. For a candle to become unusable, it must be in very unfavorable conditions of high humidity or subject to shock.
You release the button, but the ignition works
This may be due to a faulty transformer or oxidation of the contacts.
When washing the panel or boiling water, liquid can penetrate into the middle of the device, onto the contacts. With constant leaks and heat coming from the burners turned on, the contacts oxidize. They become rough, they can stick together and break. Their technical cleaning and high-quality drying will help.
Do-it-yourself electric ignition repair - detailed instructions
Do-it-yourself electric ignition repair
Modern gas stoves or gas hobs are equipped with electric ignition.
The electric ignition of gas stoves and hobs is turned on by rotating the gas supply knob to the selected burner or by briefly pressing the electric ignition button.
You hear a click generated by the discharge of the electrode to the ground of the burner. At this moment you can see a spark, something like lightning, but in miniature.
Discharge after discharge follows at intervals of one second, until the gas handle is released.
If you have an electric ignition button, the number of electric ignition discharges is equal to the number of presses on the electric ignition button.
Accordingly, the frequency of discharges in manual mode is equal to the frequency of pressing the button. The discharge causes ignition (ignition) of the incoming gas into the selected burner.
Do-it-yourself electric ignition repair. But since the circuit for producing a spark works from the mains (electricity), ignition acquired the name electric ignition.
In the case when sparking occurs automatically, such electric ignition is also called electronic.
Do-it-yourself electric ignition repair
- By pressing and releasing the electric ignition button, a single spark occurs (at the moment the button is released).
- By pressing the gas supply knob on the burner, continuous sparking occurs at intervals of one second.
1. The first option (Fig. 3) is based on the manual charge-discharge mode of the storage capacitor. It works like this:
(r1- 3.9k, c1- 2.2MkfX600V, d1- 1N4007) The circuit is connected as follows:
Diode d1 is supplied with mains voltage (Fig. 3.1).
By pressing the electric ignition button, you apply mains voltage to capacitor c1 (Fig. 3.2). The capacitor is charging.
At the moment the button is released, the contact of the capacitor c1 (Fig. 3.2) is connected to the transformer t1, through the contact (Fig. 3.3).
The reverse process occurs - the discharge of the capacitor through the primary winding of the high-voltage transformer t1.
On the secondary winding of the transformer (Fig.3.t1-1) and (Fig.3.t1-2) an output voltage of about 10 kilovolts is formed. A spark is formed.
By pressing and releasing the button the process is repeated. The transformer terminals (Fig.3.t1-1) and (Fig.3.t1-2) in (Fig.1 and Fig.2) are designated number 1.
The output (Fig. 3.1) corresponds to numbers 5 and 2 (Fig. 2). The output (Fig. 3.2) corresponds to numbers 7 and 3 (Fig. 2). The output (Fig. 3.3) corresponds to numbers 6 and 4 (Fig. 2).
(r1- 300 ohm, c1- 2.2 MkfH600V, d1- 1N4007, d2- 1N4007, d3- 1N4007, r2-1.5 kΩ, r3-30 kΩ, s1- ku202n, )
When you press the electric ignition button, charge and discharge occur automatically.
The automatic mode depends on the electrical ignition circuit design.
The circuit works as follows: with a positive half-wave of the mains voltage, capacitor C1 is charged through D2 and D3, with a negative half-wave through D1, the cathode S1 is connected to the “minus” half-wave, and through resistor R3 the control current is supplied to the control electrode of the thyristor.
Do-it-yourself electric ignition repair. The thyristor opens, capacitor C1 is discharged into the high-voltage transformer, which induces an ignition spark.
An output voltage of about 10 kilovolts is formed on the secondary winding of the transformer. By holding the gas handle down, the process is repeated at a frequency of 50 Hz, or roughly one spark per second.
Electrical ignition is more common with four and six channels (Fig. 1 and Fig. 2), number 1 indicates taps for connecting the electrodes on which you observe sparking.
In other words, we have four ignition electrodes or six electrodes. The number of electrodes depends on the number of secondary windings of the step-up transformer.
https://www.youtube.com/watch?v=nCvJ9zDK4Ig
If there are two windings, therefore we have four outputs to four electrodes. If there are three windings of the step-up transformer, we have six outputs for six electrodes.
Electric ignition, which allows you to connect six electrodes, is usually used in gas stoves of the same design as an oven. And as a result, two of the six electrodes available are in the oven and are used to ignite the gas in the oven.
The appearance of electric ignition devices can be seen in (Fig. 1 and Fig. 2). They have some differences, but the circuit design and operating principle remain unchanged.
Buy Course: Electric Ignition Repair $5
If there is a lot of fat: how to wash a gas stove
For the highest quality cleaning and removal of all contaminants, it is necessary to carry out preliminary preparation.
Sprinkle baking soda onto a damp surface in an even layer and let it sit for 30-40 minutes. This method is not complicated and makes it possible to clean the stove and oven. The oven can also be cleaned this way.
If there is too much grease, then it is better to apply a cleaning agent on it and leave it for a while, and then wipe it off
After waiting time, you can start cleaning; water and baking soda must be removed from the surface of the stove using a soft sponge.
In no case should steel wool be used when cleaning the stove and oven, as they can cause damage to the surface, but it is better to use a sponge and a toothbrush or cotton swabs, but this is in the most difficult to reach places.
To clean the grate on a gas stove, you must use the soap solution described above. Citric acid or juice and vinegar are also excellent auxiliaries. They can be used in place or separately. Ammonia and vinegar can remove dried and burnt-on stains on the surface of a kitchen gas stove.
All gas stoves are equipped with removable handles.
The main thing here is not to rush, but to act carefully, without rushing and without breaking the plastic.
Stoves from different manufacturers certainly differ from each other. However, as experience shows, most design solutions from different manufacturers are VERY, VERY similar.
Before starting work, turn off the gas supply using the shut-off valve.
Gas stove Hephaestus, Indesit, Electrolux, Darina (knobs that need to be pressed and turned when igniting).
Just pull it towards you, along with the ring on which the symbols are drawn.
If you have any difficulties, try treating it with WD-40. Then, inserting one knife into the gap between the ring and the handle itself, bend it a little. And on the opposite side, use a second knife, acting as a lever.
If it doesn’t go through the cloth, use pliers carefully.
Then soak the hands in water with the addition of fairy. After a while, the fat will turn white and be wiped off with a toothbrush.
How to lubricate the tight rotating mechanisms of the crane?
Factory lubrication of the faucet is designed to last approximately five years. In Soviet times, gas workers used graphite lubricant (called NK-50), LG-Gaz41, LS-1P.
Graphite (crushed carbon), which forms the basis of the lubricant, is able to fill microscopic irregularities in parts, while reducing friction.
It has great refractoriness and does not dry out for a long time.
You can use solid oil or technical petroleum jelly.
Tips for repairing gas stoves with your own hands
Finding out the causes of the problem
If a burner on a gas stove does not burn well or does not ignite, you must first disconnect the equipment from gas and electricity. Inspection and repair of the hob may only be carried out after shutting off the gas fuel supply.
Basic security measures cannot be neglected here.
Whether or not the smell of gas is felt in the kitchen after the burner goes out does not matter; any manipulations to maintain gas equipment should be performed only with open windows and good natural ventilation of the room
Many modern gas stoves are equipped with electronics and automatic ignition systems that require electrical power. Often, inexperienced home craftsmen, when working with a gas hob, forget about this feature of this device. As a result, methane vapors ignite from sparks. Therefore, before starting repairs, it is recommended to disconnect not only the stove itself, but also all electrical appliances in the kitchen.
Problems with gas stove burners arise due to:
- incorrect operation of the solenoid valve and/or thermocouple;
- nozzles clogged with grease and soot;
- faulty spark plugs;
- long breaks in servicing gas equipment.
Owners of private houses and apartments where there is a gas stove are required to enter into an agreement for regular inspection of the equipment in question with a specialized organization. Without such an agreement, gas will not be supplied to the consumer.
And gas workers should come at least once a year, checking the functionality of the hob and, if necessary, immediately repairing it. All other calls are paid separately.
If problems with the stove arose during the period between routine checks, you will either have to call a technician again or carry out the repair yourself
Moreover, if during self-repair of burners and other hob devices they are damaged, then it is prohibited to turn on the faulty device without the gas technicians. Even if the stove is more or less operational, then during an annual inspection a gas company specialist will identify a breakdown and immediately shut off the gas until the defects are eliminated. And these are inevitable additional expenses. Plus, they may also impose a fine.
It is recommended to undertake repair of a gas stove with your own hands only if you are absolutely sure that you will do everything correctly
There are no particular difficulties in this work, but you can break something through carelessness or ignorance
The problems are the following:
- The flame is not blue in color - there is not enough oxygen or too much gas is supplied to the injector.
- The burner does not light - the spray holes are clogged with soot or the thermocouple or spark plug is faulty.
- The fire goes out - the gas supply is cut off due to a faulty gas control or problems with the gas pipe.
You can clean or replace the burner on your gas stove yourself. But if the problem area is the meter, the gas pipe itself (cylinder) or an external gas sensor, then it is better to refuse arbitrariness.
In such a situation, you should seek help from the gas workers responsible for the serviceability of the VKGO and VDGO.
Main symptoms of a malfunction
If the gas oven stops working, it is necessary to carry out basic gas control diagnostics.
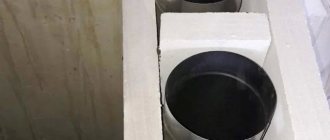
First open the top cover and the burner or hotplate. To do this, unscrew and remove the two side plugs on both sides. Visible signs of malfunction are as follows:
- there is gas flow, but with the standard procedure of pressing the button, the flame does not appear;
- food is heated unevenly: it can burn at the edges and be cold in the center or vice versa;
- the oven does not close or the door does not press well to the base and cannot fully lock;
- immediately after ignition, the fire slowly goes out;
- it becomes impossible to regulate the heat in the oven;
- as long as the handle is held, the gas cannot go out on its own;
- the oven smokes, and the fire emits a yellow-red glow;
- the flame emanating from the burners has different heights;
- the opening of the spirit door occurs with tension, as if it is being held inside;
- With little use, the oven becomes very hot.
Important If one or more of these symptoms occurs, it is necessary to inspect the equipment and identify the malfunction. Gas is a dangerous thing, so if you are not confident in your abilities, it is better to call a specialist to your home.
Cleaning with chemicals
This is perhaps the easiest and most effective way to clean the oven. When using them, you should wear gloves and ventilate the kitchen.
Typically, an oven cleaner is equipped with a spray gun, with which it is easily and evenly distributed throughout the oven. After applying the product, it must be left for some time. After which, all fat is easily removed with a sponge.
After using chemicals, the oven must be thoroughly rinsed with plain water, otherwise the food will become saturated with odor or have an unpleasant aftertaste.
If the weather outside is bad, or even winter, and there is no opportunity to go out into nature, you can have a picnic with delicious barbecue right at home.
It’s not difficult to buy and marinate meat, and you can cook it deliciously in the oven.
The lack of aromatic smoke from the wood in the grill can be compensated for by using soy sauce, liquid smoke and a slightly spicier than usual marinade.
If all these conditions are met, then making pork kebab with liquid smoke in the oven is not so difficult.
Ingredients:
- meat - 1 kg
- onions - 3 pcs.
- internal or fat tail fat - 100 g
- raw lard - 50 g
- vinegar - 100 ml
- soy sauce - 30 ml
- coriander - ½ teaspoon
- cumin - ½ teaspoon
- salt, red and black pepper - to taste
- liquid smoke - 30 ml
We wrote about what fat tail fat is in - a dish prepared according to Eastern traditions.
How does a gas stove work?
The design of gas stoves varies depending on the type of equipment. But all such devices include:
- burners;
- hob;
- oven.
Some types of gas stoves are complemented by an electronic control unit for the burner and other components. In particular, equipment is often equipped with a sensor, which, if the fire goes out, shuts off the supply of “blue” fuel.
Burners
The burners consist of the following components:
- gas supply nozzle;
- swirler;
- throttle;
- guides;
- lid;
- divider
The latter divides the general flow of flame into several uniform tongues extending outward. Older stoves use diffusion and kinetic burners. The first ones are installed in ovens. Diffusion burners are distinguished by the fact that gas is mixed with air (due to this process the fuel ignites) in a natural way. Modern stoves use combined burners.
Gas flow control
In the center of the stove burner there is a thermocouple that regulates the gas supply. When heated, this element generates a current that is supplied to an electromagnet. The latter holds the damper open, so that gas flows to the burner continuously. If the fire on the burner goes out, the thermocouple begins to cool. Because of this, the magnet is discharged, as a result of which the damper automatically closes, interrupting the gas supply.
This configuration significantly increases the safety level of the slabs. However, due to the thermocouple, you have to hold the regulator knob down for several seconds.
Lack of air
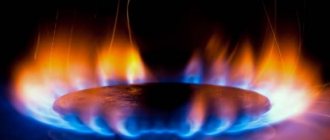
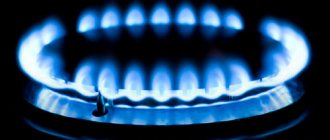
This is the first reason why a gas stove smokes. If the ratio between air and gas is disrupted, combustion becomes unstable. The predominance of gas over air leads to soot. However, if air predominates, then this is also dangerous, since the flame begins to come off the burner and make noise.
Both options lead to the release of a large amount of substances formed during incomplete combustion. These include soot, carbon monoxide and other components. They are characterized by increased toxicity, which makes cooking dangerous: when these substances get into food, they poison it.
In addition to soot or noise, the color of the flame indicates an air imbalance: it turns yellow or red instead of blue. The main way out of the situation is to clean the nozzle and adjust the air damper.
What to do if a problem is detected?
It happens that the problem of weak gas supply and flame extinction is caused by accumulated grease on the electric ignition or regulator. By cleaning them from contaminants, you can eliminate this problem. Also check the spark plug; if the holes are clogged, the flame crown will be small or smoky.
It may be worth monitoring whether oxygen is entering the oven. To do this, check that the oven door is closed tightly.
Many, noticing that something is wrong, wonder: what is wrong and how to fix the stove themselves? However, if you encounter any problem that requires appropriate qualifications, it is better not to try to fix the stove yourself. Such intervention without the appropriate skills and knowledge is fraught with big problems.
If you yourself do not have the necessary tools and knowledge to fix problems, then calling a specialist will be the best solution.
If your gas stove has not passed the warranty period, then call the service center of the company where you purchased the equipment. If the warranty period has expired, then call a qualified specialist from other companies in your city. The technician will be able to professionally fix all problems and tell you how to care for the stove.
Why does the oven smoke?
When smoking burners in an oven, the reasons can be similar, as well as radically different from smoking a burner. Typically, experts highlight the following:
- The pressure in the cylinder or line is much higher than what is required in accordance with the technical conditions of use.
- The presence of foreign impurities in the cylinder, which make the composition of poor quality. Manufacturers or suppliers add a lot of sulfur additives to the composition, which is why fire begins to stain dishes and pots.
- The oven settings are not adjusted. Modern models from manufacturers such as Gefest, Hansa and others require very fine adjustment, which depends on many parameters, from gas supply features to the personal requirements of the user. With rare exceptions, the consumer will not be able to understand the intricacies of setting, so you should call a specialist from Remontano, who will not only set it up as needed, but also give detailed advice regarding use.
- Clogged jets. If you can try to clean the nozzles in the burners yourself, the design of the oven is much more complicated. Therefore, in this case, they immediately call the experts.
- Poor quality burners. Some budget models are made from low-quality materials that have minimal durability. Because of this, heating elements that have already served their service life begin to work unstably. In particular, smoking may occur. Fixing the problem is simple - the broken product needs to be replaced. Moreover, it is necessary to use a higher quality product than what the manufacturer established.
When it smokes inside the oven, you should immediately stop cooking in it. This negatively affects its quality and can cause severe food poisoning.
What else could happen
Additionally, I will explain that the absence of a flame or its unstable combustion can be caused by a broken valve. Some models use high voltage relief valves, some use low voltage
It is important to know which valve is in the oven, since outwardly they may look the same. If you install a low-voltage valve instead of a high-voltage one during repairs, you can burn it
There is no need to climb here on your own - this is the work of a master.
If the oven does not want to ignite and all the listed components are working properly, the reason may lie in the gas supply. The problem is easy to recognize - in addition to the lack of combustion, when you turn the knob, you cannot hear a short hiss of gas. If the device operates from a central network, it is better to check the shut-off valve; it is often simply closed. When powered from a cylinder, it makes sense to look at the condition of the gearbox, in case it is also blocked. You also need to check the pressure in the cylinder in case the gas suddenly runs out. If everything is in order, but there is no fuel supply, you should immediately call the gas service. Lack of gas in the system is a dangerous call and can lead to air congestion.
If the oven is operating with a catastrophically low flame pressure, there is an incorrect ratio of the air-gas mixture supplied to the burner. If it is necessary to increase the combustion intensity, adjust the air damper.
Thermocouple burned out
A thermocouple is two connected conductors. The main purpose of the device is to measure temperature. This thing is located not far from the candle and if it breaks, it prevents the burner from igniting.
Typical symptoms of a malfunction are:
- you press the ignition button;
- The fire lights up, but goes out when the button is pressed.
There is no need to rush to replace; sometimes cleaning is enough. The sensor head (located under the divider) is carefully cleaned with sandpaper. This will restore rapid heating and the system will work with renewed vigor.
If this does not help, replace the thermocouple with a new one. I advise you to install an original spare part. With non-original parts it is very difficult to ensure the correct response threshold. After repair, the system is checked for functionality.
How does electric ignition work?
Electric ignition makes it possible to light the stove safely. It reduces the possibility of getting burned to a minimum, because with piezo ignition there is no need to use lighters or matches. There is also no contact with flame. With electric ignition, gas ignition occurs from the activation of a piezoelectric element on the gas device. The piezoelectric element gives a spark, after which automatic electric ignition takes place without the use of other devices. Repair of gas stoves with electric ignition can be done either with the help of a specialist or with your own hands: it all depends on the type of breakdown and knowledge about the operation of the structure.
About fixing the problem yourself
If the reason for the stove smoking is due to improper installation of the jet or other auxiliary problems, you can fix them yourself, but only with careful study and compliance with safety precautions. In this case, the following points can be highlighted:
- Modern stove models are equipped with two jets - they are of different diameters, which is designed to reconnect the gas stove from the central gas supply system to the use of a cylinder. The main system requires the use of a nozzle with a diameter of 1 mm, while a cylinder is 0.8 mm. You can switch the equipment yourself if you have both types of jets included.
The device is under the burner - there is a jet in the middle
- When installing the jet yourself, it is easy to allow it to tilt to the side. This leads to the fact that the gas is supplied weakly (the fire will be distributed unevenly). Moreover, such violations in the installation increase the risk of an explosion. Therefore, when installing it yourself, you must clearly determine the center and work carefully with your hands.
The presented actions are performed carefully and accurately. Remember: all independent work increases the risk of safety violations, which will lead to an increase in explosion hazard.
What to do if there is no jet
Often the kits do not include a second jet, and it is not possible to purchase one. In this case, you can resort to the following actions to independently reduce the nozzle hole in order to eliminate the problem:
Disassembling burners
- First, you should prepare the necessary set of tools and materials - soldering iron, solder, sewing needles.
- Next, the jet is processed. At the initial stage, it is necessary to remove the oxide film from the brass so that in the future the solder will better adhere to the metal.
- Clean the jet and hands with alcohol.
- Next, rosin the hole and cap, and apply a drop of solder.
- Once applied, the tin will fit into the hole.
- After the tin has completely dried, it must be ground flush with the head.
- Next, you should take a needle and make a hole in the newly formed “nozzle”.
- Use a needle to make a 0.5 mm hole.
- Every 0.1 mm increase, the nozzle is installed and the gas supply is checked.
Internal parts of the burner
All actions are carried out carefully, with a clear check of all perfect points and safety parameters.
Jets may not be present in the plates. In this case, the gas supply mechanism consists of a system for regulating the flow force of blue fuel. You can configure the system yourself by following the instructions. The cylinder is equipped with a brass valve, which has a conical thread. It also makes it possible to open it not completely - this facilitates independent regulation of the gas supply pressure.
Another reason when the stove smokes is the accumulation of condensation in the gas cylinder. The resulting liquid must be drained periodically - preferably after each emptying of the cylinder. In addition to the problem under consideration, users of gas stoves are faced with an unpleasant odor when the burners burn.
If you cannot eliminate the cause yourself, it is better to contact the special services and tell them exactly about the problem that has arisen. The work of a specialist will ensure the safety of the continued use of the repaired device. A gas stove is a complex structure that should not be touched (disassembled and repaired) by people who do not know the entire structure.
Causes of failure
Why doesn't the gas stove work? There are two most common reasons for poorly functioning electric ignition:
- electrodes do not produce a spark;
- the electrodes spark without stopping.
One of the reasons why the electric ignition of a gas stove does not work well is grease on the buttons. Solving the problem is very simple: just clean and dry the components of the hob, all the buttons in order to repair the electric ignition of the gas stove caused by contamination.
Another possible cause of failure is a crack or broken ceramic insulation on the spark plug. A dirty spark plug can fail if dirt accumulates on it. Also, the spark plug may stop working properly due to poor sealing or oxidation of the rod made of steel. In addition, the element may crack due to careless handling. In this case, the spark begins to strike to the side. The only way out of the situation is to replace the spark plug.
When the spark generation unit (ignition transformer) burns out, the button you press does not create a spark. If the piezo ignition on a gas stove does not work, it is easier to buy it than to repair it. It is possible to repair this element, but it is too expensive - it is cheaper to purchase a new one.
When washing the stove, water very often gets into the contact area of the power buttons. High humidity creates all the conditions for these contacts to oxidize, become hard and break over time. In some cases, the opposite happens - the contacts may stick together and not work correctly. It’s easy to solve a similar problem with automatic ignition not working - just cleaning and drying is enough, after which the functionality of the hob will be restored.
The stove smells strongly of gas: reasons
The gas itself is odorless, but for safe operation a special chemical additive is added to its composition, which creates a familiar specific aroma.
When the gas burner is turned on, a small amount of gas enters the room, causing a short-term false illusion of a leak. This is absolutely normal, there is no need to worry. But if a constant smell of gas is observed when the hob is turned off or running, then it is necessary to immediately find out the reason for this and eliminate the malfunction.
The smell of gas can occur in two situations:
- when the stove is turned off;
- only when the stove is running.
It is necessary to look for a breakdown in these two cases in different ways.
If you notice a smell when the gas panel is turned off
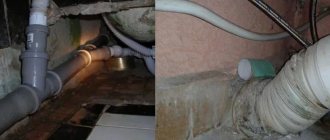
Such leaks are associated with a violation of the tightness in the components of the gas hob.
This may be due to:
- loosening the hose connection nut;
- cracks in the hose itself or in the gasket;
- the rubber seal on the connection has become loose;
- improper installation of the hob;
- The gas valve needs replacing.
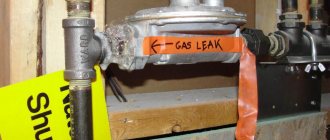
In order to accurately verify the location of a gas leak, use a simple method - a soap solution. The procedure is performed like this:
- dilute dishwashing detergent or any other foaming liquid in a small amount of water, whisk;
- turn off the power to the stove (if you have electric ignition);
- Use a shaving brush to lubricate all hoses, pipe connections, and threads;
- if you observe bubbles, this indicates a gas leak in a specific place; if there are no bubbles, the problem is not in the internal filling.
If there is a leak, then subsequent repairs depend on its location. A broken hose is completely replaced. If this is a threaded connection, then the problem is the aged sealant. We unscrew the thread, clean it, apply new sealant or winding, and reassemble it. The same algorithm of actions applies if there is a crack in the gasket at the junction: it will require replacement.
If nothing is found during the soap solution test, inspect the gas valve. Its repair (replacement) is the responsibility of the gas service or a similar organization responsible for the area where you live. If you have the slightest doubt about your own competence in this matter, we strongly recommend inviting a specialist.
You can repair the gas valve yourself if:
- you have enough experience in plumbing work, you have already had to deal with a similar replacement;
- the pipe in front of the valve is intact, there is no corrosion;
- you know where and how your apartment is de-energized;
- All necessary tools are available.
Remember: when working independently, gas leaks cannot be avoided! To do this, turn off the power to the entire room and open the windows wide.
If the gas is released only when the device is turned on
In this case, there may be two reasons:
- flame too big. Adjust it and everything will be fine;
- leakage occurs only in those parts of the gas pipeline that are activated when the stove is turned on - the nozzles, the places where the tubes exit from the taps to the nozzles, the places where the tubes connect to the nozzles.
You can check the last option using a soap solution that is already familiar to us. After turning off the power to the gas panel, remove the burners and remove the stove cover. Replace the gas burners and carefully wipe all mentioned areas with soapy water and turn off the gas. Bubbling will definitely indicate a leak.
At the nozzle installation site, a leak may be due to a weak tightening or a defective sealing washer. Easy to fix - tighten the nozzle, replace the washer
These operations must be done carefully so as not to strip the threads of the parts.
If there is a leak in the places where the pipes are attached, then most likely it is due to the unsuitability of the rubber sealing rings. They require replacement. It is produced in this way:
- the bracket is disconnected (if there is one);
- the tube is pulled out;
- the ring is removed and a new one is installed;
- the tube is inserted into the designated place;
- the bracket is put on.
The oven does not work - the main reasons
Before calling a technician to repair the oven, you should check whether there is a gas supply in the pipe. To do this, try lighting the burner on the hob. If gas enters the burner, it means that the oven is really faulty.
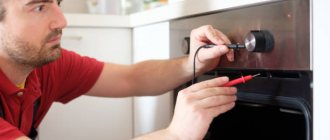
The second point that you should pay attention to is the presence of electric current in the network. Without it, the electric ignition will not work.
If everything is normal, then the oven is really faulty. You should not try to repair it yourself. Without the necessary spare parts and experience, doing this will be very problematic and even dangerous.
The main malfunctions of gas stove ovens Gefest, Hansa, Mora and others include:
- When you press the ignition button for a long time, you can hear the hiss of gas, but the flame does not ignite.
- The flame ignites, but after releasing the button, it immediately goes out.
- The flame burns for 5-10 minutes and goes out on its own for no apparent reason.
- The flame is very weak. Food cannot be cooked.
- The flame is very strong and impossible to regulate. The food is burning.
- It is impossible to turn the gas supply valve.
Self-modification of the nozzle
If you determine that the equipment has unsuitable nozzles and there are no replacements, then you can find many recommendations for modifications on the Internet. They explain in detail how this can be done using a soldering iron, solder, sandpaper and sewing needles. It is recommended to check the performance of the resulting product experimentally.
But please note, this is very dangerous! The result of such an experiment may be a leak. You shouldn’t put your life and health in such danger.
Better to buy a new part
You should not expose your life and health to such danger. It's better to buy a new part.
Design and main components of an electric stove
The electric stove looks very impressive - it is a complex household appliance, but its design is quite simple, and all the main working elements are located in a special heat-resistant case, which is made of stainless steel.
The operating principle is similar to all electrical household appliances: current passing through heating elements (heating elements) heats them to a given temperature. The stove has several burners on the hob, and their number varies: a minimum of two, and the standard is 4 pieces. For example, the budget electric stove Mechta 15M has only two burners and a small oven, while the product of Belarusian engineers Hephaestus has a standard set of burners and a large oven.
The structure of the burners is quite diverse. The classics are burners on an enamel hob with heating elements inside, modern ones are solid ceramic surfaces with various types of heaters built into them. Let's look at the main types of burners.
- Old domestic versions are equipped with cast iron products; they heat up slowly and also cool down, creating a steam effect in the kitchen, but they are resistant to moisture and high temperatures.
- Tubular spirals - they are made of a hollow tube; when heated, such devices not only give off heat, but also promote the circulation of warm air inside their body, which significantly increases their efficiency. These products are very difficult to repair yourself.
- Ceramic burners are very simple in design, they are easy to repair at home - a nichrome spiral is placed in special cells in a circle and secured. Modern models increasingly use glass-ceramic solid plates - they are more durable and easy to clean.
- Halogen devices are special burners with a similar emitter that are installed in different places on the hob. A stove with such burners provides fast heating, in a second, and low energy consumption, so they are the most economical, but only professional craftsmen can carry out repairs.
All models of modern stoves use a special cross-section power wire to transmit current to the burners; in addition, they are connected to regulators and thermostats, ensuring their protection from overheating.
If the jet needs to be replaced
Here you can also do something yourself. To work, you will need a set of keys and a Phillips screwdriver: if the nozzles for bottled gas are 8 mm, for burners - 14 mm, for pipelines - 17 mm. Don't forget to turn off the tap.
In old-style plates, the jets are hidden deep down. To begin with, remove the dividers, burners, and table top. The type of fastenings depends on the type of stove, however, in most cases you need to unscrew a couple of screws. Here you can see traverses - metal strips on which the burners are fixed. All of them are made in the same design and differ only in the length of the aluminum pipeline connecting the nozzle and the divider. There is one metal frame for every two burners. The body of each burner is rigidly fixed to the traverse, and the pipes are fastened in pairs with ears inside the body.
As I said, at the end of each pipeline there is a nozzle where the gas is supplied. Then, through a hole in the nozzle, it comes out to the burner and is fed to the divider. To replace the plates in older models, you need to release the tip with the nozzle by bending the special lock. In the new ones, everything is done much simpler, you don’t need to bend anything. When you have found something to replace, you can start repairing. Assembly is carried out in reverse order.
Expert advice
Gas oven repair specialists advise paying attention to the following points:
- Some models of gas stoves have plastic tap handles that are attached to the stem by means of a metal plate that is inserted into a groove. With use, the handles begin to become loose, the record flies out and is simply lost. The problem can be resolved. You need to take a metal canning lid and cut a suitable plate on it. By inserting the part into the groove on the handle, you can avoid such a delicate problem.
- The extinction of a fire is not only due to a lack of gas or a small amount of incoming oxygen. The problem may be that the iron part that is located next to the burner heats up and causes a current to form. It holds the magnetic valve in the operating position and may prevent gas from flowing to the burner. The problem is solved with sandpaper: it cleans the parts.
Advice If the procedure does not help, the gas stove also does not work, you need to change the thermocouple.
- If a misalignment occurs in the gas burner, it is worth checking its correct installation. If the problem occurs after washing, then the installation was not performed correctly. You need to remove the part and reinstall it. If a repeated attempt fails, then it is better to call a specialist. In rare cases, the problem lies in defective products and requires a major replacement. Although this case must be confirmed by the master.
- To make the fire in the oven stronger, since it begins to burn weakly or goes out at the wrong moment, switch to blue fuel with a lower pressure: in this case, it is necessary to replace the burner nozzle (with a wider nozzle) and adjust the oven thermostat.
It's not just gas stoves that break. Our website contains useful materials about breakdowns and repairs of electric stoves and their ovens, induction stoves, hobs, ceramic and glass-ceramic.
Why do burners work poorly?
The most common cause of problems with the performance of a gas stove is dirt clogged in the nozzle nozzle. These structural elements are located directly under the burners. Therefore, particles of food and detergents often get into the channel intended for gas dosing.
They burn out under the influence of high temperatures, but the residues still accumulate and over time interfere with the gas supply to the burners. Which leads to partial and sometimes complete loss of their performance and poor combustion.
The described procedure occurs unevenly, so combustion problems arise for each burner separately.
A high-quality flame is homogeneous, blue, does not smoke, and its tongues do not try to come off the burner. In this case, gas must be supplied from all holes of the burner. And if at least one point listed above is not observed, then this indicates a malfunction
The situation with nozzle contamination is one of those that you can solve yourself. Since this does not require special knowledge and skills, nor a rare tool. Before starting repair work, we recommend that you first familiarize yourself with the structure of the gas stove.
In addition, to resolve the problem you need to perform a number of actions:
- Remove the lid from the burner.
- Remove the burner. This is easy to do - it is simply removed from its seat with one movement of the hand.
- Remove the gas stove table to gain access to the nozzle. Why sometimes you need to unscrew several screws.
- Clean the nozzle channel.
The last procedure is performed using a pre-prepared needle or a piece of thin wire. Which, for convenience, must be bent at an angle of 90°, and this will also prevent the homemade device from falling into the nozzle channel.
To clean, a needle or wire is inserted into the nozzle channel and a reciprocating movement is performed.
It is no coincidence that a dirty gas stove is shown in the photo - it is the burnt, melted remains of food and detergents that often cause malfunction of the burners. Since they, getting under the table of the cooking appliance, clog the nozzles of the nozzles, cover the surfaces of candles, temperature sensors of the gas control system, which leads to improper operation of the latter or even breakdown
You can remove loose dirt by opening the gas tap for a few seconds. In this case, there is no need to ignite the “blue” fuel.
It is possible to check the quality of the work performed without installing a gas stove table.
What is the burner for:
- installed at the workplace;
- cover with a lid.
And then the usual procedure for igniting the flame is performed. If its parameters are not inferior to similar values of other burners, then the troubleshooting procedure is considered successful. After that all that remains is to mount the table and install the burners.
The photo shows jets, the nozzles of which often become dirty, and then cause unstable operation of the burner and the stove as a whole. They are easy to clean, since such products are similar to an ordinary bolt with a longitudinal hole. Where you just need to insert a needle and use it as a brush. But with replacement, not everything is so simple, as evidenced by the mass of troubles that the jets caused. Therefore, you should only change these parts yourself if there is an understanding that an incorrectly made hole will lead to a gas leak
It is rare, but it happens that it is not possible to clear the nozzle of contamination in the installed position. As a result, it will have to be dismantled. But there is no need to be afraid of this, since the whole procedure, if you have the necessary key, will take a few minutes. This will make cleaning easier.
In addition, after its completion, it is recommended to wash the jet with any ordinary detergent. Next, the device must be wiped dry and you can begin assembly.
Solenoid valve - the second gas control element
Most gas stoves and hobs are equipped with safety sensors - a gas control solenoid valve. They shut off the gas supply if danger arises when operating the gas stove. If a gas burner or oven goes out for any reason or is blown out by a random flow of air, the solenoid valve will shut off the gas supply after 5 seconds. The solenoid valve starts working after 4 seconds with constant heating of the thermocouple, if this does not happen or the time to turn on the burner has increased to 10 seconds, we can say that the gas control system of the stove is not working properly and most likely you need to repair the hob.
Poor quality gas cylinder
If the gas stove smokes, then the reasons lie in two possible problems.
- The first is based on an excess of sulfur content - it is this that produces that black smoke when burned. In most cases, cylinders are filled with propane, but high sulfur content in them is also possible.
- The second reason is unregulated gas pressure, which exceeds the nominal values of the device. In most cases, the problems presented are encountered when using gas cylinders.
The cylinder is used to supply gas mainly in dachas
In the first case, the problem lies in low-quality gas - cylinders are often filled with gas that does not meet the standards. The presented actions of unscrupulous sellers do not bring danger, but cause a lot of inconvenience in use. If the cause is high sulfur content, consumers are advised to contact Rospotrebnadzor to hold sellers accountable.
If consumers see a gas device smoking, they need to take the following actions:
- First, decide on further actions - use the gas in its current state, or try to reposition the cylinder or stove. In this case, you should be guided by the characteristics of the soot content - so that less damage is caused to the entire device.
- Next, they turn to the organization that refills gas cylinders. When you apply, you can receive compensation, but you will have to prove that you are right – the increased sulfur content in the gas.
- If you cannot receive compensation, you should contact Rospotrebnadzor to restore justice.
- Already after the application, an analysis of the gas contained in the cylinder will be carried out. If a decision was initially made to restore justice, it is recommended not to take additional independent actions in relation to the gas cylinder. During the examination, specialists will not only confirm the increased sulfur content, but also determine the amount of remaining gas. This will help calculate the amount of compensation.
Carbon deposits on the pipes
Everyone is used to thinking that natural gas burns cleanly. This is true, but not 100%. Any fuel contains a minimum amount of impurities that form ash during combustion. Over time, it accumulates and clogs the holes.
What to do if the gas panel burner does not light
The presence of carbon deposits creates pressure and interferes with the proper functioning of the device. The flame may not burn or go out too quickly. The burner must be removed and cleaned. Depending on the oven model, disassembling the housing is required. Most often, to access burners with a jet, you need to remove the door and bottom panel of the device.
I note that in some models, to dismantle the door it is not enough to unscrew the hinge screws. The loops may need to be unbent and folded back
By the way, it is advisable to immediately pay attention to the condition of the seals. If necessary, they are replaced with new ones
When opening the case, be aware that some metal parts have very sharp edges.
Be careful not to cut yourself
As a rule, the pipe is placed on the gas supply pipe and secured with 1-2 bolts. The burner itself can be of different shapes, but essentially remains a piece of metal with holes, there is nothing to break here. However, there are holes near the burners for air supply. If they are clogged, they should also be cleaned. Despite the simplicity of the work, it is better to entrust it to a master. If you act without experience, you can snag the gas control, causing it to break.
If cleaning does not help, it may be a problem with the seal of the structure. In this case, there may be a smell of gas, which requires immediate repair.
The electric ignition has failed
Electric ignition may not work on 1 burner or on several at once. If you cannot turn on all the cooking zones at once, then most likely the fault lies in the high voltage source. You cannot disassemble or repair something yourself; it is life-threatening.
It is also recommended to check the quality of the power cable and plug; the piezo element may not work if the wire is pinched, bent or the insulation on it is damaged. Melting of a plug or socket also negatively affects the operation of the device.
If performance is maintained on at least one burner or in the oven, then the defect could affect the insulator, which cracks during intensive use. Contacts and ignition wires are also susceptible to damage; to check, they must be tested. As a rule, the contacts themselves are rarely damaged, because the current in the high-voltage circuit is insignificant, but the insulation of the wires fails during the heating process, shorting to the housing.
Electric ignition does not work on two burners
In some cases, a gas stove on two burners does not light. Sometimes lighting it with a match helps - everything works normally, without interruption. The cause of this malfunction is damage to the spark plug responsible for ignition. We repair electric ignition as follows: clean the spark plug and look at its condition; perhaps it’s enough just to clean the spark plug’s power wire.
If there is a crack on the element, we buy a new part and put it in place of the old one. The electric ignition may also break down due to a faulty ignition button. Moisture or small debris could have gotten into it, or it could have been damaged mechanically. To fix this, you need to clean the oxidized buttons or replace them if they are mechanically damaged.
What to do if the burners go out
There are several other types of problems with gas stoves that cause the burners to go out. Among them the following stand out:
- Incorrect burner operation leading to fire extinguishing
- If the burner is not working properly, it is very difficult to turn on the tap.
- All burners burn poorly at once
Regardless of when the burner goes out: immediately after setting fire or a little later, the reasons for the extinguishing are the same. The main ones are:
- Problems with the gas control system. This causes the burners to malfunction. In this situation, it is necessary to replace the electronic valve or temperature sensor, and possibly the entire system.
- The nozzle is dirty. In this case, it is necessary to clean the nozzle (cleaning instructions are described above in this article) or replace it.
- The temperature sensor does not heat up when the burner is lit. The reason is improper handling of the device, in which it takes an incorrect position.
How to fix it?
Most often, when gas ovens malfunction, owners are in no hurry to contact specialists, hoping to carry out repairs themselves. What kind of breakdowns can be repaired without danger with your own hands? This is discussed below in our article.
- Cleaning the regulator knob. Before starting repairs, turn off the gas supply. Troubleshooting begins with cleaning the taps. After removing carbon deposits, dirt and grease from them, clean the spring. Wipe the cork carefully so as not to damage it. Disturbing the surface will cause gas leakage. Use only a soft sponge. Next, the plug is treated with graphite lubricant without touching the holes. Remove greasy deposits from the stem with a knife. Afterwards, the handle is assembled in the reverse order of disassembly.
- How to fix oven doors. Over time, the oven door becomes loose, causing it to not fit tightly or not to close. To fix the problem, unscrew the mounting screws connecting to the stove. Having loosened them well, move the door in different directions until you find a position in which it is firmly seated on the hinges. To control, place a sheet of paper between the seal and the edge of the oven. If it does not clamp well, do the procedure again. After installation on the hinges, the bolts are tightened into place.
If it is noticed that the loss of heat is associated with damage to the seal located around the perimeter of the door, replacing it will not be difficult.
- Remove the old seal. In some oven models it may be attached with screws; to get to them, pull off the protruding edge of the rubber, in others it is glued.
- Wash the channel and door with liquid detergent. Clean off any old caulk or adhesive residue. Degrease.
- Install a new seal by starting from the top, then down and to the sides. Complete the process by bringing the edges together at the bottom center. If the elastic needs to be glued, choose a food-grade adhesive that is heat-resistant up to 300º.
Among other failure options.
Checking and cleaning the thermocouple. The oven burns as long as you hold the handle - then you need to check the thermocouple mount. In the lowest position it should touch the tongue. If the placement is incorrect, most models allow you to adjust with screws. It is possible that the thermocouple contacts are dirty and this is preventing the flame from being maintained. Try cleaning the part with sandpaper.
If the oven smokes
The injectors may also need to be replaced here. In most models, it is located behind the left wall of the chamber, where the arc-curved burner is inserted. First you need to unscrew the screws and remove the burner. There is an injector hidden there that needs to be changed. I note that during long-term operation the jet could literally become stuck to the nozzle. If this happens, lubricate it with a special product and wait a couple of minutes . Assembly, as always, is done in reverse order.
Broken “gas control” of the burner
If after cleaning the burner continues to go out, the fire burns, but does not register, the cause of the malfunction lies in the automation. It is possible to determine the state of the automation using a multimeter. A thermocouple measures the voltage when heated. The solenoid valve checks for winding breakage.
6 reasons why a gas stove burner does not work.
We repair automation. “Gas control” is a set of parts working in pairs (thermocouple and solenoid valve). When heated, the thermocouple produces electricity to magnetize the valve. Loss of contact, as well as mechanical wear, will lead to rupture and gas combustion will stop. The repair is simple: remove the table tray and securely fasten it in a vertical position. A thin copper-colored wire from the burner to the gas stove faucet is called a thermocouple. The connection point between the tap and the thermocouple is a contact. Separate the parts and clean the contacts with sandpaper, connect and tighten securely.
Tip: If the gas control stops working, replace the thermocouple or solenoid valve. Install original spare parts according to the stove model. Universal parts differ in the diameter of the seats. The fit and installation height of the thermocouple plays an important role.
Why clean a gas burner?
Many of you have probably encountered a situation where the gas from the stove burners begins to burn worse. The burner flame partially or completely disappears, changes its color and shade; in particularly advanced cases, one or more burners may not work at all.
Sometimes the problem lies in weak gas pressure. But most often the cause of such troubles is the usual contamination of the burner dividers or nozzles that are located under the burner. During cooking, liquid or food particles may get into small holes. Contamination can also occur due to the frequent use of powdered cleaning agents to clean the surface of the stove. In any case, if a problem arises, you should try to solve it.
Why does the smell appear?
There are several main reasons for this phenomenon. The first and most basic is leakage. If propane leaks through the hose and the places where the hose is attached to the riser or stove, you can check this by applying a soapy solution to the hose. However, this procedure is not sufficient, because micropores may not be noticed.
Sometimes the leakage can come from the burner taps. The master, checking this assumption, will simply turn off the corresponding taps. There are other equally rare problems that cause similar phenomena, for example:
- gasket wear;
- loosening the hose nut;
- no grease on the valve plug;
- weakening of the tap gasket;
- gas valve defect;
- violation of the operation of the device, in the absence of a gas control system;
- malfunction of the burner, which can appear either as a result of a hidden manufacturing defect or due to natural wear and tear;
- unprofessional installation and incorrect settings.
Most faults can be eliminated by replacing the failed part or gasket. But despite the absence of the need for complex technical repairs, such work should be performed by a service center specialist.