Modern requirements for electrical wiring have reached a high standard, as the number of electrical appliances in apartments and houses has increased. Therefore, the wiring must withstand possible loads and meet safety requirements.
During construction or major renovations, a new electrical wiring diagram in the apartment must be developed that will take into account the increased human needs for electricity.
According to new standards, wiring is often thrown along the ceiling
Features of wiring in new houses
The wiring that was done in apartments 40 years ago was designed to operate a small set of appliances - a TV, a refrigerator, lighting. Electric stoves, kettles and boilers gave the maximum loads.
Today, people buy computers, video surveillance systems, powerful home appliances, wireless communication devices and more.
At the same time, the principles of electrical wiring design have not changed, but the network has become more complex and extensive.
Advice! It is important to provide the optimal number of sockets for appliances that will be used by residents. Otherwise, tees and extension cords will be used, which leads to increased loads on individual sections of the wiring and overheating.
The number of electrical outlets has increased
An additional difficulty in drawing up an electrical wiring diagram lies in comparing its operating parameters with the power of the devices.
Therefore, you need to know in advance what will be located where, and what loads it will put on the network.
The second point is the correct lighting of the premises, which is carried out in accordance with the standards of SP 52.13330.2016.
Along with the power network, low-current networks are also used in apartments. These are television and telephone cables, computer equipment, fiber optic networks, intercoms and acoustics. They cannot be physically separated, since the devices are connected to them simultaneously, which means that the position of the routes is taken into account when drawing up the project.
The amount of cable needed to connect all devices has changed significantly. This also applies to lighting.
Previously, rooms were illuminated by one chandelier, but today spot lighting has come into fashion, which allows light to be evenly dispersed over the area of the rooms, as shown in the photo below. Each lamp requires a wire.
Spot lighting
Interesting to know! Modern electrical appliances are not as power-hungry as they used to be. Instead of one incandescent lamp, 10 LED lamps can work at once, giving much more light. This fact allows you to avoid overloading public networks.
We recommend reading: calculation and design of artificial lighting.
Kitchen
The outlet for the hood should be located at a level of 2 meters from the floor.
It is better to place sockets for connecting a washing machine, dishwasher and refrigerator 10-20 cm from the floor level. For household appliances that do not have a very long wire, you can make a socket in about 50 cm.
- Soil resistance - a practical guide on how to determine the main parameter (75 photos)
Sanding timber - modern mechanical and manual processing of wood (80 photos)
Insulation of facades - selection of materials and instructions for creating ventilated facades (85 photos)
To place small items (for example, a toaster), the socket should be 110 cm above the floor level (or at a distance of 20 cm from the level of the kitchen countertop).
Lighting fixtures occupy an electrical outlet located approximately 5-10 cm above the furniture.
Attention! The power of all electrical lines in the kitchen should be less than the required norm, as this will allow all points of energy consumption to be activated at the same time.
Why do an apartment wiring project?
To ensure safety, the wires are additionally laid in a corrugated PVC hose, which takes up much more space.
Laying 10-15 cables correctly in a row and spreading them around the apartment is an art. And only a professional electrician acting according to the diagram can cope with the task.
Someone will say that the electrician is a perfectionist, but we will answer that the work was carried out according to the project
The second point is the need to decorate and disguise communications. After this, it will be impossible to figure out the location of a large number of conductors without partially damaging the repair.
When the developer keeps the plan, problems of this kind do not arise.
Apartment wiring plan - example
The electrician takes into account the client’s wishes regarding the location of household and heating appliances in the premises, after which he begins drawing up a diagram.
Its task is to divide the cables into groups so that they do not intersect or interfere with each other, and it is also possible to distribute the load in the network evenly.
He thinks over a protection system (some devices require grounding and the presence of separate RCDs) so that the wiring meets safety requirements.
The electrical wiring diagram includes the following elements:
- Distribution panel, which can be intra-apartment or common.
- Electric meter to control electricity consumption.
- Automatic protection devices responsible for stopping the power supply in the event of leaks, human electric shocks, or short circuits.
- Cables and wires with which wiring to electrical points is carried out.
- Switches and sockets for controlling lighting and connecting household appliances.
Step-by-step instructions for installing and connecting the socket
- The decorative panel is removed;
- The bolts are loosened;
- The glass (mounting) is installed in the wall hole and fixed. Zero and phase are neatly brought out;
- The housing is inserted and secured in the holder with screws;
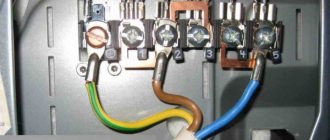
- When connecting bare parts of conductors to terminals, polarity is not taken into account;
- The last step is to install the cover and turn on the automatic device to check the operating condition of the outlet.
It is very easy to install the overhead model by simply securing it in place of the socket box.
The principle of dividing the intra-apartment network - why is it necessary?
An input circuit breaker is installed in the distribution panel of a private house or apartment, to which the power cable is connected. This element controls the intra-house network.
When the switch is turned off, electricity stops flowing to all points. This is convenient when you need to quickly and indiscriminately disconnect the power, but it is extremely inconvenient when you need to turn off the lights only in a certain room.
For this reason, the intra-house network is divided into several groups.
Branching of the intra-house network
Most often, distribution is done by room, but there are other principles of division:
- Separate group for lighting.
- Connecting powerful household appliances.
- Separate kitchen line.
- Separate toilet and bath.
Moreover, the network can branch out at several levels, for example, a separate RCD is placed on an electric oven, which will allow you to leave other household appliances and lighting in the kitchen on if the protection is triggered.
Our prices
| Work area | Price | |
| One-room apartment (up to 35 sq.m; 14 electrical points; boxing up to 8 machines) | from 16,000 rub. up to 35,000 rub. | |
| Two-room apartment (up to 45 sq.m; 16 electrical points; boxing up to 10 machines) | from 22,000 rub. up to 40,000 rub. | |
| Three-room apartment (up to 60 sq.m; 22 electrical points; boxing up to 12 machines) | from 30,000 rub. up to 50,000 rub. | |
| House area up to 70 sq.m (22 electrical points; boxing up to 14 machines) | from 38,000 rub. up to 60,000 rub. | |
| House area up to 110 sq.m (45 electrical points; boxing up to 18 machines) | from 60,000 rub. up to 95,000 rub. | |
| House area up to 150 sq.m (60 electrical points; boxing up to 24 machines) | from 90,000 rub. up to 125,000 rub. | |
View full price list
| № | Name | Unit | Price |
| 1 | Installation of internal electrical panel (box) up to 12 modules | PC. | from 3200 rub. |
| 2 | up to 24 modules | PC. | from 4600 rub. |
| 3 | up to 36 modules | PC. | from 5100 rub. |
| 4 | up to 54 modules | PC. | from 6200 rub. |
| 5 | Cable laying (1.5 sq. mm - 4 sq. mm) in a corrugation (corrugation fastening) | linear meters | 85 rub. |
| 6 | Laying the power cable (6 sq.mm - 35 sq.mm) | linear meters | negotiable |
| 7 | Installation of electrical box | linear meters | 100 rub. |
| 8 | Installation of cable in a groove with subsequent insertion | linear meters | 70 rub. |
| 9 | Installation and wiring of a single-pole ABB circuit breaker (in the switchboard) | PC. | 170 rub. |
| 10 | Installation and disconnection of the ABB, Legrand difavtomat | PC. | 310 rub. |
| 11 | Installation of introductory automatic machine ABB, Legrand | PC. | 500 rub. |
| 12 | Installation and connection of an electric meter | PC. | 800 rub. |
| 13 | Installation of socket, switch (internal) | PC. | 250 rub. |
| 14 | Installation of socket, switch (external) | PC. | 250 rub. |
| 15 | Installation of external electrical box 10 -25 mm | linear meters | 80 rub. |
| 16 | Installation and wiring of an "Amstrong" type lamp | PC. | 280 rub. |
| 17 | Installation and disconnection of a spotlight (plasterboard) | PC. | 290 rub. |
| 18 | Installation and connection of a 12V step-down transformer | PC. | 200 rub. |
| 19 | Chandelier installation | PC. | from 400 rub. |
| 20 | Installation of sconces | PC. | 250 rub. |
| 21 | Setting the bell (with button) | PC. | 700 rub. |
| 22 | Installation and disconnection of instantaneous (storage) water heater | PC. | from 1500 rub. |
| 23 | Connecting a washing machine | PC. | from 1500 rub. |
| 24 | Dishwasher connection | PC. | from 1500 rub. |
| 25 | Electric floor heating devices | sq.m | 650 rub. |
| 26 | Installation and disconnection of the heated floor controller | PC. | 400 rub. |
| 27 | Fan installation | PC. | 300 rub. |
| 28 | Installation of video intercom (with call panel) | PC. | 6000 rub. |
| 29 | Installation of the ground loop (turnkey) | PC. | from 15,000 rub. |
| 30 | Digging a trench 400 x 700 mm (with installation of an armored cable in a HDPE pipe, backfilling with 150 mm sand, laying warning tape, backfilling) | linear meters | 1100 rub. |
| 31 |
Show in full
Line for lighting
The light can be turned off separately or with one common switch.
Multi-level power distribution
Important! If there is one chandelier in the living room, and low-power lamps are used in the rest of the rooms, it makes sense to power them together - this will not create a high load on the network.
If the lighting includes a scattering of devices of different types and purposes, then it is worth breaking it down into groups - a separate main light source, a separate additional spotlight, etc.
Using the same principle, it will be possible to separate the rooms in which the most powerful equipment is installed. This also applies if step-down transformers and various power supplies are installed in the room.
Powerful home appliances
This term refers to those devices that heat something. For example, an electric heating and water heating boiler, an electric stove and an oven. When turned on, they create a high load on the network - 10 Amps is far from the limit.
The heating element from the oven can consume up to 4 kW
The socket and wiring must cope with such a load, as they are designed for loads of 16 Amps.
But, firstly, not all sockets and wires, and, secondly, other devices can work in parallel with them.
Turn on the electric kettle at the same time as the oven, and the protection in the panel will probably trip and the line will be de-energized. For this reason, manufacturers of large household appliances recommend a separate connection.
If such a device breaks down, if it is connected independently, it will be convenient for the master to work. You don't have to look for and reach for the plug, which is usually located in hard-to-reach places.
Kitchen appliances
The reasons here are the same as in the case described above. The kitchen chain is the busiest. There is a high concentration of powerful electrical appliances here.
This includes: washing machines and dishwashers, toasters, microwave ovens, multicookers, bread makers, hoods, grills, meat grinders, water heater, lighting, and so on.
This equipment creates serious loads on the electrical network
Therefore, the kitchen is separated into a separate line, and particularly powerful appliances have their own RCDs, powered from the input circuit breaker.
Such a number of devices requires a thoughtful arrangement of sockets. The group is placed in the work area so that it is possible to connect mobile devices. Sockets for large household appliances are provided separately.
Rooms with high humidity
Previously, there were no sockets in bathrooms and toilets, but today many devices have been invented for this room too.
Using them in a damp environment is dangerous.
For this reason, the room needs other protection devices. The wiring diagram in the bathroom has its own requirements:
- The room junction box should not extend into the room. It can be installed in any convenient adjacent room or corridor.
Junction box on the wall in the hallway
- Each device that will be used in the bathroom must be connected to a separate outlet only. The use of extensions and tees is not permitted.
Separate socket for washing machine
- The switch for controlling the room lighting is installed, like the box, outside the room. The most convenient place is next to the door.
- The electrical cable is laid as close to the ceiling as possible. An insulating corrugation must be used.
Installing electrical wiring in the bathroom
Important! Increased safety requirements are also imposed on fittings. The degree of protection must be at least IP 44. It is recommended to take sockets with a cover that acts as splash protection.
It is recommended to use lamps that operate on 12V voltage. All devices with a metal casing must be grounded.
Interesting to know! This problem remains unsolvable for old houses, in which grounding is not provided in principle.
Many people ground equipment to water pipes, but this should not be done because of the risk of electric shock, not only to you, but also to your neighbors.
In old houses, sometimes a complete reconstruction of electrical networks is carried out, which makes it possible to install an external ground loop. If so, then the residents are lucky - all that remains is to replace the internal wires.
Replacing electrical wiring requires major repairs
Replacing old sockets
Cases in which the need for replacement is obvious:
- Full renovation of wiring or planned redevelopment;
- Damage to the hull;
- Lack of reliability of socket fastenings;
- Heating and sparking, signs of melting;
- Looseness of the contact group.
You can also replace an outdated model by using a new one with a grounding contact. This option is considered the safest.
How to replace an old outlet in an apartment? There is a certain procedure for this:
- The method of fixing the outdated socket is determined to determine the type of model;
- Installation of internal models is carried out directly in the wall hole by inserting a holder - a plastic case. Therefore, to dismantle it, it is necessary to turn off the linear machine and de-energize the line. Then remove the cover and loosen the contacts. Remove the wires. Unscrew the screws securing the internal socket and remove it. The satisfactory condition of the body part indicates that there is no need to replace it;
- Installation of open models requires the same operations, only the body part is removed from a special socket box.
To install a new model use:
- Side cutters and three screwdrivers - Phillips, simple, indicator;
- Insulating tape and cotton gloves;
- Assembly glass.
Options for electrical wiring diagrams for apartments
Let's consider specific projects of electrical networks for apartments.
This will help you do the work yourself, but consultation with a professional electrician is required.
Studio apartment
These include studio apartments (read the article about the layout of a studio apartment). There are not many rooms in such apartments, so there will not be a lot of wire consumption. There are fewer lines, but it is necessary to ensure the optimal location of each. The general principles remain the same.
It is better to make the living room, kitchen and bathroom into separate groups - this arrangement will be optimal.
The diagram shown shows that the lines are not divided by room. Lighting is assigned to one group, and sockets to the second.
An example of a wiring diagram in a one-room apartment - drawn by hand
Not the best solution and here's why. Distribution boxes are needed for each line entering the rooms. Many outlets are connected in series, which will lead to the shutdown of an entire branch if one single wire burns out.
It's different here. It can be seen that a separate group consists of lighting in the bathroom and sockets installed in it. The remaining rooms are connected separately - the lighting and sockets in them are combined.
Tool you will need for the job
Electrical installation and repair is a complex, labor-intensive process performed by professional electricians. You can’t do this without a set of special equipment. In the work (for installation, replacement of old electrical wiring), the installation team uses the following set of professional tools and devices:
- angle grinder machine with cutting wheels for stone;
- bit;
- perforator;
- screwdrivers with handles made of insulating material;
- phase indicator (indicator);
- wire cutters;
- pliers;
- extension;
- knife;
- level;
- putty knife;
- portable lamp.
Electrical network parameters
After selecting the connection diagram, the main operating parameters of the network are calculated - the load on the branches, and the appropriate cable and RCD are selected.
This is not easy to do, since it is difficult to imagine in advance how many devices will be used, whether their number will change over time, and also to determine the places where they will be installed. The same washing machine can be in the bathroom, kitchen or hallway.
But this can be done approximately so that the designer has the opportunity to calculate the electrical wiring parameters. Naturally, no one will pick up the wires end-to-end (a reserve is left), but there is no point in overpaying for unused capacity.
For some devices, only specific rooms are suitable; the owners just have to think about where they will stand in order to stretch the cable there and install the socket. This will eliminate the need to use extension cords.
Placement of sockets and switches in the room on a detailed drawing
Most cables are laid hidden in apartments, but sometimes circumstances or the designer’s idea require a different solution.
Open wiring in a wooden house
Open wiring has advantages:
- Similarly, without destroying the existing repair, you can replace the old wiring with new one.
- Without any problems, the internal network can be further expanded.
- For wooden houses, installing open wiring while maintaining a distance from the base is considered a safe solution.
- Installation is faster.
The fact that the wires remain visible can be considered a minus, but they are hidden in decorative boxes, or they are wired in a retro style by choosing the appropriate fittings.
The cost of such wiring will be much higher than hidden
The hidden gasket has more significant advantages:
- It is suitable for any interior style.
- Saving on materials - no boxes or even corrugations are required if the installation is made using fireproof structures.
- Less chance of damage to conductors.
Network workload calculations
It is not difficult to calculate the load on the wires - sum up the maximum power consumption of electrical appliances connected to the line.
This data can be found in product passports or in summary tables.
Power consumption of various electrical appliances
Knowing the amount of current consumed per hour, you can calculate the current using the following formula: I=P/E, where P is power and E is voltage.
Formulas for calculating electric current parameters
Let's say that results were obtained which show that when simultaneously switched on, a load of 18 Amperes is created on the network.
Firstly, the appropriate sockets are selected, and secondly, the correct cross-section of the conductor is determined.
The selection of the section is carried out using summary tables.
Conductor cross-section is measured in square millimeters
For apartments, the total current per individual line should not exceed 25 Amperes.
The same requirements apply to the circuit breakers through which they are connected. The exception is lighting networks, on which a 16A RCD can be installed.
Typical frequently asked questions from readers
What kind of circuit breaker should be installed in the apartment if the electrical switchboard is rated at 25 A?
If a 25A circuit breaker is already installed in the entrance (in the electrical switchboard), then it makes no sense to install more than this rated current in the apartment.
It is more advisable to install circuit breakers with a lower rated current - 16 or 20A. If you connect a large number of powerful electrical appliances in your apartment that can simultaneously be included in the electrical circuit, and their load significantly exceeds or approaches the rated current of 16 - 20 A, you can use the same 25 A, but with greater sensitivity than set in entrance. For example, if there is C25 in the entrance, you can put B25 in the apartment.
Do-it-yourself electrical wiring in an apartment
The equipment is installed according to the developed scheme. This process includes many subtleties. We advise you to entrust this task to an electrician, but everyone must know about the most common mistakes in order to be able to control the work of hired personnel.
- Wiring is carried out only horizontally and vertically. Oblique sections of the route will help save wires, but can become a serious problem in the future when the wiring is accidentally pierced by a hammer drill.
This type of cable routing is not permitted. - Distribution boxes should always be left in sight, as access to them may be required at any time.
- If possible, avoid using daisy chain outlets.
- The cables must be recessed into the plaster to a depth of at least 2 centimeters. Otherwise, if a short circuit occurs, the trim may catch fire.
- When laying cables along combustible structures, we place it in a metal pipe, possibly corrugated. This is a special fire safety requirement, which in practice is rarely observed, and completely in vain.
The cable is laid along the boards in a metal corrugation. - Electrical wires, even those laid in corrugation, should not be connected to conductive supporting structures. These include frames for plasterboard walls and ceilings.
- When installing sockets and switches on combustible walls, fireproof material, for example, paronite, is laid under their boxes.
Sheets of gasket paronite
Hidden and open electrical wiring
It doesn’t matter which electrical wiring diagram you choose for an apartment in a new building, the cable is laid either in a hidden or open way.
With the hidden method, the wire is laid in the walls or floor (under plaster) or in the voids of plasterboard structures.
If the wiring method is open, then the wire is attached to the walls or ceiling using brackets.
Advantages of the hidden method:
- The wire is not visible.
- It is impossible to damage the wiring.
- Even if a short circuit occurs, a thick layer of plaster will prevent a fire from occurring; at most, the wires will melt. If the wiring is open, the finishing coating may catch fire.
- Easy to carry out cosmetic finishing.
- If the electrical wiring in a new building is optimally planned and executed with high quality, it will last for many years.
Flaws:
- You will spend a lot of money and effort creating electrical wiring in a new building using a closed method. You will have to sand and finish the surfaces, and this is an additional expense.
- To replace a damaged wire, you will have to spend a lot of money.
- Hidden wiring is poorly cooled. This means that the permissible voltage is lower (compared to open).
Advantages of the open method:
- Ease of installation.
- Budgeting.
- You can quickly change the electrical circuit in a new building.
Flaws:
- The interior will be ruined.
- Increased risk of wiring damage.
- Fire may occur.
Analyze the advantages and disadvantages of both methods before choosing the right one. However, experts recommend doing electrical wiring in a new building using a closed method.