When designing houses, the mandatory presence of ventilation in utility rooms, kitchens and, of course, in the bathroom and toilet is taken into account. This is necessary to ensure natural air exchange in these rooms.
As for the bathroom and toilet, it is thanks to ventilation that the maintenance of normal air humidity is ensured, the timely evacuation of exhaust air and its replacement with clean air.
If the exhaust hood in the bathroom and toilet does not work well, then air stagnation is inevitable, which in the near future will result in the appearance of mold and mildew, and will also negatively affect the decoration of these rooms. An extremely unpleasant situation, isn't it? But what to do in this case and how to prevent it?
In this article we will talk about the causes of ventilation problems in the bathroom and toilet, and also look at the best ways to solve them.
How to determine the cause of poor hood performance
When the hood does not draw well, the question arises - what to do. You can check the equipment using the methods described earlier, because sometimes the problem is corrected by a new filter or connecting the equipment to an outlet.
But more serious problems also happen when residents of an apartment or private house cannot cope with the problem. In such cases, it is worth inviting home a specialist who installs and diagnoses hoods. He will determine the cause of the breakdown and tell you what to do correctly.
Procedure for applying to REU
First, you need to find out if your neighbors have the same problem and enlist their support. After this, a letter is written with a detailed description of all the nuances and signed by several residents indicating the date of completion of the document.
At the REU department, your letter must be accepted, registered in the journal of incoming requests from the population regarding housing issues, and the date of reception must be marked on the document itself and the incoming visa.
After this, an employee of the management company is sent to analyze and establish the causes of backdraft in the apartments and draw up a malfunction report. It will be further reviewed by the chief engineer of the REU. The latter must organize a repair team in the near future, which will eliminate all these faults.
The hood does not turn on
- The stove light does not work. If there is no lighting, but the fan is running, then most likely the light bulb has simply burned out. But if changing the light bulb does not solve the problem, then the light switch is faulty.
- The hood does not turn on at all. There may be several reasons: for example, the device is disconnected from the network or there is no current in the outlet.
- The hood switch is faulty. You can check this using a tester, and if it breaks, replace it.
- There is no electric current. You need to check the electrical panel. A breaker may have tripped or a fuse may have blown.
- The power plug is faulty. The plug fuse may have blown. You can replace it yourself.
- Failure in internal electrical wiring. The examination should be carried out using a tester, tightening loose contacts along the way and squeezing the tips with pliers.
- The electric motor has broken down. In this case, there is no point in undertaking repairs; the exhaust motor just needs to be completely replaced. Trying to repair it in most cases is not economically profitable. Buying a new hood motor will be cheaper, more efficient and much smarter.
How to restore a ventilation box
If there is a need to restore the ventilation duct in the kitchen, the following steps should be taken during preparation:
- Typically, dismantling when restoring air ducts is carried out due to the fact that the apartment owner does not have enough space in the kitchen. To carry out the work, the occupied area must be vacated. Now you need to rethink the arrangement of furniture in the kitchen.
- Before restoring the ventilation duct, it is necessary to remove the coating at the work site. In this case, you will have to remove the tiles from the wall and remove the floor surface in this place.
- The remaining furniture must be securely covered with plastic film. This will protect it from dirt and dust during work.
It is better to entrust the restoration of the integrity of ventilation ducts to specialists. It must be borne in mind that we are talking not only about recreating high-quality ventilation, but also about compliance with rules and standards. Even a well-done repair that violates the rules will have to be redone. Professionals will restore your ventilation duct quickly and reliably.
Metal pipes are used in the restoration process Source odstroy.ru
However, if you know the requirements well, you can restore the air ducts in the kitchen yourself. The sequence of actions in this situation will be as follows:
- It is necessary to remove the decorative walls and clean the work area. It is necessary to remove unnecessary structural parts and open connections to the channel. When restoring the air duct (ventilation duct), you need to make sure that no debris has accumulated here. If there is one, it needs to be cleaned.
- To restore the ventilation duct, it is necessary to use pre-prepared pipes and building blocks. The first ones are needed for output channels from the apartment. For this purpose, metal structures with a diameter of 14 cm are used. Connection is made to the existing system. The joints must be reliably insulated. A sealant that is used for interior work is suitable for this.
- Using blocks, the walls of the air duct are restored. Typically, those that are 5 cm thick are used for this purpose. To restore ventilation in the kitchen, gypsum or foam blocks are often used.
- The shaft is completely closed, leaving a hole leading to the apartment. A decorative grille is installed for it on the outside.
After restoring the ventilation duct, you need to clean up the dust and dirt remaining after the repair. Now the kitchen has changed its appearance. We need to re-decorate and arrange the furniture according to a new plan. When choosing materials for repairs, it is necessary that they have heat resistance, water resistance and good sound insulation.
When the restoration of the ventilation duct is completed, you need to check the quality of the work. It is necessary that the exhaust air easily escapes into the restored channel.
The box can be decorated beautifully and unusually Source kursremonta.ru
What to do if the hood in the kitchen does not draw well
If the hood in the kitchen does not work, then there is little a person can do. Calling a specialist is the best option. This is especially true if the owner of the equipment is not confident in his abilities.
You can contact not only those who install such equipment, but also those who check ventilation in bathrooms, toilets and kitchens in multi-storey buildings (panel, Khrushchev or others). Often they are the ones who help overcome bad drafts on the last floors.
You need to carry out independent repairs when you have the knowledge. In other situations, it is better to invite a specialist.
What is a ventilation box for?
In multi-storey buildings, each apartment in the kitchen has a cavity in the wall that runs through all floors. It is designed to provide ventilation. Air enters through the holes and then comes out.
The influx of fresh air is usually carried out through open windows. Sometimes residents equip a more efficient ventilation system, but the use of such a box is still necessary.
This is what a ventilation shaft looks like Source kuhniclub.ru
In homes where gas is used for cooking, it cannot be ruled out that it will get into the air. The presence of ventilation allows you to be sure that the gas concentration cannot reach dangerous levels. Without a box, the likelihood of gas leakage and accumulation increases significantly.
Solving the problem using a fan
Many people probably thought that the conversation was about installing fans in place of ventilation grilles. Nobody forbids doing this, although it has already been described above what this can lead to.
We are talking about a fan that is installed in the system on the roof. This may be a mechanical deflector or a rotary turbine. Both devices are powered by the wind, so they are of no use in calm weather. Although, as practice shows, it is the installation of these devices that sharply increases traction and prevents reverse flow.
As for fans on ventilation grilles, you should first calculate their power. It depends on the cross-section of the ventilation ducts and on such indicators as air exchange in the premises. For example, in the kitchen this figure should vary in the range of 12-20 m³/hour depending on the type of stove and the number of burners.
To do this, you need to calculate the volume of the kitchen. For example, a room area of 3x4 m with a ceiling height of 3 m, the volume will be 36 m³. Now we multiply the resulting value by a factor of 12-20. At the minimum value, the fan performance is 432, at the maximum 720 m³/hour.
Factors causing backdraft
If the exhaust system of the house is designed in accordance with current standards, has passed a performance check after installation and has been inspected, then no problems can arise during operation. But there are problems.
If the exhaust duct in the bathroom blows in the opposite direction, the reasons may be:
- clogged air duct leading to the common exhaust pipe;
- a large deviation from the vertical of air ducts (individual apartment or public risers, when connected to a pipe on the roof), allowed during design or construction;
- an unsuccessful design of the roof structure of the house, due to which drops of rain and snow are blown into the air duct, destruction of the plaster, formation of ice - clogging of the air duct;
- violation of the exhaust system during renovation of neighboring apartments;
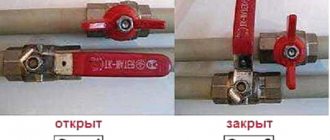
- installation of a fan with a check valve, which creates a reverse draft effect;
- high heat transfer rates of the external walls of the house - do not create the required temperature difference inside the apartment and outside;
- plastic windows - do not let in the outside flow of oxygen.
In addition to these phenomena, there may be many others that an ordinary person cannot identify. In any case, you will need to call a specialist from the housing office to your house.
DIY kitchen hood repair
If it is noticed that the hood in the kitchen has begun to work differently than before, the owner is faced with the eternal question: what to do?
You can call a home appliance repair specialist. This option has its drawbacks: it is long, expensive and it is unclear how good the quality of the repair work will be.
What if the malfunction is completely trivial, and you could fix everything yourself in 5 minutes?
Therefore, we advise you to take your time and try to repair the kitchen hood yourself. The list of faults given above can serve as a hint.
The main reasons are also described there. Let's see if we can fix the main damage ourselves.
So, if you hear extraneous noises and feel vibration when the hood is on, you should figure out the reasons. First, you should make sure that the filters are in working order and not clogged.
Secondly, you should check whether the air ducts and the exhaust duct are clogged, make sure that the connections between the air duct and the hood and ventilation shaft are well sealed.
Then you need to tighten the hood mounts to the wall. If this does not help and the noise persists, then the most likely cause is a manufacturing defect. In this case, the malfunction cannot be eliminated independently, and the engine must be replaced.
Spontaneous switching on of the device. You should immediately check whether the power button is stuck. If so, you should carefully clean the button location with solvent or detergent.
In most cases this will help. If dirt gets on the contacts of the remote control, you should do the same.
If the defect does not disappear, you should check the integrity of the board contacts inside the hood and, if necessary, clean or solder.
If this does not help, you should check the air duct and ventilation shaft for blockages, and also make sure that natural ventilation is working properly. Clean if necessary.
If the hood does not turn on, you should check everything related to the external power supply, the integrity of the fuse, switch, plug, etc. If the wiring is ok, the motor may be broken.
What the rules say
Removing the box is a violation. If this is discovered, they usually give 30 days to restore the ventilation duct. The owner of the property carries out this work at his own expense.
It is important not only to have a working box, but also to fully comply with the rules. For example, the additional channel must have a round shape with a diameter of 14 cm. If any requirements are violated, an order will be issued to eliminate the discrepancy with the rules within 30 days.
Contamination on the inner surface of the ventilation duct Source sovet-ingenera.com
When restoring the air duct in the kitchen, you need to pay attention to the thickness of the slabs. The normal size is 5 cm. If, for example, 8 cm blocks are used, this will lead to a narrowing of the hole, which is unacceptable.
Residents can do the demolition and not think about it for many years, but this situation is rare. The recovery problem occurs, for example, in the following cases:
- If the neighbors below felt that the ventilation in the kitchen was not working.
- For some reason, the previous neighbors put up with the problem, but they sold the apartment to new owners who prefer to have working ventilation.
- Before selling your home, BTI specialists will conduct an inspection and find any violations.
If problems are detected, residents can complain to the management company and call specialists for an inspection. If there is a problem with the ventilation duct, it is necessary to consider the location of the kitchen furniture, freeing up enough space for it to carry out the restoration of the air duct.
Main types of breakdowns and their causes
Whatever model of hood is installed in your kitchen, the types of malfunctions, as well as their causes, are very similar to each other.
Therefore, we can summarize the possible negative factors that can disable devices:
The hood vibrates and makes an incomprehensible noise. There are several possible reasons:
- factory defect or poor assembly;
- clogging of filters or ventilation ducts. As a result, the fan does not have enough power to push air, which causes a characteristic hum;
- installation of equipment was carried out with violations. This may be insufficient sealing of the joints, a change in the diameter of the air duct, or too strong a bending angle of the corrugated hose;
- the diameter of the exhaust air manifold does not correspond to the declared power of the device.
The device turns on spontaneously. Such problems are most often the result of dirt and exposure to high temperatures.
In this case it is observed:
- malfunction of electronics;
- buttons sticking;
- short circuit of the contact group due to moisture and dirt getting into the remote control.
Weak traction. Among the reasons that lead to poor air absorption are the following:
- dirty filters;
- impermeability of grease traps;
- clogging of the ventilation shaft and air ducts;
- insufficient or lack of natural ventilation.
The device does not turn on. In other words, there is a suspicion that it is out of order.
The reasons for this may be:
- lack of mains power;
- the hood switch or plug is broken;
- break in internal electrical wiring;
- fuse blown;
- electric motor failure.
The backlight does not light up, but everything else works: the light bulb has burned out.
Malfunction of the control panel and inability to switch motor speeds:
- contact burnout;
- slider button dropout;
- The starting capacitor has failed.
Is your hood making strange noises?
Many people wonder: why does the hood whistle, make noise, or creaks when it’s working? The answer can be found by reading the technical specifications.
Any model, for example Eleyus Lana 700 60 BL, has a certain noise range, and extraneous sounds appear for several reasons:
1. Factory defect. Determined by special expertise at the service center.
2. Clogged filters or ventilation shaft. To get rid of this problem, cleansing measures are carried out.
3. Incorrect installation of equipment: the presence of a large bending angle, loose connections at fastening points, many narrowings.
4. Inconsistency in the diameter of the exhaust duct. If you connect a hood with a capacity of 600 to 1000 m3/hour to a pipe with a size of 100 mm, although the instructions indicate a minimum of 130 mm, then noise may occur.
Some modifications based on factory settings may be loud. To select the right equipment, it is recommended to study the technical data before purchasing.
Kitchen hood not working: do-it-yourself troubleshooting
Kitchen hoods are a very popular household appliance these days. For many, the need for a hood in the kitchen is absolutely obvious. After all, when cooking food, a large amount of fat, smoke and tiny food particles fly into the air, which not only pollute the room, but are also harmful to health. As a rule, an air purifier in the form of a hood is installed in the kitchen during renovation. Unfortunately, even if it is operated as carefully as possible, it inevitably fails over time. And then the owner has to solve the problem in one of two possible ways: he contacts a service center that repairs kitchen hoods or does everything himself.
How does the hood work?
The design of a standard kitchen hood is very simple - it is an ordinary exhaust fan, which is installed directly above the stove and has an electric motor. Additional filters are also installed in this device to delay harmful fumes coming from the stove during cooking. Hoods are of filtering and exhaust type.
- A filter hood, also known as a charcoal hood, is the simplest device, so its cost is significantly cheaper. You can always install and repair a kitchen hood with your own hands. It works according to the principle of recirculation, i.e. Dirty air, after cleaning in the hood, is thrown back into the room. The cleaning element is carbon filters.
- Exhaust extractors are connected to ventilation shafts to completely remove contaminated air from the kitchen. This type of device is more advanced than a filter device, and it contains a grease trap. Exhaust hoods require a good ventilation system, but you can also repair them yourself. If there is a ventilation shaft, the air is exhausted into it. If there is no channel, then during installation of the hood, specialists install a pipe that goes directly to the street.
Modern models operate in 2 modes. Most of them have a multi-speed electric motor, which is characterized by low power, but their rotation speed can be adjusted. Try to choose a kitchen hood with a decent power reserve. Indeed, over time, as a result of filter contamination, the efficiency of the hood decreases noticeably; it can only be compensated by increasing power.
You should also regularly inspect the grease trap and change it promptly when it becomes dirty; this can be done easily, with your own hands. If you ignore this rule, the work of the hood can be reduced to nothing. The average replacement frequency for grease traps is 3-4 months. But if the shutter speed is used very intensively, this should be done more often. In filter hoods, the service life of carbon filters reaches one and a half to two years. A device can break down for a variety of reasons, and accordingly, repairing a kitchen hood can vary significantly. Let's look at the main breakdowns and action algorithms.
See also:
The hood does not draw and does not remove odors well
This may occur if the device is not used correctly. In order for the hood to effectively cope with odors, it must be turned on in advance, before cooking, and turned off 15 minutes after turning off the stove, and not immediately. By following this basic rule, you will be able to get rid of unpleasant odors in the kitchen forever. A fairly common cause of such “breakdown” is a belated change of filters. Also, carbon filters may simply not work effectively. To repair the hood, the filter must be disassembled, first removed, and the carbon granules replaced with new ones.
To change the grease trap yourself, you need to remove the grate and place it face down, after which you can remove the old dirty filter. The grate should be thoroughly washed with detergent and a new grease trap should be attached to it. Disposable grease traps differ from reusable ones in that they have an inscription that is clearly visible even through the grate. When the filter becomes so dirty that it is time to change it, the inscription is no longer visible. Fiber filters are reusable; after washing and drying, they can be returned to their place, and this can be done repeatedly. Each time you carry out this procedure, you need to thoroughly rinse the grille.
Advice:
Methods for eliminating ventilation defects
The method for restoring the functionality of the ventilation system depends on the reason for the decrease in its efficiency. Some troubleshooting methods can be implemented independently. However, a number of issues require the involvement of professionals and the use of special equipment.
Do-it-yourself air duct cleaning
Cleaning the general building ventilation line, to which the side branches are connected, is the task of utility workers. They are required to carry out preventive inspections and maintenance of the ventilation system twice a year.
Residents are prohibited from performing any manipulations with central engineering systems. The maximum that an apartment owner can do is clean the ventilation duct on the side of his home.
The first step is to remove the grill, clean it and rinse it under running water. To wash the ventilation grille, it is permissible to use neutral detergents. No chemicals should be used inside the canal.
Remove accumulated dirt and greasy crusts that have formed around the perimeter of the hole with a sharp knife or brush off with a stiff brush. Vacuum the duct, wipe the air duct as much as possible and replace the cover
To clean the ventilation duct deeper, a flexible steel cable with a brush for servicing chimneys is suitable. Insert the structure into the air duct opening and scrape off dirt from the walls with a brush. Remove any remaining debris from the canal with a vacuum cleaner.
Care must be taken while working. Ventilation shafts may contain wasp nests or other insects or animals.
If the measures taken do not improve the exhaust draft, it means that the main shaft is clogged. To clean it, you need to invite a special service.
Restoration of the ventilation riser
Spontaneous modifications affecting the ventilation duct will sooner or later have to be corrected. Understanding the structure of the air duct, its restoration will not cause any particular difficulties.
Ventilation “sleeves” have a round or square cross-section. Initially, their walls are made of concrete. During reconstruction, satellite channels can be made from corrugated pipes or delimited with foam blocks
The cost of the upcoming work must include the following:
- material for fencing the ventilation duct (foam block, plasterboard, plaster blocks or OSB sheets with fire protection);
- corrugated pipes for the installation of ventilation ducts coming from the kitchen and bathroom;
- cement-sand mortar or ready-made adhesive composition for laying foam blocks;
- plaster and finishing of the box.
To restore the kitchen air duct, gypsum boards or foam blocks are optimal. Building materials have the necessary strength, impermeability and fire resistance. In addition, the slabs provide sufficient sound insulation.
Restoration of the ventilation riser is carried out in several stages.
Stage 1 - preparing the premises and opening access to the mine
The kitchen must be emptied as much as possible - remove furniture, dishes, and light household appliances. Cover built-in cabinets, cabinets, equipment and floors with polyethylene.
To open access to the shaft, markings must be made on the wall and floor according to the dimensions of the future box. Remove the tiles, concrete screed and open the air duct.
Dismantling the floor is carried out carefully so that construction debris does not clog the ventilation ducts. As a result of the work, a mine and two satellite channels are opened
Stage 2 - restoration of side walls and partitions
The side and front sides of the air duct are laid out, corresponding to the previously dismantled structure. The companion channels are separated from each other and from the common shaft by foam blocks. At the same time, the cross-sectional area of the “sleeves” necessary for the free passage of air is preserved.
The restored duct fully satisfies the requirements for natural ventilation - air flows coincide with the directions provided for in the design documentation of the house
Stage 3 - checking ventilation and decoration
To assess the effectiveness of the ventilation system, it is better to invite a specialist. In any case, he will be required to provide a conclusion to receive an acceptance certificate for the work performed.
Decorative design. If the air circulation does not raise any questions from the supervisory authorities and there are no complaints from the neighbors, then you can safely begin finishing the box.
An alternative method is to use corrugated pipes. New satellite channels from below are connected to the old ones using concrete pouring and are additionally fixed to a plasterboard partition separating the “sleeves” from the common shaft
Structure and principle of operation
And first, it’s worth understanding the device in more detail. A modern kitchen hood is essentially an exhaust fan installed in the kitchen above the stove. Additionally, the device can be equipped with channels that remove collected air flows (with steam and grease), or with cleaning filters.
In general, there are two types of exhaust devices:
- diverting;
- filtering.
The former “carry” the air outside the kitchen, while the latter clean the air from steam, smoke, and odors, and then return it to the room. Modern models are universal because they are able to function in both modes.
When the device is connected to the mains, the impeller begins to rotate, drawing in air passing through the filter. Many models have the ability to switch fan speeds. The exhaust hood removes air outside, and the filter hood is equipped with a carbon filter, which is necessary to eliminate odors.
The filter periodically needs to be replaced, so it is necessary to monitor its timeliness. Otherwise, the effectiveness of the device will only decrease. How often should the filter be changed? It all depends on the intensity of use of the device. Typically, the frequency is three months. Carbon elements can change from six months to two years.
Connection options
The different layouts of apartments, the presence or absence of centralized intra-house ventilation significantly influence the choice of hood model. In addition, it is necessary to take into account the design of the kitchen and the features of interior solutions. Beautifully designed exhaust ducts can become an interesting highlight of a stylish kitchen. And for some rooms, the circulation mode of operation of the device may be the only possible option.
To ventilation
Hoods operating in exhaust mode require an effective ventilation system in the house. The hood is connected to this system using special air outlet channels. This connection technology requires additional work to install exhaust ducts. In addition, the connection to ventilation limits the possibilities for placing the hood. To ensure proper circulation during operation of the hood, it is necessary to create a sufficient supply of fresh air. Keeping windows open is not always convenient - it is hot in summer, and too cold in winter.
Recycling
Circulating hoods do not depend on ventilation ducts, which greatly simplifies their installation. At the first stage of purification, contaminated air passes through a grease filter. In reusable designs, its frame and interlayer are made of high-quality stainless steel. The grease filter cleans the air from droplets of fat, soot and other small particles of dirt. The convenient design of the filter allows it to be washed in the dishwasher. At the same time, the filter does not lose its functional qualities and appearance. An active carbon filter is responsible for the second stage of cleaning. It purifies the air from various unpleasant odors. The purified air then enters the room again. When operating such a hood, the temperature regime of the room is not disturbed, since the heat does not escape outside.
Malfunctions and their elimination
And now it will be easier to understand what the symptoms and reasons may be that the kitchen hood is not working properly and how to deal with it.
Smells
If there are excessive odors in the kitchen even when the hood is on, this does not mean that it is not drawing in air. The problem may be due to improper use. So, the hood should be turned on a little before the start of the cooking process, and turned off a few minutes after that. This approach is the most effective for preventing the accumulation of odors in the room.
Another reason for this symptom is low filter efficiency. It needs to be replaced or cleaned (if provided by the manufacturer). It's also a good idea to clean the grille, as grease can accumulate on it and prevent proper airflow.
In some cases, the contact between the fan and the motor is broken. Thus, no power is supplied to the device, so the fan does not spin. In this case, you should call the contacts and eliminate the cause.
Doesn't turn on
- The device may not be connected. You should make sure that there is voltage in the network and that the plug is well inserted into the socket. No matter how simple it may sound, such reasons for the device not working are quite possible. And they even meet often.
- The button doesn't work. You can use a tester to determine its performance. A call will help determine the cause. If a breakdown occurs, the button will have to be replaced with a new one or this one repaired.
- The wire or plug is damaged. These elements need to be checked. Replace if necessary.
- The fuse has failed. If so, it will have to be replaced.
- Disconnection of the electrical circuit inside the device. You should use a tester to check everything. If there are bad contacts, they need to be cleaned and processed.
- The engine has failed. If such a problem occurs, it is unlikely that the unit will be able to be repaired, especially on its own. Therefore, as a rule, it has to be changed. However, very often such a procedure is not economically profitable. And then it is more efficient to replace the entire hood.
- The engine control unit does not work. As a result, speeds may not change. The reason may lie in the breakdown of the starting capacitor. A multimeter is used to check functionality.
Preventive measures for long-term performance of the hood
In order for the air filtration structure to serve as long as possible and without major breakdowns, it is necessary, first of all, to follow the operating instructions, treat household appliances with care and care for their components.
- Avoid heating the empty stove under the hood, especially an open fire; these experiments can end sadly.
- The system should be mounted above a gas stove at a height of 70-80 cm, and above an electric stove - at 60-70 cm. If installed lower, deformation of the elements is possible, and when suspended above this range, the efficiency will be weak.
- Turn on the device a few minutes in advance before heating the burner and turn it off a quarter of an hour after cooking, then the elimination of odors and fumes will be especially effective.
- Clean and rinse the metal grease trap every 3-4 weeks. Change disposable filters every six months or more often, depending on the intensity of use of the hood. Failure to comply with this condition will result in oil particles penetrating inside the engine and settling on structural elements, leading to overheating and engine failure.
Cleaning the strainers - Start the speed mode from the first stage, gradually increasing. Use the maximum speed to a minimum to prevent premature engine wear.
- Provide additional protection against voltage surges in the electrical network. Of course, the design of the hood includes a fuse, but it cannot always cope with network instability. An additional relay will help solve this issue, which will turn off the power supply during voltage surges.
Voltage relay
As you can see, a kitchen hood is not the most complex electrical appliance, and minor repairs can be done at home, with basic knowledge of electrical engineering and the necessary tools. Most problems do not require serious intervention, but if the cause of the malfunction could not be determined on the spot and you cannot repair the hood yourself, then you should resort to the services of craftsmen and service centers.
Advantages
We work in Moscow and the region.
there may be a description here
More than 14 years of experience.
We follow safety precautions - a team of 2 craftsmen.
There is a construction certificate with houses in Moscow and the region.
We issue a package of documents and a photo report for the management company “Zhilischnik” HOA, BTI, Court.
Strict compliance with SNiP and GOST.