If the parquet has lost its appearance, you should not try to lay a new coating. Sanding the floor covering will get rid of most problems. You can do it yourself using hand tools and electrical equipment. As a result, it is possible to create a perfectly smooth and beautiful surface. We invite you to get acquainted with the technology in more detail so that you can turn it into reality.
Causes and types of unevenness for different types of parquet
Manufacturers offer various types of parquet. However, there are a number of problems that most owners of hardwood floors face. These include:
- Creaking floorboards that occurs in a room with fairly dry air. Natural wood planks dry out and then gradually move relative to their original position. Also, the cause of the appearance of a characteristic squeak is often a worn-out substrate or fasteners, which no longer hold the parquet boards in the desired position, and they begin to creak;
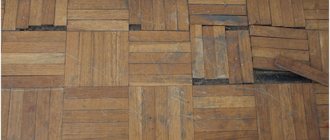
- Subsidence of individual parquet boards due to the initially uneven floor surface. The reason for this phenomenon is incorrect installation. The problem can be eliminated only after a complex of rather complex restoration work;
- Swelling of the floor covering due to increased humidity levels in the room;
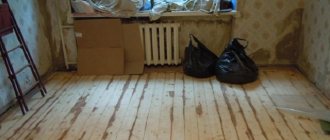
- Scratches, loss of color, chips, abrasions, cracks that occur after a sufficiently long period of use or significant external mechanical impact.
Floor finishing
A parquet primer will help complete the repair. This coating, which makes the board stronger, increases impact strength. But if the parquet board is made of hard wood (oak, teak, hornbeam), then it is not necessary to prime it. The composition is applied according to the instructions with a brush or roller, then it must dry. The drying time of the primer is 2-3 days, then finishing sanding is carried out manually or with a machine using fine abrasive sandpaper - this procedure removes wood fluff.
Now comes the stage of cleaning the floor from the smallest particles and dust, as well as applying varnish. The coating should be varnished over the entire area at once, moving from the far wall to the exit. 2-3 layers of varnish are applied, each subsequent one only after the previous layer has dried. The varnish composition dries on its own, you need to monitor the level of humidity, temperature changes and it is better to generally close the room from drafts.
Drying time depends on the type of varnish composition. As a rule, the entire procedure does not take more than 6-5 days, and the result is a perfectly beautiful varnished parquet floor that will last for quite a long time.
(1 ratings)
What is better: sand it or replace it with a new one?
Having assessed the condition of the floor covering and seeing the defects on the surface, many involuntarily think that it is easier to buy and lay a new one. Meanwhile, there is a special technology that can help restore lost characteristics. The process itself is quite labor-intensive, but at the same time it allows you to do without special knowledge and skills. You can do the scraping yourself. The main thing is to familiarize yourself with the order of work in advance.
During scraping, the top layer of damaged wood is removed from the surface of the parquet floor. The number of steps performed in the processing process may vary. Depends on the thickness of the board and the degree of wear. On average, performs 5 – 8 approaches.
Despite the wide possibilities, cycling will have to be abandoned if:
- The boards are damaged by wood-boring beetles;
- They have swollen strips that appear after the room is flooded;
- Boards or entire sections have dried out. In this case, a gap appears between the individual slats, the value of which exceeds 5 mm. In such a situation, some use putty to eliminate existing gaps. This allows you to somewhat level the canvas, but still the measure is temporary. Within a few months the area will crack and you will have to repeat all the work again;
- There are quite serious mechanical damages. If they occur on individual planks, you will first have to replace them with new ones and only then begin scraping the surface, completing all the stages, including the roughest;
- The thickness of the boards does not exceed 5 mm;
- There is mold and mildew on the surface.
If none of the above problems exist, you can safely take on scraping. Carrying out such work has a number of advantages, which include:
- Lack of a sufficiently long stage of removing the old varnish coating;
- Possibility to perform the entire range of work on your own. At the same time, only craftsmen can install the flooring;
- Increasing the service life of the old coating, for the manufacture of which valuable and noble wood was used.
Cost of issue - budget calculation
Obviously, the cost of sanding old parquet depends on whether the work will be carried out independently or by calling a specialist to your home. At first glance, it may seem that the first option is more profitable in all respects. This is true, but only subject to the conditions of surface treatment, the use of proven equipment, and high-quality materials.
Lack of experience in scraping with unreasonable savings on tools, equipment and materials will lead to a negative result - the floor will require re-processing, and this is additional expense. That is why, when deciding to restore the floor yourself, you need to take into account every little detail, from the choice of primer mixture to high-quality varnish.
Before scraping parquet yourself, you need to think carefully about whether it would be cheaper to call specially trained craftsmen with high-quality, proven equipment
Particular attention should be paid to the selection of equipment for the work. Machines for scraping and grinding surfaces must be free of defects, easy to use, and prevent damage to the floor. To ensure the process goes smoothly, you should not refuse instructions from the grinding equipment rental company.
And lastly, no matter how high the price of restoration work may seem, it is not commensurate with the cost of completely replacing the old parquet with a new one. Dismantling the covering with preparing the base and laying a new floor will cost many times more, which means that the restoration process should be approached with all responsibility, without saving where this can leave a negative imprint on the result.
Necessary tool
To complete the job, you need to prepare everything necessary for scraping. It is possible to use not only hand tools, but also special equipment. The choice is made taking into account the deadlines for completing the work and existing preferences.
For manual cycling use:
- I cycle manually. The wooden tool includes a handle and a narrow blade. With the help of the latter, a layer of wood previously soaked with water is removed from the wooden floor surface. The process moves quite slowly and is labor-intensive. An important advantage of the manual cycle is the absence of noise and dust during the processing of the surface layer. In addition, the instrument itself is inexpensive, and therefore anyone can purchase it if they wish;
- Bulgarian. There is such a tool in almost every home. To complete the work, you will need a model that allows you to adjust the speed of rotation of the disk. The main disadvantage of this option is the need to hold the tool suspended. In this case, it is quite difficult to ensure the cutting line is horizontal. Also, a grinder disk rotating at low speed will not be able to remove a sufficiently thick layer of varnish or wood. As the rotation speed increases, pits and nicks may appear on the surface of the parquet;
- Grinding machine. A more preferable option from a quality assurance point of view. It is noisy. It has large dimensions and weight. But it allows you to complete a fairly large volume at a time, ensuring the required quality. Considering the cost of grinding machines, if you decide to use a grinding machine for scraping parquet, it is better to rent the tool. This will not significantly affect the family budget. However, before giving preference to this option, it is worth considering that during operation it creates quite a lot of dust. An ordinary household vacuum cleaner will not be able to cope with the task. As a result, when varnishing the treated surface, dust particles may appear in the formed layer, which will significantly worsen the final result. To avoid this, use the grinder only in conjunction with an industrial vacuum cleaner.
If you need to increase the productivity of the process, you should pay attention to electrical equipment for scraping. These include:
- Belt parquet sanding machines. When using them, the amount of dust generated can be reduced to a minimum, since it includes a special bag for collecting sawdust. Manufacturers offer various models that differ in power and other characteristics. Their operating principle is based on the presence of a special drum on which sanding paper is placed;
- Parquet grinding machines. In such devices, the drum is replaced by discs with replaceable abrasive. With its help, it is good to perform finishing sanding with fine-grained sandpaper;
- Surface grinders, sometimes called "boot" grinders. Focused on treating hard-to-reach places. To reduce the amount of dust generated, manufacturers offer models with a special dust collection bag. However, this element is not available in every device, which must be taken into account when selecting equipment.
In addition to the equipment and tools for processing the surface layer, you must have special consumables available. These include: sanding belts, scissors, knives, masks, gloves and more.
In addition to the equipment itself, you will need many consumables: a knife or scissors, gloves, etc.
Sanding parquet on your own - getting started
First of all, we will need coarse sandpaper No. 40. The main task is for all the paper to be cut out according to the template. The paper that is tucked into the drum at the beginning will serve as such a template. We press the “Start” button, the electric motor starts working. In one pass, the machine grinds a strip 20 cm wide. First, we make a penetration along the right wall of the room. We pass to the end and return along it back. Sanding parquet at home lasts a little to the left - we shift the machine one-half of the drum and again go back and forth. So, we go through the entire room. If after the first passes the parquet is not leveled, of course, go not so much along, but also across.
During operation, you should listen closely to the engine and avoid losing speed. The speed may be lost due to a decrease in voltage, also if the drum puts too much pressure on the parquet. There is an option to adjust the drum pressure using an adjusting screw. The speed does not level out even after adjustment - the work must be completed to avoid engine failure. If the problem of low voltage does not help by disconnecting all massive devices from the network, it is better to use a gasoline generator with a power of more than 5 kW.
After using coarse paper, there are variations of danger (scratches) remaining on the parquet. We remove them with finer sandpaper No. 60, and then No. 80. With abrasive No. 40 we scraped along and across the parquet, with Nos. 60 and 80 we sanded what is the duration of the project, at what level is the parquet laid. Parquet scraping
The herringbone is done diagonally; if the parquet is laid using the deck method, then along the dies. Then there is the option of filling the cracks with ready-made putty, you can also mix varnish with parquet dust, or use wood sealant.
sanding the parquet at home with an angle grinder (grinder). It sands places that are inaccessible to a parquet sanding machine. These are, for example, corners, places under radiators.
parquet scraping ends with sanding with No. 120 sandpaper. Using the adjusting screw, we reduce the pressure of the drum on the parquet and work according to the same scheme as with paper No. 60 and 80 - depending on the installation principle.
How to sand by hand?
To achieve the best effect, it is worth purchasing a suitable tool. To be sure of the quality of the chosen tool, you should:
- Purchase a tool in a specialized store, for the manufacture of which high-quality steel was used, and the sharpening was carried out in compliance with technological requirements;
- Pay attention to the handle. The ergonomic model is equipped with a short and wide handle, which is comfortable to hold in the hand;
- Make sure the blade width is optimal. According to the master, the optimal width is 5 cm.
The work is performed in the following sequence:
- The floor surface is well moistened with water;
- A respiratory mask is put on the face, which will help protect the face from sawdust and pieces of old varnish that appear during processing;
- Visually divide the entire surface into strips and begin scraping the parquet from the center, gradually moving towards the walls of the room;
- The top layer is removed, moving first along the fibers and then across. When working by hand, you should remove even layers to avoid differences in height. The process is lengthy and requires many days;
- To smooth out unevenness, the surface is ground using a grater and sandpaper. To do this, make circular movements, achieving the formation of a perfectly flat surface.
Safety precautions when scraping parquet
If you decide to rent the necessary equipment, then you also need to take care of personal protective equipment. You will need glasses, a respirator, and a hair mask.
The noise the machine makes when sanding is dangerous to your hearing, so get some headphones as well. Wear thick clothing, as varnish particles and a dirty top layer of parquet can cause serious skin irritation.
Be sure to remove pillows, blankets and all bedding from the apartment, cover upholstered furniture with film, which is glued tightly to the floor. Nothing should be left in the room where scraping will be done. Because then it will be a big problem to clean everything from wood dust. Open the windows wide so that most of the dust goes outside.
How to sand with an electric machine?
If the manual method does not seem productive enough, it’s time to use the machine one. To do this, you need to make sure that the sockets in the house or apartment are designed for a load of about 15 - 16 A. Otherwise, the equipment will have to be connected directly to the electrical panel.
Then proceed as follows:
- Clean the floor from debris and dirt. The nails are buried. Carefully inspect all planks. If necessary, some are replaced with new ones;
- Begin sequential processing of the surface layer, using sandpapers with a grain size from 24 to 120 R. The choice of the coarsest is made taking into account the initial state of the floor covering. Before starting work, the entire surface is thoroughly wetted using a sprayer. First, use the coarsest sandpaper with a grain size of up to 40 R. This abrasive treatment will completely remove the protective varnish on the surface, old paint, and help level the base. After the treatment has been completed, there should be no unevenness on the surface. Move from the center to the edges;
- The most complex and hard-to-reach areas, for example, near the battery or in corners, are treated with an angle grinder. In this case, individual areas are processed manually;
- At the grinding stage, an abrasive with a grain size of 60-80 R is put on the drum and, moving from the center, the entire area is processed sequentially. The purpose of this treatment is to remove any possible scratches that may have been left on the surface of the floor covering after rough cleaning with a coarser abrasive. When treating the floor in strips, it is worth overlapping the adjacent rows to prevent the appearance of untreated areas;
- Considering that even after a fairly thorough and careful treatment, small cracks, crevices, depressions and other defects remain on the surface, the entire surface must be puttied. To get a high-quality result, you should give preference to a special mastic designed for wood processing. Some craftsmen also use automotive putty;
- The putty surface is treated with the finest abrasive with a grain size of 120 R and higher. Thanks to this, it is possible to completely smooth out the unevenness created by the putty and ultimately obtain an even and smooth coating.
We invite you to watch a video containing information about the procedure for performing the work:
Purpose of the procedure
When sanding an old wooden floor, cracks and sags, stains from oil and other stubborn dirt are eliminated, which ultimately extends the life of the coating. After sanding, a floor made of any wood looks much better. You can scrape not only parquet, but also simple floors made of pine boards.
If the boards are very worn out (thin), rotten, or loose, then they need to be replaced. You can carry out scraping with minimal material costs if you rent a machine and do all the work yourself. Let’s figure out what the sequence of actions is, whether it’s possible to repair the floors yourself or whether it’s wiser to invite specialists.
The most inexpensive way is to use a hand scraper, which is a scraper with a metal tip. An alternative is to use sandpaper sheets attached to a holder. These methods require virtually no money, but are very labor-intensive. Therefore, they are usually used for cosmetic spot repairs, and when comprehensively updating a wooden floor, machine options are preferred.
Varnishing
After the finishing process is completely completed, the floor surface is thoroughly cleaned of dust and wiped. It is best to perform such work with a professional vacuum cleaner. It is better to avoid using a household model, since due to a large amount of wood dust, the filter quickly becomes clogged and the efficiency of the device is significantly reduced.
Surface varnishing can be done in various ways. It all depends on the area being processed and the tools available. The choice is made between:
- velor roller ensuring uniform distribution of varnish over the surface. When using a tint composition, this factor is especially important. The height of the pile of such a roller should be limited to 4 - 5 mm. To achieve uniform painting of the surface, the composition is first applied across the boards, and then along, making cross-shaped movements. The selected varnish composition is poured into a paint bath. After dipping the roller in the composition, squeeze out the excess composition. After the first layer has dried, apply the second, having previously sanded the surface with fine-grained sandpaper. This is done without fail, since sliding over the surface, the roller lifts the wood fibers;
- paint brush. To form a uniform layer and increase the productivity of the process, use a wide brush. Thanks to it, it is possible to evenly distribute the composition over the surface. However, wood fibers also rise. After applying the first layer, the surface is sanded using 400-600 grit sandpaper;
- metal spatula. The tool is used to apply a fairly thick composition. Thanks to the thin and sharp surface of the spatula, it is possible to evenly distribute the composition over the surface, while simultaneously cutting off all rising fibers. This significantly reduces the duration of work, as it eliminates the need for additional grinding;
- spray gun. The most productive method, significantly superior to the process of applying varnish with a roller or brush. Ensures the formation of a thin, uniform layer. With the same, you can apply three layers with it, but only two with a brush. Each subsequent layer must be applied perpendicular to the previous one.
Varnishing of the treated surface is carried out in the following sequence:
- parquet boards are treated with a primer or tinting compound. The latter is used if you plan to apply transparent varnish and want to give the parquet a certain shade. The primer is left on the surface for a day until completely dry. At the priming stage, previously unnoticeable defects are sometimes revealed. To eliminate them, use a special parquet putty. Achieving full color matching, you can prepare the repair composition on your own. To do this, you need to purchase a special liquid for tinted mixtures at a hardware store, mix it with sawdust from the dust fraction, achieving the consistency of plasticine. The hardened putty is carefully sanded. The base is dust-free;
- Apply the first layer of varnish, making it as thin as possible. Even if a quick-drying composition is chosen for processing, it will take at least a day to dry completely;
- remove roughness resulting from the rise of wood fibers by carefully and accurately sanding the surface layer. To increase the productivity of the process, a grinding machine is used. After completion of the work, the floor surface is thoroughly dust-free;
- Apply the remaining layers, leaving at least a day between each layer.
Attention! It takes at least a week for the applied composition to completely dry and polymerize. You should not walk on the varnished surface or place furniture at this time.
If, after the varnish has completely dried, a sticky feeling remains on the surface, wipe the varnished surface with a soap solution. This will help completely get rid of the problem.
The number of layers applied may vary significantly. It depends on the chosen composition and type of wood that was used to make the parquet. To protect soft wood, which includes pine, birch, spruce, two layers will not be enough. Hardwoods such as oak or larch are processed only twice. This is enough to form a continuous high-quality layer.
Surface grinder Trio
A universal three-disc device for fine sanding of surfaces made of wood or cork, and for treating oiled or varnished floors. If we are talking about wood, this model is used after basic leveling with drum or belt units. Having three discs at once increases the efficiency and productivity of the machine. The device is similar to mosaic grinders: three disks rotate around a common center, while each of them additionally rotates around its own axis.
The floating seating of the discs, as well as the powerful built-in vacuum cleaner, make it possible to create a perfectly smooth surface without the formation of clouds of dust. Therefore, when working with this power tool there is no need for professional protective equipment. The original design ensures ease of control of the machine, reliable and very accurate balancing of its components. For the most convenient carrying, the unit can be disassembled into two parts.
The equipment has a power of 1.8 kW, requiring power from a 230 V network. The width of the treated surface is 460 millimeters. The total weight of the machine is 77.5 kilograms, the structure is divided into two parts weighing 24 and 53.5 kilograms.
How long will it last?
Processing frequency may vary significantly. It is advisable not to wait for the transition to radical measures. If scratches, chips, numerous stains and abrasions appeared long ago, it is not always possible to eliminate the problem with local repairs.
Cycling the surface layer will allow you to get rid of the problems that have arisen. However, the frequency of such processing may vary. The number of works performed may vary. it all depends on:
- quality of the material used;
- type of wood;
- thickness of the front layer.
The number of treatments can reach 7 times. However, in some cases only a single surface treatment is possible.
Surface scraping is a costly and time-consuming procedure. To refuse such treatment, you should take care of it in a timely manner.
Rules of care
If recycled parquet flooring is properly cared for, it will last for decades without the need for repeated restoration.
It is important that a certain level of humidity is maintained in the room. To do this, you can install an automatic device for air humidification in the room, which will prevent premature drying of the wood and creaking of the floor
It is important to ensure that street sand does not get on the parquet. This can be avoided by placing a rug at the entrance
Since natural wood is especially susceptible to ultraviolet rays, you should take care to tightly cover the windows by hanging curtains or blinds on them. To prevent scratches from furniture legs on the parquet, they should be covered with felt on the bottom. The floor can only be cleaned using a wet method and must be done manually.
How to minimize the occurrence of defects in the future?
In order for as few defects as possible to appear during the operation of the parquet flooring, it must be used correctly. The instructions included with each package contain specific recommendations for a specific type of board. In the most general case, to increase the service life of a floor covering, it costs:
- Protect the parquet from direct sunlight. Curtains or a carpet laid on the floor will help do this;
- stop wearing street shoes to protect the varnished surface from the action of abrasives in the form of small pebbles and grains of sand stuck in the sole;
- Promptly humidify the air in a room with parquet floors during the heating season. It is preferable to install an air humidifier, which will help maintain an optimal level of humidity and prevent cracking of the boards;
- stop using a cleaning vacuum cleaner. Preferable wet cleaning using a damp, but not wet, cloth;
- Wax the surface layer in a timely manner. It is permissible to apply a protective layer by applying oil or polish, which manufacturers offer specifically for protecting parquet boards.
By following the above recommendations, you can turn a capricious floor covering into a fairly practical material that can last quite a long time without losing its appearance. If necessary, parquet sanding can be done on your own. Manual processing will take quite a lot of time, but it will help to significantly reduce the cost of performing the work. A professional tool is more expensive, but can significantly increase the productivity of the process.
Preparing the base - the initial stage
Restoring or sanding a floor, like any other type of work, involves a series of preparatory work. The area allocated for treatment must be treated with water. This must be done so that during the removal of the top layer of the floor, as little dust as possible is generated. Another interesting method to reduce the amount of dust and dirt in the process is to iron the floor covering through a damp rag.
The floor surface ready for restoration must not only be clean and moistened. Before starting work, you need to dismantle the baseboards, monitor the possible presence of nails around the perimeter of the floor (they can damage the equipment), and solve problems with creaks, chips, cracks and potholes.
The scraping of the parquet board begins from the central part of the room, gradually moving towards the walls. The treated strips should overlap each other and reach the central part of the room. During the finishing process, strips of looped parquet must move in both forward and reverse directions.
Preparing the floor, like the main part of the work, can take a fair amount of time, but it’s worth paying due attention to this process
