Wooden parquet is a prestigious, practical, but, unfortunately, relatively expensive finishing material. Therefore, every person whose home is decorated with this high-quality coating is interested in maximizing its service life. Today we will tell you how to do it correctly.
From the article you will learn:
- What problems do owners of parquet floors face, and what are the ways to solve them?
- How to do a major overhaul of parquet flooring yourself.
- How to properly use parquet flooring.
- How to properly care for parquet so that the flooring lasts as long as possible.
First, let's look at methods for dealing with coating defects that do not require a comprehensive restoration of the parquet.
Elimination of scratches and minor defects
Small dents, chips and scratches that appear on the surface of the parquet are usually eliminated with the help of cosmetics intended for the care of parquet. The most popular of these is hard wax, which is also called hot melt putty. After hardening, the product exhibits strength comparable to that of wood, and is suitable for restoring surfaces coated with both varnish and oil-based compounds.
Hard wax of the appropriate shade is applied to the scratched surface in a molten form.
aparket FORUMHOUSE user
The hot melt putty is applied using a wax melter (gas or electric). After application, excess should be removed with a properly sharpened chisel or spatula. If necessary, final sanding should be done.
You can also repair scratches using a wax pencil. In both cases, the restored surface should be polished with a soft cloth.
Types of work
Before you restore parquet with your own hands, you need to master several simple manipulations. Let's talk about each of them in more detail.
putty
There are ready-made putty pastes and mixtures on sale that can be used to fill cracks and crevices (for more details: “Which putty for parquet is best suited”). However, in some cases you can prepare such a mixture yourself. To do this, you will need remnants of the old parquet left in reserve. They need to be sawn into small sawdust and mixed with parquet varnish to a paste-like state, or with epoxy varnish in a ratio of 4:1. This grout is ideal if you want to accurately match the tone of the wood.
Imitation of joints
You can disguise the putty by simulating joints, which can be done using a ruler and an awl:
- First you need to wait a little until the putty hardens to the state of gelatin, that is, it will be plastic, but not sticky. Alkyd and uralkyd varnish hardens within a few minutes after application and quickly crystallizes.
- For straight joint lines, furrows are drawn with an awl under a ruler.
- Wavy lines are pressed with a metal ruler.
- If the putty has already hardened, then to create false joints it will have to be scratched with an awl.
Manual looping
To scrape small areas of parquet, you can use a hand scraper, which can be purchased at a specialty store. If desired, a hand scraper can be made from a plane blade.
Sanding with feet
You can sand small sections of parquet using two types of sandpaper glued to the soles of old shoes. For roughing, paper No. 40 is suitable, and for finishing – No. 80. Sanding with your feet is faster than by hand, and the processing is more delicate than, for example, with a whetstone.
Fighting the squeak
Creak is a faithful companion of parquet, whose performance characteristics have decreased over time. Various reasons can lead to the appearance of a squeak:
- parquet drying out due to low humidity levels in the room;
- physical damage to the parquet (broken tongue-and-groove joints, splitting of individual planks, etc.);
- peeling of parquet tiles from the base;
- displacement of the parquet base relative to the floor joists.
If the floor not only creaks, but bends significantly under your feet, the joists are most likely damaged or the fastenings of the parquet base are broken. In this situation, complex repairs cannot be avoided, which will affect both the rough and finished floors (and not just the parquet). If the appearance of a squeak is not associated with serious damage, and if the parquet has not yet peeled off from the base, then it makes sense to try to fix the problem using one of the methods described below.
Talcum powder
If the parquet creaks, it means that small gaps have already formed between its tiles. If there is no serious damage, then ordinary talc, spilled between the parquet strips, will help get rid of the unpleasant sound for a long time.
fishermen59 FORUMHOUSE user
If the parquet itself creaks, you can pour talc into the joints and walk on the floor so that the talc gets into the joints of the locks. Then remove excess talc.
Filling with polyurethane glue
If the parquet “plays”, creaks and shows other signs of delamination, the situation can be corrected by pumping a polyurethane composition for gluing wood between the dies and the base.
Armed with a drill and a drill bit (2 mm), a medical syringe, glue and masking tape, you can get to work:
- Apply masking tape to the damaged areas of the parquet (it will prevent the glue from spreading and prevent it from rising to the surface through the cracks in the parquet).
- Using a drill, we make several inclined holes in the parquet (the distance between adjacent holes is approximately 15 cm). Attention: only the parquet should be drilled (the base must remain intact).
- Pour adhesive into the space between the dies and the base.
- After an hour, remove the tape, and remove any traces of glue that have come to the surface with a cleaner designed to remove the glue used.
You cannot walk on the parquet until the glue has completely hardened. After the glue has set and its excess has been removed, the treated area should be pressed against the base with a weight. After the glue has completely hardened, all holes can be sealed with a wax marker of a suitable color.
Cammer FORUMHOUSE user
Try drilling diagonally with a thin drill bit. Then fill in the adhesive mixture using a syringe. The hole can be sealed with a wax whale (if you choose a dark brown shade, the hole will look like a natural knot). A couple more points: you need to choose either a liquid glue or one that can be diluted with a primer. After pouring the glue, you need to crush the loose dies with something heavy.
Pulling parquet with self-tapping screws
There are cases when the sources of squeaking are simultaneously cracks in the parquet, the gaps between the base of the parquet and the joists, as well as the joists themselves. And if full-scale floor repairs are planned only in the distant future, then temporary measures can be taken to eliminate the unpleasant sound.
Cummer
If everything creaks, then solving this problem is very difficult. In such cases, a temporary measure is taken: you can try to pull the parquet to the floor slab. Take a hammer drill, a long 8 mm drill, a dowel plug (8*60 mm) and a universal self-tapping screw (5*150 mm). Drill through (next to the joist, or even through it).
After this, the floor covering is attached to the slab with self-tapping screws, and the heads of the self-tapping screws are hidden from view using wax markers.
Eliminating squeaks with wax or paraffin
If creaking occurs when the parquet rubs against the base, then instead of glue, you can pump paraffin under the parquet. We learned about this technology from the experience of our users.
strekoza FORUMHOUSE user
My mother used a syringe to inject liquid paraffin into the creaking areas. The parquet has been in my mother's apartment for more than 40 years - without a creak. It was finished during my childhood.
Working with liquid paraffin, given its high temperature, will be quite problematic. Therefore, it is better to use liquid parquet wax instead, which will not only fill the free space between the base and the dies, but will also be partially absorbed into the structure of the wood.
Mold control
Let's move on to a description of more labor-intensive procedures.
If moisture sometimes gets on the surface of the parquet, this is bad, but not critical. If water regularly seeps into the subfloor space, then large-scale pockets of mold that destroy the coating from the inside and appear on its surface will cause a lot of trouble for the owner of the house.
Fighting mold on parquet is a complex and time-consuming task, consisting of several stages:
- Complete dismantling of the finished and subfloor in areas where mold is detected.
- Identifying the cause of moisture accumulation under the parquet and eliminating it.
- Drying the screed (subfloor) and treating all elements with protective compounds.
- Installation of subfloor and installation of parquet.
The reasons that cause moisture accumulation under parquet flooring can be very diverse. This could be a fistula in the heating riser, due to which the entire floor slab or floor screed becomes saturated with moisture. Also, the cause of mold can be wet walls (more precisely, moisture that flows down damp walls under the floor). Be that as it may, you will have to approach mold removal with all responsibility.
Zalina7 FORUMHOUSE user
Mold must be dealt with radically, and not just wait for it to dry out. The mold must be eradicated, then everything must be washed well, dried, and only then sorted out. If possible, swollen dies should be replaced. There are a lot of means to combat mold. At worst, use copper sulfate or Domestos/Beliznoy.
What is scraping and how can it be carried out?
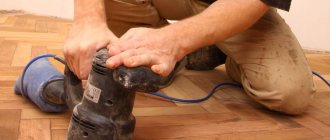
Sanding is a technology for leveling wood surfaces by scraping (removing a thin layer of chips). This process can be carried out using a scraping machine, an electric planer, or a hand scraper. After this procedure, the damaged floor will look like new.
cycle
A manual scraper is a metal scraper with a wooden handle. It perfectly removes paint or varnish layers. A medium-sharp metal plate is inserted inside the tool, which helps remove wood chips without damaging the structure of the dies.
If you have the opportunity to rent a sanding machine, take advantage of it. This will save you time and effort.
Sanding with feet
When sanding parquet, it is recommended to sand it with your feet rather than your hands. This way the pressing force is higher and less effort is wasted. To do this, you need to glue sandpaper to the sole and rub the floor.
a scraper made from improvised tools
Comprehensive parquet restoration and sealing of visible cracks
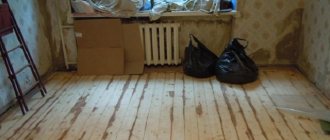
If visible cracks have appeared between the parquet strips, and their front surface is riddled with many small scratches, cosmetic repairs cannot be done. If the parquet has not yet left its base, then a comprehensive and multi-stage restoration of the coating will be required. Otherwise, the parquet will have to be dismantled and re-laid.
We will consider only the first option, because dismantling and reinstalling parquet is a topic for a separate article.
Restoration of parquet flooring is carried out in several stages:
- Looping.
- Grinding.
- Puttying and sealing cracks.
- Sanding the putty surface.
- Finishing.
Let's take a closer look at them.
Parquet scraping
The first stage of restoration: the pre-cleaned and dried surface of parquet floors is processed with a parquet sanding machine designed for both grinding and sanding. The purpose of the operation is to remove the top layer of parquet varnish. In small areas, this operation can be performed using a surface grinder (usually rented).
A coarse abrasive (No. 40) is suitable for this operation. If a surface grinding device cannot be found, then you can use a household belt sander for the job.
To process hard-to-reach areas, you can use an angle grinder or manual scraping.
Here are some more tips for using the equipment.
lana FORUMHOUSE user
Parquet scraping can be carried out by 3 types of machines (drum-type machines, surface grinders and angle grinders). The first two are removing the stripes and sanding the parquet. Parquet sanding in hard-to-reach places is done using a parquet corner machine.
To achieve optimal results, scraping should be done in two stages: first along and then across the room.
Sanding parquet
Grinding allows you to eliminate all the irregularities remaining after “rough” sanding. Parquet is also sanded in two directions: along and across. Grinding is performed in two stages: rough (with abrasive No. 60) and finishing (with abrasive No. 80).
Yurabbb FORUMHOUSE user
To remove old varnish, I used a diamond grinder, then polished with several types of abrasive (removed the remaining varnish and traces of diamond grinding, rough grinding and grinding before applying oil-wax).
Dust generated during sanding should not be thrown away. It is useful for preparing putty and sealing seams between parquet tiles.
Priming and filling seams
Puttying allows you to eliminate seams and cracks formed during the use of parquet. Despite the large assortment of the modern construction market, it is very difficult to choose a putty that matches the color of the existing parquet. Therefore, parquet varnish mixed with sawdust remaining after sanding is the most popular composition, which is used by many to seal seams during parquet restoration.
Blackk FORUMHOUSE user
Polymer putties are practically not painted, and it is extremely difficult to match the color of the parquet with them. Therefore, it is better to use wood dust mixed with varnish as a putty.
The varnish and wood dust are mixed to a consistency that allows you to rub the mixture into the cracks using an ordinary spatula. When the mixture has set, its excess can be removed from the surface of the parquet with a damp cloth.
Before filling the parquet, special attention should be paid to surface preparation: the seams must be completely cleaned of dust and treated with a parquet primer.
wladislaw FORUMHOUSE user
I usually clean the seams and crevices with a thin screwdriver and an awl, then clean them with a vacuum cleaner (but not immediately: first I blow out all the dust with a compressor). You need to prime not with a roller, but with a rubber spatula (in this case, we get uniform impregnation of all the cracks).
Finish sanding, priming and varnishing
The final stage of restoration: the surface of the parquet is sanded with fine abrasive (No. 120), treated with a primer, after which a finishing coating (varnish or oil-wax) is applied to it in several layers (at least 2 layers).
What composition should I choose for finishing? It depends on the functional purpose of the room and on what surface properties you want to achieve in the end.
Advantages of parquet varnish:
- forms a uniform coating in the form of a durable glossy or matte film (the required level of gloss can be selected individually);
- the coating does not require complex maintenance and is easily applied to the surface of the parquet;
- long service life.
Disadvantages of varnish:
- local (partial) restoration of the coating cannot be carried out;
- The varnish contains toxic substances.
Benefits of wax oils:
- natural composition and environmental friendliness;
- availability of a wide range of colors;
- possibility of local repair.
In addition, the oil emphasizes the natural texture of the wood and has good water repellency.
Disadvantages of wax oils:
- the coating wears out quickly and requires regular updating;
- the coating requires careful care and special cleaning products;
- Oil-based finishes must be polished regularly.
Applying oil to parquet may require some skill.
Yurabbb
The most difficult part is hand-painting each parquet strip with oil and wax. But the result (in the photos - not yet final) is worth it.
When applying the topcoat, you should follow the recommendations given by its manufacturer. It is the manufacturer who determines the sequence of operations and the number of layers applied.
Rules for repairing loose boards
Without proper care, parquet flooring will dry out sooner or later, especially if the air temperature in the room is higher than normal or there is a frequent temperature change. As a result, the dies dry out, decrease in size and begin to wobble.
When a problem with parquet occurs on a large area, then it is completely replaced, since partial repairs will take too much time. In addition, replacing one part of the floor surface does not mean that other loose elements will not soon need to be restored.
If you need to update several parquet floors, you need to find products of the same wood species that are similar in color and size. Deformed and loose elements are dismantled using a chisel. In the vacated area where the removed slab was located, the remaining adhesive is removed from the subfloor and the area is thoroughly cleaned. If you need to level the base, use putty.
If it is necessary to change one strip of parquet, the ridge is cut off from it, and the end of the product is processed with a plane. When replacing individual elements of a parquet floor, they are placed in place using an adhesive composition or preheated bitumen mastic.
If you need to replace several adjacent parquet floors, you can assemble a so-called “cage” from dies away from the repair site and then install it entirely so that it visually fits into the surface of the coating. A load is placed on the laid section of parquet and on the adjacent long-glued parquet flooring. When excess glue appears along the edges of the “cage”, it should be removed without waiting for it to dry completely.
After the dies are finally fixed, the area of the floor that has been restored is cleaned with sandpaper, the resulting dust is removed and covered with varnish, mastic or other composition that was previously used to treat the entire floor surface.
Proper operation and protection of parquet from premature aging
Parquet repair is a complex of complex and labor-intensive procedures. Therefore, it is much easier to prevent the aging of parquet than to carry out large-scale restoration later. We bring to your attention several recommendations that will help maintain the attractive appearance of the coating for a long time.
To understand how to properly care for parquet, you need to find out what it “doesn’t like” and from what factors it needs to be protected?
Parquet “doesn’t like”:
- rough mechanical impact;
- high humidity;
- drying out.
OVG User FORUMHOUSE
Unlike laminate, scratches, dents, etc. remain on parquet boards. (tested on myself personally). Yes, here’s another thing: the parquet board “walks.” With high humidity it swells, and with dryness (when the batteries are turned on) the seams separate.
The same can be said about parquet. Indeed, under the same external conditions, these materials behave in a similar way.
The main “risk factors” have been identified; let’s consider countermeasures.
Protection of parquet from furniture, from pets, as well as from the owners themselves
Movable furniture can be a real disaster for parquet flooring. Legs, wheels - all these are elements that cause scratches, dents and other characteristic damage.
Felt pads (which are glued to the legs of cabinets and sofas) or transparent silicone-based mats will help save parquet flooring from the effects of movable furniture. The photo shows an alternative solution that is suitable for all types of flooring.
Protecting parquet flooring from the claws of pets, as well as from the sudden appearance of wet spots on the floor covering, comes down to vigilant control over your pets. And if it is impossible to organize such control, then it is better to abandon either the parquet floor or the idea of getting yourself a four-legged friend.
Oddly enough, the owner of the premises should first of all protect the flooring from himself. Here are a few simple rules that the owner of a house with parquet floors must follow:
- you cannot walk around the house in shoes with heels or rough soles;
- Offer all your guests to change into soft slippers;
- Handle sports equipment (such as dumbbells or barbells) carefully.
Repairing wet parquet flooring
Swelling of the planks after the parquet gets wet is the most unpleasant type of damage to the floor covering. This can happen as a result of burst pipes, when the floor is completely under water. Wood has the ability to absorb moisture well, after which it becomes deformed. The only way out of this situation can be a complete replacement of the entire coating.
If you do not dismantle wet parquet flooring, mold will immediately appear underneath it and they will have to be replaced in any case, but during this time the fungus can spread to the walls and an unpleasant odor will appear in the room, which will not be easy to get rid of. For the above reason, parquet elements must be dismantled. You need to clean the base from glue, dry it well, and then just start installing the final coating.
It will take a long time to dry the planks, and before laying a new parquet floor, you need to make sure the concrete base is dry. For this purpose, the concrete surface is covered with a thick polyethylene film and waited for 12-15 hours. After the allotted time, the waterproof material is inspected and if it is dry, then you can begin installing the parquet floor. The presence of even a small amount of condensation on the film indicates that the concrete layer must still dry out and it is too early to lay the decorative coating.
If a small area of the parquet surface gets wet, then not only these parquet floors will have to be lifted, but also the floor elements located around the emergency area. This is necessary to ensure that the rest of the coating is dry.
You can try to dry the dismantled dies, but, as a rule, you have to purchase new products, matching them by color and texture relative to the rest of the parquet surface.
Maintaining indoor humidity levels
The relative humidity in a room with parquet floors should be 45–65%. If the humidity is lower, the parquet dries out and cracks appear on its surface.
High air humidity can lead to swelling of the parquet board.
A thermo-hygrometer will help maintain optimal humidity in the room. This device will show you when you need to turn on the air conditioning (or, conversely, heating) to reduce the humidity in the room. You can achieve the opposite result by using a humidifier. In addition, a thermohygrometer helps maintain the optimal temperature in the house (in rooms with parquet floors it should be 18...25°C).
If the humidity regime is not maintained, the putty placed in the seams between the parquet strips will begin to spill out due to deformation of the wood. And the creaking of the floors, which will begin in the very near future, is the most harmless thing that awaits you.
If you are just planning to install parquet at home, then choose a material that is less susceptible to changes in humidity (for example, oak parquet).
Basic rules for caring for wooden parquet
Caring for parquet comes down to proper cleaning and periodic treatment of the floors with protective compounds.
Luch ok User FORUMHOUSE
Cleaning parquet is mainly done with a vacuum cleaner. When cleaning, use an attachment with a soft brush that does not leave scratches. Try to do wet cleaning no more than once every two weeks. For cleaning, use special products (in this case, for varnished floors).
Polishing parquet (1-2 times a year) prevents abrasion of the top layer and slows down its aging. Parquet is polished with special compounds (water-soluble and oil-based). Water-soluble polishes are used for varnished floors. These are inexpensive compositions that, with proper processing, allow you to obtain a fairly shiny and aesthetic coating. At the same time, wax-based compositions intended for oil-impregnated parquet have a higher cost, but after their application the coating retains its attractiveness longer.
You can take part in discussions regarding the technology of restoration of parquet flooring by visiting the corresponding topic on our portal. You can learn more about the selection and repair of natural floors, as well as the characteristics of modern floor coverings, by visiting the FORUMHOUSE section, which contains practical experience and recommendations from our users. A thematic video will tell you in detail about the features of caring for wooden floor surfaces during their operation.