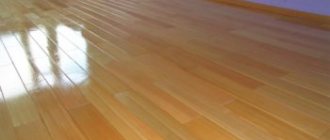
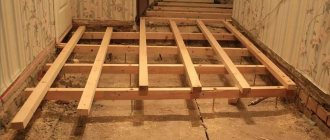
Wood floors are one of the best options for environmentally friendly and reliable flooring. They are durable, beautiful and do not harm the health of people living in the house. The disadvantage of such a base is that if it is installed incorrectly or after some time, the floor boards begin to move apart - cracks form between them, which is why the floors look unsightly, and various debris gets underneath them, and an unpleasant squeak may appear. To prevent this from happening, the technology for laying such a coating must be carried out exactly according to time-tested rules. But, fortunately, even old floors can be restored to their original form if you use a tool to screed the floorboards. Now there are a lot of variations on how to join together floorboards quickly and without much expense.
Tool for screeding floor boards
Pulling together floorboards
Pulling (or rallying) floor boards is a process that leads to the fact that the individual elements of the covering will lie next to each other as closely as possible, which will eliminate the formation of cracks and gaps. The procedure is performed when installing new wooden floors, laying floor boards, as well as during the repair of old floors.
General rules for laying floorboards
The bonding of floor boards should not be neglected, since wood is a “living” material; it reacts sharply to any changes in the microclimate in the room. For example, with fluctuations in humidity and temperature, especially seasonally, floors often begin to deform, as a result of which quite large cracks and gaps appear between individual floorboards. Moreover, they can form in the most unexpected places, that is, where there was not the slightest hint of free space.
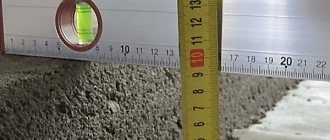
On a note! The permissible gap between the floor boards is only 1 mm.
The gap between the boards should be no more than 1 mm
Correct laying of floorboards and the use of special devices for screeding wooden floors helps to get rid of such gaps, as well as carry out the necessary prevention of their occurrence. Moreover, problems that arise can be corrected quite quickly.
Video description
How to install logs for a wooden floor, watch the video:
Preparing the boards
Even kiln-dried lumber needs acclimatization to the conditions in which it will be used. Therefore, it is advisable to bring the floorboard into the house in advance and let it lie for several days. But this can only be done after all wet work has been completed - installing screeds, plastering walls, so that the wood does not absorb moisture evaporating from the solutions.
Then the boards are sorted, putting the deformed ones aside and choosing the smoothest and cleanest ones. Products that are not of the best quality can be used for wooden flooring in less significant rooms or for laying along walls where they will be hidden by furniture.
For reference! If the boards are of different widths, then narrow floorboards will deform less when drying.
After sorting, the lumber is treated with an antiseptic and left to dry. It is enough to carry out such processing only for the back side and ends, since the finished flooring will be subjected to sanding and protective and decorative finishing.
Antiseptic treatment of lumber Source myosu.ru
Methods for tightening floorboards
There are several different methods for fusing floor boards together. They differ from each other in the use of a certain device, but in general the principle is the same. Methods for screeding floor boards:
- using an ax and a hammer;
- using wedges;
- metal clamps;
- ordinary car jacks;
- special lever Bowrench or Bowjak;
- with a mount.
Pulling together boards using wedges
On a note! All these methods are suitable for screeding old floors, but can also be used when laying fresh flooring or installing ceilings and subfloors.
Let's take a closer look at the most popular and interesting (and most importantly, effective) methods for reliably screeding floorboards.
The final stage
After laying the floorboard, the surface is inspected and in case of mechanical damage, all defects are eliminated using wood putty , and it is necessary to match it to the color of the wood.
To remove small protrusions and irregularities, the coating is sanded. It is better to do this not with a manual machine, but to rent a professional sanding machine, otherwise, after applying the paint and varnish coating, all existing defects will be very noticeable.
If you have purchased a high-quality and solid floorboard, then during its installation, practically no protrusions are formed, so sanding may not be carried out or fine sandpaper is used for this.
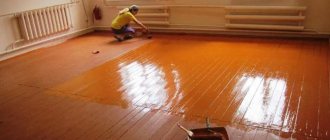
At the last stage, the floor is covered with paints and varnishes. It is better to take varnish on a polyurethane basis. You can use oil and wax based coatings, which look very beautiful after application; in addition, they are natural, so the wood breathes and helps maintain an optimal microclimate in the apartment.
Screeding a wooden floor using homemade wooden wedges
This is one of the simplest, yet most effective methods, characterized by its absence of costs and high reliability. To bring it to life, you don’t need to purchase any expensive tools - all you need to do is use a pair of hand-made wooden wedges and a hammer.
Wedges are made using a hacksaw. A floorboard or any other board 15 cm long is sawn in half with a cutting angle of 10 degrees. Pulling together floor boards using this method is done as follows.
Step 1. 8-15 boards are laid on the joists, then the trim is applied to the last of the laid floorboards.
The floorboard cut is applied to the last of the laid floorboards
Step 2. Two wedges are laid on the joist above the previously laid cut floorboard. Wedges can also be used without cutting the floorboards, but in this case the wedge, which is called a “working” wedge, must have a ridge on one side that fits into the groove of the floorboards. The second wedge will be called “intermediate” and there are no grooves on it. It is usually 10-15 mm thicker than the working one.
Laying wedges
Advice! You need to use wedges in 2-3 places along the boards being laid and pulled together. This will make floor screeding more efficient.
Step 3. Use a piece of board to close the excess gap. You can fix the thrust block between the wedges and the space not covered by the floor boards using self-tapping screws. To do this, the stop is screwed to the joists. Instead of a board closing the gap, you can use clamps or staples, which are also secured to the joist.
Fixing the thrust block
Step 4. Next, blows are applied with a hammer to the end part of the intermediate wedge. Thanks to these actions, the boards throughout the flooring are compacted together. In this case, the gap between the floorboards being joined should not be more than 1 mm.
The end part of the intermediate wedge is struck with a hammer
Step 5. After this, the boards are connected to the joists using self-tapping screws, which are screwed into the outer board at an angle of 45 degrees. Nails 75 mm long are also sometimes used.
The boards are connected to the joists using self-tapping screws
Step 6. It is easy to remove the wedges after pulling the boards together - to do this, strike the intermediate wedge from the end part again with a hammer, but from the other side. Klin safely leaves his place.
Wedges are knocked out
The procedure is performed every 8-15 boards, and it is important to ensure that the ridges of the floorboards fit into all grooves if a tongue-and-groove board is laid; 2-4 outer boards are joined together without a board closing the gap. At the floorboard closest to the wall, the lower edge of the groove is removed; a wedge is used for bonding, which is located between the outermost board and the plywood, which protects the wall from deformation.
Wedges are the fastest and most convenient method of tightening foundation boards, which does not require the use of any special and expensive equipment. The method has been tested by many generations of experienced builders and is still actively used in work.
Video - We tighten the boards using wedges
Video - Laying flooring (tongue and groove) boards
Laying on a plywood base
Joists, screed or an existing wooden floor can be used as a base for plywood. Installation of plywood is done using dowels, screws or glue.
When laying boards on a plywood base, choose moisture-resistant plywood with a thickness of 18 mm or more
Table 5. Laying boards on a plywood base
| Illustration | Description |
| Plywood sheets are glued to the cleaned and level screed. | |
| For gluing, a 2-component adhesive composition specially designed for these purposes is used. Apply it in a thin layer using a notched trowel. | |
| Plywood is laid with seams staggered in each subsequent row. Holes for dowels are made in each sheet in three places - along the edges and in the center. In this case, the hole should be located at a distance of several centimeters from the edge. | |
| The plywood is pulled to the screed with dowels. | |
| After laying, the plywood is sanded. | |
| After this, use a vacuum cleaner to remove wood dust. | |
| Before laying the boards, prepare an adhesive solution. | |
| Starting from the corner, apply glue with a notched trowel. | |
| When laying diagonally, work begins from the corner, not forgetting to leave a gap from the wall. | |
| Additionally, the board is fixed with a self-tapping screw to the plywood base. |
Wooden floor screed: special devices
In order to tighten the floor boards, you can use special devices that you can purchase in a store or make yourself. They will help solve the problem of gaps, so to speak, in a high-tech way.
BoWrench Deck Tool
What is Bowrench?
Among the various devices for screeding wooden floors, this option is often highlighted. Bowrench is a kind of lever that is great for screeding both smooth floorboards and elements with uneven edges. The device is made from a profile pipe with a square cross-section. Bowrench consists of several elements - a guide, a handle and a support bar. The latter also has metal rods that allow the structure to be secured to the joists. The guide and the bar are fixed at a certain distance from each other. When the handle-lever is turned under the pressure of a person’s hand, the guide, in turn, exerts pressure on the floor board, due to which the latter is securely pressed against the adjacent similar board.
BoWrench board fastening tool
We make Bowrench ourselves
Step 1. To make this device you will need a piece of aluminum profile with a cross section of 25x25 mm.
Aluminum profile piece
Step 2. Two pieces 18 cm and 75 cm long are cut from the aluminum profile.
Aluminum profile cutting
Step 3. Holes are marked for attaching the hinge pins - they are marked at a distance of 25 mm from both edges of the short strip and from one edge of the long one.
Holes are outlined
Step 4. The distance between the toe pins (which will be fixed to the joists) should be equal to the total distance of the joist and the width of the stud. Also, a small margin (about 5 mm) is added to this value in case the logs turn out to be uneven.
The distance between the toe studs should be equal to the distance of the joist and the width of the stud in total
Step 5. The hole for the stop strip will be made on a long section of the profile. It will be approximately 20 cm from the edge.
Mark the hole for the stop bar
Step 6. The thrust part of the device is made of a steel profile pipe with a cross-section of 25x25 mm and a length of 100 mm.
The length of the steel profile pipe should be 100 mm
Step 7. A hole for the pin is also marked in the middle of the supporting part.
Marked hole for the pin
Step 8. The marked holes are drilled with a drill with a diameter of 10 mm.
Finished holes
Step 9. A pie of washers and nuts is collected and applied to the thickness of two pipes to understand how long an M10 stud should be used. Another 3-4 mm is added to the resulting result.
Determine the required length of the M10 stud
Step 10. The resulting distance is marked on the workbench for a more convenient process of cutting the studs; all 4 studs are cut off. You will also need nuts with an M10 groover, washers and regular nuts without a groover.
Cutting studs
Studs, nuts and washers
Step 11. Nuts without a screw are used to thread the stud through them inside the metal profile.
Using nuts without a Grover
Step 12. Washers are placed on all connections so that the device does not unwind under heavy load.
Washers are placed on all connections
Step 13. The parts are assembled as in the pictures below. There is nothing complicated, the main thing is to fasten everything correctly and securely.
The collection of parts begins
Collection continues
Completion of parts collection
Advice! For convenience, the handle can be wrapped with cork, hemp rope, PVC tape or rubber. This will also prevent damage to the floor boards. If PVC tape is used, it is applied in several layers.
How to use this device? Everything is quite simple: to do this, the narrow part is installed on the joist so that the joist passes between two studs, and then the boards are compressed with a lever.
How to use the device
Interesting device - BOWRENCH
I found an advertisement in a construction magazine and was interested in a device for fastening boards.
They are asking 48-54 dollars for it! Approximately - 1750 rubles! In fact, the “corrugated pipe” is bent and two pins are welded. Our gas workers use similar “keys”. There are options with extensions between the pins.
Comments 34
I’ve been a carpenter and carpenter since I was 18, I’ve never seen anything like this, if necessary, I’ll cook something like this for myself, thank you for the useful advice!
Yes, sure. Suitable for installing floors.
I may not be speaking on topic, but isn’t it easier to immediately find normal material, in this example, not bent, but straight boards?
on this topic. Sometimes you buy straight ones, but when they sit in a warm place they become bent. This is a tree, it is alive, its fibers are arranged differently.
And if they find themselves in the hot sun, they’ll be a total mess, they might become a screw. And all that’s left to do is burn them in a bathhouse or donate them on an airplane.
I don’t argue with this, because I myself, for example, take a very long and careful approach to this process)) and, accordingly, I try not to buy it in advance, otherwise it’s very difficult to store it, no matter what happens to the material))
The post is given to study the concept of this product.
As an option (for vapor barrier), place a rail over the boards on which to rest, and modify the device. In short, you are getting wiser.
I think with a vapor barrier there should be a counter-rail that you can cling to.
Yes, and the tool can be improved.
The rail is 25x50mm, flimsy considering the quality of our material. Yes, and we are considering a ready-made device, not a homemade one. Can a homemade product be designed to suit the circumstances and then rented out?
The post is given to study the concept of this product. By the way, it is patented. I don't see any point in buying it. There are deals for 300 rubles from new metal and 1 kg\20 rubles - the price of metal taken in ferrous metal. I think this is 30 rubles. Two and a drill and four bolts with furniture heads will save those who do not have welding.
Comrades, we are going the right way! They have their own equipment for each type of specific work.
But it’s as if we don’t? It all depends on the wishes of the specialist. Ours grinds out devices for every operation. I personally went there and took the drawings.
Comrades, we are going the right way! They have their own equipment for each type of specific work.
You can increase the length of the stop and that’s it
They brought packs of floorboards, after drying, they were pulled together as expected - these were six-meter rectangles. They unloaded it with cartoons, everything was ok. They began to cut it to fit the size for installation, but 20 percent of it was clearly defective, either the groove was wrong, or the tenon was crap, or the propeller. I would kill him. They pressed with a wedge, the wife was the load, and the outer ones, in the old fashioned way, with a wide chisel.
The quality of the material is a problem. The prices are huge, but the service and quality are lacking.
Well, what country do we live in? Most frame projects are crap, with floor joists and rafters 25x150. The builders are mowing around the black, eye and eye. If you build it yourself, you won’t find good material during the day with fire.
Builders are different. And I agree with the materials/quality.
By the way, in our village a forest costs 6,000 rubles per cubic meter, in the city it was 5,000 rubles. Only in the city I came and picked out what and how much I needed, but here they are showing off, we don’t want to order, take only 1 cubic meter, sizes are only 6 and 3 meters. Quality in favor of the city!
It’s an interesting gadget, but it’s limited in use (floorboards on joists without insulation). IMHO. Probably not suitable for attaching floorboards when insulating the floor. It will tear all the vapor barrier. The skull beam above the vapor barrier is only 25mm.
There are restrictions, of course.
It’s an interesting gadget, but it’s limited in use (floorboards on joists without insulation). IMHO. Probably not suitable for attaching floorboards when insulating the floor. It will tear all the vapor barrier. The skull beam above the vapor barrier is only 25mm.
Yes! I didn't think about the vapor barrier.
A good tool, simple and convenient. If you rearrange the stops, the handle will be on the other side, although the lever will be smaller. Thank you! The ceiling will be fixed soon.
It's good if it's useful. Unsubscribe. The main thing is to do it in advance.
The person says correctly, but what about vapor barrier?
Do you think everyone makes insulated floors?
Apparently I didn't build according to fashion. I have basement floor slabs with “foil” on them, then a beam leveled at the liquid level and bolted to the slab, everything is covered with expanded clay and sawdust along this beam. And the subfloors are already screwed to the timber (50*75) with self-tapping screws. Then chipboard slabs and a finishing coating (linoleum, carpet or laminate).
The slabs also made it possible to pour a “warm floor” connected to the heating system in the bathroom and at the entrance to the house (where the shoes are kept).
Well, this is in modern, global terms. The technology here is still grandfather’s, publicly available.
But I achieved what I wanted - the child plays on the floor, and I walk barefoot, I love it so much. The floors are warm. With parents, friends, mother-in-law, I wouldn’t say that.
Doing it yourself will be cheaper.
If you do this “for life” then there is a point in buying... if you do it for the occasion... then there is no point IMHO
When building a house it was necessary. Nowadays it can only sometimes come in handy at sabbaths.
Source
Other floor tightening methods
In order to effectively pull the floor boards together, you can use a regular ax. It acts as both a stop and a lever, helping to apply a certain force to move the boards in the desired direction and seal them together. One of the boards is placed against the wall, secured with nails or self-tapping screws, and the next (adjacent) is pressed against the first with an ax that rests on the joist with its sharp part, while the blade of the tool exerts pressure on the second board.
You can use an ax to pull the boards together
Sometimes clamps are also used to screed the floor. It is only important to ensure that there is rubber at the point of contact of this metal device with the wood. Otherwise, there is a risk of damaging the floorboards. The clamp acts as a spacer; it rests against a block temporarily attached to the joists.
Using a clamp
To implement another popular method of screeding wooden floors, you can use a regular car jack. This is where its lifting power comes in handy. To do this, a wooden block is attached to the support beams, which will serve as a support for the jack. Then this tire mounting device is installed on this block and the jack is expanded - the lifting force acts on the laid floorboards.
Car jack
Due to this action, the boards are compacted together.
Video - Floor screed
Video - Screeding a floor using a jack
Prices for tools for screeding boards
board clamping tool
Flooring fixation methods
To make the floor high-quality and reliable, it is not enough to pull the boards together. It is also important to secure them well. Otherwise, over time they will disperse again, since the floors experience significant loads during operation. There are three main methods of fixing wood flooring.
Table. Methods for fixing boards.
| Way | Short description |
| Adhesive | The method is only suitable if plywood is used as flooring. It is fixed to the joists using waterproof glue. This method is not suitable for fastening boards. |
| Secret | The floorboards are secured to the joists using nails or self-tapping screws that are screwed or hammered into the end of the board at an angle of 45 degrees. |
| Clamping | The boards are pulled together using a special tool and then secured with special screws. |
The most reliable method is secret. It is suitable for securing material to any base.
Installation of floor boards
Elements for fastening
The floorboards are attached to the joists using various fasteners. These can be screws, self-tapping screws or regular nails. The latter are used most often, especially if larch or oak floors are laid. However, the disadvantage of nails is that they can come out of the joists after some time and ruin the floor.
Floorboards are often secured with nails
It is most reliable to fix the boards with ordinary wood screws. But it is worth remembering that they can rust, which is why the reliability of the connection between the joists and floor boards suffers. To prevent these metal products from corroding, their caps can be treated with a special anti-corrosion agent. This is true for non-galvanized fasteners.
On a note! There should be a distance of no more than 25 cm between adjacent fasteners.
Fastening boards with self-tapping screws (secret)
Features of screws with a cutter
There is a certain type of fasteners that have a so-called cutter at the end - a small drill; it will ensure quick screwing in of the screw with minimal risk of damaging the boards. It is these screws that are most often galvanized, which reliably protects them from rust. By the way, these elements do not have threads near the cap, which will help achieve the most durable tightening of the floorboards and joists.
Wood screw with drill and cutter
High-quality wooden floors will delight the owner for a long time with their appearance and reliability - the service life of such a base reaches 50 years with proper care and installation. At the same time, the wood coating is 100% environmentally friendly and will not cause harm to health. The most important thing is to carry out all the installation work correctly, and then there will be no disappointments.
What tools and materials are needed?
If you decide to make a wooden floor in your apartment yourself, you need to purchase materials and tools, and you must also be able to use them.
To work you will need the following tools:
- hacksaw;
- hammer and axe;
- electric drill and screwdriver;
- perforator;
- building level
In addition, you need to purchase the following materials:
- batten;
- logs with a section of 50x50mm and a length of 3 m;
- insulation and substrate;
- nails and screws;
- anchor bolts.
Once you have acquired all the tools and materials, you can begin installing the floorboards.