You can’t do without an angle grinder—an angle grinder—either in a garage or in a private yard. The unit allows you to cut a metal profile, clean a weld or remove rust from the surface of workpieces and parts; it has a low price and incredible ease of use. The grinder also has disadvantages, one of which is the unstable quality of the cut and the danger of skewing the cutting disc during use. You can eliminate annoying shortcomings by making a special frame with your own hands, which will turn a hand tool into a real cutting machine. This will increase the speed of work and achieve accuracy that can only be obtained with industrially manufactured equipment.
Option No. 2
These stationary models are more complex, but provide more accurate cutting of the material.
What you need to do:
- Desktop. Its frame is easy to weld from a channel or corner. Sheet metal is suitable as a tabletop, although chipboard, MDF or FSF are often used. It all depends on the purpose for which the installation is being assembled and what workpieces the master intends to work with.
- Frame design. One part is motionless and serves as a support. It is installed on the countertop and secured with bolts or welding. The second one is connected to the first one using a swivel joint. The “grinder” is installed on it, the position of which can be easily changed manually. Springs are provided to return the tool to its original position.
- Ruler. It will help you set the required sizes of cut samples. As an option - a strip of iron or a tube with marks and a movable marker.
In principle, there is nothing particularly complicated here. If the idea itself is clear, then making your own drawing, having decided on the linear parameters of the component parts of the machine, is not difficult.
What to consider:
- There are various models of machines. In some, the “grinder” is located under the tabletop, in others – above it. From a safety point of view, the second option is more reliable.
- It is necessary to make a cutout in the tabletop along the line where the angle grinder disk adjoins it.
- If you have basic knowledge of electrical equipment, then it is better to turn on the machine through a magnetic starter, and combine the button with a pedal. In this case, even if your hands are busy, the angle grinder can be stopped at any time with your foot.
On a note! We should not forget about basic safety requirements. After completing the assembly, the machine should be “driven” at idle speed and make sure that there is no beating of the abrasive disk - it should not touch the protective casing.
Should I buy or not?
Finding a ready-made machine on store shelves that at first glance satisfies your needs is a fairly simple task. But it is unlikely that there will be a design made entirely in accordance with your requirements, and they are different for everyone. In such cases, owners of machine tools try to improve or remodel them, but are faced with very serious obstacles - either the manufacturers made the machine from alloys that are very difficult to work with by welding, or they did not take into account the little things that you need specifically - for example, an accurate ruler or a more elastic spring. Remaking someone else's is much more difficult than making your own.
Console machine from a grinder
The base of the machine is a work table made of metal (steel or aluminum), about 50x50 cm in size. If you are going to work with long workpieces or metal sheets from time to time, then the width of the table can be increased or the possibility of installing an additional plane can be provided. To do this, you can use a retractable bracket, or a folding plane, which is normally located under the table and serves as its base.
A bracket is mounted on the table for mounting the angle grinder on a spring suspension. The spring force is selected such that it can hold the grinder in an inclined position at a height of the cutting disc from the workpiece of at least 15 -20 cm. When cutting, the tool should be fed to the workpiece with a small but noticeable force.
The angle grinder is clamped in a box-shaped housing with screws. The dimensions and configuration of the pressure plates are selected in such a way that:
- easy access to the start button was provided;
- the tool was firmly held, and no beats or deviations occurred with the cutting force;
- installation and dismantling did not take much time.
Drawings of a homemade machine can be adjusted depending on the size and power of a particular tool
Only one thing is important here - that the tool is held firmly and the plane of rotation of the disk is strictly perpendicular to the plane of the table. On the table itself, in the zone of rotation of the circle, a slot is made so that the working part of the tool fits freely into it and does not touch the metal
Mounting option - “U”-shaped bracket with drilled holes in place of the standard threaded sockets of the angle grinder
When attaching the tool, two bolts and a handle are used, which serves to feed it into the cutting zone. This option is very convenient if the machine is made for one angle grinder; if you have to use another model, it will be impossible to fix it, you will have to redo the bracket. The scheme with changing console dimensions is also quite workable, but more difficult to manufacture
The mounting option is a “U”-shaped bracket with drilled holes in place of the standard threaded sockets of the angle grinder. When attaching the tool, two bolts and a handle are used, which serves to feed it into the cutting zone. This option is very convenient if the machine is made for one angle grinder; if you have to use another model, it will be impossible to fix it, you will have to redo the bracket. A scheme with variable console dimensions is also quite workable, but more difficult to manufacture.
Homemade designs
We offer you two options for a machine made at home
on
an angle
grinder.
- The first design is more common, perfect for doing work at home. The model is not distinguished by high processing accuracy, but, alas, it has its undeniable advantages;
- Option 2 is suitable for those who want to make
a high-precision machine. The design is more difficult to complete and will require proper drawings, plus a video tutorial on assembly would be nice for a nice example. However, you won’t need to waste extra time creating it.
Important points when constructing a pendulum machine
The type of tool under consideration belongs to the category of dangerous, therefore, when constructing the equipment, the following main points are taken into account:
The manufacture of the frame is the basis responsible for the reliability of the installation. It is impossible to save on the manufacture of the frame, therefore, exclusively steel materials are used, the thickness of which is at least 2 mm. Frame - the design of this part can be different, but the most important thing is to ensure the mobility of the cutting tool. This is achieved through the use of different materials, but in any case, you need to think carefully about the quality of the hinge joint, since your life depends on it. It is better to spend more material, but make a high-quality and safe cutting machine. Tool fastening - the angle grinder is fixed directly to the moving part. Moreover, the fixation must be as reliable and high-quality as possible. When using an angle grinder, “reverse impacts” may occur, which are dangerous because the machine may simply be damaged, and the master who performs the manipulation will suffer as a result. Provide a counterweight - this is a small but important element that allows the tool to return to its original position when not needed
This will eliminate the possibility of damage to parts of the human body. A protective casing - it must be required, and it does not matter what design of the machine is invented, but using the device without a protective casing is strictly contraindicated. The presence of a ruler - this will improve the accuracy of the work performed, which is important when cutting such parts, like tiles, ceramics, and also metal. A starter is also a kind of device that affects safety. The control button should be located in close proximity to the master performing the work
This will allow you to quickly react at the right time by turning off the power supply to the tool.
In addition to options when the machine has a moving part, there are also methods for manufacturing cutting devices with the tool located in the lower part of the bed or workbench tabletop. However, this option is suitable only for cases when sawing wood is planned. Below is an example of how to make a home sawmill from a grinder quickly and easily. Details on making home sawmills can be found in this article.
This is interesting! The tool can only be used in this form with disks or circles for processing wood. Cutting tiles and metal in this position of the grinder is extremely dangerous.
Electrical part
Since the angle grinder is attached to the bottom, you cannot turn it on as usual. You will need to install:
- A clamp that will hold the control key in the “on” position.
- Socket for angle grinder.
- A control station that turns on/off the electricity in the outlet.
Using an industrial station is an excellent solution, the device has a couple of keys, the start button is tight, which will protect against accidental activation. A large and convenient “stop” button will allow you to quickly turn off the device if necessary.
Making a wall chaser
It is necessary for the groove. Furrows are cut in plaster, brick, and concrete. You can't do without it. This tool has a long spindle and guard. Device creation scheme:
- If you need to install two disks, grind off the washer.
- Place one disk and screw it in
- Then place the second disk and screw it in.
For family needs, such a wall chaser should be quite enough.
So what do you need to do for this?
For a small farm it is suitable for making and grinding feed (for chickens and hens)
- We make a small hole in the existing sheet to fill in what is needed.
- Secure the grinder with bolts
- It is necessary to make a sieve with a capacity of 20 cm
- Make a 3 mm hole in the container; the grind size should correspond to the size of the hole.
- Attach the sieve to the base
- Cut out the bottom of the bottle and insert the neck into the base of the crusher
What can you make from an old grinder? Home craftsmen ask themselves this question quite often. But if your angle grinder works properly, you can use it to make a wall chaser. By using equipment without modification, you are putting yourself at risk. In order to avoid risk, you can make a nozzle with a solid base, which will allow you to make cuts in the walls over the entire diameter of the disk.
This addition is a footplate in the form of a stop that allows you to move the tool along the wall. The efforts will be uniform. When you make such a device, take the time to install a closed cover, which will be supplemented with a pipe for connecting a vacuum cleaner.
Tips for choosing a box and bag
Before choosing a case for an angle grinder, it is worth considering that this type of tool is usually transported together with consumables - diamond blades for cutting. The purchase of a special storage box in this case must be justified by its convenience and adaptability to the size of specific equipment. Accordingly, you need to pay attention to:
- dimensions of the model - they must correspond to the dimensions of the angle grinder;
- number of sections – good if a module for storing disks is provided;
- Purpose – a wooden box is suitable for stationary storage; for transportation it is better to choose a polymer case;
- the presence of a handle - it matters if the angle grinder often has to be moved from place to place;
- Internal fastenings – latches help hold the case in place, preventing accidental damage.
In addition to hard cases, there are also soft, portable options in the form of bags that allow you to protect instruments that are used especially often when carrying, transporting, and storing.
To make a cutting machine, you will need the following materials:
- profile pipe 40 x 20 mm – 0.32 m;
- profile pipe 20 x 20 mm – 1.38 m;
- profile pipe 15 x 15 mm – 0.34 m;
- strip 40 mm – 0.14 m;
- strip 20 mm – 0.16 m;
- bearings 100 series – 16 pcs.;
- M10 bolts for hexagon 75 mm – 8 pcs;
- nuts M10 – 12 pcs;
- washers 10 mm – 32 pcs;
- long nuts M12 – 3 pcs.;
- long nut M10;
- M12 bolt with full thread 200 mm;
- bolts M10 40 mm – 2 pcs.;
- 70mm full thread hex bolt;
- plugs for profile 20 x 20 mm – 6 pcs;
- plugs for profile 40 x 20 mm – 1 piece;
- profile pipe 50 x 50 mm, for a guide – 2 m or more.
The following photo shows the process of making a homemade product.
First of all, let's make a roller carriage for the linear guide. A profile pipe with a cross section of 20 x 20 mm will be used as its basis. You will need 4 blanks 300 mm long.
Then, in the workpieces, you need to drill through holes for the future connection of parts. Their centers are located 25 mm from each edge of the profile pipes. You will need a drill with a diameter of 11 mm.
We turn the coated profile over to the other side, and having retreated 50 mm, we drill similar through holes on each side. To hide the bolts used later when assembling the carriage, the through holes in the workpieces need to be completed. To do this, one wall of each profile needs to be drilled using a drill with a diameter of 17 mm. In this way, all 16 holes are completed, the remaining 16 adjacent to them remain untouched.
Let's make a shoulder for attaching the grinder, cut a profile 40 x 20 mm, 300 mm long.
You will also need to make a knot to adjust the cutting depth when cutting. It is made from a profile pipe 20 x 20 mm, 160 mm long. Its ends are cut at an angle of 45 degrees. From a profile pipe with a cross-section of 15 x 15 mm, you need to cut small spacers 40 mm long. A total of 8 pieces are required.
We assemble the structure. An M12 bolt with a solid thread 200 mm long will be used as a connecting loop. 3 long M12 nuts are screwed onto it. Having secured the bolts with nuts with clamps to the table, you need to attach blanks from a pair of profiles 20x20 mm, and one 40 x 20 mm. The pipes must be welded to the nuts.
Then, from a strip 40 mm wide, you need to cut 2 pieces 50 mm long. In the center, closer to the edges, we drill a hole with an 11 mm drill.
These plates will serve to fasten the grinder into the standard holes used to attach the handle. In some tools, these holes can be made for M8 bolts, which will need to be taken into account. For reliability, the M10 40 mm clamping bolts must be equipped with nuts. The bolts are screwed into the gearbox through the plates and tightened with nuts.
Now, stepping back a little from the fastening of the plates, the previously made workpiece from a 20x20 profile with a length of 160 mm is boiled down. A plug is welded onto its free end from the same strip as the mount for the grinder. A hole is drilled on the protruding ear of the plate, and an M10 nut is welded onto it. To strengthen the structure, an additional steel strip 160 mm long, also sawn at 45 degrees, must be welded onto the side of the profile.
After painting the parts, we assemble the carriage. To do this, you will need M10 hex screws 75 mm long. It is necessary to tighten the 20 x 20 mm profile pipe blanks together. At the same time, a pie is formed between them: washer, bearing, washer, spacer, washer, bearing, washer. By repeating this 7 more times, the result is a finished carriage.
Assembling the mount for the grinder.
On the table, install the guide and roller carriage. Its height is adjusted by lining it with wooden blocks. The tool is attached to the edge of the table. The workpieces for cutting are pressed with a pair of metalwork clamps. For convenience, you can carry out cutting in several passes, each time adding the depth of the cut.
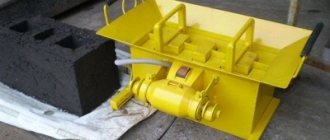
Homemade cutting machine from a grinder, ready for work.
The machine makes smooth and precise cuts.
The result is a convenient cutting machine for metal.
We also recommend watching a video that shows the process of making a cutting machine from an angle grinder and testing it.
Option 2 - how to quickly and easily make a pendulum saw
If you have a welding machine and consumables, you can make a stationary machine from an angle grinder in a matter of hours. Moreover, you don’t need to buy anything for this, since the necessary tubes, fittings and profiles can be found in a garage or a pile of scrap metal. To build a simple cutting machine using an angle grinder as the main tool, you will need to use the following parts:
- Metal profiles measuring 150-200 mm
- Sleeve 10-15 cm long
- Hairpin 20 cm long and 8-10 mm in diameter
- Washers
- Metal corner
- A sheet of metal 2-3 mm thick, which will act as a base
So, to make a simple homemade product you will need to perform the following steps:
Cut the stud to the required length, then place the sleeve inside (it should move freely along the stud), and tighten the nuts onto the ends of the protruding stud. Tighten two nuts on both sides, since the second will act as a locknut. The nuts should not be screwed in completely, they should not come into contact with the sleeve. The resulting structure should be welded to a steel sheet
In this case, it is important to grab the nuts, and the sleeve must remain mobile, that is, move freely. At the next stage, it is necessary to make fastenings for the angle grinder. To do this, you will need metal profiles, as well as washers that will play the role of brackets. Cut to the required length (it all depends on the tool used, but for a low-power grinder, the profile length is 15-20 cm). Weld washers to the ends of the profiles
It is recommended to use at least 2 mounts for an angle grinder, but three are better. The angle grinder has threaded holes for connecting the handle. We use these holes to attach the tool to the movable base using pre-prepared brackets. First, the brackets are attached to the tool using bolted connections of the appropriate size, and then the reverse ends of the profiles are welded to the sleeve. As a result, we get a ready-made machine that can be produced literally within an hour
Weld washers to the ends of the profiles. It is recommended to use at least 2 mounts for an angle grinder, but three are better. The angle grinder has threaded holes for connecting the handle. We use these holes to attach the tool to the movable base using pre-prepared brackets. First, the brackets are attached to the tool using bolted connections of the appropriate size, and then the reverse ends of the profiles are welded to the sleeve. As a result, we get a ready-made machine that can be produced literally within an hour
The photo below shows the design of a homemade machine made from a grinder with a detailed description of the necessary materials. Using the instructions, and for some, a diagram is enough to make a homemade cutting machine
It is important to take into account that a casing for an angle grinder must be provided, otherwise the risk of serious injury increases. It is strictly prohibited to operate the tool without protective clothing, not only on a person, but also on the device itself.
The simplest device is ready for use. The angle in the machine design is used as a guide for centering cutting materials. You also need to make a straight hole in the iron sheet, into which part of the disk will “go” when sawing workpieces.
What exactly are we talking about?
There are dozens of traditional designs of units for precise cutting of sheet, roll and long materials, not counting lasers, etc. from the age of high technology. We will further consider machines with a swinging working module and a round rotating cutting element - an abrasive or saw blade. Such cutting machines are called pendulum. They are the most versatile (including suitable for broaching - making longitudinal cuts of limited length) and can be done independently in a shed and garage workshop. When they say “cutting machine,” in the vast majority of cases they mean a pendulum cut grinder.
Motor or angle grinder?
This refers to the machine drive - separate or combined in a monoblock with a working (cutting) element and a power transmission to it. A separate motor has the advantage that the swinging part of the unit - the rocker (pendulum, rocker arm) can be made properly balanced, which greatly simplifies the work on the machine and increases its productivity; the latter depends relatively weakly on the cutting resistance of the material
In addition, the entire machine can be made suitable for intensive round-shift work, which can be important for those who earn income with hands that grow in the right place and a head that works as it should. An angle grinder (grinder), as you know, can work continuously for 20-60 minutes
(depending on the model), and then forced technical downtime to cool down the instrument. But for occasional use, an angle grinder has a number of advantages:
- A fairly durable and accurate cutting machine from a grinder can be made without turning parts and with a minimum of welding work or without it at all, see below.
- The basic tool remains suitable for manual work outside the machine.
- Power supply – single-phase 220 V from a household outlet.
- Starting devices and protective grounding are not required, because Only angle grinders with double insulation are widely sold.
- The external characteristic of the commutator electric motor of an angle grinder is softer than that of an asynchronous electric motor with a squirrel-cage rotor, which saves motor power and electricity consumption. In most cases (except for cutting thick, strong and/or viscous materials), we can assume that an 800 W electrical angle grinder is equivalent to an asynchronous motor with 1.2 kW on the shaft (see below), and a 1300 W angle grinder is equivalent to a separate 2.0 kW motor. 2 kW.
- Cutting machines made from angle grinders are lighter, more compact and transportable than those with a separate drive.
- Inexpensive angle grinders are not equipped with speed controllers, but a regular speed controller for a drill is suitable for them (no more than $20; usually $5 - $6). A “frequency generator” for an asynchronous motor up to 2.5 kW costs from $50.
About speed control
Why adjust the disk speed? In order not to exceed the maximum linear speed of the edge and/or rotation speed indicated on it. Otherwise, the disc may not rupture, but its performance will drop significantly, wear will increase, and the quality of the cut will deteriorate. The nominal rotation speeds of asynchronous motors 2800-2850 rpm allow the use of conventional disks with a diameter of up to 350-400 mm or more, which gives a cutting depth of at least 150 mm. The grinder spindle rotates much faster (from 6000 rpm), and placing a regular disk with a diameter of more than 160 mm on it is dangerous. The cutting depth reaches 50-60 mm, and the high-speed disc is expensive and wears out quickly. Installing a speed controller solves the problem. Productivity and cut quality do not suffer, because determined by the linear speed of rotation along the cutting edge.
About the name
An angle grinder sounds “technically”, but in fact it is inaccurate, because... The grinder does a lot more cutting than grinding. The “angle drill” is even worse, because... to drill – to drill, bore, for which an angle grinder is generally unsuitable. An angle grinder is a tracing paper from English. "angle grinder machine". But the English word to grind is much broader in meaning than all types of abrasive processing. For example, a meat grinder is a meat grinder. “To grind” does not have an exact Russian analogue; in meaning it is something like “shred into shreds along the back streets.” In general, the colloquial “Bulgarian” is terminologically incorrect, but it is short enough and it is clear what it is.
Miter saw from grinder and bicycle parts
Hello, dear readers and DIYers! As usual, almost all craftsmen who have a workshop always have a desire to expand the fleet of their machines. But not always, and not everyone has the appropriate financial capabilities for this.
In this article, the author of the YouTube channel “Workshop Diy” will tell you how he made a very high-quality miter saw from almost trash. By and large, you only need a grinder and some steel parts.
This homemade product is quite simple to make and does not require welding or turning. A similar machine was described in one of the articles earlier, but it is very difficult to replicate and requires welding.
Materials. — A handle from a children’s bicycle — A piece of table top — A profile pipe — A steel strip — A perforated steel sheet — PVC pipe — Machine oil — Spray paints — Self-tapping screws, screws, nuts, washers.
Tools used by the author. — Grinder, cutting disc — Screwdriver — Tap — Gaffer grip, wrench — Vise, hammer, screwdriver — Marker, square, tape measure, ruler, core. Manufacturing process. So, the author’s children grew up, and the adjustable handle had to be removed from the children’s bicycle. At that moment he had the idea to create a good thing out of it.
The upper handles are sawed off with a grinder, and the jumper is also removed. The place where the jumper is attached is cleaned with a flap disc. Fixes the strip in a vice and begins to bend. But the vice broke. The two resulting hinge blanks are fixed together with a geyfer grip, and a hole for the axle is drilled. Next, he made just such a part, the grinder itself will be attached to it. The marking of its holes is transferred to a U-shaped workpiece.
Drills holes, lubricates them with machine oil, and cuts threads into them. I cut four bushings from PVC water pipe. I made longitudinal slots in them and bent the steel strips like clamping clamps.
The author will use a piece of tabletop as a base for the machine. All the necessary parts are ready. He made two simple supports for the machine from a profile pipe. Now he screws them to the table from the back side.
Next, he assembles the elements of the movable frame.
Plastic bushings are put on the fixed tubes, and clamps are installed on top. The guides are lubricated with grease and slide into place. Now you need to make a working slot for the disk in the table.
The master screws a stop made of a profile pipe perpendicular to the slot.
This is how conveniently and easily two steel blanks are cut at right angles. You can also cut wide sheets of plywood or boards with the same precision. This machine copes even with large-sized workpieces without problems. The author shows this using the example of ordinary brick. This is such a simple, functional, and aesthetic machine that the master created. In terms of improvements - only adding an adjustable stop on the table itself. Then using this machine it will be possible to cut parts at any angle. If the machine will be used quite often and not disassembled, then you can install two stoppers on the rear edges of the movable frame.
The author's video can be found here.
Source
Become the author of the site, publish your own articles, descriptions of homemade products and pay for the text. Read more here.
How to make an orbital sander based on an angle grinder
Hello, dear readers and DIYers! One of the important processes in the manufacture of various homemade products is grinding. To quickly process parts, various machines are used, including orbital ones.
In this article, the author of the YouTube channel “Master Class 61” will tell you how you can make a simple orbital sander, the heart of which will be an ordinary grinder (preferably with adjustable speed).
This project is fairly easy to make and can be replicated with minimal tools.
Tools used by the author. — Screwdriver — Self-centering drills — Wood drills with countersinks — F-clamps — Polycarbonate safety glasses — Grinder — Disc sander — Mini drilling machine — Circular saw, miter saw — Screwdriver with bit set, open-end wrenches — Tape measure, combination 3 in 1 ruler, pencil.
Materials needed for homemade products. — Thick 25 mm sheet plywood — Mounting steel angles, M8 bolts, washers, wood screws with a press washer — Set of sanding discs with Velcro. Manufacturing process. First of all, the author cuts out the base for the machine from thick plywood (20-25 mm). Also, a piece of chipboard or a wide board is quite suitable for this.
The support table for parts is made of the same material, while its depth is 100 mm. Then the protective casing and additional handle are removed from a regular “125” angle grinder. These mounting steel corners will serve as holders. They are screwed to the angle grinder with M8 bolts on both sides of the gearbox housing. The factory handle holes are perfect for this. Now the entire structure is screwed to the base. The author prepared pilot holes using a self-centering drill and screwed the corner flanges with self-tapping screws and a press washer. Now the table is screwed to the stands. Its upper part should be at the level of the grinder shaft. The table is pressed to the base with a clamp and screwed to it with self-tapping screws from the bottom side. When working with similar machines, you should always use safety glasses and other personal protective equipment. Follow safety precautions!
This machine is convenient for processing corners of parts, leveling planes, and rounding edges. If desired, you can make a table with an adjustable tilt angle.
Good mood, good health, and interesting ideas to everyone!
The author's video can be found here.
Source
Become the author of the site, publish your own articles, descriptions of homemade products and pay for the text. Read more here.
Features of using an angle grinder
metal cutting
If you also use attachments with this tool, you can expand the number of options for its use. In particular, using this tool with attachments, you can perform high-quality grinding of the base of workpieces. They will be cleared of foreign inclusions. Attachments for grinders can be purchased at the store. But if you do not want to pay money, then you can make them yourself.
In some cases, this tool is used as a wall chaser. With its help, grooves are created for laying pipes and electrical wires. To use an angle grinder in this capacity, you will have to perform some manipulations and increase the standard width of the protective casing. In addition, you will need to make a support plate.
This tool can be used with one disk or several at once. If the grinder is used with two disks, then it is necessary to make some changes to the attachment point of this tool. After this, the grinder can be used in standard mode.
It often happens that during repair work there is a need to clean the base of parts that are difficult to access. In such cases, craftsmen most often resort to using a homemade device for an angle grinder in the form of a special attachment, thanks to which a small disk can be carried beyond the dimensions of the angle grinder.
In this case, the rotation will be transmitted using a special belt drive from the main drive. Using this design, materials cannot be cut. However, scale can be removed from the surface of materials without any problems. It often occurs on the surface of welds.
Currently, the market offers a large number of attachments for tools such as an angle grinder. Their use allows you to significantly expand the options for using this tool. If we talk about the most commonly used attachments for grinders, we can highlight the following:
- a device for sanding the base and removing the paint layer from the surfaces of materials;
- beds;
- protractors.
Materials and tools to make attachments for an angle grinder
The cost of the devices is not very high, so everyone can afford them. There are also no difficulties in finding these attachments. However, despite all this, many people still decide to make attachments for an angle grinder with their own hands.
If you decide to make attachments for this tool yourself, then before you begin, you need to prepare the following tools:
- An electric drill, it is advisable to purchase a set of drills in addition to it;
- It is advisable to choose discs with a diameter of 125 mm.
- Wooden bars.
- Metal corner.
- Duralumin steel plate.
- Self-tapping screws.
Homemade casing with increased safety for a 150mm disc for an angle grinder for a 125mm disc
Homemade protective casing
for
the grinder
under the Diamond cup. Dust extraction angle grinder-Vacuum cleaner. Protective dust removal.
Using the same method, we make a pipe for the vacuum cleaner hose. Carefully bend the edges of the casing, one strip at a time, inward to secure the side wall.
The wall can be made from any material, the nettle is made from narrow tin. It is natural to give the product a more aesthetic shape, process the joints, and paint it. But then we move away from the main concept - the most economical!
How to choose a saw for home use
In order for the purchase to please you, and not just the sales consultant, you first need to decide on your needs and capabilities in the area
- material;
- the range of rolled products you are going to process;
- material;
- thickness ;
- Do I need to cut at an angle?
- estimated volumes of work;
- per shift;
- per month;
- power supply parameters (voltage, phase, power);
- purchase budget.
https://youtube.com/watch?v=aZ_23jAtk5s
It is best to write this down on a piece of paper or in a file and, being armed, engage in a fight with the seller, who will tell you the key characteristics of the device being purchased:
Cutting depth. For household use, 60-70 mm is enough. Maintaining stable speed
Particularly important when cutting profiles and pipes. Smooth start. This feature not only saves the life of the machine, but also protects the supply network from voltage surges. Overload control
If there is a sharp increase in cutting resistance, the system will turn off until the cause is eliminated.
If you see that you need to cut a few pieces of pipe or profile once a week, there is no need to spend money on professional equipment. In this case, you can get by with a jigsaw or an angle grinder.
Self-refinement to a cutting machine
The simplest homemade machine is a machine made from a small angle grinder. The work will be accompanied by a minimum of costs, and manipulations will take a few hours. The exit structure will be a long metal pipe that serves as a handle and frame.
A metal transverse strip with two holes for fastening the tool is welded to one of the ends. On the same side, the pipe is fixed to a piece of angle on a movable shaft. The first one can be fixed to the desktop or to the floor in the workroom. If you are faced with the question of what can be made from an angle grinder, you can use a cutting machine using the described algorithm. According to it, on the opposite side of the fastening it is necessary to fix a spring, which will ensure the return of the structure to its original position. After completing this stage, you can use your homemade product. You just need to install the device correctly.
This version of the machine is the simplest solution for metal processing, while complex work will require precision, so the design for solving such problems must be made more stable, which means the work will have to be approached more thoroughly.
Safety precautions
While working on the cutting machine (as well as during its operation in the future), safety precautions should be strictly observed. Be sure to use a protective mask or goggles, and position the angle grinder in such a way that the sheaf of sparks is directed “away from you.” The high fire hazard of the equipment requires work to be carried out in a ventilated area and away from fuels and lubricants. During welding activities, you should also use a protective mask, thick leather gloves, closed shoes and protective overalls.
When working with a cutting machine, do not try to speed up the process by applying excessive pressure on the tool. At best, such a rush can result in a torn disk and a jammed clamp nut.
When using a welding machine, ensure good grounding and avoid operating equipment with exposed cable sections. Remember that welding outdoors in rainy weather is prohibited. As for the operation of the cutting machine, when arranging a button to turn it on, protect yourself by installing a simple decoupling with a 12-volt power relay. To do this, you can make a pedal with any non-latching switch (for example, a doorbell button) and use any solid-state relay designed for switching currents of at least 10A. A battery or accumulator with a voltage of 5 to 24 V is used as a power source.
A cutting machine made from an angle grinder is a convenient tool that can be easily made if you have the skills to work with electric welding and metalworking tools. A pendulum circular saw made in just one day will save time in the future and allow you to perform metalwork and welding work accurately and accurately.
The device of a pendulum saw from a grinder
A pendulum saw made from an angle grinder is available for assembly at home and does not require expensive materials or special qualifications. The cutting machine has a simple design and consists of several components:
- bed;
- pendulum;
- mount for angle grinder.
The bed is a steel frame welded from profile pipes, with a platform made of sheet metal with a thickness of at least 3 mm. A bracket is attached to this plate, on which the pendulum saw hinge is mounted, as well as a stop for holding the workpiece. By the way, there can be several such stops: it is convenient when one element allows you to make a perpendicular cut, and the other makes it possible to cut the material at the required angle. The most perfect stop is a rotary device with a protractor, with the help of which any angle between the part and the cutting disc is set. An important detail: where the saw touches the platform, a cut is made in the tabletop; its width should be equal to twice the thickness of the cutting wheel, and its length should correspond to the diameter.
The standard design consists of a frame, a pendulum and a mount for an angle grinder
The pendulum of the cutting machine is a T-shaped part made of a rectangular metal profile. On one side, this unit is attached with a movable connection to the frame bracket, and on the other, a mount for an angle grinder is attached to it. The mobility of the pendulum saw hinge is provided by rolling bearings or bushings, and the return of the tool to its original position is provided by a flexible element (rubber band or spring).
The angle grinder mount is a console with one or two brackets connected to the pendulum. The angle grinder is attached to one of them with bolts. For this purpose, threaded holes are provided in the gearbox housing for attaching the handle. The second bracket is a regular clamp (stepladder) that holds the cutting tool by the body.
Types of devices, their advantages and disadvantages
There are two types of designs of cutting machines, differing in the location of the grinder, which can be made at home.
The first installation is a frame with an angle grinder rigidly fixed underneath it. Only the cutting disc is visible on the working surface, which fits freely into the table slot. Cutting a metal profile or sheet in this case is completely identical to cutting wooden blanks using a circular saw. Despite the very simple design, this scheme is not particularly popular. Those who have made such a device note that it is inconvenient to use due to the need to move the workpiece. This significantly reduces the accuracy of the work and makes the process unsafe. The only advantage of a machine with a bottom angle grinder is the ability to quickly cut thin metal sheets.
A cutting machine with a lower angle grinder can be used both for cutting metal and as a circular saw
The second scheme, in which the part remains stationary and the cutting wheel itself moves, is more convenient. The so-called pendulum saw, placed above the tabletop, allows you to cut the workpiece exactly at the required angle, and it becomes possible to make the required number of parts of the same type. Due to the location of the grinder on top, cutting workpieces does not require effort, and operation of the unit becomes simple and safe. The undoubted advantages of the design include the ability to quickly dismantle the grinder for traditional use. As for the disadvantages of this method, the weak link can be considered the hinge joint, which complicates the design of the machine.
A machine for cutting metal with an upper angle grinder has a more convenient design and makes it possible to cut workpieces at the desired angle