One of the most important advantages of cast iron baths is their durability. Such plumbing can serve faithfully for several decades, maintaining its technical characteristics. However, over time, the bath may lose its original whiteness.
Agree, not everyone is ready to get rid of high-quality cast iron in favor of plastic or steel counterparts. An alternative solution is to restore the bathtub with liquid acrylic at home. The work is simple, but requires compliance with some nuances.
We will tell you how to choose high-quality acrylic for a bathtub, identify manufacturers you can trust, and also describe in detail the sequence of updating old plumbing fixtures. The information provided will help home craftsmen restore the former gloss of the coating and extend the service life of the font.
Features of the procedure
Restoration using the liquid method can be carried out on cast iron, steel, acrylic bathtubs without large through cracks.
The process takes relatively little time, but requires proper preparation. After complete hardening, a layer of 3 to 5 mm is formed, which can hide all imperfections and last for a decent number of years.
The advantages of such restoration are obvious:
- the bathtub bowl remains in place, no transportation or dismantling is required;
- the protective and decorative properties of acrylic are restored in full;
- You can entrust it to a professional or do it yourself;
- it is possible to repeat the application after some time;
- many compositions can be tinted, it is easy to change the color of the bath to any desired one;
- the surface is leveled, cracks are filled, preventing the growth of mold and mildew and further cracking.
Flaws:
- some formulations have an unpleasant odor and can cause chemical burns if used incorrectly;
- It takes at least one and a half days to dry, ideally 2-3, but different options are possible depending on the concentration of the composition;
- caring for a new surface should be carried out only with special products for acrylic, which are not always cheap.
At the same time, repairs are much more cost-effective than buying a new high-quality bathtub. In addition, the work requires tools that not everyone has. Their purchase will be justified only when renovating expensive bathtubs. In other cases, it is easier to entrust the procedure to a professional.
Advantages of the method
For some 10-15 years, restoration of old cast iron bathtubs was carried out exclusively using polyester enamel, which provided a short-lived, long-drying and fragile coating. Now liquid acrylic, a composition unique in its properties, is used to renew the enamel layer.
It is a thick, but flowable and elastic compound consisting of 2 components: a base and a hardener. Liquid acrylic is applied to the surface of the bathtub by pouring or using a roller, and it dries for 2-5 days. Restoring a washing container using this method has the following advantages:
- Smoothness and appearance of the coating. Acrylic coating is smoother, shiny, even and white than factory enamel. It has practically no pores, so it has a “self-cleaning” effect, that is, it repels dirt, remaining clean for a long time.
- Durability. The service life of an acrylic coating is 10-15 years, if the recommendations for care and use of the product are followed, which is 2 times longer than that of epoxy enamel.
- Wear resistance. If enamel restoration is carried out using the pouring method, the acrylic layer is more than 6 mm thick, so the coating lasts a long time.
- Safety. Liquid acrylic does not have a pungent odor and does not emit toxic fumes, so you can work with it even if there are children in the room.
- Fast drying. Unlike epoxy enamel, acrylic coating takes only 3-5 days to dry.
- Variety of colors. If you add a tinting paste to the acrylic compound, you can get a mixture of any shade that suits the interior of the room.
Required Tools
Before you go for the liquid acrylic itself, you will need to inspect your supplies for the rest of what you need. In this way, you will be able to avoid a second visit to the store by purchasing everything on the list in one go.
The toolkit will include:
- sandpaper/sander/drill with a sanding disc with appropriate pads. The sandpaper must be on a waterproof fabric fastener. With its help, the old coating will be cleaned. You will need at least 5 sheets. For cast iron, steel and secondary restoration of any bath – grades P60, P40. For acrylic – P80, P100. Secondary restoration is recommended to be carried out only with the help of equipment, since a thicker layer will have to be removed;
- degreaser. Solvents such as White Spirit (647), 646 and any similar products are suitable. Some people opt for soda, but this is not a very good option for ensuring good adhesion of the surface to the composition;
- a screwdriver or screwdrivers with a straight and Phillips end, a low basin and rags. Will be needed to remove the drain;
- covering film, masking or fastening tape. To protect walls, taps and floors. The width of the tape is from 5 cm or more;
- clean spatula 10-15 cm wide. Plastic or rubber with a comfortable handle for applying the solution;
- spatula or construction mixer for mixing the solution. A wooden stick or a narrow plastic spatula about 40 cm long is enough. But some people like to use a mixer or a mixer attachment on a hammer drill;
- bath putty;
- flashlight.
You will also need a knife or scissors on hand to cut the tape. It is convenient to have a stool or chair nearby. The work is carried out at a low height from the floor, so bending down each time or picking it up from a chair is a personal choice of convenience for everyone. It’s a good idea to stock up on a hair dryer to blow away dust and speed up the drying of the bowl after washing.
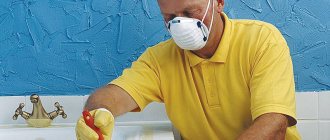
Be sure to have protective equipment: overalls or a jacket with long arms complete with trousers, rubber gloves, a respirator, goggles.
All this will protect a person from an aggressive solution. It is highly advisable to wear a headdress to prevent hair from getting onto the surface during processing.
About safety precautions
If you plan to cover a bathtub with acrylic at home, follow these safety precautions:
- Carry out the work in thick clothes, without hanging ends, let them be taken from household items.
- Shoes must be closed type. For example, operations in shale are not recommended.
- A hat, protective screen and rubber gloves must be used during the work.
- The hand tool must have a handle firmly attached to the base.
- Before using the grinder, you should check the integrity of the wires and the presence of cracks, chips and other defects in the abrasive wheel.
Buying acrylic
On the shelves of construction and plumbing stores you can find different brands of liquid acrylic. The most reliable are the following compositions:
Plastol. Self-leveling acrylic
Stakryl Ecolor
Ecovanna
Standard
YarLi
These brands have proven themselves highly among professional workers and have been tested for years.
For faster work, you should take more expensive quick-drying options that harden in 24 hours. But long-drying acrylic lays down more firmly, so it is always preferable.
To calculate the required amount, you will need to measure the size of the bath bowl. For 1.5 m you will need about 3-3.5 kg of composition, that is, 1-2 cans, depending on the volume of production.
If you are planning a colored bath, you will need a color that is compatible with acrylic (indicated on the package). The number of packages is selected according to the desired shade intensity.
Common customer reviews
Owners of acrylic bathtubs often leave reviews online on various resources and share their impressions with their acquaintances and friends. Moreover, among them there are both satisfied and disappointed with the purchase.
The first category of users is of interest to potential buyers precisely because of the mention of a model that has proven itself worthy during operation. It’s especially gratifying when several people spoke positively about the option they liked.
The second category is more interesting - it is negative reviews that allow you to get to know more closely the problem areas of a particular manufacturer’s bathtub. Thus, users targeting cheap products are interested in the stability of the front layer. More precisely, the speed of its abrasion.
It is no longer a secret that cheaper versions of acrylic bowls are made from plastic, which is covered with a reinforcing layer on the bottom and a 2 or 3 mm layer of acrylic on top. Moreover, in some Chinese products its thickness can be 0.5 mm.
A high-quality product will have only 2 layers - reinforcement on the bottom, and acrylic on top about 5 mm or thicker. You need to check this personally by looking at the cut
When studying reviews, you need to be careful - often competitors pay for negativity towards bona fide companies.
Therefore, if on a thematic forum someone furiously argues that all acrylic bathtubs are bad, except for products from an unknown company, then such interlocutors cannot be trusted.
Some owners say that bathing in a polymer container is akin to bathing in a plastic basin. This feeling occurs when the frame is insufficiently rigid or improperly installed.
Preparatory work
The restoration procedure begins with preparing the bathroom. All moving objects are taken out of it, the baseboards are removed from the sides, the ventilation grille, stationary pieces of furniture, faucet and floors are covered with film.
In this way, the bathroom is protected from excess dust and falling elements during operation, and the objects themselves will remain unstained. It is advisable to tilt the tap and shower head as far as possible towards the wall and secure it with tape. Next, they begin to clean the surface.
Bowls with deep cracks will need to be sealed with a special putty. After they dry, they move on to other manipulations.
Stripping
Use sandpaper or a sanding device to sand the surface.
If the bathroom has been previously restored, the coating is completely removed. If the treatment is primary, moderate cleaning is sufficient to improve adhesion. Moderation of treatment is determined by touch and color. The walls should get rid of yellowness, lighten, and become slightly rough. A perfectly smooth surface will not work, nor will deep scratches.
It is faster and more convenient to carry out the procedure with the help of devices. This way it is easier to form the correct curves of the bowl and evenly remove the old layer. Finally, large debris is collected with a vacuum cleaner or manually using a sponge and dustpan.
Washing
After cleaning with sandpaper, you will need to remove the resulting dust. The bathtub itself, the surrounding tiles, and any remaining objects are washed with hot water from the shower head. The film can be carefully removed, rolled up and replaced with a new one. This makes it easier and faster to collect dust for disposal.
Experts recommend washing all surfaces with liquid dishwashing gel or sanitary ware.
Drying and dismantling the drain
After washing, dry the bathtub with a hair dryer or wipe with a cloth.
In the case of fabric, it is extremely important to use a lint-free flannel or microfiber so that particles do not remain on the sides of the bowl. Natural drying does not guarantee the absence of dust, so a hair dryer is the optimal solution. Next, you need to remove the drain so as not to clog it with acrylic. Turn off the water, unscrew the clamps using screwdrivers, and carefully remove them. The water is poured into a prepared basin and collected with a rag.
The basin is drained and placed back under the hole, which is dried again. You can only use film, but a container is preferable for collecting dripping acrylic drops.
Degreasing
A solvent or other selected composition is applied to a lint-free rag or sponge. Wipe the entire surface of the bath. Leave until completely dry or use a hair dryer. Can be repeated 2-3 times.
How to do without a sealant gun?
To do this you need:
- Carefully remove the spout from the bottle. Direct the container itself in the opposite direction (there should be no people there).
- Cut off the end of the tube using a sharp knife.
- Place the spout in its original place, having first removed the cap from it.
- Insert the handle of a regular plumbing hammer into the bottom of the tube.
Interesting materials:
How to find a page in a contact by id? How to find the administrator line? How to find pike perch on the river? How to find pike perch in late fall? How to find your double from a photo? How to find your Facebook account? How to find your email address on your phone? How to find your electronic train ticket? How to find your electronic PTS? How to find your photos?
Working with liquid acrylic
When the preparation is complete, you can move on to acrylic.
Preparation of the solution
Put clean gloves on your hands and carefully open the lid of the composition so that dust and dirt do not get in. One-component acrylic is thoroughly mixed, two-component acrylic is combined with a hardener and also mixed until smooth.
Stirring the composition continues for at least 5 minutes. It is necessary to collect all drops from the walls of the container so that the acrylic hardens evenly after application.
Before pouring, the bath solution is allowed to stand for 5-7 minutes. It is important not to overcook the mixture, otherwise it will be impossible to distribute the cured acrylic.
When tinting acrylic, the toner is added at the mixing stage, 3 minutes after the hardener.
Application to the bath
Acrylic is poured evenly over the top of the bowl walls. Next, use a spatula to help distribute the liquid down to the drain. When the entire bath is covered, zigzag across the bottom. Soft rubber spatulas leave the least streaks. Leave the mixture for 5 minutes so that it settles and the excess flows into the hole.
After the specified interval, you need to check the coating for defects of “unpainted paint”. To do this, turn off the lights and carefully inspect the bathtub with a flashlight for smudges, drops, and bare areas. All imperfections are smoothed out with a spatula.
If air bubbles form on the surface, it is good to remove them with a hairdryer. At low speed they drive near the surface with quick movements for several seconds.
The covered bath is left for the time specified by the manufacturer, STRICTLY with the door closed.
If possible, it is worth waiting a little longer than the prescribed period, since each apartment has its own microclimate, and this error must be taken into account.
Before first use, install the drain back, turn on the water, and check for leaks. You can lightly wash the bowl with a special mild detergent.
Bathtub restoration with epoxy enamel
The technology of restoring a bathtub coating using epoxy enamel cannot be called new, since it has been widely used for more than thirty years. The restoration process is somewhat reminiscent of painting, but the coating composition is significantly different from conventional paint.
There are two types of compositions on sale - professional, used by craftsmen working with special tools, and enamel, intended for independent work.
The mixtures differ in their consistency. Professional ones have a lower density, that is, they are liquid, since they are applied to surfaces in several layers using spray guns. This process is quite long, since each layer must dry thoroughly before applying the next one.
Do-it-yourself materials are thicker, so they are somewhat easier to work with.
In addition to the above options, you can find a reducing agent in aerosol cans on sale. These compounds are easy and quick to apply, but, unfortunately, the material is not particularly durable, and its service life is no more than one year.
"Epoksin" - enamel for restoring bathtubs.
Epoxy compositions, just like acrylic enamels, are two-component mixtures. For independent restoration work, they most often purchase “Epoksin” and “Epovin” - domestically produced kits. These compounds take quite a long time to harden, but are affordable.
"Reflex 50" for restoration of bathtub coverings
Another, more expensive version of the composition for the restoration of bathtubs is the development of the Finnish one, which is familiar to many for the high quality of its products. To restore bathtubs, this manufacturer presents the composition “Reflex 50”.
Features of working with epoxy enamel
The two-component epoxy composition has specific properties that differ significantly from the characteristics of acrylic materials. Therefore, they should be known and taken into account even at the stage of acquiring everything you need.
- It is very important to choose the right paint color and take into account that it should differ from the color of the old coating by more than one or two tones. If the bathtub is, for example, blue in color, and it is planned to give it a snow-white color, all operations, including preparation, will have to be performed several times until the old coating is completely covered. Otherwise, the coloring will simply look sloppy and uneven.
- Another point that must be taken into account when choosing epoxy compounds is that such a two-component mixture, after combining the two components, must be used for a fairly limited period of time. Therefore, when purchasing paint, you must carefully read the instructions from the manufacturer. The period of setting and beginning of hardening can vary from 30 minutes to four hours. Once the mixture begins to thicken, it will no longer lie evenly on the surface of the bath. Taking into account this property of the material and the existing experience in working with the epoxy mixture, it is necessary to mix such an amount that is guaranteed to be produced within the time specified by the manufacturer.
Instructions for using a specific composition and its characteristics are located on the original packaging.
- Different compositions have different drying times for each layer. For example, the first layer of Reflex 50 sets within the first hour after application to the surface if the room temperature is +23 degrees. However, all subsequent layers are applied only eight hours after applying the previous one.
Advantages and disadvantages of epoxy enamel for bathtubs
When choosing this restoration option, you need to have an idea of its “pros” and “cons.”
Its advantages include the following:
- Affordable cost of compositions, compared to analogues.
- The process of applying epoxy enamels is quite simple, so even an inexperienced craftsman can carry out the work by studying the instructions from the manufacturer located on the packaging.
- Due to the thickness and high adhesion of the enamel, it creates a uniform coating and fills cracks, shallow chips and pores of the base well.
- Resistance of the coating to mechanical, chemical and biological influences.
- Long service life of the coating. With intensive use of the bathtub, the epoxy enamel layer will last five to seven years.
- For self-application, you can find compositions on sale that set within 4 hours after mixing, which gives more time for work. If you decide to use an epoxy composition to restore the bathtub, you must choose this particular enamel option.
- This material is suitable for the restoration of both steel and cast iron bathtubs.
The disadvantages of epoxy-based paint include the following:
- A bathtub coated with epoxy enamel is ready for use only 7–8 days after applying the last layer of coating.
- After painting a container with this composition, it is not recommended to enter the bathroom for two or three days, so as not to raise dust in the room, which will settle on the undried coating.
- The longer the applied layer of enamel dries, the stronger the coating becomes and more resistant to various influences. Therefore, it is best to paint before leaving for the country or on vacation. In this case, the paint layer will have the opportunity to dry well and harden.
- The coating may turn yellow after a few years. Therefore, it is better to choose not white, but a colored version of the enamel, on which the color change will not be so noticeable.
- An unpleasant smell of paint, which, however, will disappear without a trace after a while.
Carrying out restoration work independently
Tools for working with epoxy enamel
The set of tools for working with epoxy-based composition is somewhat different from the kit for preparing and applying acrylic enamel. So, for the enameling process you will need:
- Professional craftsmen most often use a spray gun, and for self-application they use a roller and a flute brush.
- Tweezers for removing hairs from brushes and rollers.
In addition, you will need masking tape, a knife, newspapers or plastic film to protect surfaces from paint, as well as a degreaser - acetone or white spirit.
A few words need to be said about the peculiarities of working with tools when applying the epoxy mixture:
- Using a spray gun will ensure even coverage of the enamel on the surface. However, it should only be used if you have experience with it.
- If you use a roller for painting, you must have a brush on hand, which is used to level the paint in areas that are difficult for the roller to reach.
- It is best to pour a little paint onto the bottom of the bathtub, and then use a roller to distribute it over the walls and sides. Add paint to the bottom as needed.
- It is not recommended to use only a brush, as it will not provide even coverage. In addition, brush hairs will remain on the surface of the paint.
Restoration of a bathtub with epoxy composition
Now, knowing the basic nuances of working with epoxy enamel, you can move on to considering the process of updating the bathtub.
The appearance of the bathtub before preparing it for painting.
Preparing a bathtub for painting with this composition is no different from similar activities when using acrylic paint - this was discussed in detail above.
The process of applying epoxy enamel to an old coating is also somewhat similar to acrylic, but has some differences.
So, after the stage of preparation and degreasing of surfaces, they proceed to painting operations:
| Illustration | Brief description of the operations performed |
| In the example shown, Tikkurila Reaflex 50 paint was used to restore the bathtub. Mix the base composition with the hardener as specified by the manufacturer in the instructions. When mixing the two ingredients, we must not forget that the pot life of this paint is only 4 hours - this is not short, and there should be enough time for everything. However, it is better to be careful - do not combine the contents of the containers completely. The best option would be to take half of one and the other can. Mixing can be done in a plastic bucket that has been cleaned of used paint compounds. | |
| It is best to place the finished paint on the bottom of the bath - this will help you use it completely to the last drop. Another option, mentioned above, is to pour some of the paint into the bottom of the container, and then distribute it over the surfaces. Here, each master chooses the method that is more convenient for him in his work. In this case, a roller with a compact size was selected for painting, making it possible to dip it into a container of paint. If the roller is larger, you can use a special paint tray or pour paint directly into the bath. | |
| Painting begins from the walls of the bathtub, from the top, gradually descending to its bottom. It is very important to ensure that no smudges remain on the surfaces. If they appear, they must be picked up immediately, distributing the paint to nearby areas without allowing it to set. | |
| The color of the base may show through the first coat of paint applied. It will seem that the paint has applied unevenly - but there is no need to panic. When the bathtub is completely painted, you need to give it time - about two hours - for it to dry. In order for the junction of the paint color of the bathtub and the wall to be even, it is necessary to stick masking tape on the wall in advance, otherwise you will end up with a crooked border, as shown in this illustration. | |
| The second layer will overlap the first, and the coating will become more uniform. You can stop here, since even now the bathtub will differ significantly from its original state - both in appearance and in the smoothness of the walls. | |
| If you want to get a perfectly even color coating, then you should apply another, third layer of paint. However, this process can only be completed after a day, since the first two layers must set very well. After applying the third layer, the bathroom must be closed, preferably for a week, to allow the paint to dry completely. | |
| No earlier than seven days later, the fittings for the drainage system are installed in place. | |
| When finished, the bathtub will acquire a uniform white or other selected color, which will completely cover all the dark areas that appeared on the bathtub during its previous use. |
If there is no roller, the work can be done with a brush, starting from the sides, then moving to the walls and ending with the bottom of the container.
Painting a bathtub with a brush.
Using this tool, you must constantly monitor the hairs left on the surface, which should be immediately removed with tweezers.
Questions and answers
I want a colored bath. Will it be possible to make a bright shade?
The toner should not exceed 3% of the total volume of liquid acrylic (counted together with the solvent if there are two components). How saturated the color will be depends on the specific pigment. It is impossible to increase the volume of the color, as this will violate the properties of the composition.
How to spot fake acrylic?
Popular brands are sometimes actually counterfeited or diluted with solvents to increase sales volume. On originals, information is always printed on the covers or lasered. The information on the hardeners is written in marker. Fakes are supplied with stickers. The seals on the jars must be undamaged. Also, before purchasing, you should study the logos of popular brands and compare the quality of printing, the colors of the label and bottle elements, and the outlines on the packaging.
As can be seen from what has been described, restoring a bathtub with acrylic is not as difficult a procedure as it might seem at first glance. It’s quite comfortable to do all the manipulations yourself if you have the necessary equipment or you can rent it from friends. The work takes a moderate amount of time, but if done carefully, it will please the owner for many years to come.
What is the price?
How much it will ultimately cost to cover a bathtub with acrylic will depend on the artist who will do the work. What are we talking about?
The fact is that if you had your bathtub restored with acrylic by a master of his craft, it will cost from 2 to 4 thousand rubles. Prices vary and it all depends on where you live. For example, in Moscow, covering will cost from 2 thousand and above.
But there is one thing. If the coating is done by a good craftsman, it will last for many years. If we decided to save money, and the acrylic coating was done by a friend of ours who knows everything, then, most likely, the self-leveling acrylic will come off within a year. In this case, we will not save, but will pay several times more later.
Therefore, when talking about the cost of coverage, we must take into account not only how much we are paying today, but also how long the bathtub will last and for how long it will save us from a new restoration.
That is, they called a good master and today they paid him 4000, 10 years passed and 4000 remained and 4000 remained, everything is fine. Or they saved money, called a bad craftsman, paid him 1500, but after 10 years this one and a half thousand turned into 10 - 15 thousand (due to alterations).
And in this article you can read about choosing and installing an acrylic liner in the bathtub
In the case of restoring a bathtub with liquid acrylic, the rule applies 100% - the stingy pays twice.
Besides the work of the master, what else affects the cost? The cost is affected by the size of the bath itself. This is logical, this is the consumption and cost of the material.
And one moment. Perhaps we called a good master, bought a sufficient amount of acrylic, and the master did everything. That's it, the restoration of the bathtub with glass is completed. But a year later, you have to change the bath again and spend money again. What's wrong?
Perhaps the problem is us. If we violate the rules of operation in the bathroom, then most likely it will become unusable in a very short time. Such situations happen often; people still, out of inertia, treat a new acrylic bathtub like an old cast-iron one. Acrylic and cast iron are completely different materials and need to be handled differently. We need to change habits.
For example, in order not to spoil the acrylic coating of the bathtub, you cannot place hard iron objects, basins, or pots in it. Nothing will happen to a cast iron bathtub. Or, for example, we continue by inertia to soak the laundry, as we have always done. Or we bathe our dog in it after going outside.
That is, we continue to treat it like our old bathtub, but we already have a completely different bathtub, made from a completely different material. As a result, after a year the bath needs to be changed again, and money needs to be spent again.
Most likely, we will be disappointed not in our actions, but in the material from which the bathtub is made. He will be to blame, not us.
Types of waterproofing bathroom floors under tiles
The market for building materials that can effectively protect a bathroom from high humidity is divided into the following types:
- Coating materials.
- Pasting (roll) materials.
- Waterproof plaster.
- Waterproof paint.
- Impregnated insulation.
- Rubber-based mixtures.
Important! During the waterproofing process, special attention should be paid to seams, joints, and cracks. Their treatment is of great importance, since it is this area that is most often the source of fungal penetration.
Materials for waterproofing a bathroom under tiles are very diverse, let's figure out which is better
Materials for waterproofing a bathroom under tiles are very diverse, let's figure out which is better.
If we talk specifically about waterproofing the floor, then the first method is preferable. For floor treatment, liquid materials such as mastic will be more convenient to use. They simplify the work technology and also reduce material consumption. Additionally, it should be taken into account that the quality of such waterproofing will be higher than in other options.
If the ceiling height is maximum, and it is not desirable to raise the floor height, it is necessary to use various impregnations. They are special liquids that are applied to a damp concrete or cement floor, which are then absorbed into it, forming a film.
This film is the very waterproofing that will prevent moisture from penetrating into the surface. Often used to treat walls and floors. The quality of this waterproofing is very high, and the price does not lag behind it either.
Coating waterproofing
Coating materials are represented by a wide range of bitumen-based products. These include bitumen-rubber and bitumen-polymer materials. Another option is cement-based products (cement-polymer mastics). Acrylic-based compositions are used less frequently. There are many types of coating waterproofing. These include dry powders, granules, semi-dry pastes, and liquid materials.
Important! Based on its composition, this treatment is divided into one-component and two-component. The second one is more acceptable for use, since it has faster drying properties and greater elasticity. This type of insulation, such as bitumen-polymer mastic, is completely ready for use
It has good tensile and compressive properties, odorless, non-toxic, and insensitive to high and low temperatures. It is used exclusively for waterproofing the floor, and only with subsequent pouring of a thin screed. Very good strength and adhesion to concrete floors
This type of insulation, such as bitumen-polymer mastic, is completely ready for use. It has good tensile and compressive properties, odorless, non-toxic, and insensitive to high and low temperatures. It is used exclusively for waterproofing the floor, and only with subsequent pouring of a thin screed. Very good strength and adhesion to concrete floors.
Cement-polymer insulation is a traditional material used in the bathroom. This is the same cement mortar, only with admixtures of substances that create the desired effect. The drying time of the mixture is quite short and has good setting properties. Sold in powder form or as a ready-made mixture.
If you need a budget material, pay attention to bitumen waterproofing. It can be either hot or cold
It should be borne in mind that it is difficult to work with such material at home, since the first type can only be used at a temperature of +160 degrees, and the second is difficult to adapt to “cohabitation” with a concrete base.
The most modern type is acrylic mastic. It is made on a water-based basis, is odorless, completely environmentally friendly and has excellent strength characteristics. Its use is both reliable and practical.
You can select the necessary waterproofing according to the following principle: for horizontal surfaces, bitumen waterproofing, bitumen-polymer mastics, or pastes containing it are suitable. Such compositions are enriched with additional substances to give additional elasticity and strength.
For walls, you can use mixtures that create a film. This can be bitumen, mastic, or paint and varnish products that repel water. Bituminous mastics, due to their strength, are even used in the design of waterproofing underground parts of buildings.
Pasted waterproofing
Pasting (roll) products are based on a polymer or fiberglass structure. Speaking about pasted products (that is, rolls), it should be noted that they can be installed in two ways: by guiding the product, or by gluing it.
For the first method, you will need a burner or a hair dryer, with which the material will melt. The second method does not require additional equipment, since it has an adhesive base that can be reached by simply removing the protective film. This method is cheaper than the previous one, but is quite complicated to implement.
Rolled waterproofing used under bathroom tiles is characterized by polyester and fiberglass materials. Both surfaces (top and bottom) are treated with adhesive substances: bottom - for adhesion to concrete, top - with the materials of the next layer.
To waterproof a wooden floor in a bathroom under tiles, this type of material is used. Thanks to its elastic properties, it is able to respond to slight movement of the boards and at the same time remain monolithic.
Plastering
This type of insulation is a waterproof coating, which is covered in 2-3 layers with a total thickness of 10-25 mm. There are two types of such insulation - cement-sand (shotcrete and ordinary cement plaster) and asphalt.
Cast waterproofing
This is a very high-quality and durable way to insulate a room and is a reliable barrier against moisture penetration. In this case, the base is completely filled with a special waterproof solution. If a room requires an increased level of protection from moisture, cast waterproofing is used.
The method of applying it is very simple:
- Clean the base of any small particles.
- Level the floor thoroughly.
- Dry it using a gas burner or infrared radiation.
- Dilute the bitumen to a liquid state and apply primer to the surface.
- Build protective barriers on the walls.
- Heat the mastic to 140 degrees, carefully pour the surface. Level with a scraper.
The use of cast insulation is rapidly gaining popularity.
Liquid rubber
This type is a modern waterproofing that ensures the reliability and durability of the repair. This is a liquid material that covers the entire base of the room. Once dry, the material will become elastic, mobile, without joints and seams (accordingly, moisture will not be able to penetrate into the cracks), adhering very well to other surfaces.
The drying speed is very fast, allowing you to apply several layers in a short period of time.
The peculiarity of this material is that it penetrates into the smallest voids, fills them, which prevents them from growing over time. Complete sealing occurs, which increases the level of durability significantly. It is very encouraging that the use of liquid rubber is absolutely harmless to health, since it is an environmentally friendly material.
What sealant is used to glue an acrylic bathtub to the wall?
Silicone sealant will do a great job with small gaps. If the bathtub does not reach the wall and a junction is formed, it must be sealed.
Interesting materials:
When are state employees paid? When are teachers paid? When should salaries be indexed? When should pay slips be issued? When is personal income tax transferred from salary? When are wages required by law to be paid? When will teachers' salaries be raised? When will military salaries be raised in 2022? When will the salaries of kindergarten teachers be raised? When will teachers' salaries be raised?
Another way
We use a different method. Wash the bathtub by hand with baking soda. Baking soda is an old detergent. We used to wash dishes with it. Is it possible to degrease the surface with white spirit before painting?
The dishes were washed with mustard powder. It's bad that people forget about simple and effective methods. Soap is very difficult to wash off the surface.
There are leftovers even if you can't taste the flavor on the plate.
When choosing a method of sealing a bathtub, which method to choose should be carefully considered. Of course, a lot depends on the width of the slot. However, silicone mastic will provide optimal protection, and a ceramic border will be more aesthetically pleasing.
Acrylic coating care
To ensure that an acrylic-coated bathtub lasts longer, the following measures must be observed:
- Do not throw metal objects at it or hit it with something heavy.
- Do not use harsh abrasives, liquids with acid or chlorine, or rough brushes for cleaning.
- Do not wash hair dye, tinted shampoos and other dyes into the bath, which may leave stains.
- Do not pour boiling water, as this may cause the coating to delaminate.