Comfort in an apartment is important for any person. It allows you to relax after a busy day at work, forget about everyday worries for a while and simply have a pleasant leisure time. Creating a pleasing home environment begins with well-groomed walls. Wallpaper is still the most preferred cladding option. Many people know how to glue them. But only specialists know how to properly prepare a room for their application. In this article we will reveal all the secrets of the technological process of treating walls before decorating them with wallpaper.
What an ideal wall should look like
In Soviet times, when changing decorative coverings, it was often practiced to apply new wallpaper directly onto old ones or onto newspapers. Thick wall layers can be found in many “aged” houses and apartments. Modern society rejects the “it will do” principle, offering instead a rational approach and verified calculations. Competent and beautiful decoration of the room with new canvases depends on the condition of the walls. The quality of the base and the scope of repair work can only be determined by first removing the previous coating. Experienced craftsmen put forward the following requirements for surfaces for wallpapering:
- The base must be clean and free:
- from previous paintings, paint and other possible coatings;
- from screws, nails, etc.;
- from fungal infections is a very important factor that greatly influences not only the appearance of the home, but also the health of its owners.
- Without cracks and numerous pores, which will contribute to reliable adhesion of the material to the surface.
- The base must be level and smooth. The assumption that a new trellis will hide all defects is completely wrong.
- The wall must be well dried. Otherwise, wallpaper glue, which contains water, will not be able to firmly attach the canvas to the wall. Increasing the temperature in the room will generally lead to peeling of the trellises.
- The same color of the base is of great importance when choosing thin wallpaper in light colors, otherwise the difference in color schemes will be noticeable even after repairs.
Taking into account the above criteria for preparing the surface for gluing, you will create a solid, high-quality foundation and the most comfortable conditions for further work.
What tools are needed?
The list of tools and consumables may vary slightly depending on the type of coating, room size and repair technology.
The general set is always the same:
- the wallpaper itself;
- wallpaper glue (suitable for the material);
- a roller and a brush to apply glue (it’s better to take both tools - in general, a roller is more convenient, but it’s too bulky for high-quality coating of corners);
- a container for diluting glue (the most convenient is a paint tray with a ribbed part);
- scissors;
- roulette;
- a plumb line (it makes it easier to determine whether the wallpaper is glued evenly);
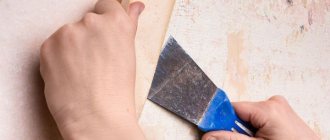
- spatula (needed to remove flaking fragments of the old coating);
- sandpaper (and an sandpaper holder - it’s more convenient with it);
- soft cloth for smoothing wallpaper on the wall (preferably cotton);
- PVA glue;
- sponge and detergent to quickly wash away accidental glue splashes;
- personal protective equipment (respirator or bandage, glasses are required - there is a lot of dust from whitewashing).
Why treat walls?
Many people don’t understand why the easy process of wallpapering needs to be complicated by carefully preparing the walls. In addition, this is a very time- and money-consuming, as well as a “dirty” event. The answer is simple. Wall cladding is needed in order to:
- the new decorative coating looked aesthetically pleasing;
- the trellises held firmly;
- protect against mold;
- glue without problems.
Housing, both in the secondary and in the new building, needs similar repair work, the only difference is in their quantity. Apartments on the primary market often already have a fine finish; in this case, you won’t have to bother with preparing the walls for long. Homes with history will require a lot more effort. In this case, the step-by-step preparation of surfaces for wallpaper must be strictly observed. Each stage has its own purpose. Finishing specialists do not recommend skipping any stage, as this will affect the final result.
Proper processing of walls before applying a new paper layer goes through 3 main stages:
- cleaning;
- alignment;
- primer.
Below is a step-by-step sequence of actions.
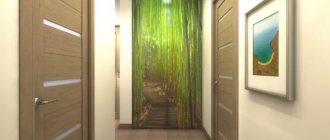
Which wallpaper to choose
| Type of whitewash | Types of Wallpaper |
| With lime | It’s better to take non-woven ones, but vinyl ones (especially embossed ones) are also suitable. Lime strongly interacts with cellulose in any form and spoils it, so it is not advisable to glue paper ones. Fabric ones are also not suitable. |
| Without lime (pure chalky) | Non-woven, paper, vinyl and even fabric are suitable. But when the durability of the repair is a priority, the choice should be given to non-woven and paper ones. |
A separate condition is that the wallpaper should be light. The more the material weighs, the worse it will adhere to any whitewash.
Selecting a primer by surface type
To treat walls under wallpaper, you can choose an acrylic mixture. In addition to acrylic, it contains latex: this has a beneficial effect on adhesion. Acrylic primer penetrates deeply and dries quickly. It is best suited for treating walls under modern type wallpaper: non-woven or glass wallpaper. Another advantage of this composition is the absence of an unpleasant odor.
For wooden walls, an alkyd or glypthal mixture is best.
Deep penetration primer is used only on loose substrates and only to strengthen the foundation. It does not create a film and practically does not reduce water absorption.
A universal primer serves only to reduce water absorption: this occurs by forming a film on the surface.
Due to the fact that GGP does not form a film, it does not fit well under wallpaper. In principle, it is possible to use such a primer under wallpaper, but this method is very expensive. It is only advisable if there is a lot of excess primer left and there is simply nowhere to put it.
In order for GGP to form the necessary film - the kind that universal primers form - it must be applied 4-5 times, with intermediate drying of each layer.
A homemade PVA-based primer is also very good, including under wallpaper. The film formed by PVA is very strong and has excellent adhesion. The only negative (not even a negative, but a slight difficulty) is that the PVA needs to be properly diluted with water. Otherwise the composition will be too thick.
There is another interesting way to make a super coarse-penetrating primer with your own hands. To do this, you need to take any cheap primer and add 200 grams of PVA glue (including 5 liters of 200 grams of PVA). The best PVA is Lakra glue PVA-M extra universal. It is sold in a 2.3 kg jar with a lid.
How much time between priming and wallpapering?
Under normal conditions you need to wait 4-8 hours
, and you can proceed to installing
wallpaper
. Oil and contact (with the addition of quartz dust) primer mixtures will require much more aging. Only after a day can you move on to further finishing of the walls.
Interesting materials:
How much does the Audi a5 Sportback cost? How much does the 2019 Audi a8 cost? How much does the Audi e-tron cost? How much does a late model Audi cost? How much does the 2022 Audi q8 cost? How much does the Audi q8 cost in dollars? How much does the Audi R8 2022 cost? How much does an Audi r8 v10 cost? How much does Aurus Commandant cost? How much does a Belaz car cost?
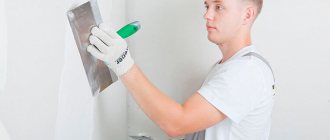
Application instructions
Before priming the walls for wallpaper, the wall must be thoroughly cleaned and dust free. Otherwise, the dust after priming will begin to form rather unpleasant lumps that will remain on the wall.
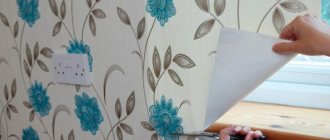
If we are talking about a secondary building, then the old wallpaper must be removed - right down to small pieces. If newspaper is found, it will also need to be removed.
Joints and corners should be treated with a regular (but clean) brush.
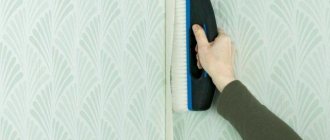
It is recommended to go through the main part of the wall using a roller. It is most convenient to work with a small tool. Rolling should go from bottom to top. The opposite should not happen, because in this case smudges will form on the wall.
Drying time when you can glue wallpaper
On average, the primer dries in 1-2 hours. Some compositions dry within 2-3 hours. Primer for porous, highly absorbent substrates, dries for at least 4-6 hours.
How to store the composition
Like other paints and varnishes, the primer should be kept in a tightly closed container. The composition should be stored in a moderately warm room (the optimal temperature for storage varies from 10 to 20 degrees), and away from sunlight.
A few more tips
If the shade of the wall seems too dark, you should apply a light putty to it before priming. It is recommended to choose white putty: in this case, gray concrete will not show through the wallpaper.
If you are gluing thin wallpaper, be sure to pay attention to the compatibility of its shade with the color of the wall.
To save on primer, you need to purchase a dry mixture. This advice is especially relevant if you have a large volume to prime.
Even a perfectly prepared drywall surface needs to be puttied. This will make your job easier the next time you want to change your wallpaper.
Try to work at a temperature of 5-30 degrees Celsius. Air humidity should not rise above 75%. There are exceptions - manufacturers usually mention this. But you still need to prime the walls within this framework.
You can't conduct experiments - you have to do everything to the maximum. The best option is to apply the last layer of “multi-finish” putty to the walls (especially if part of the wall surface will be painted and part will be covered with wallpaper). Next comes grinding and removing fine dust. After this - a thorough, generous primer. If you follow all these recommendations, the wallpaper will sit very firmly.
How to wash off the remaining lime?
Lime whitewash is washed off with clean water, but the process is long. You can speed up the procedure using special means from a hardware store or proven folk methods:
- mix 4 tablespoons of baking soda and 3 tablespoons of grated laundry soap in 10 liters of warm water;
- mix 10 liters of water, 400 grams of baking soda and 400 grams of salt;
- dissolve 1 tablespoon of ammonia in 10 liters of water;
- Dilute 1 tablespoon of acetic acid and dishwashing detergent in 5 liters of warm water.
Moisten the surface with the solution and after 10 minutes it will be ready for cleaning.
What to do if the whitewash is crumbling
It is better to completely remove whitewash that has begun to crumble before using the wallpaper. After all, upon contact with something wet (primer or glue), it will begin to fall off in large layers.
The easiest way to remove whitewash:
- Carefully cover the floor and furniture with oilcloth or newspapers. If this is not done, it will be very difficult to remove dust from crumbling whitewash.
- Prepare a weak soap solution - 2-3 tbsp. l. Laundry soap shavings are dissolved in 10 liters of heated water.
- Place the solution in a spray bottle and spray a small area of the wall.
- Clean off the whitewash with a thin, sharp spatula while it is wet.
- All residues that do not yield to the spatula are washed off with a damp sponge or rag.
When the whitewash layer is very thin, it is better to do without a spatula so as not to damage the wall structure. Any scratch will have to be repaired. Therefore, it is better to immediately wash off a thin coating with a sponge.
Which glue to choose
There are only 2 conditions when choosing glue:
- must match the type and material of the wallpaper;
- It should not be too liquid - the lime may become soggy.
But with proper priming (more on that later), liquid glue will not do any harm. It will not “break through” the primer if it is completely dry after application.
It is better to buy glue from well-known brands (Russian and foreign), having first studied reviews on the Internet. The more popular the brand, the higher the likelihood that someone has already talked about their experience of using it in combination with whitewash.