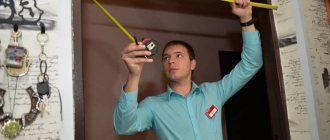
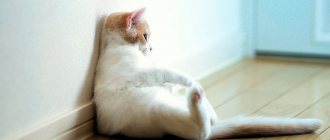
It is impossible to imagine a residential building without window openings. Their main function is to illuminate interior spaces in a natural way. They have a special influence on the psychological state of the person himself, simulating the presence of open space around him. This is also a part of the interior that is constantly in sight and, accordingly, is exposed to all the trends of changing fashion. Therefore, not only the appearance of the product itself plays an important role, but also the finishing of the window slopes inside and outside.
Internal cladding allows you to decorate the opening, mask all the shortcomings of the installation work, increases the durability of the installed structure, protects it from moisture, and helps fix the insulating material. Typically, window installation companies can only complete the design with an internal window sill and external flashing. You will have to do the slopes yourself or use the services of specialists.
Pasting methods
If you previously had the simplest paper sheets glued on, then removing them from the wall is easy:
Previously, we started wallpapering from the window .
This is due to the fact that the wallpaper was glued overlapping each other. To hide unwanted defects, all work began from the most illuminated place in the room. But there is also an equally popular method of gluing from the door (where and how to start gluing wallpaper?). It is suitable for applying vertical stripes to the surface. The slopes of all doors are strictly proportional and have the greatest vertical height. It’s easier to focus on the doorway in order to stick the strips evenly.
Now there are no such problems with joining the canvases, so it is better to choose the simplest method and start pasting the walls from the doorway (how to join wallpaper correctly?).
Around the doorway
On the slopes
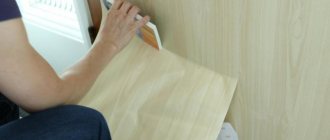
Having reached the pasting of the door slopes, hurry up and immediately glue the next panel. It is necessary to bring the wallpaper to the slope so that the canvas overlaps the door opening. It will be much more convenient if the width of the roll is wider than the slope .
If you can’t do this, then you need to stick a narrow strip of wallpaper on the open area. Measurements must be taken very accurately so that the strip is glued end to end. It is worth considering that the coating should extend slightly onto the door frame.
It is necessary to cut the canvas vertically so that it extends a little further than the corner line, about 2-3 cm , and cut off the excess. On the opposite side of the door slope we do the same.
All that remains is to paste over the area in the middle of the doorway. It must be accurately measured and a piece of the required size cut from the roll. We must remember that the wallpaper should extend onto the inside of the slope and onto the door frame.
Below is a visual video about how to glue wallpaper on slopes:
What is better to do with the slopes: paint or wallpaper?
We recently replaced the front door and covered the door slopes with plasterboard. Now you’re wondering whether it’s worth covering them with wallpaper or is it easier to paint them with water-soluble paint?
comment to favorites NiceS hot [3.3K] 6 years ago
I always and everywhere advise finishing the slopes with paint. It’s easier to work with, cheaper, and always remains for later work (if anything). It looks very good and harmonious with other slopes and openings. Wallpaper will create the impression of the wall itself, and not the slope, and the slope is lost.
There is also the option of applying decorative plaster to the slope. Just don’t use bark beetle and the like, but Venetian Italian or something similar.
the system chose this answer as the best comment add to favorites link thank Kim Jong-un [412K] 4 years ago
If you choose only from these two options (there are other, much better ones), then it is better to paint.
You are writing about the front door; in the area of the slopes there will be temperature changes and possibly increased humidity due to the temperature difference.
Paint (it is better to use it for exterior use) will perform much better under these conditions.
Wallpaper is not suitable for every interior, door slopes do not live their own lives, they must be in harmony with the decoration of the walls.
If the walls are painted, then the wallpaper on the slopes will look like a patch.
But the opposite option (the walls are covered with wallpaper, the slope is painted) is quite acceptable.
We recently replaced the front door and covered the door slopes with plasterboard.
Drywall is better moisture resistant in this area; it is also important to properly prepare the drywall for painting.
General recommendations
If the renovation of a room has just begun and the doors have not been installed, remember: all work must be carried out from top to bottom . First make the ceiling, then glue the wallpaper, and only then install the doors. Then you won’t have to worry about carefully covering the surface near the platbands.
Anyone can hang wallpaper on walls, regardless of their professional skills. It is necessary to study the instructions and follow them strictly.
Source
Wall painting option
What is the best thing to do if the walls are painted rather than papered? Here, too, it is better to first install the door frame, without the door leaf and trim. Then proceed to decorative finishing. Just first seal the cracks and arrange the platbands. In addition, the surface of the door frame should be covered with protective masking tape.
After the paint has dried, hang the canvas and install the trim. This technology reduces the risk of possible wood swelling, and damage to the door block is reduced to zero. In addition, the process of painting the wall near the platbands is greatly simplified.
Source: domzastroika.ru
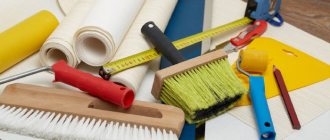
What you need for wallpapering
Before starting work, you need to prepare everything you need. In fact, you don’t need a lot of special devices and tools. Let's list what is really needed.
Tools
To mark and cut the strips you will need a tape measure or a tailor's centimeter, a long ruler and a pencil. Cut the material well with a sharp knife, either a kitchen knife or a stationery knife. Scissors will also work. To mark the walls, you will need a plumb line, with its help the exact vertical is determined. To work, you need a roller with medium pile to apply the glue. You can replace it with a brush or a large brush, whichever is more convenient for you.
To smooth out stripes on the wall, various devices are used. This can be a smooth rubber roller or a plastic spatula in the shape of a triangle. Both options are good, you just need to choose yours. To glue the joints, use a small smooth roller, which presses the edges of the material. You will also need a rag or soft cloth to remove excess glue and stains from it.
Materials
You will need wallpaper. There are non-woven, paper, liquid, glass wallpaper, vinyl. They are chosen based on the conditions and purpose of the room where they will be located. So, for bedrooms, living rooms or children's rooms they choose eco-friendly paper or non-woven fabric. Embossed vinyl is the optimal solution to the question of which wallpaper is best to glue in the kitchen or hallway. The finish is good for painting; it is appropriate in any room.
During the preparation of the base, putty or a similar repair compound may be required to seal cracks or crevices. If the base is uneven, you will have to lay a leveling putty layer. In this case, a gypsum mixture is usually used.
In addition, a primer is needed. It improves the adhesion of the base and reduces glue consumption. The composition is selected depending on the characteristics of the base. If necessary, choose a primer with additional properties, for example, protecting against mold or mildew. The primer is available in the form of powder, liquid concentrate and ready-to-use solution.
To apply the trim, you will need an adhesive compound. Choosing which glue is best for gluing wallpaper should take into account the type of canvas. So, for paper, any composition, even the most inexpensive, is suitable; for vinyl, you need mastic for heavy finishing. There is always a recommendation on the roll for using glue. It shouldn't be ignored.
Polyurethane glue
Not all polyurethane compounds are intended for application to plastic surfaces, in our case, corners. When purchasing, you need to carefully read the instructions. An example of a suitable polyurethane-based composition that can be used to glue a plastic corner is “Supercontact”. Advantages - reliable gluing, the ability to adjust the strip if it is not aligned correctly.
The disadvantages of this type of glue are the strong odor and higher cost. Although a tube of such glue is comparable in price to a tube of liquid nails, its packaging is much smaller and the consumption is approximately the same. There are some peculiarities in application. You need to apply a thin layer of glue to the surface of the corner and wait for it to harden. You can press it to the wallpaper after 20–30 minutes. Setting occurs within 24 hours, and complete drying occurs after 2 days.
Preparing walls for wallpapering: step-by-step instructions
High-quality gluing of new finishes is impossible without proper surface preparation. The wall must be level, clean and dry. Decorative coating will not hide large defects; they will be very noticeable. In addition, an untreated surface holds the finish worse and absorbs a large amount of adhesive solution, which increases its consumption. We will step by step explain how and what to treat the walls with before wallpapering.
Removing old coating
To begin with, the base is completely cleaned. The technology depends on the type of design. The old design is completely removed. To make this easier, the finish is pre-moistened with warm water from a spray bottle. To speed up the process of softening the glue, add shavings of laundry soap, 9% vinegar, fabric softener or a special preparation. The soaked strips are lifted with a spatula and removed. The remains are soaked and removed.
The water-based emulsion or whitewash is washed off. Oil and similar paints can be removed in different ways. The cheapest and most labor-intensive is mechanical. It involves scraping off the paint layer. This is done manually using a hammer and chisel or using a grinder, hammer drill or drill with special attachments. You can use a special remover that dissolves old paint, or a thermal method. In the latter case, the paint layer is heated with a hair dryer and then removed from the base.
The plastered wall is carefully inspected for cracks and other defects. It is advisable to tap it to identify areas with peeling coating. They need to be cleaned. After all fragments have been removed, the condition of the surface is assessed. If there are many defects, the old plaster is removed completely.
Alignment of walls
Leveling technology depends on the condition of the surface. If there are cracks in it, they start by sealing them. They do it like this.
Large potholes and chips are repaired in the same way. After eliminating the defects, leveling begins. When choosing what to use to level the walls before wallpapering, you need to take into account the condition of the base. If the unevenness is small, finishing putty will be sufficient.
If the unevenness is significant, they are corrected with a plaster mixture. To do this, beacons are placed along which the solution is laid. After it has dried, final leveling is carried out with a putty mixture. With its help you can remove the smallest irregularities. Before applying plaster or putty, the base must be primed and allowed to dry.
You can level the walls with sheets of plasterboard. For minor differences, up to 30-40 mm, the gypsum board is glued to the base. In other cases, a sheathing made of metal profiles is installed, onto which plasterboard is fixed. In any option, the sheets are leveled to ensure the correct plane. The seams between the plates and dents from fasteners are puttied. Serpyanka is applied to the putty joints, covered with the mixture, then sanded.
How to prime walls before wallpapering
Not everyone understands whether it is necessary to prime the walls before wallpapering. However, this is a necessary operation. The primer closes the pores of the base, which prevents it from absorbing the adhesive composition, significantly increasing its consumption. In addition, after drying, the primer forms a film that increases the adhesion of materials. Therefore, the adhesion of the finish and the wall improves. The primer improves the quality of the base, preventing the formation of cracks and other defects.
The primer is selected according to the type of base. For example, concrete and gypsum putty require different compositions.
Step-by-step instructions for applying primer
Usually two coats of primer are sufficient. But if the instructions for the composition say that more is required, follow these recommendations.
Advantages and disadvantages
In the question of what comes first, wallpaper or doors, each option has its own advantages and probable risks of poor quality work. It is very important to take into account the structure and type of wallpaper, the quality of the finish and the presence of protective coatings on the doors. Let's try to evaluate these indicators and figure out what is better and more correct - finishing the walls first or installing interior doors right away.
Doors first
Craftsmen who claim that you need to install the doors first and then glue the wallpaper base their opinion on the following factors:
- if you don’t install the trim right away, then nothing will interfere with the gluing, the wall won’t be covered with glue;
- most of the doors sold have a high-quality coating against moisture - the material will not swell;
- dust that appears when installing the box, especially in brick walls, will not settle on the wallpaper;
- closed doors will eliminate the creation of drafts, wallpapering will be of better quality;
- gluing the trellises under the platband will be neat and beautiful;
- simple adjustment of the existing opening to the door block.
Among the disadvantages are:
- the remaining likelihood of wood swelling from moisture;
- installation of platbands only after finishing the walls.
Looking at the pros and cons outlined above, we can say that installing doors before wallpapering is more preferable and is unlikely to create trouble . But possible dust settling and drafts can create problems. With the door already installed, all cracks are sealed with foam and closed. This option eliminates the possibility of damage to the wallpaper near the door, as, for example, when installing a box. The installation of slopes will not lead to the plaster mortar getting onto the covered wall.
Wallpaper first
Wallpapering before installing interior doors has three important positive factors, which supporters of this method refer to:
- Pasting a doorway is easier to do;
- eliminates the possibility of the door frame swelling as a result of high humidity;
- To avoid drafts, you just need to close all windows, vents and entrance doors.
Typically, pasted wallpaper dries completely in 2-4 days. At this time, the humidity level in the room rises and can create some discomfort for residents. The absence of a door will ensure more active drying without drafts, only through natural exhaust channels.
As you can see, the evidence of benefits in this case is based on preserving the door frame, without mentioning that wallpaper and other materials are also expensive. Therefore, let's talk about the disadvantages, of which there are noticeably more:
- when drilling (for installation of the box), stone may crumble in a thin wall with the formation of shells, the sealing of which will require removing the wallpaper near the door;
- high accuracy of measurements is required to select a door for an existing opening;
- poor-quality sealing of gaps between the box and the wall;
- installing slopes will certainly lead to the wall being sprayed with solution;
- dust settling on the wallpaper during installation work.
As a result, we can conclude that wallpapering and then installing doors will give worse results. Although it is quite acceptable.
Basic rules for wallpapering
Pasting wallpaper, no matter what it is made of, is carried out according to certain rules. We have collected the most important ones. Let's look at how to glue wallpaper for beginners.
Where to start wallpapering a room
In the question of where to start gluing wallpaper in a room, you cannot act at will. This is wrong if you have to work with simplex. This is the name of a single-layer paper finish. The joints of such stripes are quite noticeable. Therefore, gluing begins from the window and moves from it in different directions. Other types of canvases can be glued similarly or other patterns can be used. For example, “circular”. In this case, the strips are glued around the perimeter of the room, returning to the place from which work began.
The circular pattern means that the first sheet can be glued almost anywhere. However, such areas are most often chosen.
Sometimes they do things differently. Draw a vertical line on any section of the wall. From this place they begin to stick. This option is good when you are sure that the picture will match exactly. But it doesn't always work out that way. Therefore, the optimal solution would be to stick it from a corner, window or door. Here the slight discrepancy will not be so noticeable.
Applying glue and wallpapering on flat areas of the wall
The gluing technology for different types of canvases is slightly different. We have prepared general instructions for hanging wallpaper yourself.
The remaining strips are glued in the same way. Important point. Before starting work, close the windows in the room to prevent drafts. Otherwise the decor will come off. How long you can’t open windows after wallpapering depends on the condition of the finish. When it is completely dry and straightened, you can ventilate the room. On average, it should remain closed for a day.
How to properly apply wallpaper in corners
The first rule is that you cannot glue a whole strip to a corner. The curvature of the angle disrupts its geometry, resulting in creases and distortions. Make the joint correctly. The cutting is carried out so that one wall has a sheet with an allowance of 20-30 mm at an angle, and the second without such an allowance. First, a strip with an allowance is glued on, then a second one is applied to it. It is glued with an overlap.
Start pruning. Take a long metal ruler, apply it to the middle of the seam, and press it. Using a sharp knife, make a continuous cut along the entire length. Carefully remove the trimmings from below and above. Roll the resulting joint with a roller. If it doesn’t stick well, carefully coat it with an adhesive compound. Using this technology, both external and internal corners are pasted over.
How to stick wallpaper near windows, doors and behind the radiator
These are the most problematic areas when gluing. The greatest difficulty is the design of window and door frames. Here are instructions on how to do everything right.
It is quite difficult to properly cover the space behind the battery. You need to start by taking measurements in order to cut out a fragment exactly to size. The areas where the radiator fasteners are located are outlined. Vertical cuts are made to them. Then the pattern and the wall are coated with glue. The soaked canvas is applied to the base, all folds are straightened, and pressed with a rag.
Source
How to properly glue wallpaper from the window or to the window
The answer to the question of how to correctly glue strips of trellis from a window or to a window will depend on the materials used for repairs. At the moment, you can find different types of trellises on the market, each of them has its own advantages and disadvantages:
- Paper . Their advantages include affordable cost, environmental friendliness of the material, a large selection of colors (photos with possible variations are simply dizzying), and the disadvantages are a short service life due to the ability to quickly fade in the sun and lack of moisture resistance.
- Non-woven fabrics are the most popular material in recent years. They are made from cellulose, therefore they are also environmentally friendly, are not harmful to allergy sufferers, and have the widest format, so they form fewer compounds. At the same time, dust accumulates well on the embossed surface of the material, and the translucent texture makes them suitable only for gluing to a plain surface.
- Vinyl are strips of foamed polyvinyl chloride on a cardboard or non-woven base. They are suitable for gluing all surfaces (from concrete to drywall), and their embossed surface will simply hide small bulges in the wall. But this is a non-breathable material that does not tolerate changes in humidity or temperature.
- Textile (fabric) on a cardboard or non-woven base are hypoallergenic, can hide bulges in the walls, have sound insulation, and a heat-saving effect. Such trellises do not tolerate water and are among the most precious finishing materials of this type.
Having chosen a material suitable for finishing, you need to decide whether the strips will be glued overlapping or joint to joint. In the first case, it will certainly be correct to glue from the window, and in the second case, the reference point can be a window opening, a door, or another large object (even a closet).
Decorating interior corners with wallpaper
You cannot glue wallpaper in the corners continuously - the main rule of repair. And to avoid distortions and oblique seams, you must adhere to a vertical guideline. To find it, use a level (laser, water) and draw a vertical on the surface.
Attention: each wall must have its own vertical line!
Decide on the direction of work and do not change the course. Choose the corner in the room from which it is most convenient to start, and get to work, adhering to the following recommendations:
Tip: when gluing washable or vinyl wallpaper, it is better to use a special transparent glue.
Finishing slopes with plastic panels
Slopes can be finished with plastic panels. To do this, the window sill should be protected with film, after which you can begin to remove excess polyurethane foam. For the work you will need a PVC profile and a screwdriver. Don't forget about a jigsaw and a protractor. Window cladding with sandwich panels can be done using slats or polyurethane foam. The slopes are measured to cut the material. The width of the products should be 5 mm less than the slopes so that the slats do not protrude beyond the walls. The panel is laid on a stool or chair, then marked and then cut using a jigsaw.
Regardless of which installation method was chosen, you will need to install a starting profile. The products are fastened from the top guide. Self-tapping screws will strengthen the profiles on the sides. Liquid plastic should be poured between the side panel and the window sill.
Installation
When finishing window slopes with panels, you can do without a starting profile. To do this, decorative items should be placed behind the frame and pressed against it. But this approach is applicable if the distance between the wall and the frame is not filled with construction foam to the full depth. To finish window slopes with panels using slats, you need to screw the frame elements on top and along the edges. The starting profile should be located along the outer edge. Its fixation is carried out with self-tapping screws.
When finishing window slopes with panels on mounting foam, you should moisten the surface by applying water to it from a spray bottle. The first decorative element is inserted into the U-shaped profile, and the cavity between the wall and the slope is well foamed. The panel must be placed in a horizontal position and secured with masking tape. The same actions are carried out with the side elements.
The mounting foam must harden, then the tape is removed, and the remaining voids when finishing window slopes with PVC panels are also filled with foam.
Heating radiators, sockets, switches
Do not mark the location of the socket or switch on the canvas and cut a hole in the material. If the vertical reference is followed, the two holes may not line up. It’s better to stick the strip on the wall (after removing the decorative items), keep it vertical, level it, and then use a sharp knife to carefully “draw” a cross in the place of the socket or switch. The material will be easily cut, leaving straight edges and triangles, which can then be easily folded inward or trimmed.
When gluing a wall with a battery (pipe), the procedure is even simpler. Having reached the radiator (pipe), cut the strip of material in several places. It is easier to push small strips of wallpaper behind the radiator (pipe) and smooth them out with a roller or brush.
The following instructions will help you avoid mistakes and create the perfect room design.
Source
Useful tips
Having figured out all the aspects of how and where to start work, you should listen to some advice that will simplify the task. Then the wallpaper will stick much easier and faster:
- Before gluing, the walls must be puttied to smooth out any bulges and primed, allowing them to dry thoroughly. This will help prevent fungus from developing on them later.
- To carefully stick wallpaper around switches and sockets, you need to remove the protective plastic boxes from them, glue a strip, and then cut off all excess with a knife.
- It is better to treat the outer corner of a niche or window opening with a special plastic corner to match the color of the main finishing material.
- An uneven joint near the ceiling can be decorated with a border or decorative cord, and near the floor it can be hidden behind baseboards.
- To stick the first strip very evenly vertically, you can draw a line on the wall using a plumb line.
The choice of a “starting point” is as important as adherence to technology or the choice of high-quality materials and tools. Only if all these criteria are met will it be possible to achieve an excellent result.
Preparatory stage
First, everything in the room that can be removed is removed, including door frames and baseboards, if possible. They also remove sockets and switches, closing the boxes with wires with plugs - plastic or wooden.
You also need to know how to glue wallpaper correctly
Turn off electrical outlets
When working with electricity, we de-energize the room and do not turn it on until we are finished. It is advisable to carry out all work, including wallpapering, with the power turned off. The work is “wet”, and water or glue can get on the wires and short out. If the wiring is done according to all the rules and there are protective circuit breakers, this is not a big deal. They'll just turn off the power and that's it.
If the wiring is still done in the old way, it can be dangerous. The worst part is that in this case there is often no way to turn off the power in a separate room. Only in the entire apartment or, at best, in half of it. Then the solution is to remove the power wires from the sockets and switches (with the power off, of course) and carefully insulate the ends, then hiding them under plugs. Then you will have to unwind them and put them back in place, but it will be safe.
Lighting during work is temporary - extension cords are pulled from other rooms and portable lamps are turned on. Once you have dealt with electricity, you can move on.
If the walls are just leveled and puttied, you don’t need to do anything other than primer. But if they have an old coating - wallpaper or paint - they will have to work. First, remove the previous finish.
Cleaning off old wallpaper
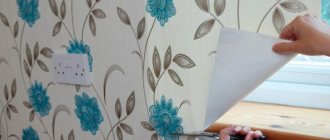
If wallpaper is pasted on the walls, pry it up in a random place with the corner of a spatula, then pull it by the bent corner, tearing it off. If you're lucky, entire strips come off, sometimes several meters long in a single strip. But more often it comes out in small fragments. First, they remove everything that comes out “dry”. If it’s really difficult and in small parts, take a bowl of water and a roller and wet the walls in this way. To make them come off easier, you can add dishwashing detergent to the water.
If the wallpaper is paper, water is simply applied to the surface. If they are vinyl or with some other durable film, first they break through the film. This can be done using a spiked roller, or with a brush with metal bristles. The main thing is to break through the film so that water can be absorbed into the base - paper or non-woven fabric - and soak the glue. Sometimes you need to wet the wallpaper several times to make it come off easier.
Next, the steps are the same as with paper ones: pry them with a spatula and tear them off. Sometimes this technique of tearing off pieces is ineffective. It works faster if you scrape off the soaked finish with a spatula. Then scrape the blade along the wall at an acute angle. In general, it doesn’t matter how, but the old wallpaper must be completely removed.
Removing paint and whitewash
You also have to work with a spatula, scraping off centimeter by centimeter. The work is monotonous and rather tedious, and also dirty. There are several ways to speed things up.
Oil paint on concrete
There are actually two options: chemical and mechanical. Chemical - these are special paint removers. The composition most often looks like a gel. They are applied to the surface and, after some time, (indicated on the packaging) it rises with bubbles or begins to shrink. The paint has softened and can be removed with any spatula.
This is what the paint looks like after the “work” of washing
Everything happens quite simply, but there are two “buts”. First, the price of the wash is quite high. Secondly, the fumes are clearly not useful. You need to work in a ventilated area, but do not let the remover dry, otherwise there will be no effect. And still, even with ventilation, sometimes my head hurts. So a respirator won’t hurt, and gloves are a must.
The mechanical method is not just a spatula. This will take a very long time to scrape. Use a grinder or hammer drill. The grinder has brushes made of metal wire. You can try to remove it like this. The method works, but not always or it is too slow. Then you can take a hammer drill and a chisel, and holding the chisel perpendicular to the surface, move it along the wall without deepening it. The paint bounces off quickly. After such a “shock” treatment, all that remains is to clean off the residue with a spatula.
Water-based emulsion, whitewash or paint on gypsum plaster
Removing this type of paint on walls is no easier. You can scrape it off, just very, very slowly. The solution is very simple: again water and a special paint scraper. You can buy it at a hardware store. Immediately take several spare blades: for example, the kitchen needs three or four of them.
Coat the wall well with water. Brush or roller, several times possible. Then you leave it to soak. And then you start cleaning with a scraper. The paint just pops off. It is only important that the wall is well wet.
Sealing irregularities
Here you will first have to assess the condition of the walls. First you need to remove all the nails and screws, remove chips and repair cracks. Then examine the results. If the walls are more or less even, there are only small defects, you can get by with occasional leveling. Only cracks, dents and chips are repaired. They can be covered with finishing putty. Just before leveling, completely clean the wall of dust and pieces of wallpaper, and then cover it with a primer (with a wall roller and a brush in the corners).
If the wall has been “treated” with a hammer drill, you cannot do without full putty of the entire wall. Mostly today they use gypsum putty. First, apply a layer of primary or starting. It has a coarser grain and the layer can be up to 3-5 mm. This composition is used to level out the main unevenness, trying to achieve a smooth surface. After drying, they pass through a special mesh, removing any unevenness or sagging that may exist.
Afterwards finishing putty is used. It is very plastic and is applied in a thin layer - up to 1-2 mm. After this, the wall becomes smooth (after the irregularities have been smoothed out with a mesh, only with a smaller mesh).
Primer of walls
The second layer of primer is applied after puttying. It forms a film on the surface that reduces the absorption of the glue and also improves adhesion. For wallpapering, you can use a thinner wallpaper glue as a primer. Each pack has a table indicating the amount of water for gluing and priming. We dilute the glue in the required proportion, wait for it to be ready (also on the package) and cover the walls with the composition. The priming technique is the same: first go over the corners with a brush, then with a roller on smooth surfaces.
In the video, for some reason, the use of primary putty is called plaster, but otherwise the sequence of actions is presented correctly.
How to glue wallpaper around windows and doors - pasting methods
From our newest article you will learn how to glue wallpaper around windows and doors without the help of others. Do not try to cut out the wallpaper panels in advance in order to adjust them to the size of the windows and doors. Glue the wallpaper completely straight over the trim, then smooth it out before trimming the edges along the door or window. Make diagonal cuts to fit the wallpaper to sharp corners. To prevent damage to wood structures when making diagonal cuts, use scissors, but not a knife with replaceable blades. If short strips of wallpaper are glued directly above and below the opening, make sure that they hang strictly vertically and that the pattern on them matches the pattern on the subsequent whole panel.
- Glue the panel to the wall so that it goes over the window casing. Connect it butt to the edge of the pasted wallpaper.
- Use a brush to smooth out any flat areas of the wallpaper. Press the panel tightly against the trim.
- Use scissors to make a diagonal cut from the edge of the panel to the corner of the casing. If the wallpaper is glued around the window, then literally make the same cut in the lower corner.
- Trim the excess wallpaper around the trim with scissors, leaving an allowance of approximately 2.5 cm. Smooth out the panel and squeeze out any air bubbles.
- Press the wallpaper onto the trim with a wide spatula and trim off the excess with a sharp wallpaper knife. Trim the allowances at the ceiling and at the crown. Wipe the wallpaper and trim with a damp sponge.
- Cut short pieces to cover the areas above and below the window. You can find suitable scraps. Glue small pieces of panels strictly vertically so that their pattern matches the next whole panel of wallpaper.
How to wallpaper around windows and doors
- Trim and prepare the next whole panel of wallpaper. Hang it on the wall and butt it with the edge of the previously pasted panel so that the pattern matches.
- Pasting cardboard wallpaper read here
- Use scissors to make diagonal cuts from the edge of the panel to the top and bottom corners of the casing. Trim the excess panels around the window or door casing, leaving an allowance of approximately 2.5 cm.
- Butt the bottom half of the panel end-to-end with the edge of the previously glued panel. Trim off the excess with scissors, leaving an allowance of approximately 2.5 cm. Smooth the wallpaper with a brush.
- Press the wallpaper onto the trim with a wide spatula and cut off the excess with a sharp wallpaper knife. Trim the remaining allowances at the ceiling and baseboard. Wipe the wallpaper and trim with a damp sponge
How to glue wallpaper around a window located in a niche
- Glue the wallpaper panels so that they cover the niche. Smooth out the wallpaper and cut off any excess from the baseboards and ceiling. To fold the wallpaper for the top and bottom of a niche, make a horizontal cut in the middle, not bringing it to the wall by approximately 1.5 cm.
- From the end of the horizontal cut (step 1), make vertical cuts to the top and bottom of the niche. Make small diagonal cuts to the corners of the niche.
- Fold the top and bottom cut edges and glue them to the surface of the niche. Smooth out the wallpaper and trim it at the back edge. Tuck the wallpaper along the vertical edge of the niche. If necessary, apply wallpaper around the window.
- Determine, cut and prepare a piece of wallpaper that is suitable in size and pattern for covering the side surface of the niche. The side piece should fit slightly into the top and bottom of the niche and onto the folded vertical edge. To join overlapping seams, use vinyl-to-vinyl glue.
Methods for wallpapering pipes, heating radiators and fittings
When wallpapering areas near sinks, pipes and other obstacles, you need to cut the wallpaper. Glue the wallpaper so that the patterns match, and make a cut from the edge closest to the reinforcement.
If possible, make the cut along the strip of ornaments so that it is invisible. At the end of the cut, cut a hole that will match the size of the reinforcement.
How to glue wallpaper around a pipe
- Butt the masking flange of the pipe away from the wall. Glue the panel onto the wall so that the pattern matches the previously pasted wallpaper. From the closest edge of the wallpaper, make a cut to the pipe.
- Smooth the wallpaper down to the pipe using a brush.
- Cut a hole at the end of the cut so that the wallpaper fits around the pipe. Bring the edges of the cut together and smooth them with a brush.
How to wallpaper around a wall-mounted sink
- Use a brush to smooth the panel right up to the edge of the sink. Make horizontal cuts in the wallpaper, leaving approximately 0.5 cm allowances at the top and bottom of the sink.
- Trim the wallpaper around the side of the sink, leaving a small allowance.
- Smooth out the wallpaper. If possible, tuck the remaining allowances into the gap between the sink and the wall, or cut them off.
Rules for gluing
When wallpapering there are several rules that must be followed. The technique varies depending on the type of wallpaper, as does the glue, which is necessary for a quality result. the difference is mainly in when and where to apply the glue. You don't have to guess. Everything is on the insert, which is included on each roll of wallpaper. There it is graphically depicted, and in some it is written, which part should be coated with glue: only the wall or only the wallpaper, or maybe both at once.
These markings are on the insert.
But some things remain the same. For example, applying a starting strip.
Where to start
In reality, the starting location is not that important. It is important that the first strip is glued strictly vertically. Therefore, the choice is yours.
If the room has a perfectly designed corner: smooth and exactly vertical, you can start from there. You can start from a door with a perfectly aligned jamb. If there is nothing like that, draw a guideline for yourself. Take a building level, mark a point on the wall and draw an exact vertical line through it. Inexpensive household-grade building levels, which we usually use for repairs, sometimes give a significant error. And since it is important for us to stick the first strip strictly vertically, check the accuracy of the line using a plumb line. He never lies, pointing straight down. If everything is fine, you will align the edge of the strip along this line.
If you still haven’t decided where to start gluing wallpaper and this is your first experience in this area, start with the wall that is least visible. For example, the one along which there is a closet. The first couple of pages will be difficult for you, but then you will better understand what’s what and there will be fewer flaws.
How to glue wallpaper on a wall
If glue, at the request of the manufacturers, is applied to the cut fragment, the smeared strip is folded so that the coated side is inside. To do this, fold the edges towards the middle, then fold them several more times. The folds are not pressed. Let them remain round. This is necessary so that all layers are saturated and the canvas fits well on the wall and also sticks without bubbles.
How to fold paper wallpaper coated with glue
If you need to apply glue to the wall, coat an area slightly larger than the width of the wallpaper. The area under the ceiling, in the corner and near the floor is coated with a brush. Then the rules are general.
Take the cut strip and climb up the stepladder. Place the top edge a few centimeters on the ceiling, then align one of the edges along the drawn “start” line. Since wallpaper today is glued end-to-end, it doesn’t matter which edge.
Strictly attaching the side edge to the line, moving from this line to the other edge, glue the wallpaper in the ceiling area. Then, gradually moving down, you go down a little lower.
Extra centimeters on the ceiling are cut off. It is more convenient to do this with a paper knife and a large spatula. Press the paper well against the corner by running your hand. Then apply a spatula. Run a knife blade along its edge.
Trimming under the ceiling and near the baseboard
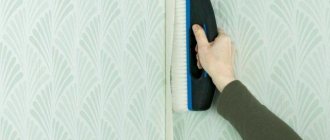
When gluing the canvases, movements are made from the center of the strip to the side and slightly downward, expelling the trapped air to the edges. Previously, this was done with a rag, but it works better and faster with a roller with an elastic attachment (it is usually yellow). There are practically no bubbles when working with it. But if the wallpaper is structural, with an embossed pattern, you can crumple it with a roller. Then take a wallpaper brush. It is wide and flat, with hard pile.
Wallpaper brush for quick pasting
Having reached the place where the strip is not yet glued, unroll the rest tightly and proceed according to the same pattern. First, you expose the edge, then use a roller or rag to expel the air, achieving a flat surface.
The second strip is glued in exactly the same way, with the only difference being that the canvas already on the wall will serve as a guide for gluing the edge. That’s why it’s important to glue it evenly, otherwise everyone else will also be mowed.
Secrets of pasting corners
The most difficult part to glue wallpaper correctly is in the corners. But this is only until you know the secret. You can try to do it simple at first. Wrap one of the parts onto the adjacent wall by 1-2 cm, and cut the second at the corner.
One of the ways to paste an internal corner
It’s not difficult to do, this method looks good. But on some wallpapers this stripe is very visible. For such a case, there is another way. Glue the canvases on both sides of the corner so that they wrap at least a little on the other side (2-3 cm is enough). Press well so that they fit exactly. to the walls and corner.
Having cut everything off, remove both cut strips and join the remaining strips in the corner. If the wallpaper was pressed well before trimming, the match is perfect, without any discrepancies.
How to properly glue wallpaper in corners
How to glue wallpaper on outside corners? Almost in the same ways. In the first case, one of the stripes is wrapped around the corner by one or two centimeters (for thicker wallpapers, 2 cm is better, for thin ones, 1 cm is enough). The second strip is glued strictly along the corner. If this overlap is visible (usually on non-woven wallpaper), you will need to cut along the entire strip. In this case, we wrap more and cut vertically using the same spatula and knife. We remove the cut and glue the joint.
Meter-long wallpaper in the corners is glued in the same way as narrower ones. It happens that a narrow strip is needed in a corner, and the rest is cut off. If the wallpaper is without a pattern, it can be used somewhere, at least in another corner. With patterned canvases, sometimes it is also possible to attach them somewhere, but this is more difficult to do. That’s why they take patterned ones with a decent supply: just for such cases.
How to glue vinyl wallpaper on paper, how to remove imperfect corners in this video.
How to glue wallpaper near doors and windows
If the door or window is flush with the plane of the wall, problems usually do not arise. Wallpaper is cut along the door frame or along the edge of the trim. The canvas is cut at an angle of about 45° to the corner of the casing or frame. The cut parts are wrapped along the opening, bent and then cut off with scissors or a knife. It’s smoother and faster using a knife and spatula.
How to glue near the door
The option that causes more difficulties is when it is necessary to cover the slope of a door or window. When using paper wallpaper, the principle is again simple: glue the strip onto the slope, extending it 1 cm onto the wall. We glue a piece on top exactly along the cut of the window opening.
One of the ways to cover the slope of a door or window
But this method will not work with wallpaper on non-woven fabric: the “overlap” is too visible. In this case, the strip is cut along the window opening with a small margin. Another fragment is glued on top with an overlap, cutting them exactly along the cut of the window opening. The glued piece is wrapped inside, onto the slope. Then they join as before.
It's difficult to explain in words. It’s more accessible in video. By the way, it also contains a story about the design of wallpaper for arched openings.
Mistakes to Avoid
If, after installing windows and slopes, problems arise, air and moisture pass through the cracks, thereby negating the heat and sound insulation advantages of window structures, it means that the technology was violated during the work.
This can happen for two reasons: errors were made during installation, or the work was not completely completed on the street side. Let us dwell in more detail on possible flaws that should not be allowed:
- Any material chosen for cladding must extend at least slightly onto the window frame.
- When installing plasterboard structures, the sheets are placed under the window profile in an attempt to simplify the work, which is unacceptable.
- Under the casing, at the point of contact with the window, there are voids - they should not exist. It is better to place mineral wool or foam insulation here.
- Due to incorrect measurements, the cladding may not fit tightly to the slopes.
- Do not neglect sealants, antiseptics, and waterproofing substances; they prevent the formation of mold and mildew.
- It is not recommended to decorate slopes with a layer of plaster more than 2 cm thick; it may crack.
How to make joints invisible
Care must be taken to ensure that the joints of the canvases are invisible during gluing. You need to connect the canvases so that there is no gap between them, but also so that they do not overlap one another even by a millimeter. A perfect match must be achieved.
Move the strip in the desired direction
Since we, alas, rarely see perfectly smooth walls, it turns out that the seam either creeps in a little or diverges. Your task is to move the canvas so that it becomes perfect and invisible. You can move the canvases with your hands - they can slightly stretch and contract. Due to this, you achieve the required match. If the resulting defect is too large and nothing can be achieved by shifting, the strip is peeled off to this place and, having corrected it as necessary, is glued again. Sometimes, if the seam is sticking out a little, rolling it with a special tapered roller can help.
With this technique, it turns out that first the edge is glued, which is joined, and then, from it, they begin to smooth out the rest of the surface of the canvas. If you have examined the seam and are satisfied with the result, take a clean rag and wipe it off any excess glue that may have come out during all these actions.
To learn how to glue meter-long vinyl wallpaper on a non-woven backing and how to make the joint invisible, watch the video.
Plastering
Another way to finish windows is to apply plaster. This method can be used only in cases where the surface of the slope is perfectly flat and smooth. The thickness of the application of the plaster composition should not exceed 2 cm, since thicker layers are susceptible to rapid cracking and crumbling. Plastering includes the following technological stages:
- removing dust, dirt, applying antiseptic;
- priming with special mixtures;
- applying the initial leveling layer;
- reinforcement of the slope surface;
- finishing plaster, painting.
Applying plaster
Eliminating shortcomings
If there is a lack of experience, it may happen that bubbles appear on the walls after or during drying. You can remove them with simple steps. Take a large syringe, fill it with glue, pierce the bubble and inject some glue into it. Vinyl wallpaper, acrylic, paper - the top part is unimportant. The actions vary depending on the basis. If the wallpaper is paper-based, wait five to seven minutes; if it is non-woven, act immediately.
Next, you need to use a roller, spatula or rag to expel the air from the bubble. First, move the glue inside, then from the edges to the puncture, displace the air along with excess glue. Wipe them with a clean cloth.
How to remove bubbles from wallpaper
Seams come apart quite often. Wallpaper may peel along the thread or baseboard. There are two ways to glue them. Use a brush and the remaining glue or buy a special one for seams. It comes in a tube and is applied precisely. And again, the procedure depends on the base. After wetting the paper, wait a while, then glue it, making sure the edges match.
What to do if the seams on the wallpaper come apart
Source