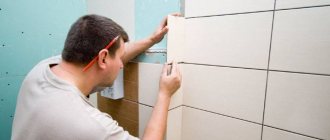
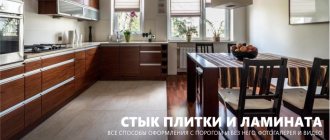
The best finishing option for a bathroom is tiles. But for its installation certain conditions must be met. This concerns the quality of alignment of walls and corners. If this is not done, then it will be difficult to achieve high-quality laying of the material due to the use of a non-uniform layer of glue. How can you bring out the plane of the walls and corners in the bathroom? This article is devoted to addressing this issue.
Corner bathroom: types, sizes, bath materials (48 design ideas)
A bathroom with a corner bath is a functional and aesthetic solution. Well suited for both spacious and small rooms. Are you looking for a bathroom design idea with a corner bathtub? Read our article in which we will tell you how to arrange your space so that it is comfortable and pleasant.
Round corners
Tile countertop, tiled countertop
There is a need to tile the countertop. This option was supposed to be (criticism, advice?) 1. Take a standard tabletop (23 mm chipboard). A tabletop, but not plywood or just chipboard, simply because tabletops are sold at hand, but everything else still needs to be brought. Plus, the standard tabletop fits perfectly, no need to trim anything. 2 On top of the liquid nails we glue one layer of moisture-resistant gypsum plasterboard, plus we fasten the gypsum plasterboard with self-tapping screws. GVL, but not DSP already because GVL is available. 4. Glue 10x10 porcelain tiles onto Flexleber on top. 5. Grout it with LITOCHROM STARLIKE epoxy grout. This option was assumed and it remains in force for now (therefore criticism and advice are welcome). However. The other day they brought me kitchen furniture and the company seems to have collapsed. Along with the furniture they brought a tabletop, which I did not order and did not pay for at all. At the same time, the freight forwarders even forgot to take a receipt stating that the goods were delivered. Well, I modestly remained silent. Well, I think the company will not become poor, because when ordering furniture, after calculating the price, we subtracted the cost of the tabletop from the price, it turned out to be minus 7,000 (SEVEN) thousand, despite the fact that prices for tabletops of this size (3 meters with kopecks) start from 900 rubles. (23 mm) up to 1800 r (38 mm). So, they brought tabletops 38 mm thick. If you put GVL (10 mm) on top of all this, plus tiles (another 10 mm), then you get a tabletop 60 mm thick, which seems a bit thick. Or not, does anyone have any experience or thoughts? Kitchen in the so-called “Castle style”, a version of a similar kitchen below. And so. What if you don’t bother with GVL, but just glue the tiles onto this laminated countertop with liquid nails? The grout is the same. Do you think it will hold up?
Multi-level ceiling with a bend, a niche and a cornice
Hello to all specialists. Here I found in the wilds of the Internet one ceiling option that I’m crazy about. Here he is:
I made a tentative drawing based on my room dimensions:
in a circle looking down M1-M3 - lamps in a semicircle looking down P1-P3 - lamps in a line looking down. 1) Because According to the drawing, on the left there will be a niche of 15 cm, and the center of the main circle is located in the center of the room, then to eliminate antisymmetry, I made another linear level on the right of 16 cm. How correct will this be from a design point of view? 2) Red, blue and green colors the lines show the trajectories on which the lamps will lie. 3) The dotted black trajectory of the circle shows the eaves side. - And here is the main question:
Bathroom with corner bath - what are its advantages?
Corner bathtubs can take up less space than classic rectangular bathtubs while still providing more bathing space. They are perfect for you if you like to relax in hot water, but your bathroom is not impressive in size. The interior of a corner bath is more spacious than a rectangular one, and its shape will allow you to relax while bathing in a comfortable position.
A small bathroom with a corner bath is a great solution thanks to the additional seat that most models have. This item will perfectly replace a shelf for bath cosmetics - you will always have them at hand. Thanks to this, there is no need to install additional cabinets on the wall.
The idea of a room with a corner bathtub and a seat is also suitable for houses where older people live, and this element will also provide comfort to people with disabilities. A corner bathtub will be a convenient solution for young parents - thanks to it, you can bathe your child in comfortable conditions.
The spacious interior of the model will make it easier to soak a large blanket, which is sometimes necessary. A bathroom with a bathtub instead of a shower will also help care for dogs who sometimes need a bath after a long walk.
A corner bathtub will provide you with a nice hot bath in the winter, but you won't get a quick, refreshing shower in the summer. You will solve the problem by installing the screen. Corner baths have unusual shapes, but if necessary, you can easily create a comfortable cubicle. The screen should be installed on one side of the bathtub so that it fits perfectly against the edge. Thanks to this, you will avoid the problem of water splashing.
Discover the advantages of a bathroom with a corner bath:
A corner bath is the ideal solution for small bathrooms.
Plastic borders
Being a cheaper finishing material, plastic bath borders have a wider range. In particular they are:
- Internal (mounted together with tiles).
- External (installed after the tiles).
- Consisting of two parts (two-part profile).
Each of these borders can be self-adhesive. The width of the product varies, up to 30-50 mm. There is no uniform length standard for these products. The set may contain borders 1.8 m long or long, up to 3 m. The height of this element is also different, depending on the height of the bathtub. Therefore, when purchasing one, pay close attention to the total length of the slats. The situation is similar with prices. The minimum cost of such a bathroom set, which includes, in addition to the border itself, plugs and corner elements, starts from 250 rubles, with the simplest appearance. This category also includes the “swallow” profile, the convenience and beauty of which is appreciated by many craftsmen. Particularly popular are the profiles of the companies progress plast, profiles and kolpa san, makroplast.
For installation you will need:
- Plastic border for the bathroom.
- Silicone sealant.
- A hacksaw for metal (it has fine teeth).
- Miter box.
- Pencil.
- Roulette.
- Acetone (solvent).
If you look at the reviews, it turns out that gluing such borders is extremely simple. First you need to wipe the work area dry from dust and moisture and degrease the surface. Then, you need to measure the required length, set it on a plastic border and saw it off on a miter box at an angle of 45°. Regardless of whether your border is self-adhesive or not, we recommend additionally using silicone sealant. It will increase the strength of the connection and serve as an additional guarantee of water resistance. After this, you can apply silicone sealant to the bathtub curb and place it on the gap.
Components and borders can be purchased at any store that sells building materials. If you purchased a set of plastic borders with corners, then install these elements at the junction of the planks. If they are not there, then the joint between the two planks is additionally sealed with silicone sealant. In the latter case, the failed element can only be remade if the sealant has not set.
Types of corner baths
A corner bath can be symmetrical - the most popular are the 110 cm and 160 cm sides. They look impressive, but can be difficult to fit into the room if it is small. This type of corner bathtub often has a drain in the middle, meaning two people can comfortably use it at the same time.
If you dream of a bathroom with a corner bathtub, pay attention to asymmetrical models . Their shapes are so varied that you can easily find a bathtub suitable even for an unusual room. Models available in sizes 140x80 or 150x75 cm.
Corner baths are available in a symmetrical version, which is better suited to a spacious room. For a smaller bathroom, choose an asymmetrical model - thanks to its unusual shapes, you can easily integrate it into a small space.
How to paint a ceramic border
The thought of painting ceramics can make most people confused. However, in order not to remove the old, but quite securely sitting border, you can simply update or refresh it.
Before painting, the border must be washed thoroughly, especially the seams. After drying, a layer of primer with high adhesion is applied to it.
After the primer has dried, you can begin painting. For this purpose, it is better to use epoxy or acrylic compounds.
Coverings painted with satin enamel look gorgeous. It gives items a unique velvety effect.
It is very important to choose paints labeled “for wet areas.”
It is advisable to apply several layers of paint for saturation and stability. If desired, you can make a stencil with a pattern or ornament from cardboard and apply the pattern through the stencil using a soft sponge. After drying, the paint is coated with two layers of varnish. It is better to choose water-based varnishes.
This option for updating the baseboard finish deserves attention due to its simplicity, ease, speed and low cost.
Corner bath design and modern interior
The arrangement of bathrooms with a corner bath can be either modern or classic. There are so many styles available that you can easily find ones with minimalist raw shapes as well as elegant round ones. However, before choosing a bathtub, think about the colors you will use. If you like modern interiors, choose white as a great base for your decor.
A modern bathroom should be light and airy, even if it is not overly large. The optical magnification effect will give you white tiles with a shiny finish. You can combine this type of wall cladding with mirror mosaics, which reflect light beautifully.
You can apply mirror mosaic in the washbasin, on the wall behind the mirror. This type of decoration can also be used to cover a bathtub, even if it has a rounded surface. You can also use mosaic tiles on the wall above the corner bathtub.
A modern bathroom with a corner bath can have either white or gray flooring. White wall tiles and silver mosaics work well with gray floor tiles. Non-slip porcelain tiles will be ideal. If you want to combine modernity with elegance, use marble-look tiles - a white finish with subtle black veining will fit perfectly into a white and silver space.
White handleless cabinetry will work well in a modern bathroom. You will get the effect of internal lighting thanks to the glossy finish of the facades. If you want to give your interior a bit of an industrial feel, choose matte black furniture with a simple shape and hang a lamp with an openwork lamp on the ceiling.
A modern style bathtub bathroom idea should also include additional options, keep them in mind even in a tiny room. Match silver mosaic tiles with a vanity in the same color and choose a shimmering mirror frame. You can bring a beautiful aroma into your interior using incense sticks.
The key element of the bathroom is, of course, the corner bath. An asymmetrical model with sharp, unusual shapes will look great inside. If the room is spacious, a symmetrical bathtub with a glass facade, lighting and hydromassage is well suited.
Modern bathroom with corner bath - how to arrange it?
Small corner baths
Do you like classic bathroom design? The corner model will allow you to create a cozy room in which wood or its imitation reigns. You can use the right kind of natural raw material in a room with higher humidity levels.
Create a cozy bathroom with a corner bathtub by choosing a color base. Choose from warm colors. Beige and brown will be ideal.
Use wood on the floor. Do not be afraid of this decision - more and more often designs involve the use of natural raw materials. However, the wood must be of the right kind - exotic teak, iroko and merbau are the best, while oak is the strongest of the local materials.
It is worth bringing natural materials into the interior through furniture. In the sink area, use a massive chest of drawers in warm colors. Hang a mirror above it - in a wooden frame, of course. On the shelves of the chest of drawers you can place wicker baskets made of water hyacinth.
You can lay the walls with matte tiles. Choose an off-white shade that has a hint of beige in it. A warm shade will go better with the color of the wood.
A cozy bathroom will look good with a round-shaped bathtub. You can choose either an asymmetrical or a symmetrical model - it all depends on the size of the room. If you want to show off your bathtub, choose a wooden frame that will be pleasant to the touch. Teak is ideal for its construction.
A cozy bathroom design should also include extras. Make sure you create a pleasant atmosphere to feel like you are in a spa. By placing scented candles near the bathtub, you can also decorate the interior with green potted plants.
Cozy bathroom with corner bath - how to decorate it?
Ceramic borders
It was quite difficult and diligent work: I had to cut small squares from the tiles, which were then used to form the slope from the wall to the bathtub. If the work was done conscientiously, the effect was absolutely decent. Now there is no such need.
In many construction stores, when you buy tiles for a toilet, they can immediately recommend favorable ceramic borders. But often they still have to be purchased separately. When choosing such a frame, you need to work hard so that the border matches the color of the tile itself.
In exceptional cases, you should choose a white border, then merging with the plumbing fixtures, it will not stand out from the uniform design.
In fact, all ceramic products are considered quite strong and hard. And therefore, of all the options that have been considered, ceramic borders will especially last a long time; they are virtually not subject to deformation and can be used without replacement for many years.
But you need to remember about the disadvantages of this option: it has poor resistance to mechanical damage, i.e. with a strong blow, such an object may prick.
In most cases, this kind of trouble occurs when installing ceramics, and already installed borders add to their own hardness the mechanical strength of the wall and bathtub and are virtually invulnerable.
Working with ceramic components requires specific skills, and therefore the best option is to entrust this process to specialists. If, for example, you personally agreed to take on this task, then it will be useful for you to read how to make a border in the bathroom from ceramic profiles (or baseboards).
Features of installation work
To work, you need to purchase the required number of blanks. Buy borders with a reserve (in case of damage), and also calculate how many corner-type elements you will need. You will also need specialized tile adhesive (it must be moisture resistant), sealant and grout. All work consists of several stages:
- Surface preparation. They must be very thoroughly cleaned and dried.
- Sealing the gap. If it is small, you can get by with silicone sealant. If, for example, the gap is large, it is sealed with foam for installation.
- Preparation of glue (according to the rules).
- Laying the border itself. How to glue a ceramic skirting board to a bathtub? Using a spatula, glue is applied to the back side of the parts, and they themselves lie close to each other so that there is no gap. Special corner components are placed in the corners. You need to give it a day to dry.
- Grout. The finished grout removes small gaps between the parts, and also between the wall and the baseboard.
Any of these types of borders has both its own advantages and disadvantages. When choosing an option for yourself, consider the entire interior of your bath. In any case, decorating your bathtub with a border will give it a complete and beautiful look.
Bathtub design with corner bathtub. Attic.
A bathroom with a corner bath in the attic is a great solution if you want an extra bathroom for the kids or for yourself. Bevels - while they don't make interior design any easier - allow you to organize your interior in interesting ways. An attic with a corner bath can be decorated in any style. When choosing, pay attention to the size of the room and the availability of natural light.
If the room has two large skylights, you don't need to use only light colors. If the room is dark and, in addition, there is little light, gray, beige, and most importantly white will suit best. This, however, does not mean that a small bathroom should be boring without light - you can spice it up with tiles with a trendy Moroccan motif.
A corner bathroom should be, above all, comfortable. If the lowest wall in the bathroom is 110 cm high, you can install a toilet seat or bidet next to it. If it is less than a meter, use the space for an additional shelf for cosmetics. The low wall is also suitable for mounting a radiator.
Attic with a corner bath - how to arrange it?
What dimensions can a tiled molding for a bath have?
Modern ceramic modules can become a designer find in the overall style of the bathroom. They are distinguished by a wide choice of patterns, colors and decor. There are three main types:
- pencil - a thin strip designed for narrow and long crevices;
- corner - the most common type, designed for sealing medium-sized joints;
- frieze - a variant of a corner and tiles in the form of an influx.
The size of pencil borders is usually 15mm in width and 20cm in length. Dimensions of a standard tiled baguette: 5.5 cm - height and depth, length - 20 cm.
The baguette can come with a set of facing tiles.
How to choose the right corner bathroom in a store
The first selection criterion should be the bathroom area and layout. The size and shape of the bathtub should allow freedom of movement. You should leave a minimum space of 70cm between the edge of the bath and the wall, and the optimal value would be 100cm. Bathtubs have more space, with the right angle sides being the same length, so for small bathrooms, choose models with asymmetrical sides.
Bathtub options are available on the market with lengths ranging from 100 to 200 cm and widths from 70 to 100 cm. As for the latter, manufacturers offer oval, trapezoidal and other types of bathtubs. Therefore, you are sure to find something that suits your interior.
When choosing a bathtub, pay attention to how it looks inside. Some of the models available will be simple with plenty of space inside, while others will have different types of headrests, armrests and seats. The latter will become a convenient option when the bath is used by children or elderly people.
Before buying a bathtub, with the consent of the store employee, try it out in practice to evaluate its convenience and functionality. When making your choice, consider the ability to optimize water use in your home. Also think about where the cosmetics and other accessories you will use while bathing will be placed, and whether the bathtub we choose will meet your requirements in this regard.
The most popular material from which bathtubs are made is acrylic, as well as models made of steel or iron. Acrylic is the most commonly used material due to its features - its smooth surface is easy to clean, scratch-resistant, and has a warm surface that allows water to cool more slowly. Acrylic is also very lightweight, which will certainly make assembly or possible subsequent replacement easier.
Source
Rules for laying corners with tiles
If you decide to use tiles for wall cladding, you need to take into account all the details of construction work at the planning stage
In this case, special attention should be paid to how to lay out the corners with tiles so that the room looks beautiful. Naturally, before starting work you need to prepare the necessary materials and tools
It is better to think about laying tiles in the corners in advance
To do this you will need to purchase:
- ceramic tiles;
- special glue;
- crosses for joints between slabs;
- notched spatula;
- finishing profiles;
- tile cutter and building level.
You will need to count the number of whole tiles that will fit in the area from the first inner corner of the room to the other. It is necessary to take into account: the size of the tile joints (which ranges from 3 to 5 mm); the distance from the joints of adjacent walls, which is approximately 5 mm; choose the so-called “red” place in the room, which, as a rule, should be in plain sight (for example, opposite the entrance).
It is recommended to start cladding from the most visible place
Therefore, it is recommended to start facing work with it. The opposite place on the wall should be less noticeable
When laying tiles in a “dark” place, you need to pay attention to the fact that it is advisable to lay out material larger than half the size on it. If too thin strips are glued, the cladding will have a makeshift appearance.
Therefore, you need to perform all the calculations quite accurately in order to comply with the rules for laying the material on the surface and obtain the visual effect of the integrity of the facing wall. All this must be taken into account at the planning stage.
It must be borne in mind that before tiling begins, the walls must be as level as possible. The quality of the cladding and the appearance of the surface depend on this.
Laying tiles in corners correctly
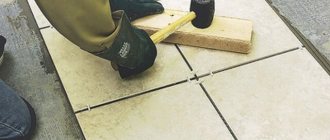
Before laying tiles in the corners, we decide on the so-called “red” place of the room - usually it is immediately noticeable. You need to start working with corners from this place. When tiling corners, the material must be glued on two adjacent sides - strictly symmetrically, so this must be taken into account and the same tile trims must be used. For cutting, you need to use a special tile cutter, which is equipped with a template that takes into account the required cut size with a seam allowance for grouting.
Making an internal corner
First, glue (mastic) is applied to a wall with an area of about one square meter; you need to start from the floor. The glue is spread with a special spatula over the entire surface to obtain an even layer with equal grooves. The solution is then applied in the same way. Glue the first tile. Then glue the second one.
Constantly check that the cladding is correct
To ensure an even seam, we install special crosses at the joints of the surface. Having glued the first row of tiles, we check the levelness of the cladding with a building level. Next, we continue to lay out the surface in the same way. Having reached the next wall, mark the distance to it, cut off the tile if necessary and glue it.
When starting to lay the material of the adjacent wall, we glue the remaining trimmed part. If the material is made with a pattern or design, then we combine its parts. In this case, we glue the edge of one tile overlapping onto the surface of the other, leaving a gap of about 2 mm. The material laid out in this way creates a feeling of integrity of the tiled surface, as if it were curved. Next, we continue to glue the tiles to the required height level.
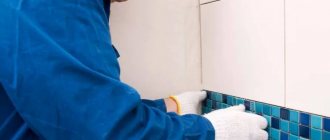
Covering the outer corner
Only solid material is used for cladding external corners. When laying, the position of adjacent tiles on both the right and left must be strictly symmetrical, and the laying is carried out overlapping the surface of the tile. In this case, the cladding will look beautiful if the ribs have a rounded or glazed appearance. If the surface has unattractive edges, you can use a special profile for finishing, applying it with cement mortar. Such surfaces will look great. That's the whole secret of laying tiles. Further laying of the coating is carried out according to the rules described above.
When facing external corners, do not forget to maintain symmetry
Summing up the laying of corners with tiles, we can highlight the following important points that are necessary to complete the work:
- calculation of the quantity of ceramic tiles;
- choosing the right “red” place;
- the order of laying facing tiles on the internal and external surfaces of the corner.
Video on how to decorate the outer corner of ceramic tiles:
All that remains is to purchase the necessary materials and tools and begin work.
repaireasily.ru
When the layout “decides”: because of the round corners, the plumbing “does not fit” into the bathroom
The Belarusian people do not like panels, however, not without reason - low ceilings, poor sound insulation, the impossibility of redevelopment, and even the dubious aesthetics of the buildings themselves. But, as it turns out, even among panel houses there are “favorites” and “outsiders.” Shareholders of one of the high-rise buildings being built in the Mikhalovo residential area had to encounter something unexpected. And it seems that no one was misleading people: the layouts of the houses of the ZA-OPB series are freely available and, before deciding to build, you can look at everything and figure it out. But reality sets traps where you don't expect them.
The high-rise building is being built by the general contractor Minsk House-Building Plant, which introduced the ZA-OPB series to the world. houses of this particular “model” as follows: “The main series of residential buildings erected by Minsk House-Building Plant OJSC is a series of residential buildings made of volumetric blocks - ZA-OPB. Volume-block housing construction is an industrial method of constructing buildings, in which the main building element is a volume-spatial block, including one or more volume-planning cells: a common room; bedroom; bedroom and hallway; kitchen, bathroom, bathroom and hallway, staircase, etc.”
True, the presentation forgot to mention the most important thing - all the cells, including the bathrooms, have rounded corners, which decorators (and the residents themselves) hate so much. And only when describing the advantages of the next series of houses, which are considered to be an order of magnitude better, the house-building plant points out that in the houses of the OKPM series (volume structural planning module) “the internal space of the block rooms changes - instead of round corners of the room they become rectangular, which significantly improves operational and planning characteristics of apartments".
The drawings of the ZA-OPB series, which no one hides, show that the angles in the rooms do not even tend to 90 degrees. The same nuance can be noted in the bathroom. On paper everything looks more or less decent and beautiful, but in reality - nothing at all. Due to the rounded corner, a standard bathtub simply cannot fit flush against the wall. A significant gap forms between the plumbing equipment and the wall.
“We dreamed that all the corners in the bathroom were round, but, unfortunately, only one. Thank you for placing the cast iron not in the center,” one of the future residents sneers.
“This is a fairly old and well-known series of houses among finishers,” explains specialist Alexander Skok. — As far as I know, earlier, in order to hide the resulting gap, even at the construction stage, workers fixed a special concrete strip between the bathtub and the wall, which leveled the wall, gave an angle and, in addition, became a kind of shelf 7 centimeters wide. But since in this case the bathtub is already standing , then perhaps they won’t do this. Future residents also need to be mentally prepared for the fact that the walls may be crooked and the ceilings may be domed. Perhaps these Minsk residents will be lucky and everything will be fine, but when I visited the houses of this series, there were enough problems. I know that people who faced the same problem cut the corner of the bathtub itself (we are by no means talking about concrete, but about plumbing), achieving the desired radius, and placed it close to the wall.
Source
Where to buy a quality bath corner
Currently, the corner can be purchased at construction markets, in huge construction stores and, of course, in online stores.
In an online store there is no opportunity to take a good look at the product in order to determine the quality and make sure that the desired pattern or shade is correct. In construction markets, goods are often stored in incorrect conditions, which can subsequently affect the quality and service life. This is especially true for self-adhesive models, which must be stored in dry and warm rooms. It turns out that large hardware stores are most convenient in this regard. Here you can view the product, check the quality, consult with a specialist and purchase additional items if necessary. The storage conditions for the goods are decent and the goods can be changed if necessary. Most importantly, you don’t have to wait days and weeks for the goods to be delivered.
Polymer materials are used to produce self-adhesive curb tape.
Method number 1. Washed down the ends of the tiles at 45°
Today, more and more often, to decorate external corners, they choose the method of grinding the ends of the tiles at an angle of 45 degrees; popularly it is often called a bevel. This method of decorating corners requires skill, experience and high precision of the tool. Trimming the edge of the tile (bevel) makes it possible to do without a decorative profile.
Many of our customers are primarily interested in aesthetics. The beveled ends fit perfectly together, forming a right angle. Visually, the corner looks immaculate and expensive.
Please note that with this method, the evenness of the tiles is important, so try to select tiles without flaws.
We advise you to think carefully before joining corners at 45 degrees, weigh the pros and cons. The fragile, thin edge of the tile easily chips. In addition, an acute angle is dangerous; you can get injured due to negligence. Advantages of washing down the ends of tiles with 45 g
.:
• impeccable appearance.
Flaws:
• high price;
• increased vulnerability of tiles;
• labor-intensive work, special tools are required;
• risk of injury from an acute angle.
External and internal corners when laying tiles. Design options. Alternatives to cutting at 45°
Both external and internal corners when laying tiles are done in the same way - in three ways:
- overlap
- with insert corner
- using a 45° cut
External and internal corners when laying tiles. Design options. Alternatives to cutting at 45°
Laying tiles with overlap
Internal corner
If the tiles are straight, thin and large in size, then this installation method will look quite aesthetically pleasing. The loss of a couple of millimeters under the edge of the adjacent tile will be invisible to the eye.
If the tile is small, thick or convex (for example, a hog), and also requires trimming, then when laying the tile overlapping the corner will look sloppy. In this case, it is more advisable to cut at 45°.
External and internal corners when laying tiles. Design options. Alternatives to cutting at 45°
External corner
When laying the outer corner overlapping, the edge of the tile is exposed. This solution is optimal if the edge of the tile is inaccessible to the eye.
External and internal corners when laying tiles. Design options. Alternatives to cutting at 45°
In this case, it would be nice to look at the outer patch corner, which will cover all the flaws.
Metal overhead corners have a quite presentable appearance.
External and internal corners when laying tiles. Design options. Alternatives to cutting at 45°
Washed down the tiles at 45°
When decorating internal corners, as mentioned above, cutting at 45° is optimal if the tile is small and convex. However, more often this method of corner design is applied to external corners.
External and internal corners when laying tiles. Design options. Alternatives to cutting at 45°
What you should pay attention to
- Many people undertake to make a cut at 45°, but not everyone can do this work efficiently.
Advice - don’t take the master’s word for it, ask him to show his skills in practice. Damaging one tile will not ruin your mood.
- Angles with a 45° cut are fragile.
If the outer corner is on a walkway and you plan to carry heavy, large objects (for example, a washing machine) past it, be careful - chips may occur. To avoid problems, leave a few tiles in reserve after repairs. Any tiler can easily remove damaged tiles and glue new ones in their place.
- Angles with a 45° cut are more traumatic.
Of course, if you hit a sharp corner with your elbow, it will hurt much more than if you hit a flat one. However, it is still very difficult to cut yourself on this corner - the top of the corner is coated with sealant or silicone.
Laying using an insert corner
Angles, both metal and ceramic, are an alternative to cutting at 45°.
Internal corners are used for ease of installation, but they have a practical meaning in the area of contact with water, to ensure greater tightness. As a rule, they are used at the junctions of the bathtub and the wall.
External and internal corners when laying tiles. Design options. Alternatives to cutting at 45°
The outer corners hide the edge of the tile.
Looks most aesthetically pleasing:
- Decorative metal corner profile
The angle when used will be strong and less dangerous.
Its only drawback is the price.
External and internal corners when laying tiles. Design options. Alternatives to cutting at 45°
- Tile pencil or corner
Corners formed in this way are less dangerous, but very fragile. In this regard, it is worth stocking up on a couple of corners, in case chips appear and replacement is required.
Method number 2. Plastic outer corner layout
A decorative plastic profile is very often used to join external corner tiles. This popular method of decorating external corners in the bathroom is easy to install and relatively inexpensive.
Decorating the outer corners of the tiles with the installation of a plastic layout gives the corner a finished look, masks laying defects, hides uneven corners, and protects the tiles from chipping.
Advantages of the method:
• ease of installation;
• protection of joints from damage;
• affordable price (our installation cost is 70 rubles per linear meter);
• ensures the safety of joints.
Flaws:
• fragility of plastic corners;
The corners can be of various shades, which makes it easy to choose the color. Traditionally, a white layout is used. When purchasing colored tiles, we recommend that you simultaneously purchase a plastic profile that corresponds in millimeters to the thickness of the tile. Some of our customers note that this corner looks very cheap. The choice is yours.
Let's consider other options.
Method No. 3. Metal outer corner layout
The decorative metal profile looks especially aesthetically pleasing. Metal layouts can be made of brass, stainless steel, aluminum.
Stainless steel profiles are not used so often due to their high price. The aluminum corner is lightweight, practical and relatively inexpensive. It fits easily into any interior.
The most popular are metal outer corners with chrome or nickel plating, as well as layouts painted in gold and silver shades. They look impressive and go well with the design of the plumbing fixtures.
Advantages of metal layout for tiles:
• presentable appearance;
• reliable protection of corners from damage
Method number 4. Joining the ends of the tiles in the usual way
The usual butt laying of tiles with the formation of an outer corner of 90° is the most affordable way to design an outer corner. Some people don’t see much point in decorating the outer corners and ask to join the tiles in a simple way without cutting at 45 degrees. and profile. The method involves laying one end of the tile on the edge of the other. Advantages of the method:
• accessibility of installation
• presence of an unclosed edge
The choice of external tile joining method depends on the design of the bathroom and your finances. To ensure that the final result does not disappoint you, we recommend using our tips. Their practical benefits can be discussed in the comments.
Source
Elimination of defects
Regardless of which method you choose, it may simply not be possible to do all the work perfectly. Especially if you are a beginner, non-standard situations can and will arise during your work.
Moreover, due to lack of experience, some nuances may simply get out of control. And if you need to lay boar tiles, then questions may arise about how to properly lay out the joint in the corner.
For example, one of the difficulties you may encounter is that it is difficult to achieve a perfect 45° cut. So, you can sand off the excess with sandpaper until you get the desired result.
If you overdid it and your cut was too large, then do not rush to break the tile. Leave it until the next joint. Perhaps there will need to be tiles already.
But what if during the work chips form on the surface of the tile. It is clear that this is not a completely rosy situation. However, you can get rid of them using regular grout. If it is difficult to disguise them in the corner, then you can cut out a plastic corner and glue it to liquid nails or silicone. Everything will go very quickly and easily.
How to straighten corners in a bathroom
Published by: Arthur Kanapatsky 0
The best finishing option for a bathroom is tiles. But for its installation certain conditions must be met. This concerns the quality of alignment of walls and corners. If this is not done, then it will be difficult to achieve high-quality laying of the material due to the use of a non-uniform layer of glue. How can you bring out the plane of the walls and corners in the bathroom? This article is devoted to addressing this issue.
What can you use to make a bath rim with your own hands?
The easiest way to make a bathtub rim with your own hands is to use white or transparent sealant and fill the gap between the tiles and the bathtub. It can be used as a temporary one.
This option does not look very aesthetically pleasing and will not last long.
A durable and reliable border can be made from leftover tiles. You just need to try to cut it evenly, otherwise it won’t look very neat. It is better to install a homemade ceramic border using special glue or liquid nails. If you have evenly cut parts of the same color as the entire wall cladding, this option is not only reliable and practical, but also looks very aesthetically pleasing. However, some consider this a thing of the past; now it is no longer in fashion.
Leveling materials and methods
The tile laying process allows for certain deviations in surface level. For the most part, this applies to products with large sizes. If we are talking about laying mosaic tiles, then the surface must be perfectly flat. This is due to the fact that due to its small dimensions, it will be almost impossible to display the level. There are several ways in which you can level the walls and corners in the bathroom. Among the main ones are:
The first option involves the use of a standard cement-sand mortar, which is applied to the surface along beacons. The advantage of this method is the availability of materials, as well as their relatively low cost. Finishing in this way can be done over rough materials without significant preparation. With proper installation, it is possible to achieve excellent adhesion and high strength of the wall plane in the bathroom after gaining strength. This increases the load-bearing capacity, which is important for high-quality installation of tiles in the bathroom. If brick walls are plastered, the solution additionally protects the brick from destruction under the influence of various factors. To achieve better moisture resistance, special additives are used in the solution.
In certain situations, tiles can be laid on putty walls. This may be required when the plaster has already gained strength, but there are significant deficiencies that cannot be eliminated in any other way. Difficulties when using this method can arise if the compositions are incorrectly selected. After curing, the putty is porous, which increases moisture absorption. This means that the tile adhesive may dry faster than required and the tile may simply fall off. Laying tiles on a plastered surface can also be done in the case where a different finishing option was chosen during the renovation, but this is done at the final stage.
An excellent way to level walls and corners in the bathroom is to use plasterboard. The finishing process with such material takes less time and is carried out using a dry method, which means there is no need to wait for strength to set, which means that work on laying tiles can begin faster. For the bathroom, it is better to use moisture-resistant boards that do not lose their properties even with significant changes in humidity and temperature. Another advantage of using plasterboard sheets is the possibility of forming not only straight, but also curved planes, which can be finished with mosaics.
Finishing
Method one: tile edging
Plastic corners for bathroom tiles are used when decorating the corners of openings, wall turns, niches and shelves. The corner is a rounding that remains visible and a perforated plate that is placed under the tile.
Tiled corner.
How to glue such a corner under the tile?
I do it like this:
- The wall is primed with penetrating primer;
- The tiles are soaked in a basin or bucket for 3-5 minutes. This is necessary so that the pores of its back surface are filled with water, which will allow cement particles to enter them. This, in turn, will ensure high-quality adhesion between the tile and the base;
- Tile adhesive (I use Ceresit SM-11 or SM-17) is applied to the tile with a comb spatula;
- The tile is pressed against the wall on top of the corner previously pressed against it and lightly knocked down with a rubber hammer.
When laying the next horizontal row, the process is repeated. To prevent the corner from tearing out from under the tile under its own weight, it can be secured by hammering a nail into the plaster, drywall or masonry joint.
The corner of the doorway in the bathroom is edged with a plastic corner placed under the tile.
Method two: starting profile
Another type of corners is aluminum for tiles. They are attached to the wall with dowels with self-tapping screws and do not allow the first horizontal row to move down under its own weight. This is useful when laying large tiles (more than 50x50 centimeters in size) and gluing massive mosaic panels.
When attaching the starting profile, you should be guided not by the line of the floor or furniture, but by the level. The first row of tiles, glued with a deviation from the horizon, will make the entire wall look untidy due to uneven junctions with the walls.
Aluminum starting profile for tiles.
Preparing the walls
The planned major renovation of the bathroom implies that it will be freed from various devices and equipment, after which it is possible to carry out step-by-step preparation of the surface for its further leveling. The first thing you need to check is the condition of the wall decoration in the bathroom. To do this, remove old tiles that may be on the walls. The easiest way to accomplish this task is to use a hammer drill, in which you can attach a chisel in a fixed position. After removing the tiles, if there were any, use a small hammer to tap the entire surface of the walls. If in some areas the sound is dull and cracks appear, this indicates that the plaster has already begun to peel off and requires removal.
Plaster should be removed in the same way as tiles. A hammer drill with a chisel will do the job perfectly. The first step is to create a small chip, which will serve as a starting point. If the plaster is in good condition, which was revealed by a ringing echo when tapping a hammer, then there is a need to determine the existing difference in surface level. An ordinary plumb line, a rule with a level, or a laser level will help with this. When using a plumb line, just select any point closer to the ceiling and place the thread parallel to the wall in the bathroom. If the gap is uniform, then the wall has a fairly smooth surface. The rule will need to be applied in several places, monitoring the position of the bubble or the gap between the wall and the rule. With a laser level everything is somewhat simpler. It is enough to project a line parallel to the wall and take measurements from it to the wall at various points.
Note! When laying regular tiles, a difference of 10 mm to the height of a standard wall is allowed, which is quite easily leveled with a layer of glue under the tile.
If the wall is at a suitable level but has finishing in the form of paint or similar material, then this will need to be removed. To do this, you can use a grinder with a grinding wheel or a special grinding machine with sandpaper. This is done in order to achieve good adhesion between the tile adhesive and the wall surface. Paint can be a problem in this regard, as the adhesive may peel off from the surface after drying. If there are large plaster deposits, they can be carefully corrected with a hammer drill.
Shutdown
Once the ceramic border around the bathtub has completely dried, a few more finishing touches are needed to achieve the final effect. The seams between the tiles and the border must be additionally sealed with acrylic or silicone sealant, but this must be done as carefully as possible so as not to stain the tiles.
The ideal option to achieve aesthetic beauty would be to cover the seams with the same grout that was used to cover the tiles. But for this, before gluing the ceramic border, it is necessary to provide a gap of the same width between the modules, using special plastic crosses. In this case, your work will look perfect.
Important. Remember that ceramic baseboards for bathrooms absorb the most moisture, therefore, for grouting, you must use only moisture-resistant grout with antifungal additives. Choose the grout color according to your design style and your personal aesthetic preferences.
An excellent option would be a mosaic border in the bathroom, since such material is very easy to lay out due to the small size of the modules. Despite the fact that mosaics cost a little more than standard corners, they allow you to do high-quality work without any special experience. Also, a mosaic bathtub rim is often used when there are rounded lines, as it allows you to perfectly replicate any circle.
After studying the material presented above, you will be able to lay out ceramic corners yourself without the help of third-party specialists.
Internal corner
Aligning an internal corner often requires more effort than an external one and the process is integral to aligning adjacent walls in the bathroom. After the old finish has been removed and the level of difference in the plane of the walls in the bathroom has been determined, you can begin to work. The first stage is to apply a deep penetration primer. It is necessary to increase adhesion, as well as to reduce moisture absorption by the material from which the walls are made. If absorption occurs too quickly, then after drying, apply one or more layers.
The easiest way to level the walls is by plastering using beacons. The latter are small metal strips that act as supporting elements for the rule necessary to tighten the solution. After the primer has dried, you can proceed to installing the beacons. Prepare a small amount of tile adhesive or cement-sand mortar for plaster. The solution is applied in a strip of small width to the place where the beacon is planned to be installed. Next, a level is attached to the beacon, and the bar is positioned in accordance with the position of the bubble. To do this, in some areas you will have to drown the lighthouse in the solution.
The distance between the beacons is made smaller than the length of the rule, so that it is convenient for them to rest on the elements. You can place beacons on all the walls in the bathroom at once or mount them as you go. Once all the necessary elements are secured, you can begin preparing the selected type of solution. Using a trowel or ladle, it is applied to the area between the beacons and is gradually pulled together with a rule until a flat surface is achieved. To align one internal corner, you will need to plaster two perpendicular walls in the bathroom. When the plaster is applied and rubbed on them, it is necessary to wait for it to gain strength so that it can serve as a support for the corner trowel.
The next step is to apply the solution to the inner corner. It should be in moderation or a little more, because the excess can always be removed. Once a sufficient amount of solution has been applied to the inner corner, you can use a special corner spatula. The walls of the tool will rest on the plastered planes of adjacent walls, and its angle will form the correct angle in the wall. It may take several passes to achieve the desired result. Excess solution that appears is removed with a damp sponge.
When forming internal corners using drywall, the process will move faster. A sheathing of metal profiles is pre-installed on the walls. They are placed at such a distance from the wall to achieve their correct vertical position. The internal corner is formed directly from the rack profile. The two elements are installed perpendicular to each other. In this case, the side wall of one is fixed to the front part of the other. An example of how this should look is shown in the illustration above. For greater rigidity, the profiles are twisted together using small self-tapping screws. After the corner is formed by the profile, drywall is laid. The first sheet of drywall is laid flush against the profile, the second sheet rests against the first, which allows you to form the correct internal corner. The entire process is shown in the video below.
Note! There is also a special corner profile on sale, an example of its use is shown in the photo above.
At what height should the tile border be placed?
In the kitchen I want to put washable wallpaper up to half the wall, and then lay tiles all the way to the floor. At what distance should the tile end, and at what height should the border be placed for it?
In the kitchen I want to put washable wallpaper up to half the wall, and then lay tiles all the way to the floor
The sequence of work is not entirely correct.
First the tiles are laid, then the border (frieze)
The installation height of the curb is individual; there are no rules, regulations, special recommendations, and so on.
You'll have to make a decision based on your taste.
If, for example, the tiles are dark, the wallpaper is light, you want to see the kitchen light, then there should be less tiles on the walls than wallpaper and vice versa.
Even the size of the tiles does not greatly affect the installation of borders. The tiles can be cut from below to give absolutely any height.
I advise you to stop here:
Typically, kitchens have cabinets, both wall cabinets and those that stand on the floor.
The border is beautiful and expensive, it is desirable that it be visible, so that it is not covered by wall cabinets or cabinets installed on the floor.
The height of the cabinet, from floor to edge, is usually 80, 85 cm, proceed from this.
Also keep in mind that the distance from the bottom cabinet to the wall cabinet is approximately 60 cm (there are other options, but on average, 60 cm).
These are the dimensions the curb should fall into (between 80 cm and 1.40 cm).
In general, it is best to pick up a tape measure and measure both the height of the cabinets and the level at which the wall cabinets will hang, because they are hung to suit the owner’s height, taking into account the fact that she can get an item from the top shelf without jumping.
For this reason, wall cabinets are mounted at different heights.
Also take into account the height dimensions of the tiles; perhaps there is no point in cutting the tiles, perhaps a whole one will be laid from the floor.
Source
External corner
Forming an outer corner of a bathroom wall is somewhat easier than creating an inner corner. For these purposes, special auxiliary elements have been developed. They are a metal or plastic perforated corner. It is suitable when the difference in the level of the walls is not too large. In this case, the principle of installing the corner for the outer corner coincides with the way in which the beacon is installed when plastering the wall. A certain amount of solution is applied to the outer corner of the wall in the bathroom, after which the corner is leveled using a level or plumb line. After the solution under the corner sets and fixes it securely, it can be used as a beacon.
The formation of an external corner in a bathroom using drywall is carried out using a similar method as for the internal corner. The guide profile is installed on the floor and ceiling. They should be installed perpendicular to each other with a slight projection from the wall. Next, two rack profiles are mounted, which are connected to each other perpendicularly using self-tapping screws. In some cases, one rack profile will be sufficient, since it already has an exact angle of 90 degrees. After this, a serpyanka or fiberglass stack is applied to the outer corner, which is formed by plasterboard boards, which is fixed with glue. It is also possible to use a plastic or metal corner, which further strengthens the structure. You can clearly see the process in the video below.
Docking methods
There are several methods for finishing wall corners. In this article, we suggest you consider the following options:
Each of these methods has its own differences. We are confident that one of the listed methods will help you lay tiles.
Direct docking
You can lay tiles at right angles. This is the easiest way without any hassles. That is, it is assumed that the tiles are joined to each other without any trimming. As a result, one slice will be hidden, and the second in plain sight.
This method allows you to level a corner in any part of the wall, even the most inaccessible, with the least effort. If the tiles converge into a corner and one of the edges is cut off, then think about it so that it is not visible. It is better to have a factory cut on the outside.
Another method that involves perpendicular joining can also be included in this category of joining tiles. This method is only relevant if a special border is used to cover the protrusions.
The principle of joining tiles is as follows: the tile is glued to the surface so that the top tile, located horizontally, hangs over the edge. In this case, the joint of the tiles in the corner will be neat (provided that the canopy reaches no more than 5 mm). In this case, it is important that the overhanging edge has a factory cut.
Laying tiles in an internal corner - video
Edge Trimming
We can safely say that this is the most difficult way to decorate the corners of ceramic tiles. It is mainly used by those who have special equipment for cutting tiles or by experienced tilers.
The idea is that the sides of two tiles are cut at 45°. The result is a perfect 90° angle. Mostly the tiles are placed so that there is a small gap near the walls. A tile at least half the width of the whole is placed in it.
And laying it is not difficult, because it has a rectangular shape. To form such a clear angle, you need to understand that the walls must be perfectly aligned. If the angle of the wall, both internal and external, does not have 90°, then cutting 45° corners on the tiles does not make sense.
As for the cut, it is best done with an electric tile cutter. The cutting element should be a diamond-coated circle. Due to high speeds, a perfectly even and smooth cut is obtained.
The only thing is that the guide on the bed must first be set at 45°. After such a cut, you will not need to further process this side of the tile.
Some craftsmen have adapted to using a budget option, making the cut with a regular tile cutter and adjusting the edge with a grinding machine. However, this method has its drawbacks. It is extremely difficult to make a perfect cut, as is the case with an electric tile cutter.
If you already have a tile cutter, and it has the ability to change the cutting angle, then you can beautifully design the internal and external corners of the walls.
A visual example of tiling a corner with cutting tiles at 45 degrees
Using Trims
This decoration of wall corners is in great demand. Joining tiles using trims greatly simplifies the tiling process. They exist both internal and external.
One of the main advantages is that it is possible to choose trim of a wide variety of colors, which will be most suitable for decorating a corner. They can be plastic or metal. Accordingly, they differ in cost, the first ones are much cheaper. Among workers, trims are also called corners.
So, to finish the outer corner, an L-shaped corner is used. It has a slight bulge. Corners for internal corners have a concave shape. They are often used as a transition from tiles to a bathtub.
The advantages of such corners:
Options for correct installation of tiles on external and internal corners - video
Corner tiles
Ordinary corner tiles are often used to decorate wall corners. But not all manufacturers produce tiles of this shape. By far, this is the easiest way to trim corners. In appearance, they are presented as two tiles connected at 90°.
However, they are used primarily for external corners. When laying tiles of this shape, glue is used, onto which the remaining tiles are laid in a straight line.
The result is beautiful. Using special corners made of metal or plastic cannot even compare with this method.
repair - what to do with the rounded joint between the wall and the ceiling (photo in the topic)
Renovations are pending. I was racking my brains about what design to choose, what wallpaper, and in general what to do, if the whole apartment is filled with bends like these (they’re called pads, as I understand it). I looked all over the Internet, but I couldn’t find any options for exactly how we did it. I don’t consider stretch ceilings at all, if that’s the case.
In the photo on the left - this is a room, and one wall is rounded like this, and then also with a transition to a right angle, it goes into the ceiling. Now there is wallpaper there and everything looks harmonious. After the renovation, this wall (it is long) is planned to be empty, that is, the maximum that will be placed along it is a chest of drawers. That is, the wall will be bare and you need to beat it somehow. I wanted to mix it up with wallpaper with floral patterns, but you can’t stick it to the ceiling with a curve, it’s ugly.
In the photo on the right there is a corridor - everything there is generally twisted, and even if you allow a suspended ceiling or a plasterboard structure there, it will steal 50 centimeters, and it will turn out to be such a long trailer.
Anyone with imagination, please suggest something, collectively we think it’s better, otherwise there’s no one to even consult with, the whole family said - think for yourself.