The most popular type of ceiling decoration in country houses are beams. One of their very attractive features is that you can install them yourself.
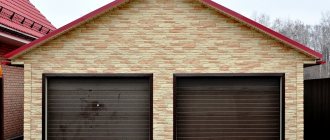
The material used to make beams is usually wood, but polyurethane is less common. The first option is perfect for finishing ceilings in private houses, while the second is more often used in the construction of garages and sometimes in apartments.
These finishing materials are installed around the perimeter of the ceiling and secured there with specialized fasteners. Ceilings are most often hemmed with plasterboard or OSB slabs.
Decorative ceiling beams: what are their advantages?
In general, ceiling beams appeared as load-bearing structures of a building, but by now, in most cases, they have a purely decorative function.
Decorative beams fit very harmoniously into almost any interior, which is why they are often installed in living rooms or halls.
The main advantages of finishing the ceiling with beams:
- The room in which the ceiling beams are installed visually expands.
- Beams can still serve more than just a decorative function if they are installed on a log house.
- Beams are very good from a design point of view, since these days they are available in a very large assortment on the market.
- The cost of beams is affordable.
The management authority must carry out routine repairs of common property regardless of the need for major repairs
The cornice is part of the common property of an apartment building, which must be maintained in proper condition: to ensure compliance with the reliability and safety characteristics of the apartment building, safety for the life and health of citizens, and the safety of their property (clause 10 of RF PP No. 491).
After signing a management agreement with the owners of the premises, the management organization is responsible for the condition of the common property, including responsibility for its improper maintenance and failure to eliminate violations and damage (Part 2 of Article 162 of the Housing Code of the Russian Federation).
Clause 4.6.1.2 of Rules No. 170 imposes on the management organization the responsibility to eliminate deformation in roof load-bearing structures. The eaves of a house are a roof element that affects the insulation and strength of the roof; it protects the walls of the house from moisture.
The court did not accept the management organization’s argument that major work was needed to repair this element as a basis for declaring the order of the State Housing Inspectorate body illegal. The agency demanded that the management organization eliminate the violations, but the organization decides for itself how to comply with the order.
The need for major repairs in itself is not a circumstance that excludes the obligation to maintain the common property of the house in proper condition and carry out routine repairs. This position coincides with the conclusions of other courts in similar cases, for example, No. A17-6634/2017.
The fact that the house is included in the short-term capital repair plan does not relieve the MA from its obligations to properly maintain the common property of the house in order to ensure safe and favorable living conditions.
The process of finishing ceilings with plasterboard beams
Installing plasterboard beams is not at all a difficult task. Installation is quick and simple, and if the beams are damaged, they can be easily replaced. Below we provide instructions for finishing the ceiling with plasterboard beams.
The action is performed as follows:
- We apply markings to the surface.
- We install hangers. We use dowels as fastenings.
- We fasten the sheathing from a metal profile.
- We cut out the plasterboard beams according to your measurements.
- We fasten the beams to the sheathing with self-tapping screws.
Removing ceilings in an apartment
Another problem was observed in the wooden part of the house: the ceiling beams sagged by 10-15 centimeters. Probably, such a problem did not arise immediately and the logs holding the ceiling boards sagged over the decades of the house’s life. While there were interior partitions in the four-wall space, the curvature of the logs was not very noticeable, and perhaps these partitions supported the beams.
Walking through the attic, another problem was noticeable. The entire ceiling flooring noticeably swayed and sagged under the weight of a person.
One way or another, something had to be done about it, and in fact there are several ways to level the ceiling.
Leveling with metal profiles and plasterboard
A neighbor told me about the first method (they did it for him). The logs of the beam remain as is, and the curvature is leveled with sheets of drywall and metal profiles. The profile is attached strictly horizontally below the beams, and plasterboard sewn onto it forms a flat ceiling surface.
With this method, the ceiling level naturally decreases noticeably, and this is why we did not like this method. The ceiling in old wooden houses is already lower than the usual two to fifty in modern apartments, but here there is another 15-20 centimeters minus. It will turn out to be a dugout. In addition, drywall cannot solve the problem of beams sagging when walking in the attic.
Leveling with floor supports
The second method is to install supports under the beams in the middle of the span. That is, the ceiling is raised with a jack, and in the middle, with emphasis on the floor, pillars made of wooden beams or round timber are installed. Subsequently, these pillars are hidden in partition walls.
The disadvantages of this method are the mandatory presence of partitions and the additional load on the flooring.
When installing the partitions, I still raise the beams, but mainly in my reconstruction the third method was used.
Aligning the ceiling with reference to the rafter beams
The third and fourth options are suitable for those whose rafter system is made the same as mine. In my house, just above the four ceiling beams there are five logs of the rafter system. Over the years of stress on their edges, they also bent a little, but in the opposite direction. Actually, these logs were used as support.
Round timber spacers with a diameter of 8-10 centimeters were installed between the rafter beams. The ends were cut at an angle so that the round timber rested exactly and flush against the rafter beams. The spacers were nailed to the logs of the beams.
Photo of attaching the spacers to the rafter beams.
The clamps were made from a 20x4 mm steel strip 60-80 cm long. 12 mm holes were drilled at both ends for screws. There were two clamps and two spacers for each beam.
Photos of blanks for clamps
After installing the spacers, the actual lifting was carried out. A hydraulic jack was installed below on a timber stand. A pillar made of round timber was attached on top of it, resting on the ceiling beam. Then the jack's work continued and the ceiling rose.
This system is not secure. When climbing, a wooden pole can turn to the side (I have 2 cases of 4 climbs), so a helmet won’t be superfluous here. It is advisable to cut the post to its maximum height, rather than select pads for the bottom. It is advisable to place the jack itself as low as possible, more stable, and preferably not on a beam, but on a steel plate. The load on it is less than when lifting the entire log house, and a six-ton truck is quite enough, but nevertheless...
At the top, the end of the post in the ceiling beam can leave a noticeable dent, and if the appearance of the log is important, then it is worth placing a board there.
The beam rises until it bends in the opposite direction, taking into account the fact that even if it is secured, it will sag after lowering the jack. The raised log is secured in the attic to two spacers with clamps and screws (10x120 mm).
Photo of the secured clamp. Animated drawing of the ceiling rising.
A photo of what ended up in the attic.
It was not possible to completely eliminate the sagging; out of 10-15, one or two centimeters still remained. Moreover, the beams were bent with a reserve with a jack, but in the end the rafter logs sank. You will have to correct this matter when installing the partitions.
However, the ceiling swaying when walking through the attic stopped
Raising ceiling beams with studs
The fourth method was used when leveling the same beam in a tristen. The same spacers were used in the rafter beams, but instead of clamps there were steel studs with M10 threads. The ceiling beam and spacers were drilled through. And the lifting was carried out not with a jack, but by tightening the nuts on these studs.
Here it is advisable not to overdo it with tightening these nuts. You can break the thread, you can even break off the stud. It is better to tighten the nuts at once, two on each side.
Lifting beams with a pin Photo was taken during partial dismantling of the attic to pour a concrete beam
The method has two disadvantages. The first is that the nut with a washer and a piece of stud end up in the room, it is noticeable, and it needs to be masked with something. The second is in a cold bridge running along a steel rod. After all, one end of the stud is in the attic and there is frost in winter, and the other is in the room and condensation will collect on it.
We had such studs there temporarily and were removed after the ceiling beam lay on the concrete beam.
The best ideas for finishing ceilings with beams for a country house
The work does not end with installing the beams; then you will need to cover them with some kind of material. OSB boards are best suited for this role because of their practicality.
Installation procedure:
- Cut a small hole for the lamp.
- Using jumpers we fix the slabs on the floors
- After installing the slabs, place a self-tapping screw at a shallow depth (several mm). Its cap will have to be hidden; glue and shavings are best suited here.
- We attach the decorative plinth to the lamp.
Preparatory work
Before you begin repairing the ceiling in an apartment, it must be properly prepared. If there were tension or suspended ceiling structures in the room, they must be carefully dismantled.
The surface must be cleaned of all previous layers, be it old plaster, water-based paint, other materials, or the ceiling is being repaired after a leak.
It is worth noting that this is the most labor-intensive but necessary process. Without properly cleaning the ceiling, the repair will be short-lived and will look unfinished.
The step-by-step preparatory work looks like this:
- cleaning the ceiling surface from old layers;
- repairing cracks and removing loose layers of plaster;
- sealing all embroidered seams with preliminary primer;
- priming and grouting the ceiling with various types of putty.
Of course, if ceiling repairs are carried out in a new building, then the preparatory stage can be skipped. In order not to be distracted once again from the ceiling repair process, you need to take care of the necessary tools in advance. These are a trowel and scrapers, falcons and floats for grouting and leveling the mortar, spatulas, brushes and a roller.
Regardless of which ceilings are planned for repair, the base must be prepared in accordance with all the rules.
Removing old coatings
First, the surface of the ceiling is wetted to remove the layer of whitewash or wallpaper. This can be done using a roller, gradually wetting the surface of the ceiling. Older models of vacuum cleaners were equipped with a special nozzle for spraying solutions, which will undoubtedly speed up the process of washing off whitewash layers or wallpaper.
After moistening, you can easily tear off the wallpaper and remove the whitewash with a spatula or wash it off and remove it with a sponge. Also, using scrapers and spatulas, liquid wallpaper is removed.
When removing polyurethane tiles, you should ensure that no layer of adhesive remains. You can do this by picking up the tile and trying to remove it completely, without leaving small pieces.
The old layer of plaster or poorly adhering putty must be tapped and all loose areas removed.
If the ceiling was covered with water-based or, less commonly, oil-based paint, you should resort to applying a special composition. It is sold in building materials stores. Apply it to the ceiling and leave overnight (about 12 hours). In the morning the layer can be easily removed with a spatula.
During mechanical cleaning, the process may be delayed, since you will have to work with a spatula or sandpaper. At the same time, the dustiness of the room and the length of time of work did not receive recognition for this type of removal of old coatings.
Joining and sealing cracks
Having removed all the precariously held plaster, you need to repair the cracks and joint seams. Such jointing is necessary so that when filling seams and cracks with mortar, the composition holds firmly and does not damage the future new coating.
Then use a brush or brush to sweep away all the dust and small remnants of the old putty. After this, the cracks are treated with a primer to the full depth of the joint.
Cracks are sealed with mortar, sealant or foam. In case of significant cracks, sealing is done using serpyanka tape.
Fiberglass serpyanka is used to reinforce a layer of mortar, sealant or polyurethane foam. It is applied to the crack and treated with a compound so as not to damage the new coating in the future. The serpyanka tape should be 1-1.5 cm wider than the seam being repaired on each side.
Primer work
The final stage of ceiling preparation is priming. This will create an additional protective layer, increase the adhesiveness of the floors and impart antiseptic properties. Ready-made primer compositions are available for sale. They are applied with a regular paint roller. Hard-to-reach places are treated with a brush.
After coating, the primer must dry for at least 10 hours. Usually 2-3 layers of the composition are applied, this provides additional protection and a basis for applying plaster.
The next step in preparing the ceiling for repair will be putty or plastering work to level the ceiling. This is done so that after the repair, flaws do not appear that are visible through the decorative layers of the repaired ceiling.
The surface is treated with initial or coarse putty, so that irregularities, potholes or seams are not visible. It is worth considering that the putty layer can reach a thickness of 5 mm. For better leveling, work is carried out using a rule or a wide spatula.
A painting mesh is applied to the not completely dry putty and pressed into the layer of material with a spatula. After drying, proceed to finishing putty. For this, a special composition is purchased. To obtain a perfectly smooth ceiling, the surface is treated with graters and sandpaper.
If the cracks are too large or the differences between the slabs are significant, then you can level the ceiling using sheets of plasterboard. The advantage of this option is that it will provide additional sound insulation if the house is multi-apartment or will create an additional layer of thermal insulation when living in a private house.
It is worth noting that putty work will need to be carried out in full in order to level the seams and remove all traces of screws or self-tapping screws.
Ceiling with open beams in the interior and cold colors
A very modern option would be a ceiling in cool colors: white, blue. This type of finishing is used in classic styles. Styles such as hi-tech and loft are also very suitable here.
However, it is worth remembering a very important thing: when using white beams, all furniture and interior elements must match. Otherwise, the interior will look very defiant.
The main advantages of this finish:
Ceiling designs with white beams will look equally good in rooms with high and low ceilings.
Beams are a very practical element of the interior as a whole, since they can hide wiring, lamps and similar elements that spoil the appearance of the home.
In addition, beams can act as space delimiters and divide your room into zones.
Why do you have to repair the ceiling?
Repair of a wooden ceiling in a private house or apartment from Stalin times is carried out for the following reasons:
- Gaps, cracks and holes in the ceiling structure increase heat loss in the room and are a reason for major repairs.
- An unpleasant putrid odor and traces of mold on the ceiling surface indicate fungal infection of wooden elements. This fact cannot be ignored, because mold threatens the health of household members. Need antiseptic treatment.
- Shedding of plaster and deflections of beams are dangerous due to the collapse of finishing materials and the entire ceiling.
- An uneven ceiling needs leveling and cosmetic repairs due to its aesthetic unattractiveness.
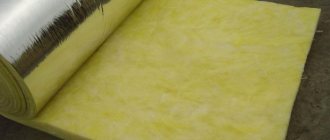
- If there is an unheated attic above, then the ceiling must be well insulated and protected from condensing moisture in order to extend the service life of the finishing material and increase the comfort of the room.
In some cases, residents make renovations because the old finish is out of fashion, has served its purpose, or has become unusable after being flooded from above.
Design Features
Brushing
When planning the interior, you need to pay attention to all the details, even the most insignificant ones. When it comes to beams, there are several options: to beat the entire surface or to decorate it partially, making strict structures. You can lay beams in a wide variety of ways, relying on your own taste and discretion, so you shouldn’t be limited by the rules.
Legal relations
The attic space is shared, but according to the law, part of it can be privatized by the owners of the upper floors
In the Housing Code of the Russian Federation, Art. 36. It is directly stated that in residential buildings all attics, basements, halls, entrances (and other non-residential premises) are the common shared property of ALL (!!!) apartment owners. Moreover, they should only be used in their COMMON interests.
Excerpt from Article 36 of the Housing Code of the Russian Federation
What does it mean:
- An attic is common property in an apartment building.
- It is strictly prohibited to unauthorizedly attach part of the attic space to your apartment to make a residential attic.
- Redevelopment or unauthorized construction that causes harm to one of the other residents of the house may serve as a reason to initiate criminal proceedings against the person who carried out such actions.
If you live on the top floor and want to own the attic of an apartment building, then you need to go through several important and mandatory steps.
If the verdict is positive, you can begin refurbishment of part of the attic space
Stages of privatization of an attic space:
| AGREEMENT | Obtain the written consent of ALL (!!!) owners of apartments in your building (Minutes of the general meeting + consent of those not present at it) |
| STATEMENT | Submit an application to the architectural and construction department of the district administration |
| PROJECT | Provide a repair project developed by an organization that has the appropriate license |
| DECLARATION | Submit a declaration to the State Architectural and Construction Inspectorate. Within 10 days, the commission will either issue permission to connect the attic space to your apartment or refuse you permission to do so. |
After completing all construction work, you will need to obtain a technical passport and register ownership (privatize) of the attached attic space.
A certificate of ownership is also issued for a privatized attic
Regarding the technical part of the project:
- Free access to the attic. Privatization of the attic space and its redevelopment should not infringe on the rights of other apartment owners. In other words, all residents must have access to the attic of an apartment building.
Those. you cannot privatize a hatch or ladder to an attic space. You also cannot voluntarily hold onto the keys to the attic of an apartment building on the grounds that you have something valuable stored there.
- Technical Services. The annexation of part of the attic space and its subsequent privatization should not affect utility networks and communications. You must remember that initially the attic of an apartment building is a technical floor.
You do not have the right to alter/modify ventilation ducts, air ducts, re-arrange electrical cables, etc.
- Redevelopment. Taking into account the first two points, the new owner can only carry out certain works. Those. It is not always possible to convert a cottage space into a living space.
In the video, the lawyer talks about joining the attic space to the apartment. Particular attention is paid to the differences between temporary and permanent use of the attic space: