For hidden wiring of engineering systems, a hatch for the bathroom under tiles for floor, ceiling, and wall installation is used. A secret inspection hatch is made from polymer materials or metals; the door opens to the side, folds back entirely, and slides off in a vertical plane to the side on special hinges.
Plumbing hatches are installed under the bathtub, on false panels, gypsum plasterboard boxes, and inside plasterboard ceilings. Due to the complex design of the hinges, it is easier to buy an inspection hatch for self-installation than to make it yourself.
Functions
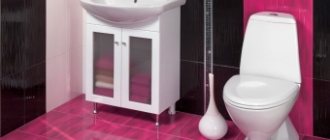
A bathroom hatch is a special device that is installed in the wall of a plasterboard box that masks pipes, water meters, valves and other plumbing equipment. It is a small door, opening which you can quickly gain access to communications without compromising the integrity of the finish. After installation, ceramic tiles, wallpaper, or paint to match the bathroom walls are glued onto the hatch to maintain the integrity of the interior. This mechanism is used to:
- Always have access to hot and cold water meters to read readings from meters and monitor their operation.
Easy access to sensors and pipes - Promptly eliminate with your own hands the causes of leaks and breakdowns in the sewer or water supply system of the bathroom.
- Organize a compact, unobtrusive place to store household chemicals, medicines or other household needs.
- Gain access to the siphon under the bathtub for cleaning and maintenance.
Important! Hatches are made of steel, plastic or wood, treated with an antiseptic and moisture-repellent composition. To ensure that the door remains invisible and blends into the wall, ceramic tiles or other material used to decorate the room are glued onto it.
What is an audit?
In old cast iron pipelines, the inspection was a rectangular window, closed with a sealed lid. The flange tee cover was secured with four bolts. The use of pipes and connecting elements made of cast iron is practically irrelevant today. Metal products compete with plastic ones, whose characteristics are superior in terms of quality. The audit for sewers has also undergone changes in form. Replacing the rectangular hole with a round one simplified the production of the part and its operation.
Modern model of sewer inspection, widespread abroad Source serviceoptk.ru
Material and dimensions
- Resistant to high humidity.
In the bathroom, contact with water cannot be avoided; even inside the box, the product is not protected from moist air, so the material should not enter into oxidative reactions with oxygen. Plastic models have the best moisture resistance. Plastic hatch - Strength.
Ceramic tiles are glued to the hatch door, masking the structure, so it must withstand a lot of weight without deforming. In this indicator, steel models are much ahead of cheaper plastic ones. Hatch for tiles - Machinability. To hide the door of the inspection hatch, apply a layer of putty on it, paint it, or glue decorative tiles with your own hands. That is, the material is chosen so that it matches the selected type of finishing material.
Note! The dimensions of the inspection hole are selected based on the purpose, the dimensions of the equipment hidden inside the box, and the specifics of the finishing material.
The minimum size of the hatch is 10x10 cm; it only allows you to view and record the meter readings. The largest plumbing hatches have a size of 180x200 cm, but they are used only in important communication nodes, where repairs and troubleshooting are carried out by two or three people.
How not to make a mistake with your choice
The entire process of choosing a plumbing hatch consists of successive stages and nuances, each of which needs to be considered in detail:
- determining the location of the niche. During the renovation process, when communications have already been completed, think about where the hatch would be most conveniently located. This could be either an opening in the screen under the bathtub or a hole in the floor. When choosing the latter option, keep in mind that the hatch door must have shock absorbers to ensure its secure fixation;
- measure the dimensions of the niche - the length and width of the future device are important, this is what you need to start from when choosing in the store;
- take the purchased tile and measure its dimensions, write down the measurements obtained to provide them to the consultant in the store;
- When choosing, calculate how many tiles will fit on the niche door, after which you can safely select a hatch that matches the dimensions.
The selected product must not only be suitable in size, but also have a reliable opening mechanism. The best choice is stainless steel or aluminum - this way the device will last for many years. The weight of the structure is also important: during further cladding, the bathroom doors should not sag under the load. This will lead to rapid wear of the product and its replacement.
It is recommended to check the mechanism carefully: try opening and closing the hatch right on the spot. If the structure jams, it is better to immediately change the device, because the operation of the hatch should be clear and smooth. If you chose a removable hatch, check the condition and reliability of the fixing chain. It is supposed to be strong, capable of holding the hinged lid suspended.
When choosing a plumbing hatch, remember whether there are any obstacles in the bathroom to open it. The type of structure and opening method will depend on this indicator. The color of the door does not matter, because it will still be hidden under the tiles. Hinged white hatches are considered traditional. A high-quality product must be highly resistant to moisture, be fireproof, lightweight, harmless to humans and easy to install.
Design requirements
An inspection hatch under a bathtub is a simple plumbing equipment that can be easily installed with your own hands. In order for it to last a long time, you need to choose a high-quality model in accordance with the size of the hole, the dimensions of the devices mounted inside the box, as well as the frequency of opening the doors. For service safety purposes, the following requirements are imposed on the design:
- The inspection hatch must be strong enough and well secured.
It must be able to withstand the weight of the door being opened with force. Hatch installation diagram - When installing the hatch, it is important to strictly maintain horizontal and vertical lines and avoid distortions. To monitor the correct installation, it is more convenient to use a laser building level.
- The hatch doors must move smoothly and have enough space to open completely, otherwise in an emergency it will not be possible to quickly repair equipment failure.
- The hatch is attached to the drywall with dowels or self-tapping screws, but you can attach this device to the ceramic tiles with your own hands only using anchor bolts.
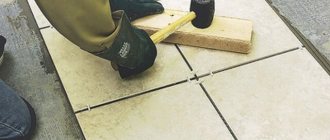
- Ceramic tiles are glued to the hatch doors using tile adhesive or liquid nails.
This is interesting: How to close risers in the bathroom - practical and aesthetic solutions for the bathroom
A plumbing inspection hatch is an indispensable device that allows constant access, control and maintenance of devices mounted in the bathroom wall or in a special box.
Installation
The installation of the audit proceeds according to the following plan:
- After determining the placement height, the pipe diameter is cut with a hacksaw or grinder.
- Using sandpaper, chamfer the outer part of the pipe, and also remove burrs formed after trimming.
- The sewer inspection is washed and placed in the lower pipe.
- The next part of the riser is inserted into the upper branch of the inspection tee. The process continues in the same way until installation is complete.
Dimensions of hatches for tiles in the bathroom
Bathrooms are rooms filled with various communications (plumbing, electrical, sewerage, ventilation) and devices (meters). To repair them, unobstructed access is required, which can be provided by special bathroom hatches under tiles, and their sizes are selected according to the dimensions of the hidden niche, and the material is selected according to the owner’s preference. In addition, inspection holes are useful for storing cosmetics, cleaning devices, and washing plumbing fixtures. To make a choice, you need to understand the existing types of hatches, since they serve specific purposes and have different sizes for each bathroom and toilet object.
Structural elements
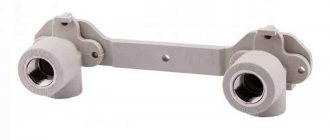
The type of hatch depends on its design features. Wall options consist of the following elements:
- frame (plastic, aluminum);
- lock;
- loops;
- sash.
Hatch elements
Scheme of a rubber hatch-clip
A plumbing hidden door for a sanitary room is made of moisture-resistant material or treated with special waterproof materials, for example, drywall is coated with a moisture-proof emulsion.
The method of opening and closing the sash depends on the hinge mechanism. The simplest option is hinged hinges, the complex one is double hinges with additional adjustment units.
Scheme of the hatch frame structure
Inspection frames are mounted in two ways (liquid nails, self-tapping screws) into a niche or wall. The lock can be roller or push. In one case or another, it is hidden.
Types of hatches by purpose
Inspection devices are intended to eliminate technical problems in various communications, according to this they are divided into the following types:
- plumbing (plastic, metal) – designed for hiding and servicing devices and communications;
- electrical – provide easy access to wiring, sockets, lighting. They may also have a hidden type of operation;
- ventilation – designed for servicing the ventilation system (filters, pipes). They have a perforated door through which air flows, as well as free access for repair and maintenance of the line.
Hatches to the bathtub at the installation site
Depending on the installation location, wells for the full operation of plumbing fixtures are divided into the following types:
- ceiling - most often installed in a suspended ceiling made of plasterboard or chipboard. When choosing it, you should be guided by such parameters as lightness (so that the door does not open spontaneously under its own weight) and strength;
- wall-mounted – inspection devices of this type are the most common in everyday use. There is a wide range of plastic, metal and combined ones. Size, color and the possibility of finishing under the wall when choosing are not a problem;
- floor - such windows are installed to service utilities located below floor level, for example, a cellar or basement. Their sizes can reach impressive dimensions to ensure free entry and exit for the owner.
Floor inspection hatch
Wall hatches
Roof hatch
Benefits of using hatches
Even the simplest hatch has the following advantages:
- integrity of the tile - if installed correctly, there is no need to adjust the size of the tile. Experts advise you to adhere to this particular technology when finishing walls;
- sizes in a wide range (in the case of a rectangular shape - from 0.20 to 1.5 m). The option of individual production is also possible, but in this case the price will increase several times;
- the possibility of using larger tiles than the door itself;
- unity of design - the door is subject to various types of finishing (even with heavy materials), which makes it invisible in the bathroom;
- ease of installation - you do not need to have certain skills to carry out independent installation.
Types of hatches by design
When choosing, pay attention not only to the purpose of the hatch and its installation option, but also to the design features. Check out what a bathroom hatch can look like under tiles, and find out which option is more convenient for you. Opening and closing the door is carried out using different mechanisms and, according to this, they are divided into the following types:
- hinged - they are usually made of metal so that they can be opened using rubber or plastic suction cups. The mechanism involves pushing the sash forward, and then opening. But you can find plastic products on sale;
- under tiles - they have a swing mechanism (like an interior door). They are distinguished by ease of installation, low cost, wide selection of installed accessories (push lock, handles);
- sliding - the design is more complex compared to previous types. Suction cups are used to open and close. First, the sash is pulled forward, then moved in any direction. This structural element is necessary if access to communications is limited by furniture or household appliances. In order not to look for suction cups throughout the bathroom, you can use a push or roller mechanism to quickly open the door;
- push - by pressing a finger on the tile, the door device of this type of hatch is activated, moving forward and swinging open. The push mechanism is perfect for installation in a bathroom, which is finished not with tiles, but with mechanically unstable materials, for example, mosaic panels;
- on magnets – neodymium magnet is often used in the manufacture of floor and wall viewing windows. Its main advantage is that it can withstand heavy weight. They are made invisible, compared to push ones, by a clever design technology: a smaller groove for the hatch so that the sash is under the cladding, for example, tiles. If the window is large and heavy, the door is equipped with a convenient handle. Small lids are most often made hinged. In floor-standing versions, the magnet serves as an additional element to add weight to the lid. In the wall-mounted version, the door slides to the side.
This is interesting: Which bath screen is better to choose: types, their advantages and disadvantages
Magnetic hatch
Push hatch Swing hatch
Sliding sunroof
We distinguish inspection windows by material
For ease of use and decoration of the bathtub, the inspection well is made from various materials. The most popular in the construction market are:
- plastic ones are the most cost-effective option for providing access to hidden communications and meters. The design of the doors is no different from each other (neutral white plastic), but the sizes are presented in a wide range. The smallest windows are 10x10 cm, the largest are 80x50 cm. These sizes are quite sufficient to inspect meter readings or repair any unit or pipes. Plastic devices are easy to install. It is enough to plant it on a pre-prepared place with liquid nails or screw in self-tapping screws. The opening mechanism - push - is pressed on the lower corner of the sash, after which it swings open;
- metal - the design is very similar to plastic products, only they are made of metal. The size parameters and installation method are also identical to the plastic product. A distinctive feature is its operational properties - long service life and attractive appearance for a long time. The downside is their price.
Metal hatch
Plastic hatch
Metal viewing windows are used mainly as invisible windows because they weigh more than plastic ones. They finish it with the same material as the bathroom wall so that the structural element does not stand out from the overall picture. In addition, the hatch can be installed not only to provide access to communications, but also to store various cosmetics and cleaning products for cleaning. To install an invisible well, you need to work harder than in the case of a visible one. The first stage is the installation of the inspection element, the second is finishing the wall.
If funds do not allow you to purchase a hatch or there are other reasons (non-standard shape, size), then you can make it yourself from available materials, for example, from plasterboard or chipboard. These materials easily accept masking coatings. To increase operation, it is recommended to make the frame from metal.
How to calculate the size
Rules by which you can calculate sizes:
- decide on the installation location. Usually this is a pipe junction unit, meters, ventilation pipes;
- we measure the tiles (height, width) that will be used to finish the bathroom walls;
- we calculate the number of tiles in order to close the well;
- We calculate the height and width of the sash. The number of horizontal tiles counted is multiplied by the width of one unit of finishing material. This is how the width of the viewing window is calculated. Such calculations are used to determine height. But the dimensions of the viewing window will be slightly larger.
| Door dimensions, mm width x height | Dimensions of the door window on the outside, mm Width x height x depth |
| 155x244 | 200x300x50 |
| 255x244 | 300x300x50 |
| 255x344 | 300x400x50 |
| 255x444 | 300x500x50 |
| 255x544 | 300x600x50 |
| 355x244 | 400x300x50 |
| 355x344 | 400x400x50 |
| 355x444 | 400x500x50 |
| 355x544 | 400x600x50 |
| 355x694 | 400x750x50 |
| 355x844 | 400x900x50 |
| 455x444 | 500x500x50 |
| 455x544 | 500x600x50 |
| 455x744 | 500x800x50 |
| 555x344 | 600x400x50 |
| 555x544 | 600x600x50 |
| 555x844 | 600x900x50 |
| 555x944 | 600x1000x50 |
During the calculation, the protrusion of the tile beyond the lid is taken into account. It should be no less than 0.5 cm on the side where the loops are located and no more than 5 cm on all other sides.
When deciding on the size of the hatch, you need to strive to ensure that the whole amount of facing material fits on it. Otherwise, it will not be possible to hide his presence from the overall picture.
There are viewing windows on sale whose design has a movable mechanism, that is, during installation it is possible to adjust the size. If after installation excess structural elements appear, they are cut off with a grinder. The location of communications may be different and in some cases it is better to install several small hatches that fit perfectly into the size of one tile.
How to choose the position of the viewing window and its opening side
The location for the inspection well is determined in accordance with the location of other items in the bathroom. It is also necessary to provide for installation with the necessary viewing angle convenient for the user. Experts recommend opening the door from left to right, but vertical swinging requires a large space. Avoid installing the sash close to the floor, otherwise the lower edge may cause mechanical damage to the coating. The angular position of the hatch is not rational for two reasons: weak design, inconvenient door location.
This is interesting: Choosing blinds for the bathroom: advantages and differences
Basic principles of eliminating blockages using revision
The sewer system becomes clogged when grease, rags, bulk substances in the form of sand or filler for trays, as well as the remains of construction mixtures get into the pipe. The blockage is cleared through an inspection window located above the clogged section of the pipe. The blockage is removed using a cleaning cable or a hydrodynamic pipeline flushing device.
Hot water is used to remove fat plugs. After neutralizing the blockage caused by the accumulation of sand, filler or construction debris, flush a large amount of water down the toilet. Large debris is pulled out with a plumbing rope.
A plastic inspection well-tee allows you to avoid constructing a caisson made of concrete rings Source kanalizaciya-expert.ru
Advantages of inspection hatches
Inspection hatches have a rigid body and can be quickly installed
Modern inspection or inspection hatches have many design advantages, which have ensured their popularity in the market. The main advantages include:
- rigid body and quick installation. This ability makes it possible to reliably integrate hatches into any structure, and the rigidity of the body prevents deformation and provides a long service life;
- providing quick access to plumbing elements. Available opening mechanisms allow you to quickly open the door and gain access to controls and shut-off valves.
- decorativeness and secrecy. Almost all models of hatches have a decorative coating; some models provide hidden installation and allow you to cover the door with the finishing material of the room.
Important. When purchasing such a hatch, you need to remember that its dimensions should provide not only access to the control elements, but also make it possible to repair installed components and assemblies without dismantling the cladding.
Simple tips
Here are a few more recommendations on how to properly cover the pipes in the toilet with plastic panels, chipboard partitions, and blinds.
To construct camouflage structures, it is better to use a metal profile as a frame. Wooden frames will swell from moisture and deform the coating.
To prevent the appearance of mold and fungi, the inner surface of the finish and pipeline must be treated with antiseptics or special solutions.
When installing roller shutters, the drum is turned so that it faces the pipes and does not clutter up the usable space.
Fabric blinds look beautiful as hatches, but this option cannot be called practical. They are expensive, and the fabric gets dirty quickly.
If the manhole cover is immediately selected to match the appropriate dimensions of the tiles, then you will not have to perform costly and burdensome cutting of ceramics.
I like it I don't like it
Types of hatches by type of mechanism
Basic models of inspection hatches for bathrooms
The modern market offers the buyer several options for hatches, which are conventionally divided into types depending on the door closing mechanism. At the moment, there are such types of mechanisms as:
- hinged, where the opening is carried out with a handle or using a special suction cup. Such hatches are installed in places where there is enough space for the door to fully open;
- sliding, in such designs the door is mounted on special runners. The door goes out and moves parallel to the plane of the surface. Installed in places with limited space;
- The design of the pressure hatch is similar to the hinged hatch, only the door is opened by pressing on it and does not have handles. The door extends outwards and then opens as a hinged design;
- A magnetic hatch often does not have any mechanisms, and the door is held in the housing using magnets. The door may have stationary handles or suction cups. After removal, the door can be put away in another place, since it is in no way connected to the body.
FYI. There are also many combined models on the market that combine several types of mechanisms at the same time.
Standards
Sewer inspection is a mandatory pipeline element for installation, the need for which is established by the requirements of building codes and regulations. Installation of the audit according to regulatory documents is carried out by:
- in multi-storey buildings higher than 5 floors, where inspection units are placed at intervals of 3 floors;
- on the lower and upper levels of a low-rise building;
- in a horizontal sewer system with a pipe diameter of 50 mm, inspections are placed at intervals of 15 meters;
- on horizontal sections of the pipeline connecting more than three plumbing fixtures and not having another element to control blockages;
- in sewer systems with domestic wastewater, the length of the pipe section between inspection and cleaning should not exceed 12 meters;
- at a distance of no more than 10 meters for sewerage with industrial wastewater or storm water.
Monitoring compliance with the number of inspection holes is carried out at the project stage by entering it into the working drawing of the pipeline.
If the sewer pipe is deep, inspection wells must be installed Source eurolos.ru
Manufacturers of inspection hatches
Let us consider, as an example, several models from these and “Element”, which have been represented on the domestic market for a long time and have managed to prove themselves from the best side.
Revizor inspection hatch
Revizor inspection hatch model
The most popular model on the market is the AluKlik pressure hatch from the Inspector company. The product has a solid aluminum body, which is equipped with steel stiffeners pressed into the structure. The advantages of the hatch are that its cover is made of moisture-resistant plasterboard, which allows you to decorate it with the facing material of the bathroom itself and thus hide the location of the product as much as possible.
The product has a wide range of sizes, starting from a hatch of 20x30 cm and ending with spacious hatches with dimensions of 60x120 cm. The mechanism is made of high-strength steel with expanded possibilities for adjusting and adjusting the door both during installation of the hatch and during its use in the future.
Important. The presence of a felt seal around the perimeter of the door junction and latching rollers guarantee complete tightness of the connection, which can withstand not only direct exposure to water and moisture vapor.
The rollers not only provide a tight fit and lock function, but also facilitate automatic opening of the door. To open the hatch, just press on the surface of the door.
Let's consider the second option - for painting
Brands such as Praktika and LukeLand produce hatches for the bathroom that can be painted and walls covered with wallpaper. Such hatches are installed on top of walls or in ceilings.
It is recommended to carry out work in a material made of plasterboard, but if desired, the hatch can also be built into a concrete wall.
- The Knauf company produces such a hatch, which is installed for painting; it is chosen for its best qualities, despite the high price.
- The products include non-standard models. Such as laboratory hatches that do not need to be painted.
- Compared to other companies that produce conventional designs, this brand is worth taking a closer look at.
Folding devices
Such designs are good for places where it is difficult to open or slide the door. When pressing on the sash, it opens at an angle of 45°, secured to a chain with carabiners. Usually this is enough to check communications or rewrite water meter readings. When it is necessary to allow full access (for repair actions), the carabiners are disconnected and the hatch is completely removed.
Advantages of folding hidden hatches:
- possibility of use in hard-to-reach places;
- The doors can be easily removed and provide free access.
The only drawback is the inconvenience of installing the door, and after each disconnection it may be necessary to correct its position.
Collapsible box with magnets
It's possible that blinds and cabinets aren't your thing. If you need a very ordinary box, but the prospect of breaking the structure in case of a leak scares you, consider the option of a collapsible box. It is designed without any special tricks:
- The frame is assembled from galvanized metal profiles using self-tapping screws.
- The tiles are glued to drywall.
- Holes are drilled in the drywall for neodymium magnets (the minimum magnet size is 2 cm in diameter and 3 mm in thickness).
For rational reasons, you should not attach each tile separately with magnets. Calculate where it is convenient for you to make a large inspection hatch that gives access to the main communications (collector connections, meters). Also mark the places where small hatches should be located for detailed inspection of the pipes.
For those who do not know that this is a box, when assembled the structure looks like an ordinary wall. But if necessary, you can disassemble it in a matter of minutes, and then just as quickly install all the elements in place. By the way, not only boxes, but also screens for bathtubs are made using a similar principle.
The only problem with such boxes is their leakage. To prevent moisture from seeping inside and causing mold, all joints between the tiles should be filled with transparent sanitary silicone sealant, and after drying, cut the resulting seams with a sharp painting knife. However, you cannot remove the tiles often - because of this, the silicone will eventually fall into the seam.
Another option for sealing joints is to use classic grout. Before removing the tiles, the grout will need to be removed, and after installing the tiles in place, the grouted joints will need to be restored.
Peculiarities
Plumbing rooms in apartments are often small in size, so you want to use every centimeter of space. A hand-made closet in the toilet will be the best option for storing things. This is an ideal place to store various small items on shelves. Here you can put tools for repair work, which you will probably find in the house, and there will be a place for other important items.
You can build shelves, a wall cabinet or a pencil case yourself. The final result of the work depends on how correctly the size of the cabinet and its color were chosen. Furniture in the toilet should be beautiful, comfortable and functional. Usually the toilet is small in size, so the furniture should not be bulky and voluminous, so as not to visually take away the already small space of the room.
Before starting work, you should choose the model you like and draw a detailed work plan. To make a toilet cabinet, you should make a drawing with detailed measurements. There are many options for shelves and cabinets for sanitary facilities; among them, you should choose the one that is suitable for a specific room.
When choosing a model, you should take into account the design features, namely:
preference should be given to moisture-resistant materials; when installing the cabinet, it is important to leave free access to pipes or valves, water meters and other sewer fixtures; the size of the furniture must exactly match the size of the room; the cabinet must be securely fastened to the wall; have enough shelves to store as many things as possible; The plumbing cabinet must be functional and fit harmoniously into the overall design of the room.
A special case
Often, the apartment owner takes on the job for purely aesthetic reasons: the only goal is to close the water supply and sewer risers, which significantly spoil the appearance of the toilet.
What can be recommended in this case?
Instead of drywall, it is better to use wall panels made of thick plastic. We emphasize: mechanical strength is important here. An accidental blow will easily pierce thin, inexpensive panels of domestic production; but Italian ones that are one and a half times more expensive can only be damaged with a hammer.
- The panels are attached to the galvanized profile frame with clamps. The structure must be collapsible: sooner or later access to the risers will be required. A starting L-shaped profile is launched along the perimeter of the wall.
- Access to the valves and filters is provided by a plastic plumbing hatch or, as it is sometimes called, a plumbing door to the toilet behind the toilet. The hatch is installed in the cutout of the panels using silicone pipe sealant.
- To ensure that the risers are ventilated and do not rust due to the formation of condensation, a pair of narrow and long ventilation grilles are mounted in the upper and lower parts of the wall.
Plastic doors for sanitary cabinets
Plastic doors for a toilet cabinet are the easiest to install and, importantly, will fit seamlessly into any interior. Another important advantage of plastic products is moisture resistance and resistance to other types of influence.
Plastic doors come in a wide variety of designs, which allows you to choose a model for any style solution
A wide color palette provides plastic products with enviable popularity
Such doors are easy to clean; a simple damp cloth is enough, and in case of heavy contamination, you can use various cleaning agents without fear of harming the material.
Drawing
Let's draw a future closet on a piece of paper.
In the figure we indicate the hatch door. The bottom of the hatch should not be lower than the height of the barrel so that it can be opened. If the barrel is planned with a vertical drain mechanism, with a lever, you need to take into account the height of the drain handle. Note: the dimensions of the hatch door are standard and can be viewed on any seller’s website.
Together with the cabinet drawing, we will draw a frame diagram. The frame of the sanitary cabinet between the walls of the toilet is not complicated. Vertical racks near the walls and in the places where the hatch is installed. Horizontal racks on the ceiling and floor, as well as reinforcing racks along the bottom and top of the hatch installation. Around the installed hatch, a kind of frame should be formed from profiles for drywall, and the profiles themselves must be reinforced with a wooden beam in order to be able to secure the hatch door.
Floor
It is better to install such a cabinet in a combined bathroom, where the toilet is not squeezed into a tight space between two walls; but this design is quite suitable for a separate toilet. The main requirement is communications hidden in the wall.
To make a cabinet you need the following tools and materials:
- natural wood, MDF or laminated chipboard panels;
- electric jigsaw;
- wood glue;
- manual frezer;
- electric drill;
- furniture fittings (handles, hinges, shelf holders);
- metal ruler and pencil, square;
- regular or plexiglass for windows (to save time and money, you can do without it by making the doors solid wood);
- primer and paint;
- Grinder;
- an iron corner or other device that allows you to attach the cabinet to the wall.
Step-by-step instruction
The situation is similar with glass - it is much easier and more efficient to entrust its cutting to professionals. Having ready-made parts, you can immediately begin assembly.
If ordinary boards are used, the work will proceed as follows:
- Measure the height and width of the toilet with a cistern and determine the desired cabinet parameters.
- Draw a sketch of the product on paper, marking the dimensions of various elements on it.
- Transfer the outlines of the parts onto the board using a simple pencil. Pairs draw in a single copy and, after cutting out the first, use it as a pattern. This method helps to obtain two or more identical blanks.
- A milling cutter is used to cut out a relief on the part connecting the façade and side walls to the roof. To make your task easier, you can buy factory-made shaped furniture strips, which come in various shapes and sizes.
- A grinding machine is used to process the cuts and the rest of the surface if there are irregularities and splinters on it.
- A primer is applied to the front and back of the parts, allowed to dry and covered with paint. It is advisable to choose acrylic enamel in a spray can - this way there will be no smudges or smears on the surface, and the coating itself will be moisture resistant.
- Assemble the cabinet body. All connections are glued and, if possible, tightened with self-tapping screws:
- holes are drilled in the side walls at the same level and shelf holders are inserted into them;
- glaze the doors and install handles at the same stage;
- they hang the doors on the almost finished structure;
- Between the side walls from below, a drawer (crossbar) is fixed.
How to hide pipes in a toilet using blinds
Blinds in the toilet are the best option for those who do not want to bother with drywall and build various structures. This option is suitable for small bathrooms. It is much easier to close communications using blinds, but its cost is 2-3 times higher than the cost of a box or plumbing cabinet. Regular blinds can be made from floor to ceiling. Installation of blinds takes little time and leaves virtually no construction waste.
When choosing a method for masking communications, determine the possibility of installing a particular structure in your toilet. To avoid pipe breakage, before installing the camouflage structure, it is worth checking all connections for leaks.
Blinds in the toilet with installation
Roller blinds in the toilet
Vertical blinds