We all love to soak in a hot bath. But have you ever thought about doing this in your garden while enjoying the sunset or the starry sky? But this is a great idea! This is not difficult, but it does take time as you will have to wait a few days for the foundation to harden and the plaster to dry. So, a DIY bath. Go!
Service details
Wooden hot tubs should not be left without water for a long time: in summer, 5-10 cm is left at the bottom, and in winter they are filled with snow up to 20 cm. Ideally, the container should be constantly in use.
To prevent the development of mold fungi, the material is treated with an antiseptic. Once a year, the outside needs to be coated with natural wax. The water is changed every 3-4 days until algae begins to multiply. Do not allow the water in the bowl to freeze.
When using it, it is important not to overheat the water, so immediately purchase a thermometer. Comfortable temperature in the cold season - 37-40 degrees Celsius
Steps to construct an electric floor
Before purchasing a heating cable or mat, we focus on the free space in the bathroom. We do not take into account the area under the bowl with the screen, shower stall, plumbing furniture, washing machine, washbasin and toilet. There is no point in placing heating elements under these items. Moreover, the cable will overheat in such places and fail.
Electric floor power in the bathroom
The standard floor power for bathrooms is 170-180 W/sq.m. meter. We multiply this standard by the installation area. For example, the total area of the bathroom is 5.5 square meters. meters. Minus the area occupied by various objects, we get, say, free 3 square meters. meters.
We multiply the average standard value of 175 by 3, add a reserve of up to 10% to the result and get 525-575 W/sq. meter. This is the required power of the floor heating elements.
Instructions for installing cables and mats
Preliminary calculations make it possible to purchase components and consumables in the required volume, after which you can safely begin constructing the system.
Step 1. Clean the base from debris, remove dust with a vacuum cleaner, smooth out unevenness (1-2 leveling layers are enough).
Step 2. Lay thermal insulation. Thermal insulation sheets should be placed on the floor with the reflective surface facing up and the joints between them should be sealed with mounting tape (adhesive tape).
Penofol is suitable for thermal insulation, and on the first floors it is recommended to make the thermal insulation layer thicker using expanded polystyrene or polystyrene foam. But in any case, the front surface must be reflective so that thermal energy goes in the right direction
Step 3. Waterproofing. We roll out the film or rolled waterproofing membrane, carefully level it and press it to the base, lift the edges onto the walls (20 cm). If you have to use several panels, then lay them with an overlap of 10 cm, and fasten the joints with tape.
It is allowed to use both coating and cast waterproofing in several layers. Each previous layer must be thoroughly dried before applying the next one.
Step 4: Edge processing. We attach a damper (edge) tape along the perimeter along the walls. It is needed to create a “floating” screed to avoid the appearance of cracks and swelling on it. The tape should be up to 20 cm wide, so that it is enough to cover the height of the floor, including the tiled floor.
Step 5. Laying the cable (or mats). We check the working condition of the cables and begin installation. The heating cable is placed on a substrate to which it can be attached.
Metal mesh is suitable for this purpose. In addition to fixation, it will prevent the cable from sinking into the screed and provide strength. Make sure that the cable does not cross. We handle it carefully to avoid even the smallest damage.
We connect the end of the heating cable to the electrical coupling. It will need to be recessed into the screed, positioned as close as possible to the thermostat (thermostat), but maintaining a distance between the wall and the connection of at least 20 cm.
It is much easier to spread an electric mat on the floor. The process is somewhat reminiscent of cutting fabric.
If the electric mat rests against an obstacle (wall, etc.), it can be cut with scissors or a knife along the supporting mesh and turned at any angle or in the opposite direction. Sections from sections must be moved at a distance of at least 5-6 cm
Step 6. Install the thermostat with sensor. In the right place on the wall, a meter above the floor, we drill a hole, guided by the dimensions of the thermostat.
We drill a longitudinal groove from it vertically downwards and continue it along the floor towards the location of the sensor. It is advisable to place the sensor between the cables, and not close to one of them, so that it shows the temperature reliably. The distance from the wall is half a meter.
We place the sensor with the wire in a corrugated pipe. The corrugation will protect the equipment. We insert the wire from the heating mats into the same corrugated tube and direct both wires to the thermostat.
To do this, we stretch the corrugated pipe along the floor, put it into the groove on the wall, and try not to bend it too much at the junction of the floor and wall, so as not to damage the wires. When the screed is poured, the corrugated tube with the sensor should protrude slightly from it.
When laying a heated floor, the resistance of the mat is checked with a multimeter. A deviation of 5-10% from the factory figures is allowed. You also need to check the insulation resistance. If the megohmmeter shows at least 10 megohms, the mat is reliable
Step 7. Screed. The installation is nearing completion, so we once again inspect all the elements of the cable floor, make sure there are no defects and begin pouring. We prepare the cement mortar and distribute it over the surface carefully and evenly with a minimum thickness of 3 cm. There should be no voids in the screed. If mats have been laid, we skip this step.
Step 8. The final touch remains - glue the tiles to the screed or directly to the mats with tile adhesive.
This is followed by a long drying period. It will be possible to turn on the electric floor no earlier than 28-30 days after completion of the work. It is imperative to wait until the mortar and glue have completely dried so that the screed does not crack.
Tips for installing infrared film
Preparatory work - as in the previous version. The infrared film is laid in parallel sheets on the thermal insulation material. Overlapping sheets is strictly prohibited. Next, you should install a thermostat with a sensor and make sure the system is working.
The assembled structure is covered with polyethylene and reinforcing mesh. Secure the mounting grid with self-tapping screws, but be careful not to touch the contacts. The mesh needs to be filled with cement-sand screed on top and the system tested again. After the screed has dried, tiles are laid on it using glue.
The infrared sheet in the bathroom is laid out on the floor, at least 20 cm away from the walls and with an interval of 30 to 50 mm between the strips
The infrared floor can be tested no earlier than after 28 days, when it is guaranteed to dry.
Pros and cons of spa pools and bathtubs for summer cottages
Wooden bathhouse: pros and cons
The advantages of installing an outdoor jacuzzi include:
- the opportunity to relieve fatigue after a hard day at work;
- improvement in general health after taking water procedures;
- reduction of pain after bathing;
- relaxation of the nervous system.
- easy care;
- operation throughout the year (winter and summer);
- compactness and spaciousness;
- variety of shapes, sizes and colors.
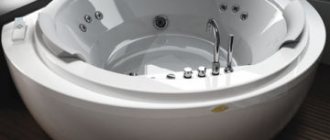
When choosing a stationary spa pool, be sure to pay attention to its functionality. Modern models are equipped with different types of massage (turbo, jet, bubble). They provide different functions:
- aromatherapy;
- air massage;
- hydromassage;
- backlight;
Heated towel rail options
Wall-mounted types of radiators are most often used for heating in the bathroom. The structures are made in the form of a ladder or snake. Heated towel rails are mounted on a partition, so they do not take up useful space.
Mermen
The operating principle of the models is similar to floor radiators. The coolant inside the curved device is connected to the heating system or hot water supply of the home. The compact device will easily warm up small rooms, but will not cope with larger ones. Another disadvantage is the dependence on the presence of liquid in the pipes at the required temperature.
Heating on the wall Source housemix.com.ua
Do-it-yourself heated outdoor font
Russian Maslova bath: features, pros, cons
Plastic font under a canopy
Plastic outdoor swimming pools are installed on a frame, usually metal, but it can also be brick, made of sand-lime brick or rubble stone. Approximately half of all polypropylene bathtubs are installed in a pit, in the form of mini pools; in this case, it is necessary to insulate, reinforce, and plaster the walls of the pit to avoid the accumulation of ground moisture.
A steel bowl is traditionally installed either on poles - supports, or suspended on chains. The cast iron font must be laid on a frame made of stone or brick. All this requires thorough preparation and capital expenditure, not to mention heating in outdoor conditions. Therefore, such a heated outdoor font is built mainly in private households, in semi-enclosed extensions and verandas.
Even with the most careful care, a cast iron boiler always rusts without water and tends to stain hands and things, so it is better to buy a branded cast iron bathtub, with a special oxide coating that improves heating and reduces corrosion.
Finnish version of a heated barrel
Outdoor font embedded in the terrace flooring
A round plastic container can be placed on a brick well-superstructure; steel and cast iron bathing boilers are often installed in the same way. The stone support is more reliable and stable, does not require painting, does not burn or deform, even if the heating furnace suddenly flares up too hot.
Using a unique technology, our company produces heated outdoor wooden barrels of various sizes and configurations. During the production process, we process materials in such a way that they become more resistant to temperature changes, mechanical stress and moisture.
DIY "boiler"
To heat the water in the font, you can buy gas or electric instantaneous water heaters. But we will look at a simple-to-use and mobile water heating system.
We will need:
- a metal tank with a lid for boiling laundry, commonly called boiling water, or a 15-liter bucket;
- copper tube ᴓ15 mm;
- 2 PVC pipes of suitable diameter;
- low voltage circulation pump;
- 12 V power supply (Battery).
Algorithm of actions
From a metal tank we construct a “Firebox” with an ash pit. The “grid-iron” can be constructed from the bottom of a zinc bucket of suitable size or from a metal sheet with holes. In the tank, 1-2 cm above the bottom, drill several holes for air flow.
Place the “grid” in the firebox so that there is a gap of 3-4 cm between the bottom of the tank and the “grid”. Make a hole in the tank above the grate into which a copper tube is threaded.
We make a heating circuit from copper wire. To do this, we place the copper tube, turn by turn, tightly around an object of suitable size. To prevent the tube from breaking or becoming deformed during operation, fill it with regular kitchen salt. Subsequently, the salt will dissolve and flow out with the water.
We place the formed contour in the firebox, and thread the lower end of the copper pipe into the hole above the “grid”. We bring the upper copper end directly into the font.
We connect the lower end of the copper tube through an angle adapter and a PVC pipe to the circulation pump. We attach the second PVC tube to the pump, and lower the other end into the water of the font.
Burning coals are placed in the firebox, and more fresh coal is added on top. To improve traction, you can additionally supply air into the “blower” through a piece of metal tube using a regular aquarium compressor.
The coals burn and heat the copper circuit, through which a pump drives water from and into the font. A mobile and fairly efficient boiler is ready.
The flight of creative thought is limitless. The photo shows an example of a very creative version of a heated font.
Choose your option that is right for you, and be healthy!
Installation nuances
Bathhouse in the basement of a private house: projects, pros and cons
A heated font can be built for use indoors or outdoors by allocating an appropriate place on the site.
On the street
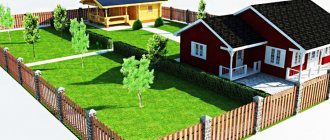
It is necessary to prepare a flat and solid base for mounting the bowl. This takes into account the weight of the structure when filled with water, along with the weight of the intended users. In order to comfortably take water procedures, the outdoor version of the font is surrounded by decorative plantings overlooking a beautiful garden landscape. It is necessary to build a canopy; if necessary, you can supplement the outdoor bathing complex with a hedge.
In room
Often, bathtubs are placed in a bathhouse; if desired, the bowl can be mounted on a veranda, in a garage, or an indoor pool. Indoors, the structure should not be installed close to heating appliances. If you have a heated floor system, it is recommended to equip the podium with insulating materials, for example, plywood with a layer of polystyrene foam and a rubber backing.
Photo gallery: different types of fonts
The font, lined with bricks below the floor level, can be well decorated with oriental-style mosaics
The font, which does not take up space in the room, is decorated with tiles and lighting
The wooden model is in perfect harmony with the interior lining of the bathhouse. The electric font is made with heating and a hydromassage system
An external heater is connected to the plastic hot tub: it is safer and does not take up space
In the bathhouse you can place a wooden font with internal heating, but only separate it with a partition
A final few words about heated outdoor hot tubs
To protect swimmers from burns when the stove is located internally, a wooden grate is installed. If you attach a shelf for beer mugs and glasses of wine to the grille, you will be able to partially compensate for the loss of usable space.
Instead of an internal shelf, you can make external protruding sides on which it is convenient to place snacks and drinks.
To heat water, you can use a spiral-shaped water heater. Water circulates through a tube, which is heated by a fire from the wood. A mandatory attribute of such a device is a protective screen on the side of the font; also, for greater protection and reduction of heat loss, the coil can be lined with brick, but at the same time leaving small gaps.
The lid is a mandatory accessory for the hot tub: it protects against debris; limited access to sunlight slows down the “blooming” of water; The heating process goes faster with the lid closed; Water in a closed container cools more slowly.
An outdoor heated plunge pool cannot replace a swimming pool or sauna. This is an additional attribute for lovers of water treatments with contrasting temperatures in the fresh air.
When choosing a suitable option, people often focus on price, forgetting about durability and ease of maintenance. At the same time, owners of budget bathtubs point out difficulties in washing and constant care.
Bathroom heating (forgot about PS 
In general, the situation. Stalinka. I did renovations everywhere. I forgot about the heated towel rail in the bathroom. I remembered when I moved in and it was hellishly cold in the bathroom. Both on the floor and in the air.
4 sq. meters, combined bathroom. It’s too late to redo anything with the pipes. That leaves the option of something electric.
Do you have any tips on how to heat a room inexpensively? Preferably a 24-hour option.3
There is a wall, 40 cm wide, probably a meter high, where you can hang a heated towel rail. But are they even designed to heat rooms? Please advise something.
11/17/2011 at 14:19
There are special electric heated towel rails. Sold at any large plumbing store. You can also look it up on the Internet using the search function.
11/17/2011 at 17:52
ayya wrote: There are special electric heated towel rails. Sold at any large plumbing store. You can also look it up on the Internet using the search function.
Yes, I know. This is exactly what I had in mind when I wrote about the 40cm wall. A search on the forum for electronic information did not turn up much. Maybe someone can answer a couple of questions:
- Will they heat the room? Compared to the usual water letter m for example.
- How to calculate how much money he will eat?
- Any recommendations for choosing?
- Which company is better?
As far as I understand, there are no other electrical appliances for heating a bathroom?
11/17/2011 at 18:04
They will eat money. And quite a lot. Why suffer all your life? Hand over the repairs - it will be cheaper. Taking into account the operation of the hood, you will heat the exhaust air - monkey work
11/17/2011 at 18:40
ayya, these special PSs have a thermal power of usually 60 watts. Exactly 0.6 square meters
Ap4u, “cheap” and “heated with electricity” are mutually exclusive concepts.
11/17/2011 at 18:51
MaKon wrote: Ap4u, “cheap” and “heated with electricity” are mutually exclusive concepts.
Absolutely right. Ap4u, Before repairs, try heating with an infrared ceiling with a thermostat. 600 watts. At the dacha in the outbuilding I use this and the floor warms my head
11/18/2011 at 05:19
There is no option to redo the repair.
So now I'm faced with a choice:
- Or just get used to the fact that the bathroom is 10 degrees cooler.
- Or heat it with something electric.
Therefore, I ask for help again. Regarding the option with electronic heated towel rails - who can answer the questions? And maybe there are some other heaters for bathrooms?
“infrared ceiling with thermostat” - what is this? But right away, the ceiling is suspended
11/18/2011 at 10:16 am
Ap4u wrote: Regarding the option with electronic heated towel rails - who can answer the questions?
MaKon wrote: these special substations usually have a thermal power of 60 watts. Exactly 0.6 square meters
Ap4u wrote: “infrared ceiling with thermostat” - what is that?
11/18/2011 at 11:55
In the bathroom there is a Trugor 60*80 electric heated towel rail and a small piece of warm floor, area 4.2 sq.m. Warm!
11/18/2011 at 11:55
There ARE options. Moreover, at least SEVERAL, from which you can certainly choose ONE acceptable one. :yu Only you DO NOT see them (and this is normal, because you are not an expert).
In my opinion, you are complicating everything by refusing to install normal heating. Indeed, you will definitely go broke on electric heating. And this ruin will be lifelong. And the Spartan conditions of severe cold are complete darkness. In a month you will howl again.
Just imagine: The shower is warm or even very warm. You feel good, very good. Bliss. And then you turn off the water and find yourself all wet in the refrigerator. The buzz will immediately disappear. By the time you get out of the bathroom and dry yourself/get dressed, you will freeze completely. The feeling of pleasure will suddenly be replaced by anger. After this, only the unpleasant sensations of discomfort from taking a previously beloved shower or bath will remain in your memory. As a result, after some time, hygiene procedures will be firmly associated with terrible torture. And that's still good. Here's a more gloomy prognosis: you'll end up with pneumonia. Which will eventually become chronic. Do you need this?
It’s the 21st century, and you’re almost driving yourself into a dugout. Stop Experimenting. Do it normally.
You should show a specialist your bathroom and how the risers run. You may have to dust it, but not so much as to make a new finish. There is NO need to make grooves in the wall for heating pipes, because they run along the wall and heat the room. The only thing you have to do is drill holes in the wall for the pipes to lead from the riser to the bathroom. When the pipes are laid, all that remains is to take out the garbage and seal the cracks around the pipes. For example, if you have tiles on the wall, you will only have to change a couple of tiles. It's NOT difficult at all. If it's painted, touch it up. It's also simple. If it’s oilcloth or wallpaper, then it’s even easier - before drilling, cut it and move it to the side, then fill the hole and glue the oilcloth in place, and cut off the excess along the contour of the pipe.
Professionals digest the heating risers and change the radiators in the finished living room, so that the wallpaper is intact and clean. And you are afraid that you will have to renovate your bathroom again. But installing heating pipes is not so scary. Theoretically, I can assume that you will have to drill through the walls. But don't tear it down. And for this there is both a head and tools. And a normal specialist will do the job well and accurately. The floor can be covered with cardboard and oilcloth so as not to be damaged by a piece of cement that has fallen off the wall. Walls and plumbing can be covered with film. Particularly valuable items can be wrapped in a blanket and covered with film to protect them from damage. You can also pay the plumber a little (or more) for the jewelry of the work. So, for the money, he will do everything even more accurately.
In general, here's what you need to do: 1. Draw a diagram of the apartment, take a photo of the bathroom and post it here. 2. Based on your diagrams, they will recommend something here. You soberly evaluate all the options and come to some conclusion. 3. Find a professional who will do THIS for you. 4. Moreover, once again discuss different options with a specialist. And come to the most optimal one (first of all, for you, since you have to live in it; secondly, the most acceptable in terms of implementation, i.e., the one that will suit the specialist). 5. You worry a little (or a lot) in the midst of the process, when thunder rumbles and dust stands in a column (i.e. the plumber is working). 6. And then the rest of the time you enjoy the comfort of a warm bathroom.
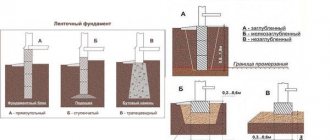
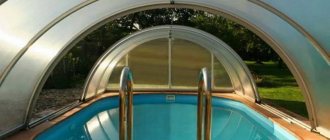
Methods for installing a hot tub outdoors
The choice of installation method for an outdoor bathtub is largely determined by the design of the bowl, its size and the method of heating the water. For wooden structures, a platform paved with stone is traditionally used, and the font must be raised above the coating, at least 10-15 cm, so that the bottom part gets rid of condensation.
Plastic font under a canopy
Plastic outdoor swimming pools are installed on a frame, usually metal, but it can also be brick, made of sand-lime brick or rubble stone. Approximately half of all polypropylene bathtubs are installed in a pit, in the form of mini pools; in this case, it is necessary to insulate, reinforce, and plaster the walls of the pit to avoid the accumulation of ground moisture.
A steel bowl is traditionally installed either on poles - supports, or suspended on chains. The cast iron font must be laid on a frame made of stone or brick. All this requires thorough preparation and capital expenditure, not to mention heating in outdoor conditions. Therefore, such a heated outdoor font is built mainly in private households, in semi-enclosed extensions and verandas.
Even with the most careful care, a cast iron boiler always rusts without water and tends to stain hands and things, so it is better to buy a branded cast iron bathtub, with a special oxide coating that improves heating and reduces corrosion.
Finnish version of a heated barrel
Types of heated floors + their features
What to prefer - water or electric heating systems? There is no point in burning kilowatts of electricity to heat the floor in a house with a powerful heating boiler. It would be more rational to make some changes to the existing heating system in order to direct the hot coolant into the pipes located in the floor.
Of course, it is best to think about connecting a heated floor at the heating design stage. But even in the working system it is easy to find a point at which it will be possible to break the pipeline to insert an additional distribution comb.
It distributes coolant flows and is called a collector among engineers. Each flow is directed to a separate heating circuit; the floor is heated by several such circuits. All of them are connected to the collector, the coolant is supplied to the collector using a special circular pump.
If the floor area in the bathroom is small (up to 5 square meters), then you can dispense with the distribution comb and pump and use cut-off taps and a thermostat. In large rooms you cannot do without this equipment: the boiler will consume too much energy, and floor heating will have to be considered ineffective.
The arguments for choosing the most suitable heated floor for tiles, which are most often used in arranging a hygienic room, are given in our recommended article.
In the bathroom, not just any type of covering can be laid on the floor, and a water floor makes this selection even more stringent. The material must have a heat transfer resistance of up to 0.15 m2*K/W. This corresponds to ceramic and stone tiles. Look on the product label for an icon indicating compatibility with warm water floors
In electric floors, the heating “core” is:
- heating cables, mats;
- infrared carbon emitters.
Heating cable or mat? The fundamental difference is seen in the complexity of installation and the height to which the floor is raised.
For a heating mat, a 3-4 mm layer of thin tile adhesive above itself is enough, thanks to which the tiles on the floor instantly become warmer. The cable in the mat is fixed on a nylon mesh with a given pitch.
The operation of a heated electric floor (like any other electrical device) requires compliance with safety measures. In order for the cable to be used in the bathroom, it must have an IP67 protection standard. The thermostat can be moved to the next room
If a cable is used rather than mats, it must be laid on the floor manually; the laying step is set arbitrarily. On top the cable is filled with a layer of DSP 30-50 mm thick. The smaller the step, the colder the room can be heated.
The cable takes longer to warm up the floor, but such heating can be used not only as additional, but also as the main one. Mats cannot cope with this task. In addition, they have a higher price.
However, the industry also produces thin heating cables that do not need to be coated with a solution up to 30-50 mm. On such a cable, as well as on mats, you can immediately apply tile adhesive, but at the same time it is possible to adjust the laying step. As a result, the advantages of both the cable and the heating mats come together.
Now about infrared heat... If we all had an idea about electrical cables before, then infrared heat is a new thing. In this case we are talking about a two-layer thin film, inside of which there is an even thinner carbon crystal lattice, emitting in the infrared range.
Film heated floors are no better and no worse than electric cable ones. They have their own scope of application. Infrared film is better suited for dry installation under parquet boards and laminates without the use of mortar and glue, which do not adhere well to its smooth surface.
Therefore, laying an infrared floor under the tiles in the bathroom is a very questionable decision, despite the fact that manufacturers allow it to be used in wet areas (bathtubs, showers).
If you use infrared film in the bathroom for complete heating, you need to cover at least half of the floor with it or additionally install the same wall panels
There are other arguments not in favor of film. The width of the area on which it is placed must be a multiple of the width of the film itself. Otherwise, either the entire area will not warm up, or you will have to lay the film in pieces, apply voltage to each piece separately, and connect many contacts manually. All this reduces the reliability of the design.
Heating mats also have a standard width, but they make it much easier to cover an area of any size and shape, cutting the mesh to which the cable is attached, but without damaging it. In terms of electrical safety, cable heated floors also benefit because they have a grounding loop, while heating films do not.
So, if you do electric floor heating in the bathroom, then use cable or mats. It is easy to assemble such a heating system; it is enough to have basic electrical knowledge. Installing a water floor is much more difficult.
What else does a comparison of electric and water floors give us? A heating system built into a screed with water circulating through pipes is prohibited for use in apartment buildings due to its heavy weight and the risk of accidents. Installation is possible only on the first floors, and then after receiving a bunch of permits.
Connecting to a central heating system is also not an option, even for apartments on the ground floor. Where can I get coolant in this case? From the heating riser.
But having made an additional journey through the bathroom, the water will return to the same riser cooled. Apartments located on the floors below will not receive enough heat, and their owners will rightly begin to express dissatisfaction. And in the summer the floors will not be heated.
In the bathroom, it is recommended to use two-core wire in the electric floor. A single-core cable is connected to the network at two ends, and a two-core cable is connected to the network at one end. An insulating sleeve is put on the other end. You can lay out the two-core cable on the floor as you wish, but the single-core cable must be returned to its starting point
There are no such prohibitions for electric heating circuits. Since there is no water in the system, flooding is also excluded - incidents that bring a lot of trouble to both the culprits and the victims. The device does not use the same powerful and heavy screed as required by water varieties.
And again we return to the need to raise the height of the floor. In the version with an electric floor, its level, as mentioned above, rises by 30-50 mm. And with water - by 80-100 mm. You don’t want to build a podium that is too high, but a water heated floor is more economical during operation compared to the alternative electric option.
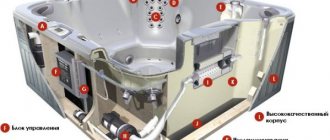
Pool heater production technology.
Making a spiral is not as easy as it might seem from the outside. Desire and available resources alone are not enough to get a high-quality and reliable pool heater. Termopool has a large production base, which includes sophisticated high-precision hydraulic, laser and bending machines. The process of manufacturing wood-burning pool heaters in general includes a large number of production processes, such as: argon arc welding, laser cutting, bending, crimping, painting, drying, test assembly and packaging of the heaters. Due to the manufacture of the spiral on a powerful hydraulic machine, its turns fit tightly and without displacement to each other. As a result, the firebox is dense, which makes it possible to extract thermal energy as efficiently as possible and maintain maximum temperatures in the firebox.
| A heating element |
heating a cast iron bath
Everyone knows how unpleasant it is to lie down/get up in a cast-iron bathtub when it is not yet filled with water. On the other hand, the strength and durability of a cast iron bathtub is beyond doubt.
The question is: is it really possible to attach heating to a cast-iron bathtub with some kind of heating cable, for example? I think a couple of kilowatts of cable wrapped around a bathtub is quite capable of heating cast iron in a minute.
I'm also thinking about running a drain from the heated towel rail around the bathtub
Does anyone have similar experience?
10/19/2011 at 00:41
Everyone knows how unpleasant it is to lie down/get up in a cast-iron bathtub when it is not yet filled with water.
Excuse me, but you sleep in it. If you really want to lie down, then fill it and lay down.
Plumbing work Moscow and region
10/19/2011 at 00:42
sergei995 wrote: Everyone knows how unpleasant it is to lie down/get up in a cast-iron bathtub when it is not yet filled with water.
Strange - why do you need to lie down in an empty bath? Fill it with warm water and then lie down, but with a couple of kilowatts of cable wrapped around the bathtub, you may not get out of it, and whoever has such experience, I suppose, now they can’t say anything. Regarding wrapping with metal plastic from the PS - this is an illegal action, as is a water heated floor from the hot water supply. I'm just blown away by such wishes, dear editors
10/19/2011 at 04:37
Yes, it often happens - you just sit on the edge of the bathtub, quickly rinse off, or take a shower - you stand with your feet in a cold bath. I would like to avoid this.
In my opinion, a warm cable often lies in water. It warms up the pipes, for example. Completely sealed, and the bath is grounded and standing. Why on earth would he hit?
I am not afraid of illegality if it is reliable and does not harm anyone. What's the difference between using a heated towel rail to extract heat or using a copper tube?
My heated towel rail is not “pass-through”, but “parallel” to the riser. Those. I won’t cool the neighbors’ water.
10/19/2011 at 07:29
It’s not easier to buy an acrylic bathtub.
10/19/2011 at 10:35
You take a shower head, rinse the bath with hot water for another minute, and the bath is warm
10/19/2011 at 11:19
sergei995, the whole question is how much heat you will take away from the hot water with your stray
10/19/2011 at 16:33
The question is clear, but I won’t take too much away, I’ll adjust the tap - otherwise there won’t be any breathing in the bathroom. The bath will heat up in 10 minutes and continue to warm the bathroom.
Now there is a heated towel rail, so the taps to it are only open 20% - otherwise it’s hot.
10/19/2011 at 16:36
alexutel wrote: You take a shower head, rinse the bath with hot water for another minute, and the bath is warm
Well, this is somehow Soviet-style. You can also use a basin. I want it to always be comfortable!
10/19/2011 at 17:48
sergei995 wrote: Well, this is somehow Soviet-style. You can also use a basin. I want it to always be comfortable!
)) do not close the hot water valve at all, this is bourgeois and it will always be warm and cozy in the bath I wanted to lie down
10/19/2011 at 18:50
Crap. you can read so much nonsense.
10/19/2011 at 19:49
I just came up with an idea - to put a gas burner under the bathroom, maybe autonomous, from a spray can. I lit the gas, heated the bath, and lay down. Guests arrived, poured water, threw in some potatoes and carrots, added salt, turned on the gas - the soup was ready.
10/19/2011 at 19:50
Tehnik-san wrote: Strange - why do you need to lie down in an empty bath?
perhaps there is another goal hidden behind this, to sleep in warmth
10/19/2011 at 23:15
ssrr wrote: I just came up with an idea - to put a gas burner under the bathroom, maybe autonomous, from a spray can. I lit the gas, heated the bath, and lay down. Guests arrived, poured water, threw in some potatoes and carrots, added salt, turned on the gas - the soup was ready.
in! great idea!
10/19/2011 at 23:52
ssrr wrote: I turned on the gas, heated the bath, and lay down. Guests arrived, poured water, threw in some potatoes and carrots, added salt, turned on the gas - the soup was ready.
The main thing is not to forget to get out when the wife turns on the burner and throws in the potatoes and carrots.
10/20/2011 at 00:24
ssrr wrote: I just came up with an idea - to put a gas burner under the bathroom, maybe autonomous, from a spray can. I lit the gas, heated the bath, and lay down. Guests arrived, poured water, threw in some potatoes and carrots, added salt, turned on the gas - the soup was ready.
Plumbing work Moscow and region
10/20/2011 at 00:25
Ahhahahaha Well, we had fun, honestly. It’s a pity that in fact no one said anything..
10/20/2011 at 00:44
sergei995 wrote: It’s a pity that in fact no one said anything
please heat with an infrared heater and do not use electric current, and quickly and you can attach automation
10/20/2011 at 00:48
Of course, I also don’t see the point in heating the bathtub, it’s more convenient for me to give it a hot shower before going in there, it will warm me up, and you never know who splashed chemicals in there. liquids. ))) But if you want, then if I were you, I would use a flat IR heater, it is better to fix it at a distance of 3-5 cm from the bath.
10/20/2011 at 11:06
MAPh wrote: and you never know who splashed something there from chemicals. liquids.
Well, your family is kind, sincere people.
10.20.2011 at 16:29
A woman is also a person
10.20.2011 at 18:27
sergei995 wrote: It’s a pity that in fact no one said anything..
Is that what they already said? Well, I can repeat it - bullshit. It’s better to take 100 grams (or better yet, 200) and go to bed. It will go away on its own.
10/21/2011 at 01:21
So, we wrapped it with a copper tube, foamed it, and connected it to the riser.
Ball valves were installed.
The bath is a little warm. At least it’s nice to sit down naked. I'm happy
Yes, this is probably idiocy and madness, I won’t argue.
But if I like idiocy, it doesn’t bother anyone, and at the same time it costs a couple of thousand rubles, isn’t that wonderful?
Now I have an exclusive warm cast iron bath
10/21/2011 at 01:44
What if the cable for underfloor heating is equipped with a separate switch for these purposes? Under 10 mA ouzo protection, of course. I don't have hot water, if that's the case. Or rather, there is, but from an electric boiler.
10/21/2011 at 02:00
sergei995 wrote: But if I like idiocy, it doesn’t bother anyone, and at the same time it costs a couple of thousand rubles, isn’t that wonderful?
Here we are talking about your safety and if you climbed into an empty heated bath with a satisfied smile on your face, then I wish you to get out of it without tragic consequences, electricity in the bath is no joke and use the hot water system for heating - by doing so you are stealing unaccounted for heat from their neighbors, and after such amateur performances, so that they can get mountains. water of sufficient temperature - you will need to pour more cooled water into the sewer, because the circulation will be disrupted by this action or will stop altogether and they will pay for your fantasies, but if they figure out the culprit, they can then keep it in a warm bath longer))
10/21/2011 at 03:26
Tehnik-san wrote: Here we are talking about your safety and if you climbed into an empty heated bathtub with a satisfied smile on your face, then I wish you to get out of it without tragic consequences, electricity in the bathtub is no joke and using the hot water system for heating is this by doing so, you are stealing unaccounted for heat from your neighbors,
Well, it’s not true, honestly. Firstly, I don’t use electricity.
VO-2, I don’t steal heat. The riser is a walk-through, I already wrote, i.e. The outlet to the heated towel rail is parallel to the main pipe. It was hot in the bathroom, so even the tap on the heated towel rail was only slightly open.
Now the heated towel rail has been dismantled, its role is played by the bathtub. That is, the bathtub works like a heated towel rail. And it takes exactly the same amount of heat. That's all. Think for yourself. It's simple physics. The cast iron bathtub heated up in 10 minutes and then begins to warm the room. If I began to take in more heat, the bathroom would become unbreathable at all. Now the taps are open a little. Plus the tube around the bathtub is several times smaller in cross-section than the cross-section of the dryer towel.
Decorating Tips
Use sandpaper to sand the wooden container inside and out, paying special attention to the edges of the walls: smooth out small flaws, prime. After the primer has dried on the outside, sand it, oil it and coat it with varnish or paint.
To finish other types of fonts, mosaics, ceramic tiles, and PVC film coating are used. The last option allows you to save money. Sometimes a deep font is made in bathhouses, if the structure of the room allows. The deepened bowl is more attractive and looks like a swimming pool.
The recessed font has an attractive appearance and does not take up space
It is easy to get in and out of, and only a small amount of materials is required for finishing. However, it will not be possible to move a deep font from one place to another.
Preparing tools
The technology for manufacturing a wooden tank requires a certain set of tools. To work, you need a tape measure, a building level, a simple pencil, a hacksaw, a can of sealant and a glue gun. You will also need a drill and a round wood bit, a router that allows you to make grooves in the panels and process the edges. To process boards, you need a sanding machine and special sandpaper. This is due to the fact that all surfaces of the font must be smooth and even.
The router allows you to create grooves in panels
Shape and material of the font
Classic version of Furaco
Outdoor hot tubs are manufactured in several form factors:
- Classic wooden outdoor bathtub in the form of a barrel-tub. It is considered the safest and most environmentally friendly, but in practical use such a bath causes a lot of trouble;
- A plastic outdoor swimming pool, usually large in size, is built with a plastic decking board or natural oak plank trim. It is very reliable and durable, does not require special care, you can safely leave it on the terrace for the winter without any consequences for the plastic shell;
- Stainless steel bathtubs are the most expensive and not always the most convenient to use. They cost several times more than plastic ones. They can withstand even the most barbaric heating methods, including thermal shock. The service life is several decades;
- Cast iron hot tub is the most difficult to maintain and install. An outdoor heated bathtub made of cast iron is bought mainly by connoisseurs and true connoisseurs of this kind of relaxation.
Cast iron must be cleaned and washed regularly, otherwise rust will appear. Additional constant heating in outdoor conditions is not required; it is enough to warm up the cast-iron font once to enjoy water procedures for an hour and a half.
There are also composite and ceramic models in which the inside of the mini pool is coated with a special compound that prevents corrosion or salt deposits during the water heating process.
The inside of the mini-pool is made of polypropylene plastic, which ensures good heat retention and you don’t have to worry too much about the condition of the surface. The plastic walls of an outdoor bathhouse are quite hard and difficult to scratch or break through. If you are looking for a suitable font for your dacha, then a polymer bath will do just fine.
Heated plastic all-weather barrel
In addition to the fact that a 1.5 m3 outdoor tank in the courtyard of a summer house can be used as a backup source of water, a plastic mini-pool has a number of advantages and disadvantages over other types of swimming pools:
- Firstly, the body is not susceptible to corrosion, even if you use a plastic mini-pool several times a week, actively use heated water and regularly wash the walls using modern detergents. Even in such harsh conditions, an outdoor hot tub with a stove will last at least a year and a half;
- The walls of an outdoor bath - barrels made of cast polypropylene - are tactilely more comfortable when touched by open parts of the body. They are quite smooth and warm, even if the water heating does not work quite as well as we would like, bathers will not experience serious discomfort;
- The small weight of the plastic container, usually no more than 100-150 kg, makes it easy to carry and install an outdoor heated bathtub in any convenient place.
Advice! An outdoor plastic hot tub should not be left in the countryside in the open sun. The food-grade plastic from which the container is made does not tolerate ultraviolet radiation from the sun; the material often fades and becomes covered with cracks and stains. At a minimum, an outdoor barrel should be covered with a cover or lid.
It should be noted the high decorative qualities of outdoor models made of polypropylene. Typically, a plastic liner is mounted on a frame and covered with a beautiful finish, giving the font a complete resemblance to wooden pool models.
The use of an oak barrel bath for water procedures dates back almost several hundred years. Modern models of wooden hot tubs are made mainly from oak, ash, cedar and larch wood. Wooden outdoor bathtubs are not particularly varied in shape; they are usually a barrel or a wooden vat, with high sides that widen or taper towards the bottom.
Hot tub and water heating system just delivered from the salon
Cast iron and steel bowls are the most expensive and difficult to install. According to many experts, the use of metal is considered just a tribute to the fashion for this type of recreation. Heating an outdoor container requires a lot of wood consumption, but is considered the safest. You can use an open fire, a fire or a stove installed under the bottom of the font.
Stainless steel barrel
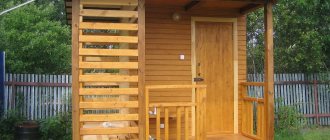
Do-it-yourself bath font made of wood: step-by-step instructions
Traditionally, after the high temperatures of a Russian steam room, it was customary to plunge into cold water, which is why they tried to install baths on the banks of a river or other body of water. Similar traditions have been preserved to this day, but today, more and more often, bathhouse lovers prefer, upon leaving the steam room, to jump into a font built under the roof, rather than run in the cold to the nearest body of water.
Is it possible to build a bathhouse with your own hands? If there is a desire, then, of course, it is quite possible. It can be made of wood, poured with concrete, or a ready-made bowl made of special plastic can be installed, which is subsequently lined with decorative material.
An interesting parallel is that Japanese culture has its own traditional bathhouse called ofuro. It basically consists of a wooden barrel. Ofuro differs from a regular font in that it is heated using a metal stove installed next to the barrel or even inside it. By building a similar option, you can get another bathhouse and a font at the same time.
Shape and material of the font
The font is most often made in four geometric shapes - square, round, triangular or oval.
- The most popular shape of a wooden font is oval. This structure is the most compact of all, and can be installed even in a small room. In addition, the oval shape has good rigidity, and this design is easy to assemble.
The oval-shaped hot tub fits well even in cramped spaces
- The round shape is well suited for making a wooden Japanese bathhouse, since it needs to have a compartment for installing a stove.
- A square font made of wood is extremely rarely made, since it is not very convenient to use, and its design does not have sufficient rigidity. In addition, the corners of square structures take longer to dry out, and the process is uneven, which is very undesirable for wooden structures. Therefore, craftsmen often simply round the inner corners of the font.
- The triangular font can be made of wood or plastic. It is convenient because it is compactly installed in the corner of the room and does not occupy a significant area of the bathhouse. This design looks very neat and quite respectable, and will probably be suitable for any interior of a bath room.
A concrete font located in the floor of a bathhouse can have the most arbitrary shapes, since its rigidity is provided by reinforced walls and a bottom.
Plastic hot tubs also have different geometric shapes. Such mini-pools are usually installed on a bath floor (on the surface or in a pit made). The shapes of the font do not affect its performance characteristics in any way, and you can choose any of them to suit the taste of the bathhouse owner.
Wooden font
If you decide to make a wooden font yourself, then you first need to choose a suitable material for it, since not every wood is suitable for making containers that are constantly in contact with water.
For such products, hardwood is suitable, as it absorbs moisture into its structure to a minimum, which means it will last the longest possible time.
It has long been known that certain trees have beneficial healing properties that give a person additional vitality. Therefore, it is precisely these breeds that are chosen for the manufacture of not only bathtubs, but also other accessories that are used in the bathhouse.
Trees that have similar qualities include larch, Siberian cedar, beech and oak.
Larch
Larch wood is an excellent choice for any bath accessories, as it has specific properties that have a beneficial effect on human health. Thus, it has been noted that larch aromas and infusions increase the overall tone of the body, activate protective reactions, and also cleanse and rejuvenate the skin.
Larch can withstand both extremely high temperatures and temperature changes; it has a solid structure, therefore it is strong and durable, as it perfectly resists the penetration of excess moisture into the thickness of the tree. Thanks to its special antiseptic properties, it is not susceptible to putrefactive processes and the formation of fungus.
Cedar
Cedar wood has even greater density than larch, and has no worse characteristics in terms of resistance to the external environment. In addition, it is a source of phytoncides that inhibit the growth of bacteria, which eliminates the appearance of mold and fungal colonies.
Cedar wood is enriched with essential oils, which have a healing effect even at the cellular level. Cedar has the property of normalizing the functioning of the cardiovascular and nervous systems, calming and helping to relax, and in addition, it is considered a strong aphrodisiac.
Beech
Beech wood has a dense and durable structure, which helps it resist external negative influences and withstand humidity and temperature changes over a very wide range. Beech has a tart aroma and strengthens the human immune system. A font made from this wood will last a very long time.
Oak
Oak wood has been known for its remarkable properties for hundreds of years. Oak has always been a symbol of strength and excellent health, since the tree itself has a dense and durable structure. Having an oak font, you can receive a charge of vivacity and energy every time you go to the bathhouse. In addition, this wood promotes wound healing, improves sleep, normalizes metabolism, and neutralizes inflammatory processes.
Oak can easily be called the most popular material for making bath accessories, which is why bath lovers most often choose this wood.
Wooden bathtubs also have their disadvantages - they are difficult to operate and maintain. The parts should not be allowed to dry out, so after using and washing the container, you need to pour a small amount of water into it and close the lid on top so that it evaporates more slowly, but constantly maintains a certain level of humidity inside.
To install wooden hot tubs, it is necessary to prepare a perfectly flat surface to avoid distortion and deformation of the structure. If it is impossible to find such a platform, you can level the font itself by placing wooden pads of the required thickness under the desired side.
Pouring font
In addition to the bathtubs installed on the floor and embedded in it, dousing bathtubs are also made. They are usually used in cases where there is not enough space in the bathhouse, and it is impossible to install a full-fledged mini-pool that a person could climb into. In addition, dousing baths are often installed in Russian baths and saunas simply for those who like to take an instant cold shower.
Video: do-it-yourself bath font drawings
Prices for bath fonts
Bath font
Installation of a wooden font
Drawing of the font and materials for its manufacture
Before buying materials for making a font, you need to draw up a high-quality assembly drawing of this container with accurate calculations of the dimensions and number of parts.
It is recommended to make the drawing in several projections - then it will be easier to calculate all the parameters of the necessary components - parts of the walls, bottom, stairs.
The staircase may have steps, as in the presented drawing, or simply wooden rungs. But in the latter case, for safety reasons, it is necessary that the ladder hooks onto the edge of the font.
- Boards will be needed for the walls and bottom of the font, stands under it, internal benches and stairs. Typically, material with a cross-section of 20 × 120 mm is used, taking into account that the edges of the board will be milled. The length of the board will depend on the chosen height of the font.
- For stands under the font, you will need a beam 100 × 100 or 150 × 150 mm. Its length will depend on the width and length of the font.
- In addition to the boards, you will need metal strips and bolts with which the installed boards will be tightened. The metal for the strips should be flexible enough, but very durable.
- Self-tapping screws will be needed to fasten the individual parts of the bottom and screw in the legs. But you also need to take into account that there should not be a single metal part inside the font.
Manufacturing parts for a wooden font
Making wooden elements for assembling a font is not as simple as it seems, since they will have to create a single, strong, and at the same time, airtight structure that will not leak in any place. The boards should fit tightly together, creating a solid, crack-free surface on the walls and on the bottom plane. In addition, the walls of the font must be tightly connected to the bottom plane.
- The boards are sawn into equal sections (in accordance with the drawing), equal to the height of the walls plus 100 ÷ 120 mm. This is the distance that the bottom of the font will rise above the floor. The lower part of the boards will close this space from drafts.
- Then each of the boards is milled along the edges. A semicircular tenon is formed from one, and a semicircular groove is cut out from the other, having exactly the same radius as that of the tenon - they should fit each other perfectly.
- The boards for the bottom should also be milled for a tongue-and-groove joint without side chamfers, so that the floor surface is perfectly flat and does not have even small gaps.
- Another option is that the boards should be smooth, perfectly fitted, without tongue and groove joints.
- Next, on each of the boards intended for the walls of the font, the same distance is measured from their lower edge, for example, 100 mm. Above it, the exact thickness of the board from which the bottom will be mounted is noted, for example, 25 or 30 mm.
- In the marked area, a square groove is carefully milled, with a depth of one third of the thickness of the board, in this case - 8 ÷ 10 mm.
- Having finished manufacturing the parts according to the calculated dimensions, they are thoroughly polished. So, the boards for the walls should be perfectly smooth on both sides, and the bottom parts should be at least on the side that faces the inside of the font.
Installation stages
The principle of installing a wooden font is similar to making barrels. The difference in this process lies in the shape and thickness of the wooden elements that form the walls of the resulting container. The boards for the font are absolutely flat, and for the barrel they taper towards the bottom and upper open part of the container.
The installation of the font is carried out in stages, as follows:
- The first stage is the installation of a shield made of boards. It will then serve as a blank from which the bottom of the font will be formed. The boards are glued together with wood glue and compressed with clamps until the wooden panel is completely ready.
It is clear that for an oval font a rectangular shield is assembled, for a round one - a square one.
- After the glue has dried, the desired figure is marked and drawn on the wooden surface with dimensions corresponding to the drawing. Then the bottom assembly part is cut out very carefully. Errors when cutting out this curvilinear figure cannot be allowed - it is better not to rush in order to avoid a fatal mistake. The edge of the finished bottom must be carefully sanded to remove burrs and small irregularities.
- Next, the resulting shield must be additionally strengthened on the lower side of the bottom with 20 × 30 mm bars. They are screwed with self-tapping screws, which in no case should go through, otherwise their sharp ends will stick out in the floor of the font, which can lead to injury.
Additionally, you can attach support bars, which will subsequently act as legs - they are installed along the edges of the bottom plane.
If you purchase ready-made hot tubs, the bottom is usually divided into three parts. This is done only for ease of transportation. The parts from the kit are assembled into a whole plane in the same way as mentioned above - using glue, bars and self-tapping screws.
- Next, to conveniently drain water from the container, closer to the edge of the bottom, a hole of the required diameter is drilled into which a siphon with a hose is installed.
If it is not possible to install a drain pipe due to the lack of sewerage, then water can be pumped out of the font using a pump, but this option, however, will become more complex and inconvenient.
- The next step is to move on to assembling the walls. To do this, the bottom part is lifted onto a work table that has the same height as the walls of the font - this will make it more convenient to mount the boards on the edge of the bottom shield.
- First, fitting is done - one of the prepared boards is tightly installed on the edge of the shield. It is put on the shield with a square groove and tapped all the way with a rubber hammer.
- Next, a pencil mark is made along the installed first board, and then the resulting line is extended along the entire edge of the shield. This will serve as a guide for installing the remaining boards.
It is very important to correctly install the boards on semicircular turns, while respecting the angle, which must be determined in advance and noted in the font drawing.
- The boards are installed as closely as possible to each other and are also tapped with a rubber hammer.
- The last board begins to be mounted on top, between two already installed elements. It fits neatly into the general row. In this case, neighboring boards may even move slightly away from the bottom surface.
It’s not scary - after the last part is moved to the same level as the rest of the wall elements, it and the adjacent boards are tapped from the side so that they sit tightly with their grooves on the bottom plane.
- The next step is to tighten the assembled font with metal strips. They have special lugs along the edges into which the tightening bolt will be installed. After installing the bolt, a nut is attached to its thread, turning which tightens the metal hoop, thereby pressing the boards as tightly as possible to each other.
There should be at least three such hoop stripes. They are located in the lower and middle parts of the font, as well as at a distance of 100 ÷ 250 mm from the top of the structure.
- After this, the font is turned over and installed on the bottom. On top, all parts are treated with fine-grained sandpaper and then sanded to perfect smoothness to absolutely eliminate the possibility of skin injury.
- The next stage is the manufacture of an extension ladder. The simplest option consists of two well-treated boards installed vertically and horizontal rungs. It is advisable to install hooks on the top of the stairs or secure wooden supports behind the support boards.
- Ready-made wooden seats are installed inside the font, and if desired, a shelf-table can be attached to the side outer wall of the container.
In addition, water supply systems, filtration, heating or forced circulation are often installed in the finished font to create massage jets - like a Jacuzzi. But these are tasks of a different level of complexity and are not considered in this article.
- The last step, after installing the hot tub indoors or outdoors in its regular place, is to connect the water drainage hose to the sewer pipe.
Video: the work of a master making a wooden font
The installation of a Japanese Ofuro bath is carried out in almost the same way. However, there is also a characteristic feature - in addition, the font should also have a wooden grate, which should separate part of the space for a special stove installed directly into the water.
The stove has a special, absolutely sealed design to prevent water from entering its firebox. Firewood is placed into such a stove through its upper compartment, and the air is blown through a hole that is led out through the wall of the font.
Another option for installing the stove is used - in close proximity to the font. The stove in this case is equipped with a water circuit through which water circulates, heating up and returning back to the font. This is somewhat different from the Japanese tradition, but nevertheless the effect is almost the same.
An ofuro bathhouse is usually installed outdoors, preferably under a canopy. If it is installed indoors, the pipe from the stove is connected to the chimney or discharged through the wall or roof.
How to make a concrete font
A concrete plunge pool is essentially a mini-swimming pool, which is why it is built according to the same principle.
- The construction of such a font is quite hard work, since the first thing that needs to be done is to dig a foundation pit for it. It should have a depth slightly less than the height of the average person, that is, approximately 1500 ÷ 1600 mm, plus 170 ÷ 200 mm for laying the sand cushion, reinforcement and pouring cement. The width of the font is made at the request of the bathhouse owner and according to the real possibilities of the available space.
- A pit along the length and width in each direction (or along the radius - if a round font is planned) is dug 150 ÷ 170 mm larger than the selected size, since this is exactly the thickness of the concrete walls.
- If you plan to make a drain at the bottom of the pool to drain water, then you need to dig a trench in the wall located closer to the drainage pit to the same depth as the pit, and then lay a drainage pipe there with the required slope. But usually in such a font a pump is used to pump out water.
- After the pit is ready, sand is poured onto its bottom, which must be moistened and compacted well. The thickness of this sand cushion should be 80 ÷ 100 mm.
- Next, a reinforcement grid made of rods with a diameter of 8 ÷ 10 mm is fixed to the bottom and walls. It is secured to the walls using brackets made of 5 mm wire. It must be remembered that the grate should be located at a distance of 50 ÷ 70 mm from the ground walls.
- To fill smooth walls, a solid plywood formwork is installed vertically, which is additionally reinforced with bars and spacer angles.
The formwork is installed level, at a distance of 150 ÷ 170 mm from the earthen walls. It usually rises 120 ÷ 150 mm above the floor surface - to create sides that will prevent water from spilling over the surface.
Additionally, the plywood walls of the formwork are bursting with bars, which will not allow them to bend under the weight of the poured mortar.
- The solution is poured into the formwork, which, as it hardens, forms reliable concrete walls of the font.
The surface of the sides is well leveled, and the entire structure is left to harden, which will take about 25 ÷ 28 days.
- After the concrete has gained the required strength, you need to remove the formwork and make a screed on the floor of the font. It should have a total thickness of 60 ÷ 80 mm.
- Next, after the floor is ready, you can begin leveling the walls using plaster mixtures. The plaster is applied in such a layer as to reliably fill all possible cavities caused by air bubbles and other uneven surfaces of the walls.
- The next step is to move on to waterproofing work. It is necessary to waterproof not only the walls and floor of the pool, but also the walls of the room around it, if the font is adjacent to them.
For waterproofing, a special deep penetration impregnation is usually used, which is applied in several layers using a wide brush or roller. Moreover, with each subsequent layer, the impregnation penetrates deeper into the wall, and is capable of impregnating it to a thickness of up to 200 mm. This waterproofing composition penetrates into all pores of the plaster and concrete wall, reliably sealing them from subsequent penetration of moisture.
- Next, after the waterproofing composition has dried, decorative tiles should be immediately laid on the walls around the font and on its sides.
- After covering the walls around the font and its protruding sides, you can proceed to applying liquid rubber or laying ceramic tiles on the walls inside the resulting mini-pool.
— If you choose ceramic cladding, it is recommended to choose the option in the form of small tiles, which are laid on the surface using waterproof tile adhesive. The grout for sealing joints should also only be waterproof.
— Liquid rubber is usually applied by spraying, but it can also be done using a roller. The main thing is to create a continuous surface on the walls and floor of the font. This material forms a smooth, elastic and durable film that is not afraid of mechanical damage and at the same time will not allow water to come into contact with concrete walls.
- The last to be installed is the staircase leading to the font. It can be hooked onto the side of the pool, or it can be embedded in the floor next to it, depending on the chosen model.
- It is recommended to make a drainage groove near the pool, through which the water flowing from a person when leaving the font will be drained. The drain is covered with a grate on top.
Plastic font
To get rid of unnecessary hassle, you can purchase a ready-made plastic hot tub container, especially since they are produced in a variety of shapes, and you can not only choose the most suitable one, but also order your own exclusive version with specific dimensions from the manufacturer.
A plastic plunge pool can be recessed into the floor - this process is carried out in almost the same way as building a concrete mini-pool. The difference is that instead of laying a ceramic decorative coating or spraying a rubber film, a plastic container is installed.
Another option for its installation is installation in a frame built according to its shape and further covering with panels (for example, wooden).
- It is very important to properly prepare the surface for installing the font - it should be even and fairly smooth. A plastic container is placed on it, in which a hole for draining is made in advance. When installing a drain pipe, its connection to the font must be well waterproofed.
- Next, a frame of wooden blocks is mounted around the font, onto which wooden or plastic panels will be attached. The panels themselves in this case do not play any load-bearing role - they only perform a decorative function. All loads must be taken by the frame made of timber, so it must be made reliable and rigid.
- For the frame, you need to prepare beams with a cross-section of at least 50 × 50 mm, and for the outer cladding - thin boards (even about 10 ÷ 15 mm thick), but always treated with water-repellent compounds. Plastic panels or lining with a pattern that imitates the texture of wood are quite suitable. Installation of finishing material is carried out depending on its type.
If a wooden or plastic lining is chosen, then the sheathing under it is made more often, and it is secured to its bars using clamps, which can be screwed, nailed or stapled.
If wooden panels are chosen, then they are screwed to the frame with self-tapping screws into holes drilled “under countersunk”, and the top of the caps are covered with a composition made from a mixture of wood glue and sawdust.
If during cladding it is necessary to veneer the corners, then they can be covered with special fitting corners - in this case they can simply be glued to “liquid nails”.
Installation of a shower font
The principle of making a dousing font is the same as for a large wooden “vessel”, but in a pinch, you can even use an ordinary hard plastic bucket, which, for beauty, can be lined with wooden slats on top and tightened with metal hoops.
The shower font is installed on the wall using wooden brackets. Two semi-axles provide mounting mobility. To tip a cold water font over yourself, you need to secure a rope.
A special float mechanism can be installed inside the font, which controls the presence of water in the container. After the bucket is emptied, it is automatically filled from the water pipe. In principle, the design is comparable in operating principle to a cistern. This version of the font does not require large expenses, is easy to manufacture and install, and has proven its effectiveness in bathing procedures.
Making your own bath font is quite a difficult task. But if you want, even this is possible. Using step-by-step instructions and using all your creative abilities, you can cope with a similar task. If there is no confidence in its successful completion, then it would probably be wiser to purchase ready-made products or invite qualified craftsmen to build the font.
Equipment and dimensions of outdoor heated swimming pools
Today, nothing prevents you from ordering stove-heated hot tubs directly from the manufacturer. We offer compact and convenient outdoor hot tubs that can be easily installed anywhere, without requiring mandatory communications and other labor-intensive manipulations.
Purchasing an outdoor hot tub with a stove heating will allow you to maintain the optimal water temperature in outdoor conditions in the hot tub insulated with insulation and create increased comfort during water procedures.
Don't miss the opportunity to buy a heated outdoor hot tub made of natural wood. This is a classic option that fits perfectly with the interior of a wooden bathhouse. Moreover, it is not at all necessary to make an outdoor hot tub from natural wood; for this there is a more practical thermowood.
Order all-wood hot tubs with heated water only if you strictly respect traditions and love everything natural, familiar / classic, and are willing to spend a lot of time on preventing irreversible processes in the material.
The smooth hypoallergenic plastic of an outdoor hot tub prevents bacteria from accumulating on the surface of the walls, making it considered the most hygienic option for making the inside of a heated water hot tub.
An example of our plastic font on the sauna terrace.
Combined outdoor baths with stoves are just what you need for relaxation, there are no problems with them!
Such heated outdoor hot tubs are products of arbitrary geometric shapes made of thermowood, or natural wood, with an inner liner made of polypropylene. This combination allows you to reduce the cost of the model while maintaining its functionality and practicality.
Standard equipment:
- Drain system
- Cork
- Bench (ladder) inside the font around the perimeter
- Solid stainless steel belts AISSTI – 304 (3 pcs.)
- 2 step ladder
- End rim (font ring)
- Podium between the fonts (for double outdoor fonts)
Features and types of font designs
The font is an addition to the sauna in the form of a wooden barrel with cold water for traditional dipping after the steam room. In modern conditions, the design is used as a multifunctional device for a set of water procedures outdoors or indoors. Heating is provided by electric or gas equipment, or a solid fuel boiler is used.
Oval font
The following types of fonts are distinguished by shape:
- round and oval;
- rectangular and square;
- polygonal, trapezoidal.
According to the design, heated fonts are divided into 2 categories:
- with a cauldron inside the bowl;
- with heat supplied from a generator outside.
Depending on the volume, there are options for diving one or several people. The outside of the structure is equipped with steps; inside the container there is a ledge used as a bench.
Octagonal font
Choosing a form
First of all, you need to decide on the material from which the font will be made, and its shape. Previously, in Rus', such a bathing container was an ordinary wooden barrel in the shape of a circle or oval. But the development of modern construction technologies allows you to choose any shape: from a traditional circle to a triangle or square. The only question is how many people the bathhouse is designed for and whether there is room to place a mini-pool in the house or on the veranda.
Traditionally, fonts are built in the shape of an oval. It saves space and can be installed even in a small steam room. In addition, oval fonts hold their shape well and are easy to assemble during installation.
The spherical shape is ideal for the traditional Japanese bath - ofuro. The difference between ofuro and the usual Russian bathhouse is that it is essentially both a bathhouse and a place for swimming at the same time. The Japanese version requires a separate place to place the stove: it can be installed inside the structure itself or located nearby. A do-it-yourself font with a stove can be made in exactly this form.
The square shape rarely becomes a favorite among bathhouse owners. It is not practical and its design is not rigid enough. In addition, square structures dry out much longer than their spherical “brothers”, and this happens very unevenly, and this can lead to defects in the wooden structure. It is for this reason that experts round the corners on the inside.
Triangle-shaped structures are traditionally made of wood or artificial materials (for example, plastic). Its advantages are that it is compact and can stand in the corner of the room without taking up much space in the bathhouse. Visually, such a mini-pool is pleasing to the eye and looks modern and representative. It is universal and suitable for almost all types of premises. Ofuro is ideal for those who are thinking about how to make a heated font with their own hands.
Photo from the site https://strb64.ru
What floors can be laid on top of heated systems?
Before we discuss how to implement such a system, it is worth addressing the selection of suitable materials. Few people know that only certain types of flooring are suitable for underfloor heating.
We must choose materials characterized by high temperature and heat inertia. These criteria are primarily met by ceramic tiles and stone elements. They do not block heat in any way, and are also strong enough not to damage the heating system.
You can also consider laminated panels or thin plastic liners (however, check if there is information that allows installation in the case of underfloor heating) and even on wooden floors. In the latter case, you will need to choose the right type of wood - hard and exotic species such as oak and teak will be quite durable.
You should categorically refuse any types of wood characterized by a high shrinkage coefficient (pine, beech), as well as solid boards (multi-layered ones would be advisable) and thick ones (more than 1.5 cm).
Outdoor heated hot tubs on the market
Outdoor font made of larch (d1.17-H1)
The diameter of the font is 117 cm and the height is 100 cm. The wood is coated with a special composition that protects it from the sun, exposure to the atmosphere and temperature changes. The cost, together with an additionally purchased kit for heating water, is 133 thousand rubles.
Outdoor hot tub (d1.50 – H1.2)
Material of manufacture: oak. The height of the font is 1.20 with a diameter of the product of 1.50 meters. The wood is processed in the same way as the previous model. Due to the use of more expensive wood and the increase in size, the cost of an oak font together with heating equipment is 189 thousand rubles.
The product line contains dimensions in height from 100 to 180 cm, in diameter - from 117 to 200 cm. Depending on the size and type of wood, the cost of the product changes.
Equipment for heating using wood can be supplied separately, which is structurally compatible with the presented hot tubs. Oven diameter – 50 mm, length 70 cm, weight 20 kg. The cost of the equipment is 80 thousand rubles.
Furaco font (dia. 1.50 meters, height 1.20 meters)
An internal wood-burning stove is used for heating. The type of wood used for production is cedar or larch. The product is supplied additionally with:
- internal wood-burning stove;
- protective grille;
- chimney; podium;
- seat;
- stairs.
The cost of the product is 114.5 thousand rubles.
Furaco font (dia. 1.50 meters, height 1.20 meters)
Heating is carried out using an external wood-burning stove. The type of wood used for production is cedar or larch. The product is supplied additionally with:
- external wood stove;
- protective grille;
- chimney;
- podium;
- seat;
- stairs.
The cost of the product is 124 thousand rubles.
The line of similar ovens contains devices with diameters of 1.80 and 2.00 meters with the same height of 1.20 meters.
Finnish hot tubs made of thermowood Fispars Thermowood NA
Made from thermowood processed at high temperatures. As a result, the material becomes more durable, environmentally friendly and does not emit resin. Heating is provided by an external wood stove. The manufactured line of devices contains products with a diameter from 1.6 to 2.4 meters with a water volume from 1400 to 3700 liters. The cost of bathtubs starts from 200 thousand rubles.
What material to choose for assembling the font
You can build a structure yourself from concrete, wood or polypropylene sheets. Factory hot tubs are also made of plastic, steel or cast iron. To choose the right material, you should know the advantages and disadvantages of each of them.
Concrete structure
A similar bathing container is displayed both inside the bathhouse building and in the open area. The depth, width and length of the bowl are chosen depending on personal preferences.
It is advisable to decorate the walls with waterproof material: mosaics, ceramic tiles or cover them with film. For ease of descent, an iron ladder is fixed or monolithic steps are brought to the edge.
By following the rules for pouring concrete, it is easy to build a durable and comfortable structure with a unique design. It will be complemented by a mini-waterfall or hydromassage mechanism, and will be decorated with LED lighting.
A concrete font can be placed indoors, sunk into the floor
When building a concrete font, it is important to install a high-quality water supply and drain it. All connections are checked for leaks. Ceramic tiles or mosaics are laid in accordance with the process technology so that during use of the structure the decorative finish does not fall to the bottom.
Disadvantages of a concrete font:
- a large amount of preparatory work - excavation of soil for a foundation pit, installation of formwork, reinforcement, pouring and compacting concrete mortar, laying waterproofing material, installing water drainage;
- production time - concrete completely sets and hardens in about 30 days;
- unsafe operation - the lining is slippery, which requires care and compliance with safety measures at the time of immersion and exit.
A concrete font will last a long time if it is built according to all the rules and high-quality materials are used.
Video: construction and operation of a sauna font made of brick and concrete
Hot tub made of fiberglass and polypropylene
A plastic container is suitable for those who do not want to spend time decorating the walls. Most often they are made in blue or green, the bottom is decorated with a pattern. Such factory fonts are cast in various shapes and sizes. The optimal depth is from 1.2 to 1.4 m. The volume depends on the dimensions - 0.95–2.65 m3. Walls 5–12 mm thick.
The service life of a polypropylene product is about 50 years. Plastic does not fade in the sun and does not lose its seal due to sudden changes in temperature.
In such a font you will need to install a faucet and a connecting pipe to the water supply and sewerage pipes. To prevent the bowl from being crushed under the weight of water, it is equipped with stiffening ribs on the outside. It is possible to install lighting, shelves, stairs and other parts. Water heating is carried out using an external heating device: a wood-burning or electric stove.
A plastic font is quickly installed and does not require additional sealing of the walls
Installation of a plastic font is carried out in a short time. Before deepening the container into the pit, you will need to concrete the bottom and walls. Insulation is mandatory. Around the structure you need to build a wooden podium on a metal frame. There is no need to wait for the concrete to completely harden: after removing the formwork, you can already install the plastic bowl. The surface of the plastic, if desired, is covered with a special anti-slip layer.
In the case of ground-based installation, such a font is decorated with wood.
A plastic hot tub, lined with slats on the outside, takes on the appearance of a wooden container and fits perfectly into the interior of the bathhouse.
Such a plastic liner extends the service life of the wood. The advantage is that such a structure does not need to be additionally treated with sealants, and the water can not be drained for several days.
To clean plastic, use any non-abrasive detergent, but without chlorine, otherwise the coating will be damaged.
Metal font
Metal structures are rarely installed in bathhouses due to the complexity of their installation. More often there are vats made of cast iron or steel, suspended on a chain to a tripod made of logs, taken outside the room. The water is heated slowly using a fire built under the bottom, and then drained through a pipe at the bottom of the product. River pebbles or shield flooring are placed at the bottom of the bowl to prevent burns.
A steel font is suspended on a stable structure with the possibility of heating water from below
In some cases, a “floor” recessed installation of a metal vat is carried out. Then the fire will have to be built on the side of the bowl. For the recessed version, a concrete base is also poured.
But such bathtubs are heavy and expensive: a design measuring 2x0.73 cm costs at least 200 thousand rubles, and the weight of the product is more than 1200 kg.
Wooden font
The main advantages of a wooden font:
- environmental friendliness;
- aesthetic appearance;
- procedures with benefit;
- aroma of the material.
If we compare the cost of structures, wooden ones cost 2-3 times more than plastic ones. For example, a bowl made of larch measuring 1.2 x 0.7 x 1.1 m will cost 45 thousand rubles, and a round container made of oak measuring 1.5 x 1.3 m will cost 110 thousand rubles. The average cost of a cedar barrel is 70 thousand rubles, and a plastic one is within 20 thousand rubles.
If you want to save money, make the design yourself. However, in this case, carpentry equipment, fasteners, a special adhesive mixture and skills in working with wood will be necessary.
To preserve the appearance and service life of the structure, it is important to follow these recommendations:
- do not keep an empty font under the sun - the wood will burn out and dry out;
- do not place it near heating sources - installing the structure on a heated floor system leads to drying out of the wood. Make an insulating platform from a plywood sheet with a layer of polystyrene foam and rubber gaskets;
- After bathing, drain the water to prevent green mold from forming;
- in cold weather, leave unused outdoor structures dry so that water does not freeze and destroy the wood;
- to clean walls, use liquid cleaning mixtures and a soft cloth;
- Once every 30 days, check the tension level of the hoops and tighten the nuts if necessary;
- Do not leave the container unused for a long time - the wood begins to deform and dry out. If the barrel has not been used for too long, soak it first in cold water.
The outside of the font also needs to be looked after using wood care products.
Fonts made from wooden boards are divided into 2 types according to the manufacturing method: those connected without glue and those connected using glue and a layer of varnish for protection. The optimum moisture content of the material is 8–10%. The slats are connected to each other using a tongue-and-groove type.
Adjacent slats should be connected using the tongue-and-groove method - such fastening is considered reliable
The joints are treated with a moisture-resistant adhesive mixture. The bottom is installed in the transverse recess of the lamella, and their connection is covered with a moisture-resistant sealant.
If we talk about the benefits of wood, then the healing effect is achieved only in a font made without glue. However, glue barrels have a longer service life and can be used intermittently without causing damage to the product.
Video: making a homemade outdoor swimming pool from a PVC membrane
Concrete plunge pool - a miniature pool “for centuries”
Despite all the advantages of a wooden font, the complexity of its manufacture is an obstacle for many home craftsmen. And in order to make a concrete font with your own hands, you don’t need any special knowledge - just be able to hold a shovel and use a concrete mixer. In this case, the sequence of work will be as follows:
1. We dig a hole for the font with a depth of 1.5 - 1.6 m.
2. Install the fittings. We lay the reinforcing mesh on the floor at a height of 5 cm from the bottom. You can raise the mesh by placing it on plastic clamps (“fungi”-stands) for the reinforcement. There is another way: drive 4 pins into the ground so that 5 cm remains on the surface, and only then put reinforcing mesh on them. We place reinforcing mesh on the sides.
3. We put together formwork from OSB, reinforced with timber - for the inner wall. We install it 5 cm higher than our reinforcement mesh (so that the total thickness of the floor is 10 cm). We also make formwork for the outer wall of the font and install it directly on the bottom. If necessary, we provide a hole in the formwork for drainage.
4. Fill the walls with concrete at one time to create a monolith, then fill the bottom.
5. After a week, we dismantle the formwork, plaster the walls, and cover with mortar all the potholes, pits and other deformations remaining after removing the formwork. We level the floor with mortar according to the beacons.
6. Treat the surface of the hot tub with a waterproofing mixture (for example, Ceresit CR 65). Then we prime the surface and paint it with rubber paint. You can use other interior finishing options (tiles, film, etc.), but this option seems the most reasonable in a bathhouse.
7. We install a staircase, organize lighting with LED lamps or a jacuzzi - whatever your heart desires.
Construction of a water system
Making a warm water floor in a bathroom with your own hands is a more difficult task, but why not try to cope with it... We have to assemble a structure from pipes and connect them to a source of hot water.
Metal-plastic and polyethylene pipes are suitable for the pipeline. Both materials have flexibility and low hydraulic resistance.
Thorough theoretical preparation
One heating circuit can cover an area of up to 20 square meters. meters, which is enough for a bathroom, but if the floor is planned to be divided into autonomous zones, then water must be supplied to them through a distribution manifold.
Assembling the manifold consists of connecting all its sections with a pump and mixer, installing thermometers, taps, and air vents. After this, the assembled distributor can be mounted on the wall and pipes can be connected to it
The collector must have flow regulators. With the same water supply to circuits of different lengths, they will heat unevenly. A longer circuit will heat up worse. Moreover, the flow of water in it may even stop due to strong resistance. To eliminate these troubles, flow regulators in the manifold are used.
A mixer is also a necessary item. The maximum heating temperature in the floors is 50°C; water is supplied to the heating radiators at higher temperatures. If you drain water from the general heating system into the floor, then it must be diluted with cold water to the desired temperature, which is what the mixer does
A number of strict conditions in order to proceed with installation:
- The presence of a closed-type heating system using a circulation pump.
- A double-circuit boiler must have a power reserve.
- All work is carried out with the heating system completely turned off.
The pipes must be freed from coolant.
In the thickness of a warm floor, one can distinguish the obligatory functional layers:
- base;
- hydro- and thermal insulation;
- pipeline made of durable pipes;
- concrete screed or gypsum fiber;
- decorative floor covering.
In wooden houses, you can also make a water floor, but you should worry about reliable waterproofing. It needs to be done in several layers, this is the only way the wooden base of the floor will last for many years without repair.
Step-by-step guide for installing a water floor
The construction of a water system is a cycle that includes standard types of work.
Stage 1. Clean the floor and, if necessary, remove the old covering.
Stage 2. Waterproofing the floor. We lay a waterproofing film on the floor. Preferably in one piece, but if there are several strips, then they should be laid overlapping and the seams should be joined with a blowtorch. The waterproofing material should also cover the surface of the walls (up to 10 cm upward).
Stage 3. Fill the rough screed with a mixture of expanded clay and cement (3-5 cm thick). Dry thoroughly (up to a week), sprinkling the surface with water in the first days to prevent cracks.
Stage 4. We insulate the surface with foam plastic, polystyrene or other similar material. We spread polyurethane with a foil reflective coating on top. We seal the joints with tape. Now the heat from the pipes will be directed only towards the room.
Stage 5. Lay the pipes. We bend them according to the developed diagram, maintain 15-20 cm between the pipes. We fasten the resulting curved structure. We connect the water supply pipe to the flow distribution manifold.
Snake pipe laying is the most common. An alternative is snail laying. The first option is easier to install, but provides uneven heating. In the second option, the heating is generally more uniform, but there may be cold areas of the floor, since the return turns lie between the supply turns
Stage 6. Turn on the coolant supply and check for water leaks in the system.
Stage 7. We make the second screed with the same solution as the rough one. If unevenness of up to 5 mm was allowed in the rough screed, now we pre-install beacon slats to perfectly level the surface.
One of the purposes of underfloor heating screed is heat accumulation. With a thick screed near a water floor, heat accumulation is higher
The finishing layer of screed takes 5-7 days to dry - the same as the rough layer. After complete drying, you can begin finishing the floor and laying floor tiles.
Installation of a plastic hot tub
The easiest way to install a plastic container in a bathhouse is to place it directly on a soil pad. To do this, you will need to make a small pit in the bathhouse, 50-60 cm deep, with dimensions and proportions measured along the plastic body of the font.
Installing a plastic font is in many ways similar to installing a bathtub in a sauna
A sand cushion is poured inside, and insulation is laid from 50 mm thick EPS sheet. The body of the font is installed on a cushion and a drainage system and electric or water heating are installed. Next, the container is reinforced along the outer walls with steel reinforcement strapping; steel corners are driven into the ground, to which the reinforcement frame is tied. The lower part of the plastic body is filled with expanded clay concrete, waterproofing and insulation are laid, after which the remaining part of the wall is laid with bricks.
The hot tub can be heated directly from the stove or from a container of hot water.
Making a font or mini-ice hole
Let's consider the simplest option, which a home craftsman can do. To do this, it is enough to have minimal plumbing and carpentry skills.
Necessary materials
- IBC is a container for 1000 liters, commonly called a Eurocube, which has a metal sheathing;
- siding strip, external corner, 4 pieces, 1.2 m each;
- siding;
- hardware, fasteners;
- lining, leftovers of 1.1-1.2 m each, 8 pcs.
Operating procedure
Cut off the top of the polymer container along with part of the metal sheathing.
Install strips in the corners, the outer corner, and cover with siding.
The top of the tank is finished with clapboard pre-treated with moisture-repellent agents.
We build stairs or steps. The photo shows a version of steps made of logs. Treat the logs and paint them the same color as the lining.
As a rule, an IBC container is equipped with a tap at the bottom. This is convenient both for draining water and for filling the container using a pump and hose.
Advantages of plastic hot tubs
In order to fully appreciate all the advantages and disadvantages of a composite or plastic bowl over a regular wooden one, you need to have some experience using an oak or linden font. Periodic drying and cleaning of the barrel, washing and removing dirt from the seam joints, all this clearly does not add positivity. God forbid you forget a wooden font in the sun for a long time - there will be a lot of hassle with repairing and adjusting the rings.
Therefore, replacing a wooden barrel with a plastic one is a whole heap of bonuses and advantages:
- Lightweight bowl design. Bringing and installing a container in the bathhouse or nearby on the site will not be difficult for a team of two or three people;
- Durability, the average life of a polypropylene bathtub, even in a humid and hot bathhouse atmosphere, is 20-25 years, of course, provided that the stove is installed correctly and at least the simplest care;
- Resistant to hot and cold water. The plastic wall of the font is absolutely inert to moisture, even if the bowl had to be used as a backup water storage, nothing will happen to the container.
Separately, we should remember the decorative qualities. Sometimes potential owners are put off by the stereotype of a plastic container that looks like a water tank. In fact, this is not entirely true; for those who appreciate aesthetics, you can always choose a plastic font made of polypropylene with an external stone finish, but more often with an imitation of oak plank.
A plastic font is easily recognized by the absence of hoops on the body. This model has heating from a remote stove, it can be installed either in a bathhouse or in the yard
Of course, such a barrel bath would simply be a copy of a mini-pool, which are usually built inside a bathhouse and are rarely taken outside the building, if the font were not equipped with heating in several versions. If you exclude the traditional heating of water using a hot stone for a Japanese furaco barrel, you can choose more convenient heating methods using a bottom electric heater, or choose a hot tub with a stove, a real wood-burning sauna firebox.
Installing underfloor heating in the bathroom
Since we already know the characteristics of an electric floor heating system and which floors are best suited, we can imagine how to do it. Everything may seem complicated at the beginning, but if we adhere to the relevant rules and recommendations of the system component manufacturer, the entire procedure should be surprisingly simple.
Floor preparation
It should be remembered that when installing underfloor heating, the substrate should not contain any removable surfaces. It must also be prepared properly, mainly by cleaning and light hydration.
After which it is necessary to apply a primer (or a special contact layer that will improve adhesion). After this we can move on to applying the primer. In the pan we must make the correct slope (about 1%), thanks to which the water will flow into the wastewater grid.
Installation of heating cables
In the next step we can start laying the heating installation and lowering it using a screed. We must remember to maintain the correct height. It must be at least 35 millimeters. Only then will all kinds of elements be introduced in the correct order.
Installation of waterproofing
Waterproofing the floor plays a very important role, as it protects the screed and heating elements from exposure to water. Two layers of waterproofing will need to be applied, preferably using a steel trowel, although a brush is also acceptable.
The first layer should drown the so-called sealing accessories - they will ensure proper tightness of the waterproofing, which will certainly affect the efficiency of its operation.
Tape gluing and collar insertion
They are built in where the floor meets the walls and along the extension. These are sealing tapes that are highly flexible. We embed them using a waterproofing mass. Then we must assemble the sealing corners.
The flanges are shaped like special rings that will protect the installation pipes. The said clamps are pulled onto the tubes and then pressed against the waterproofing mass. All the above steps must be performed quickly on the newly placed mass.
Installation of heating mat and primer
Finally, we can move on to assembling the most important element - the heating mat. Before doing this, however, check the condition of the mat. First, look for any kinks that need to be ironed out. It should be remembered that the mat cannot be disassembled where fixed elements will be installed, such as a shower, bathtub, washing machine or shelves.
Once it is properly prepared, we can immerse it in deformable adhesive, which must be applied to the floor immediately before assembly. Spread the mat evenly without stretching it.
When it comes to priming, we are talking about floor surfaces that have not been waterproofed. The soil layer will protect them from external factors.
Gluing tiles
Methods for gluing tiles vary depending on the products chosen. In the case of gres or terracotta, the most commonly used mortar is flexible. Thanks to this, the tiles will be reliably protected from damage as a result of rapid temperature changes.
The solution should be applied with the smooth side of the float, and then profiled with the other side, equipped with teeth. If we purchased a low-quality adhesive, we must also apply a little of it to the tiles. Then all we have to do is attach these elements to the floor.
Some developers also use self-draining adhesive, which is very popular when assembling ceramic tiles. It is characterized by favorable binding and protective parameters and is designed specifically for large tiles. We place it on the floor with a spatula with semicircular teeth.
Securing surfaces
When the tile gluing stage is completed, you need to wait until the glue dries. This period is different for each type of product, so it is best to follow the manufacturer's instructions.
After the appropriate time has passed, we can begin cementation. It is best to use cement mortar, which has properties beneficial for underfloor heating systems. Mix the compound with water (in the proportions specified by the manufacturer) and then distribute it in the gaps between the plates using a rubber float.
All excess mortar should be collected promptly - if we allow it to dry, it may not be possible to remove it. After all work is completed, be sure to thoroughly clean the tiles.
The quality of the solution is of great importance, primarily because of its aesthetics. Cheap products quickly get dirty and may even crumble. Fortunately, there are many compounds on the market that should meet our requirements. It is worth deciding first of all on products that are antibacterial and resistant to moisture. Regardless of the type of solution, be sure to clean it regularly.
Sealant treatment
This is the last step in the underfloor heating installation process. You need to choose silicone that will withstand various conditions in the bathroom (large accumulation of steam and moisture), as well as resistance to the development of various microorganisms.
The silicone should be distributed evenly in the joints, without leaving empty spaces. Immediately after applying the silicone, we need to properly shape and level it with a spatula.
Did you find this article helpful? Please share it on social networks: Don't forget to bookmark the Nedvio website. We talk about construction, renovation, and country real estate in an interesting, useful and understandable way.
Electric heaters
Devices for heating a bathroom must be moisture-proof, otherwise steam, condensation or drops of water will lead to a short circuit. The power of electrical equipment for the bathroom is proportional to the size of the room. For rooms of 6 square meters the figure does not exceed 500 W, for 9 m2 - 750 W, for 12 m2 - 1 kW.
Convectors
Electric heaters are made in the form of a flat panel. The heating element contains a thin nichrome thread. The technology converts incoming energy into heat. The equipment does not dry out the air and operates silently.
The temperature is adjusted using a thermostat. After reaching the set degree, the unit turns off. The device is not afraid of moisture, so it is suitable for use in the bathroom. The convector can be placed next to the wall or screwed to the partition using brackets. The only drawback of the model is that it is forbidden to hang anything or dry things on the body.
Infrared
The operating principle of this type of heater is similar to underfloor heating. IR equipment heats objects, not air, in the bathroom. The equipment evenly heats the room within 5 minutes. During operation it does not make noise and does not burn oxygen.
The infrared heater is mounted on the wall, although the maximum efficiency is noted when installed on the ceiling. The device consumes a lot of electricity and is expensive. The device is used as a supplement, and not a replacement for the main heating system. In severe frosts, the bathroom will be uncomfortable.
Warmth in the bathroom Source schott.com