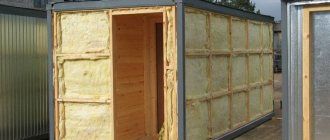
Small metal block containers placed directly on the ground can be easily moved around the site without the need for cranes. There is no need to invite assistants. All moving work can be performed by one physically healthy person independently. In order to move the shed around the site without a crane, if the structure is made of stacked beams, you will need to make more efforts, purchase a mechanical winch and invite a couple more strong guys. Let's consider both options.
Raising a change house: a problem
Guk.FORUMHOUSE user
I need to lift and move the change house 8 meters. The size of the building is 3000x5000 mm. There is a gas pipe on the side of the road. The crane will not pass. How can I manage without a manipulator? I think it might be possible to drag it across the ice in winter, or pull it with a winch from a jeep? Is there a simple and inexpensive solution to the problem?
masha120776FORUMHOUSE user
And I need to move the change house 40 meters and rotate it 180 degrees. The plot is planted with trees. The house is standing, so the truck crane is no longer needed. I think we'll do it like this:
- Let's put the boards on the ground.
- Let's lift the utility block with a jack.
- We will place logs or metal pipes under the cabin.
- The workers will push.
Normal plan?
conclusions
To lift and move the change house you need 2-3 people. A “bottle” jack with a lifting capacity of up to 6 tons will cost 1,500 – 2,000 rubles. You can do without a winch by moving the utility block with a lever, or pull the change house with a passenger car. The main thing is not to give up. Whether it is profitable or not - decide for yourself. Compare the cost of renting a manipulator and the price of purchasing equipment if you do not have a hydraulic jack, winch, pipes and cable. Don’t forget to add your time costs if you still want to move the change house yourself.
The video shows the lifting and moving of a house onto a new foundation.
Source
Preparing to move the cabin
Most of the cabins installed in summer cottages are quite large and have considerable weight. Therefore, several people must be involved in moving them. It is best to use the services of professionals and contact. Using specialized tools, our craftsmen will complete the work quickly and efficiently.
If the issue is resolved on your own, you must carefully prepare and assemble the following equipment and tools:
- One or more jacks for raising the change house.
- Mechanical winch, designed for at least 4 tons.
- Slopes of steel pipes the width of the structure and 4 six-meter logs.
- Powerful steel cable with a diameter of 6 mm or more.
- Cable and rigging clamps.
The number of assistants depends on the dimensions and weight of the structure. Typically, at least 6 people are required to complete the work. At the same time, each of them must present a movement plan and know what to do.
Stages of work
Monitoring safety precautions and strictly following instructions is required. At the initial stage, the place, equipment and tools are prepared.
Step 1. Using several jacks, lift each corner of the object and place a support under it.
Step 2. Metal rollers are installed on the logs placed under the structure.
Step 3. The change house is lowered onto the metal slopes; it should lie neatly on them.
Step 4. The support is removed.
Step 5. The steel cable is fixed to the body of the building.
Step 6. Using a winch, movement to a new place begins.
The place for attaching the winch must be reliable, the load on it must be high. During movement, the cable attachment point can be changed. If the cabin is factory-made, it has a strong and reliable frame and will withstand the load.
Tools needed for moving:
- winch with a manual mechanism (at least 4 tons);
- 1-2 jacks;
- 4 logs (6 meters);
- 3 slopes made of metal pipes;
- steel cable with a thickness of at least 6 mm;
- rope clamps;
- rigging shackles;
- metal thimbles.
To minimize costs and move the building efficiently, you need to perform actions consistently. There is a high probability of injury while moving the cabin. If each person follows the plan, then the work is organized correctly.
There are many features of installing cabins on a summer cottage. This structure is relatively light, but it cannot be installed directly on the ground. You need to take care in advance about what to place the change house on at the dacha so that it does not sink into the ground and serves for a long period of time.
Choose the most convenient location for it so that you can easily move around the entire facility. All this can be achieved if you act in accordance with all the knowledge you have acquired.
Rearrange the change house using a manipulator
Construction of a change house is a very complex process; making a change house of good quality is not even possible for all companies that have been doing this for several years. But if you want to entrust your money to the hands of real professionals who are capable of doing everything efficiently at all stages, you should contact the KRAUS . We employ the best specialists with extensive experience in the production of cabins, we have excellent and modern equipment with which we manufacture cabins, and quickly and efficiently deliver them to your site. We provide various services for the construction, transportation of cabins to another site and its alteration. Our company can resolve all issues related to your change house at any time. Our specialists are ready to rearrange the change house using a manipulator, which will take several hours and you will not have to disassemble the house.
Planning Guidelines
The change house is a secondary utility room, but you should not take the process of its construction and arrangement too lightly.
First, prepare a drawing. You can make it yourself or find a ready-made version in available sources. The drawing will allow you to imagine how the finished building will fit into the surrounding landscape, as well as calculate the required amount of building materials.
Select the dimensions of the structure and its layout at your discretion. As a rule, industrial structures intended for living are about 5-6 m long, about 2.5 m high and similar in width. Otherwise, regarding the dimensions of the house and its layout, be guided by your needs and preferences.
how to move a change house?
Irina 5a,10a Fri Oct 11, 2013 7:55 am
Good afternoon, neighbors! I was faced with the fact that I need to drag the change house deeper into the site, I don’t know how best to do this, maybe someone has moved it and will share their experience? When the delivery was being made, the crane could not get through and was placed on the site of the future house... Now I’m thinking about how to move it to where it was planned, it’s 70-80 meters away, maybe someone has contacts for the all-terrain crane?
Irina 5a, 10a Messages: 37 Registration date: 2012-01-18
How to choose a location for installation?
Carefully choose the location where the structure will stand. It is recommended to install the installation in lowlands, due to the risk of flooding. The entire site must be completely level. Even if you build a shed from metal, water will still be harmful to it and will also easily penetrate inside the structure.
Inspect the soil carefully. Even in insulated country houses there is a slight weight that can affect the subsidence of the entire building. It may warp or even sag, which will make it very difficult to live in and operate. To prevent all this from happening, you must know what to put the change house on at the dacha. Approach the choice of foundation.
Finishing
More often than not, finished wooden cabins made from timber do not require additional finishing from the inside or outside, but if the walls are lined with MDF or chipboard, finishing work is necessary.
Internal
Features of the interior decoration of a bathhouse from a cabin:
- Chipboard and MDF must first be covered with heat and moisture insulation, and the lining must be stuffed on top.
- It is not advisable to sheathe walls lined with boards.
- It is better to make shelves for a small steam room two-tiered. This will save space.
By the way! It will be interesting to know: How much cement per 1 m3 of concrete for pouring a foundation
External
If the change house does not fit the general style of the site, it can be sheathed with siding, block house, etc.
A gap must be left between the wall and the decorative material for ventilation.
What to put the change house on?
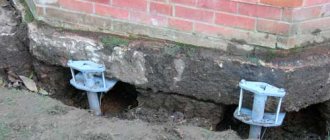
The best option for installing construction cabins and country houses is on concrete blocks and screw piles.
Installation on blocks
- Blocks can be used in different sizes, usually 400*200*200 mm. They need to be installed under the load-bearing skis with the calculation - one support for every two meters. Based on these recommendations, place all blocks this way:
- Prepare the base, make holes according to the size of the block (depth, approximately 100 mm);
- Fill the holes with sand (If, when filling, you still have uneven areas of the site, you can also compensate for them with sand);
- After this, lay concrete slabs on the sand, their thickness should be at least 50mm, they can prevent the blocks from loading into the ground;
- The blocks must be installed on a slab that is completely perpendicular to the direction of the supporting skis;
- To understand how many blocks you need to install, you must understand that the higher the building is above ground level, the more protection it will have from rotting and other similar factors. But don't make it too high, because... then it will be very difficult to climb it. Use one or two blocks;
- Lay the roofing material on the blocks, then install the load-bearing skis. Thanks to roofing felt, you can ensure reliable waterproofing of the entire structure.
- You can easily install the blocks under the change house with your own hands, without involving additional personnel. The main thing is your desire in this matter.
Materials
The dacha cabin is the first to appear on the site
By the way! It will be interesting to know: Requirements for issuing a Certificate of Admission to work on the installation of rail crane tracks and foundations (supports) of stationary cranes* (type 2
Wood
The advantage of wooden cabins is their low weight. Such structures even stand on truck tires or building blocks stacked on top of each other. And they feel fine. In general, a wooden country house with a toilet and shower is a good option.
A wooden country house with a toilet and shower is the most common option
A significant disadvantage of wood is its fire hazard. And it’s difficult to fight this. Of course, before construction, the material is impregnated with fire retardants, but if it burns, then even this will not save.
Metal
Metal two-room country house with shower and toilet
Other options
So, here’s what else you can use to make a change house for your dacha:
Build using frame technology. The racks can be metal or wood, the covering is moisture-resistant sheet material (OSB, moisture-resistant plywood). The insulation is usually mineral wool, but can be polystyrene foam.
Characteristics and types
The flexible hose for connecting plumbing is a hose of different lengths made of non-toxic synthetic rubber. Thanks to the elasticity and softness of the material, it easily takes the desired position and allows installation in hard-to-reach places. To protect the flexible hose, there is an upper reinforcing layer in the form of a braid, which is made from the following materials:
- Aluminum. Such models can withstand no more than +80 °C and retain functionality for 3 years. At high humidity, aluminum braiding is prone to rust.
- Of stainless steel. Thanks to this reinforcing layer, the service life of the flexible water line is at least 10 years, and the maximum temperature of the transported medium is +95 °C.
- Nylon. This braid is used for the manufacture of reinforced models that can withstand temperatures up to +110 °C and are designed for intensive use for 15 years.
Features of gas connections
When connecting gas stoves, water heaters and other types of equipment, flexible hoses are also used. Unlike water models, they are yellow and are not tested for environmental safety. For fixation, end steel or aluminum reinforcement is used. There are the following types of devices for connecting gas appliances:
- PVC hoses reinforced with polyester thread;
- made of synthetic rubber with stainless steel braid;
- bellows, made in the form of a corrugated stainless steel tube.
The Santekhkomplekt holding offers engineering equipment, fittings, plumbing fixtures and devices for connecting them to communications. The assortment is represented by products and materials from well-known foreign and domestic manufacturers. Discounts apply for bulk purchases, and product quality is confirmed by standard certificates. For information support and assistance, each client is assigned a personal manager. The ability to arrange delivery within Moscow and to other regions of the Russian Federation allows you to quickly receive the purchased goods without unnecessary hassle.
Causes of soil waterlogging
There are several reasons for soil waterlogging:
- clay heavy soil structure with poor water permeability;
- aquifer in the form of gray-green and red-brown clays is located close to the surface;
- high groundwater table;
- technogenic factors (construction of roads, pipelines, various objects) that interfere with natural drainage;
- disruption of the water balance by the construction of irrigation systems;
- The landscape area is located in a lowland, ravine, or hollow. In this case, precipitation and the influx of water from higher places play a big role.
Making the floor
First, we construct a subfloor from boards treated with an antiseptic. We lay them out as tightly as possible to each other and attach them to the frame with self-tapping screws.
We spread a waterproofing film over the boards. We attach it to the joists using a construction stapler with staples.
We nail additional logs to the base for laying thermal insulation and attaching the second layer of boards. We fasten the logs in increments equal to the width of the selected thermal insulation material. Mineral wool, a relatively inexpensive and time-tested thermal insulation material, is well suited for floor insulation.
We lay insulation in the space between the joists. We fix a layer of vapor barrier material on top. A stapler with staples will help us with this again.
We lay the finished floor boards. We attach them to the joists using self-tapping screws. Finally, we varnish or paint the floor.
