One of the essential plumbing fixtures for a bathroom is a sink. Bathroom washbasins differ in shape, configuration, installation method and connection to communications. One of the most used options is to install a sink with a cabinet in the bathroom, since this model allows you to organize the storage of towels, detergents and various useful items in a convenient place.
Features of installation on brackets
The wall-hung washbasin can also be installed on brackets.
For this installation option, first, the fastening elements are applied to the sink, determining the distance required for installation, after which they make the appropriate marks on the wall and drill holes in the designated places using a drill. After drilling, dowels are inserted into the holes and the brackets are fixed to the wall. The faucet is inserted into the washbasin, after which the wall-mounted sink is hung on brackets. As in the previous case, the last stages of work involve connecting the washbasin to the water supply and sewerage system. Provided that it is installed correctly, the sanitary ware is firmly fixed to the fastening elements and does not move.
Hanging sinks on brackets can only be attached to strong walls that can support the significant weight of the washbasin. The height of the sink in the bathroom corresponds to the height of the brackets and usually varies between 80-85 cm. If there is no free space in the bathroom, you can choose a corner wall-mounted washbasin model
In this case, it is important to measure the same distance from the floor to the sink level on adjacent walls and position the washbasin symmetrically relative to the corner
Making a floor stand
Now let's look at how to make a floor stand. To do this you will need the following tools and materials:
- MDF board. The tabletop, bottom, shelves and sides of the cabinet will be made from it.
- Mosaic tiles.
- Electric jigsaw.
- Fastenings.
- Paper (old wallpaper will do).
- Latex moisture-resistant glue.
- Notched spatula.
- Grout for tiles.
The entire work process can be divided into the following seven stages:
- At the very beginning, a cabinet without a table top is made. For this purpose, a box is made, the fastening of which will be located inside. Afterwards, the doors are mounted on the previously installed hinges. If you don't want to make doors, you can make drawers. However, in this case, one point needs to be taken into account - whether pipes will pass inside the cabinet. If you do not have sufficient experience, then it is best to install doors. In the middle, strictly according to the internal size, you can mount one (or two) shelf.
- Then holes are made in the back wall for the exit of hot/cold water pipes and sewer pipes. In some cases, pipes may come out of the floor, then these holes are made at the bottom.
- Then the legs are screwed to the bedside table. They will be the basis of the entire structure, so they must be reliable. It is enough to purchase four legs. If the cabinet is massive, you can add a fifth leg in the middle.
- When the box is ready and the legs are installed, you can begin making the tabletop. To do this, you will need to make a template on paper according to the size of the sink. Then transfer this template on a 1:1 scale to the surface of the MDF board. Now all that remains is to cut the hole using a jigsaw.
- The tabletop is screwed to the frame of the cabinet using corners from the inside. When you install the sink on the stove, you will notice a gap that needs to be filled with silicone. Now water will not seep into the cabinet. Connect all communications.
- At this point, it's time to finish the top of the countertop with mosaic tiles. To do this, you need to purchase special glue.
- When the glue has set, all seams are sealed with a special tile grout. When the grout is dry, simply wipe the tiles dry. The work on making the floor stand is completed!
Materials
Furniture with a washbasin should be functional and beautiful, but if it is made of low-quality materials, then all its benefits are reduced to zero. Since the quality and service life of the entire structure depend on the materials. The main requirements for cabinet materials are their ability to withstand sudden drops in temperature and moisture resistance. Materials that have such qualities are MDF panels, chipboard, artificial stone and wood. The surface of furniture made from MDF is usually processed using two methods:
- By painting. First, a primer is applied to the surface of the material, and then it is painted with paint in several layers. This makes the furniture highly protected.
- Treatment with a special composition. The material, both outside and inside, is treated with a special moisture-resistant liquid, which prevents the process of reproduction and spread of fungi, mold, etc.
A cabinet made of chipboard is cheaper, and it is not afraid of various mechanical damage. The surface of this material is covered with sheet plastic, which prevents delamination and swelling of the material. There is no doubt about the reliability of furniture and sinks made of artificial stone
The only thing that is very important is that there is no damage to the surface of the furniture, including scratches that could destroy the integrity of the material. If the furniture is made of wood, it must be coated with a special moisture-resistant product
In terms of cost, furniture made from natural wood is slightly more expensive than those made from MDF or chipboard.
The quality of the fittings is of no small importance. Over time, the doors may begin to creak and become loose.
Therefore, the more firmly they are installed, the longer they will serve you.
As for the sink itself, it can be: ceramic, porcelain, earthenware, cast iron, steel, stone and glass. In this case, the materials of the cabinet and sink must be combined.
Depending on what materials the entire structure is made of, its cost changes. At the moment it ranges from 1,050 to 325,600 rubles.
Coating
How to make the surface of a manufactured cabinet or other piece of furniture waterproof and waterproof?
I used acrylic latex based rubber water dispersion paint The name is “Rezel+”, the manufacturer is the Sevastopol LLC “Accent”, the price is about 120 rubles per kilogram.
Inexpensive rubber paint made in Sevastopol.
What attracted her?
- Wear resistance. The coating can be cleaned with any detergents, except abrasive ones;
- Absolutely waterproof. Suffice it to say that this paint is recommended by the manufacturer as a roof sealant;
- No odors (composition: water-based acrylic latex);
- Dries one layer in just one hour.
To apply the paint I used a regular soft brush. The painting was done in four layers, with each layer applied perpendicular to the previous one.
If you use a roller or sprayer, the coating will be smoother.
Waterproofing paint isn't the only coating that can withstand splashes and high humidity. For another project (my daughter's changing table) I used alkyd urethane yacht varnish. It emphasizes the texture of the top layer of veneer, which has a very pleasant effect on the appearance of the product.
Yacht varnish is a coating designed for constant contact with water.
There are several subtleties to applying varnish.
- After applying the first (priming) layer with a brush or roller and drying it completely, all furniture surfaces are sanded again. The varnish lifts wood fibers on the surface of the veneer and makes it rough to the touch. Sanding will allow you to get a smooth finish without applying dozens of layers of varnish;
The raised pile made the surface rough.
- Subsequent varnishing is performed in one go. The varnish is not applied with a brush or roller, but is poured onto a horizontal plane and evenly distributed over it with a wide steel spatula . This method of varnishing will allow you to obtain the coveted smooth glassy surface with a minimum number of flaws;
This coating method is often used when varnishing parquet.
- The next surface of a cabinet, cabinet or other product is varnished in the same way after drying the previous wall. Drying at room temperature takes at least two days, so you have to be patient.
Required Tools
Since installing a sink is not a very complicated process, you don’t need too many tools for this:
- drill or hammer drill. It will be necessary to drill holes in the wall;
- screwdriver or screwdriver. Insert dowels into the holes and tighten the brackets with screws;
- building level. Make even markings;
- tape measure and pencil. Measure the required height;
- hammer. For driving dowels;
- gun for a bottle of sealant. Seal the seams.
Here, in principle, is the entire simple set of tools for fixing the washbasin. Read on to find out what the height standard for installing a sink in a bathroom is.
The following video will tell you what you need to have with you before installing the sink:
https://youtube.com/watch?v=AVjqVh9FW5o
Waterproofing and sound insulation
Very often, in typical houses, waterproofing does not meet the standards.
- The discrepancy begins from the moment the house is built.
- The same applies to sound insulation. Time passes, and the properties of soundproofing materials are lost.
- To avoid trouble, you need to clean the floor slab, and all empty spaces must be sealed with sealant.
- You will have to put a layer of waterproofing underneath.
Preparing for installation, determining the location of the fastener
When planning to purchase a wall-hung model, it is important to determine in advance the optimal size of the sink. The dimensions of the bathroom are preliminarily measured, and the future location of the plumbing product is determined
The suspended version of the sink can only be mounted on a solid base, so it is better to avoid plasterboard walls.
If there are water supply and sewer lines, the location of the existing water inlet and drainage must be taken into account. The height of the bathroom sink is selected so that adults can use it comfortably (it is advisable to provide a special chair for children)
Ideally, the height of the sink from the floor should be 85 centimeters. But you can adjust this value up or down. The exception is a wall-hung sink with a bathroom cabinet. In this case, the installation height of the washbasin depends on the size of the piece of furniture.
The following points are important:
To attach sinks to suspended structures, screws and dowels or brackets are used (a desirable option if the sink is made of marble or granite). In the latter case, the height of the sink determines the level of support for the washbasin; You can attach a washbasin to a plasterboard wall only if the sheets are installed on a frame base and tiles are provided on top
Fastening is carried out using “helicopters”, which are drywall bolts with distributed loading; In order for the sink to hang securely on the wall, the fastening elements must be immersed into the wall by at least 70 mm, so you need to select fasteners whose length is at least 100 mm. Also, it is important to pay attention to the diameter of the screws - it must correspond as closely as possible to the size of the mounting holes (minimum 6 mm ).
Which one to choose?
Based on the market assortment, today it is represented by a wide variety of shapes and sizes. There are sinks for small baths, and others for large ones. As for the shape and type of the cabinet, it will largely depend on the shape of the sink. She may be:
- figured invoice,
- rectangular invoice,
- mortise of different shapes and sizes.
There are exclusive shell shapes, such as round/oval. Of course, in each individual case the cabinet will have certain design features.
Choosing a cabinet when you need hanging models
Wall-mounted furniture is considered the best for small spaces. Leaving the floor free, it visually enlarges the room and simplifies cleaning. But this is not all the advantages of fashionable plumbing and furniture.
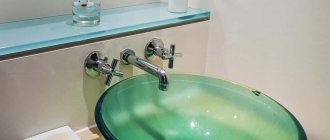
Wall-mounted washbasin with cabinet
The undeniable advantages of suspended models ↑
A wall-hung cabinet with a sink has the following advantages:
The bathroom floor is equipped with a heating system. This means that the furniture for this room must either stand on legs or be hung on the wall. If you remember how the metal coating of the legs is affected by constant humidity, the choice becomes obvious. A wall-hung cabinet under the sink is the best solution in this case. For those with tall or, conversely, very miniature stature, it is better to adjust the height of the sink mounting to suit themselves. And wall-mounted models are ideal for these purposes. For rooms with a small area, owners often choose a layout in which the washing machine is located under the washbasin. This composition looks more aesthetically pleasing if a hanging cabinet is installed under the sink in the bathroom. In order to place a communications system behind a bedside table that stands on legs, you often have to cut holes in its back wall. Installing a wall-hung sink does not have such inconveniences. The flying design visually makes the room more spacious, adds lightness and weightlessness
This is especially important if a massive, most often double, sink is chosen. The wall-mounted cabinet eliminates the heaviness of the washbasin.
Wall-mounted furniture for a small bathroomHarmony of Yin and Yang in bathroom design
Installation of a wall-mounted sink, despite all its advantages, has a number of limitations:
- First of all, when installing a bedside table, the reliability of the fastenings is important. Therefore, if the bathroom has flimsy walls, made, for example, from plasterboard, you should not choose a wall-mounted model. But don't rush to despair! If your renovation is still at the planning stage, simply provide embeds in the wall for further installation.
- If it is not possible to hide the sewer pipe in the wall, you should not install a wall-hung sink for aesthetic reasons. After all, the appearance of such a structure under the cabinet is not very pleasing to the eye.
Spacious drawers for small items
Variety of models - what are the types of hanging cabinets ↑
Hanging bedside tables for bathrooms can be divided into several categories:
- by location: corner and classic;
- by type of sink: with mortise and overlay bowl;
- according to the type of material: wooden, made of MDF, chipboard, etc.;
- with and without table top.
For miniature bathrooms, it is better to choose corner models. Bedside tables equipped with a tabletop are much more convenient to use.
Creative metal model with marble top
Compact corner model
Creative ideas and practical tips ↑
Mounted models open up the widest possibilities for creativity. Some interesting ideas for proper organization of space:
- A practical option is to choose a hanging cabinet with a built-in towel rack or an open shelf for storing them. This will help keep the room tidy and make it feel more spacious.
- An additional highlight of the bathroom can be the installation of lower lighting. A pebble path with built-in lamps mounted under the sink will also look very beautiful. This will give the room charm and mystery.
- When choosing a double sink for a bathroom, it is better to choose a long mirror that matches the size of the cabinet. This way the composition will look complete.
- A hanging cabinet with a sink makes it possible to conveniently place a children's high chair! Is it difficult for your child to reach the faucet due to his short stature? Provide a stable stool for him, hiding under the structure with the washbasin.
Stone path under the hanging pedestal
A section for storing towels connects two cabinets into a single structure. Mobile “steps” for a child are created in the same style as the interior of the room. Wall-mounted sink without a cabinet.
Design Features
Such kits must meet several requirements.
Among them:
- ensuring the safety of things inside;
- moisture resistance of the material used in their manufacture;
- stability of the stand itself, as well as shelves, drawers and other contents;
- tightly closing doors;
- minimum occupied space;
- compliance with the overall design of the room.
Installing a cabinet with a sink attached to the wall
The stand for a bathroom sink can be wall-hung or floor-mounted, which determines the installation features. In the first case, the cabinet is mounted directly under the washbasin and has no support, and in the second, it is equipped with a pair or four legs.
The hanging cabinet has a stylish and attractive appearance. Such furniture is especially appropriate in combination with a washbasin of a similar design in a miniature bathroom, since the lack of support contributes to the visual expansion of the space. In addition, when choosing wall-mounted cabinets with a sink, you don’t have to worry about the negative consequences of the furniture coming into contact with water that gets on the floor during washing or wet cleaning (cleaning itself is greatly simplified). Another advantage that a hanging cabinet under the sink gives is constant air circulation under the washbasin, which prevents the growth of germs and bacteria that prefer a humid environment. Of course, such models are more difficult to install (especially if you choose a corner wall-hung sink with a cabinet), but the result is worth it. Combined hanging models can only be installed on load-bearing walls.
A wall-hung washbasin with a bathroom cabinet of a floor-standing model is convenient because the installation of the piece of furniture does not depend on the type of wall. Both compact corner models and wide rectangular options for washbasins of the appropriate size are available.
When choosing, it is important to correlate the sizes of both elements in advance
Installation of the washbasin is carried out almost similarly to the two previous options. Before attaching the sink to the wall, first check how freely the siphon and mixer are connected and whether the internal equipment of the cabinet interferes with the process. If such a nuance is present, it may be necessary to make special holes for the washbasin elements in the back wall of the furniture.
When all the points have been clarified, they install the hanging fasteners in the form of brackets and fix the cabinet, on top of which the sink itself is installed. After checking the parallelism to the floor and the reliability of the fixation, the washbasin is connected to the water supply and sewerage system. To attach the sink to the wall if there is a cabinet, use anchor screws or silicone (the second method does not require the use of a drill, but is less reliable.)
https://youtube.com/watch?v=8d-LyqQfngQ
WATCH THE VIDEO
Thus, installing a wall-hung washbasin, subject to a responsible approach to choosing a model and preparatory measures, is quite possible on your own, which ensures noticeable savings. The main thing is not to miss important points, securely fixing gaskets, fasteners and threaded connections, and then the operation of the installed plumbing product will not cause any unpleasant moments.
Niches for bathrooms
Leaving this surface open is considered not rational - high humidity conditions will ruin any product or decor placed on it. A worthy solution is to install cabinets with frosted perforated glass. On such a surface, stains and traces of limescale are less visible. Although you still have to wipe them.
Such cabinets will allow you to place a fairly large number of items on your shelves.
You need to select bathroom furniture based not only on your own preferences, but also taking into account the dimensions of the room. Sometimes you can save space by placing the cabinet higher or attaching it directly to the wall. It is quite possible to install any furniture in the bathroom with your own hands, even for an inexperienced craftsman.
The final appearance of the finished furniture depends on the imagination of the home craftsman.
Kinds
Nowadays you can find many types of furniture with a washbasin. They have different shapes, sizes and installation methods, and are made from different materials and parts.
Depending on the mounting method, there are two types of bedside tables with a washbasin:
- floor;
- hanging.
The advantage of the first group of cabinets is that:
- they are easy and simple to install;
- you can move it to different parts of the room as much as you like;
- there are a huge number of floor models of cabinets, designed in different ways;
- they are able to withstand enormous weight, which is why you can see marble washbasins on the floor cabinets.
Floor cabinets can have different bases, for example, models with legs or with a plinth. The second subtype is also called cabinets on a monolithic frame.
Cabinets with legs
The installation process for such models is simple. If the structure does not need to be mounted on the wall, then it is enough to assemble it and simply place it in the right place. Such models can be installed in rooms with a heated floor system. They do not prevent the legs from moving freely and cleaning the room easily and without hindrance. The most reliable cabinets are those with legs, the material for which is chrome-plated metal.
Nightstands with plinth
They are very convenient to use and can be simply placed in the desired location. Such bedside tables are reliable if the base is made of reliable materials protected from moisture. Otherwise, the entire structure may lose its integrity after some time.
Corner cabinets
Ideal for small spaces. They take up minimal space and still perform their tasks perfectly. They look quite stylish and very neat. Despite the fact that they look compact, they can accommodate many items. Corner furniture models with a washbasin are also available as floor-mounted or wall-mounted. It is precisely these cabinets that are in increasing demand today, since they are installed in the most often unused place - the corners of rooms.
Washbasin-moydodyr
It is a washbasin with a large mirror, a built-in washbasin and storage cabinets on legs underneath.
Hanging cabinets
Like corner models, hanging cabinets are becoming increasingly popular among buyers.
Their advantages are obvious:
- They can be installed in small bathrooms. At the same time, they are able to visually increase the space.
- They are easy to use.
- They do not interfere with cleaning the room at all.
- If a flood suddenly occurs, they, including the items stored inside them, will not be damaged in any way.
- They look very fashionable and stylish.
The only drawback is that it needs to be mounted on a very solid wall. Such cabinets must be mounted using dowels or anchors. In this case, the surface must be either a solid panel or a brick partition.
Washbasin brackets
The washbasin bracket is a very important part of securing the entire sink. Today, discoveries in the field of plumbing never cease to amaze. Something new is constantly being discovered, more modern and practical solutions are being introduced that improve our lives in all senses. Ordinary washbasins are also not immune to such innovations. Thanks to the use of new design solutions, it became possible to use new options for fastening sinks. There are many more options for such mounting, but one of the most popular and practical is wall mounting. Wall-mounted sink brackets can be purchased right now in our store at very reasonable prices.
How to install a washbasin
Since wall-mount brackets provide additional comfort for using the washbasin and allow you to clean under the sink itself without taking up valuable space, there are several fasteners of this type:
Fastening the washbasin by cutting the brackets into the wall shelves. This mounting option allows you to combine several functions at once. The sink begins to serve as a cabinet, as well as a tabletop, thanks to the use of a shelf. Thanks to a structure of this type, you get a compact and easy-to-use structure with a wide range of functionality. If we talk about fastening the cabinet itself, then special types of brackets are used for this, and in a small bathroom, in order to save space, you can use mounting fittings. Fastenings using special brackets for sinks. This is a simpler and more common installation method. Thanks to such a simple system, the installed plumbing fixtures can be intelligently used from a design point of view; in addition, it is worth noting that such fasteners are almost invisible. That is why this option is used much more often than others. You can buy sink brackets in our online store at the best price
Of the models in this plan, we recommend paying attention to the universal version “L Black”, which is available in different colors.
What is needed to ensure a reliable fastening system
In order for the brackets for a wall-hung sink to perform all the functions assigned to them and to hold the sink firmly, it is worth following a few basic rules for the system of their installation and use:
Make sure your wall is as safe and secure as possible for drilling holes. If your bathroom is dominated by soft and thin walls, then installing such a structure is not suitable for you.
Washbasin brackets can be made from different materials and have completely different degrees of reliability. Because of this, the rigidity of these systems varies greatly. Make sure the brackets you choose are compatible with the weight of the sink and can support the structure. Our products are made of durable and reliable metal that can withstand heavy weight and heavy loads. In addition to the main parts, when choosing brackets, do not forget to take into account their features. You must take into account the shapes and sizes of the product so that they match the washbasin itself and look harmonious with it
It is also important to choose stylized products of a certain type.
You can buy washbasin brackets right now in our online store. We offer the best prices and a wide range of options that will serve you for many years. Here you will find brackets in different colors.
Possible installation problems and methods for solving them
If the water supply and sewerage come out of the floor or are in an inconvenient place, resort to sawing the furniture from below (if necessary, then in the shelf) and from behind in the right places using a jigsaw or an ordinary hacksaw, after which the connection will be made without problems. It also happens that the sink cannot be attached to the wall, since there are no corresponding holes or a pipe runs in a place suitable for drilling holes. This problem is solved by gluing the sink to the lining using silicone. The washbasin will hold quite firmly.
Dismantling
When the preliminary part came to an end, it was time to start acting. First of all, you need to get rid of those things that will be replaced.
- Dismantling should begin with the old plumbing. Caution is needed in this process, as there is a risk of damaging pipes and electrical components.
- When removing large objects from the bathroom, cover the floor with newspapers.
- Newspapers are a great help when doing inexpensive bathroom renovations. This will create protection against scratches.
- During dismantling, all materials for repairs are purchased. If you order them, you need to do this so that they arrive at their destination before the end of July.
- This is due to the holiday in August, which all manufacturers go on.
The protective properties of newspaper will help keep materials safe and sound.
It is convenient to store materials in a specially designated room. Their paint varnishes should be kept in places with good ventilation.
Choosing a vanity unit
When choosing a bathroom vanity, you need to follow some simple but important rules
First of all, pay attention to the interior of the bathroom. If all its elements, including plumbing fixtures, hanging cabinets and shelves, are made in a soft style with smooth lines, a strictly rectangular cabinet will be out of place
If the bathroom is decorated in a classic style, which is characterized by luxury and wealth, installing a sink with a cabinet in a minimalist style will not be acceptable in this case. Ideally, this piece of furniture should match the materials and colors of the overall interior design.
When choosing furniture, consider the overall color and interior of the bathroom.
In addition to design, it is necessary to pay attention to other important points, for example, the correct choice of fittings for the product. Handles, legs and hinges must be made of chromed metal
A bedside table with plastic gold-plated or chrome fittings usually loses its original appearance after a couple of months. When purchasing furniture with a colored coating, you should know that the paint on its surface must lie evenly.
The arrangement of the bathroom is also of great importance. For example, if the room has a heated floor, you should not buy furniture with a plinth; it is better to buy a sink cabinet with legs
Such a thing will not heat up from the floor, will significantly facilitate the cleaning process, and will provide the necessary ventilation of the product, which is important for rooms with high humidity.
In terms of furniture functionality, you can be guided by personal preferences. A good option is a cabinet under the sink with a laundry basket, which significantly saves room space. For small bathrooms, there are corner models that take up minimal space, while being quite practical and functional. It’s good if the shelves in the cabinet are adjustable in height, so they can be adjusted to the height of detergents and cleaning products. A roll-out cabinet is another interesting solution for decorating a bathroom. It can be moved to any place, but it has a significant drawback - the difficulty of installing a sink, because all communications (water supply and sewer pipes) are installed permanently. So, you need to choose this piece of furniture based on the purpose of its installation: it will be used to store all kinds of household accessories or simply hide the pipes to the sink.
Redevelopment
When making repairs, you can easily cross the line of the law. This can happen when replacing plumbing, electrical and other communications. Such changes must be shown in the technical passport.
The same applies to work that involves changing walls. Care should be taken when creating openings and moving partitions.
How to avoid breaking the law? It is necessary to contact professionals who are licensed to develop project documentation.
- At the moment, GOSTs and SNiPs are in force in Russia, which are implemented everywhere. However, there are still restrictions set by local legislative bodies.
- For example, in Moscow, such restrictions include a ban on expanding the bathroom at the expense of living rooms, a ban on installing heated floors connected to a hot water supply riser, and a ban on carrying out repair work in dilapidated houses.
The Internet is full of photos of renovated bathrooms where you can see similar violations. You cannot repeat what you saw.
How to properly install a sink with a cabinet in the bathroom
When installing a sink with a floor cabinet, the procedure is as follows: Place the washbasin on the cabinet. Using a level, make it strictly horizontal - adjust the legs of the cabinet.
- Mark on the wall where the washbasin will be fixed.
- Make holes in the wall. Their depth must correspond to the size of the fasteners used. For tiles, take a feather drill, for concrete - with a carbide tip, and use the drill in impact mode. Fix the washbasin with anchor screws or metal pins screwed into dowels.
- Install a mixer and outlet with a siphon. Place the washbasin on the cabinet and press it to the wall with nuts, screwing them onto the studs. Be sure to place plastic spacers under the nuts to protect the housing from damage when tightening the nuts.
- If necessary, make holes in the cabinet for laying pipes.
- Connect the washbasin to the utility systems. Corrugations or pipes can be used to connect to the sewer system. Rubber seals are always used. To connect to the water supply, flexible hoses with union nuts are used. Install instrument taps on the water supply pipes. Check if there are spacers on the nuts. Connect the hoses to the taps, carefully tighten the nuts and tighten them with a wrench.
- Seal the gaps between the bowl and the wall surface with silicone sealant.
- Open the tap and make sure there are no leaks in the area of the threaded connections. If leaky connections are detected, disassemble the connection, add a thin braid of combed flax to the threads or apply 5-6 turns of FUM, re-tighten the connection and tighten it.
- If desired, attach a mirror to the wall above the sink. Using a tape measure and a level, mark the location of the holes for the fasteners, drill them to the optimal depth, insert the dowels and screw the hooks into them. Hang a mirror on them and check its horizontalness with a level.
Installing a wall-mounted cabinet under the sink in the bathroom has some features, which we will describe below.
Practical advice
When installing various plumbing fixtures and equipment, the same problem can be solved in several ways. Which one is better is up to you to decide. We give only professional advice from masters, but there is no consensus among them.
Options for sealing a sink with a wall
- Silicone is applied on the outside around the perimeter of the sink. The traditional method is used in most cases. Disadvantages - low-quality material peels off over time, dirt gets into the gap between it and the sink and becomes very noticeable. You have to periodically remove the old silicone and apply new one. After a year or two, black spots appear on all types of silicone, even on the most expensive ones with antiseptic additives. In addition, over time, it changes its original color, becomes dull, and various stains appear on the surface. It is impossible to eliminate this drawback by cleaning or washing; you have to completely remove the old silicone and apply new one.
You can apply sealant to the joint between the bowl and the cabinet
Advice. Match the color of the sealant to the color of the ceramic tile, not the color of the sink. Due to this, it is possible to make deviations in the width of the gap invisible.
- Silicone is applied around the perimeter of the sink from the back side until it is fixed to the wall. The thickness of the layer and the location of its application are selected in such a way that after pressing against the wall, excess does not appear on the surface.
The disadvantage is that over time the cracks have to be cleaned of dirt. Applying sealant to the back of a sink - Using rubber seals for windows and doors. They have glue on one side, a thickness of approximately 5 mm, and are characterized by high elasticity and long service life. The seals are carefully glued around the perimeter on the back side of the sink before installation, and after pressing they ensure a complete tight fit. Many professional plumbers consider this sealing method to be the most optimal. Nothing peels off, accumulated dirt can be easily removed if necessary, and the service life of the seals is practically unlimited.
Eliminating the gap between the cabinet and the sink
Some washbasins do not have a lip over the side surfaces of the hanging cabinet; water can get into the ends. Responsible manufacturers complete their products with special self-adhesive tape; it is glued before installation on the sink cabinet and closes the cracks. Unfortunately, for various reasons, the thickness of the tape is not enough to compensate for all the gaps.
It is recommended to use rubber window sealant instead of tape, the same as we recommended above. It is glued around the perimeter of the cabinet, after which the sink is put in place.
Seals
Adhesive sealant
The sealing is complete, the possibility of water ingress is completely eliminated. It is not recommended to use silicone sealant for the same reasons. The disadvantage of this method is that there is no additional fixation of the sink to the bathroom. Factory tapes hold the structures together quite firmly, the cabinet and sink work as a single unit.
Below is shown how to eliminate the gap between the washbasin and the cabinet.
Wall cabinet installation technology
Correct installation of the selected model will help save time and avoid the need to redo everything from scratch. Strictly following the instructions will also protect you from property damage and unpleasant health consequences.
Subtleties of installing mounted models ↑
Installing a wall-hung sink, which comes with a cabinet, requires compliance with several rules:
- Securely attach both the cabinet and the washbasin to the wall (if we are talking about a built-in sink).
- For installation, you must choose a wall made of durable material (not plasterboard). Or install mortgages at the stage of rough finishing work.
- All connections must be tightened very carefully, without fanaticism, so as not to damage the coating of the model - excessive efforts can lead to cracks.
For suspended models, anchor bolts (left) and dowels (right) are used.
Step-by-step instructions with video for proper fastening ↑
After all the necessary communications have been brought to the mounting location, we proceed to the installation of the structure itself. How to install a sink with a cabinet in the bathroom:
- We mark the wall for installation and level the cabinet.
- We remove the internal shelves for ease of fastening and install the cabinet on the wall. To do this, you can use anchors (100–140 mm), dowels or a kitchen hanger with evenly spaced dowels.
- We place the sink on a wall-mounted cabinet and use a pencil to mark the locations of the slots in the wall for fastening.
- We remove the washbasin (and possibly the cabinet) and drill into the wall in the marked places. We install anchors or studs for fastening.
- We fasten the cabinet (if it was previously removed), apply sealant along the side edges, install the sink on it, hanging it on studs or anchors. If there is a gap between the cabinet and the washbasin, place silicone furniture pads in this place.
- Carefully install the plastic bushings, washers and nuts included in the kit. Lightly tighten the nuts with a simple open-end wrench.
- We fill the gap between the wall and the surface of the washbasin with sealant.
- We install the siphon and mixer, return the shelves to their place.
https://youtube.com/watch?v=Xf47zggDHtg
Video: installing a cabinet with a sink in the bathroom
Hanging models of bedside tables for bathrooms, romantically called “floating” in English, are a new step in bathroom design. Convenient and easy to install, they are quickly gaining popularity in world markets. Choose a model to match your interior according to your idea, and be on trend!
Installation of a water lily sink
Flat “water lilies” are designed for installation above the washing machine. You need to understand that not every washing machine model can be installed under the sink. Typically these are compact, low-rise devices.
Some companies specifically develop and produce them. It is optimal that the sink comes complete with such a device. In such a tandem, devices usually complement each other perfectly.
If this is not the case, choose the water lily shell very carefully. It should overlap the washing machine by at least 10 cm. This way the latter will be reliably protected from water splashes. Another important point is the presence of a special drain, which should be located as close as possible to the back or side wall of the device.
There are two types of this drain:
- Round. A flat-type siphon is placed directly under the drain hole. Water drains quickly, and this design rarely gets clogged. A significant disadvantage is that the siphon is installed above the washing machine, which is fraught with problems with wiring and short circuits in the event of an emergency.
- Slit-shaped. The siphon is attached to the washing machine in the back wall of the bowl, so if there is a leak, water will not get into the electrical appliance. However, the drain hole is very narrow and often clogs.
For safety reasons, you can look for a sink with an overflow, which will further protect your washing machine from water.
The installation process of the “water lily” is carried out as follows:
- We mark the wall. To do this, draw a horizontal line indicating the upper edge of the device. To ensure that the line is strictly horizontal, use a level. We try the bowl against the drawn line, making sure that there is a sufficient gap between the machine and the sink. If everything is in order, we mark the holes for the fastenings.
- We drill holes and install fasteners. In this case, we use dowel fastenings or anchor bolts.
- We put the brackets in place. They are secured in place with bolts. Do not tighten them tightly at first, leaving gaps of about 0.5 cm.
- We apply sealant to the back of the sink to protect the joint between it and the wall from water. We also apply sealant to the parts of the bracket in contact with the surface of the bowl.
- We put the sink in place. To do this, we put the eyes of the plumbing fixture on metal hooks, after which we fix the device in place using anchors or dowels.
- We check that the sink is securely fastened, and then tighten the bolts that secure the brackets.
At the next stage, a siphon is connected to the sink. This must be done before the brackets are fully tightened.
There are several modifications of siphons for “water lilies”; the procedure for their installation may vary slightly.
In general terms, the work is performed in the following order:
We find the assembly instructions and, in accordance with them, assemble the siphon. All threaded connections and sealing elements must be coated with silicone
Carefully tighten the threads so as not to break the plastic elements. We put the siphon pipe, designed for connection to the washing machine, onto the drain hose
To ensure a strong connection, tighten it with a screw clamp. We check its reliability. If it is insufficient, the pressure of the water drained from the machine may tear off the hose. We connect the siphon outlet to the sewer pipe. It is advisable to further bend the corrugated pipe and secure it in this position with soft wire or electrical tape. This will make it possible to eliminate the possibility of an unpleasant sewer odor, which often happens when installing “water lilies” equipped with a flat siphon.
The design features of the sink do not always allow the faucet to be mounted on a bowl. In this case, it is installed on the wall or on the side of the bathtub to be used alternately with one and another plumbing fixture.
It is important that the spout length of the device is sufficient for such manipulations. In rare cases, the sink is equipped with a hole for the faucet
The mixer is installed in strict accordance with the manufacturer's instructions after installing the siphon and finally securing the sink to the brackets
During the installation process, we pay special attention to high-quality sealing
All seals must be treated with sealant. Threaded connections are sealed with Fum tape or special plumbing tow and paste.
The nuts on the flexible line are made of zinc alloys and are quite fragile, so they must be tightened very carefully, otherwise they may break. Upon completion of installation work, we conduct a test run of water. We carefully inspect all connections, and if a leak is detected, we immediately correct all defects.
Design
When choosing furniture for any room, you need to pay attention to the appearance of the furniture. It must match the design of the room
This is not difficult to do; it is enough to know some of the features of various styles in the interior. For example, for a room designed in a classic style, the following are perfect: a marble countertop, a porcelain sink, a natural wood cabinet with elegant legs. A gold-plated faucet will complement this luxurious interior.
For those who want to create a more modern, airy style, we recommend turning your attention to glass models of cabinets. It is better to choose fittings for furniture with a sink in a different color that does not match, but is in harmony with the color of the furniture
For example, if the cabinet is light, then it is better to choose handles for it in dark shades, but if the cabinet is dark, then select elements in light shades. Thus, if you decide to buy a cabinet with a sink, then you need to do it carefully and with love, so that the bathroom becomes not only comfortable, but also cozy. Allow yourself to safely experiment with different styles, having first familiarized yourself with their features.
Walls
Economical renovation in the bathroom allows you to abandon the boring tiles and replace them with decorative plaster or wood.
- If the second option was chosen, then you cannot do without varnish.
- It prevents water from penetrating the tree, thereby destroying it.
- Products available for purchase in stores will protect you from mold and mildew.
Installation
Installation of a cabinet with a built-in sink consists of several stages. To successfully complete all these stages, you need to follow some rules.
Choosing a location
Usually a new sink is installed in place of the old one. In this case, there is no need to rack your brains over how to install water supply and sewerage. If you want to install a cabinet in a new place, you will have to solve this problem. In addition, the furniture itself should fit there comfortably, and its cabinets should open and close freely. If you are going to buy a wall-mounted vanity unit, make sure the wall is strong.
Carrying out calculations and markings
Carrying out calculations and markings makes it possible to lay the pipes exactly, without damaging the cabinet itself. Fittings, that is, connecting parts of pipelines, must be located above the middle shelf. Incorrect measurements can cause them to rest against walls and furniture shelves. This also applies to the sewerage system. For the drain pipe that comes out of the floor, you will have to drill a hole in the bottom and shelves of the cabinet. Then the corrugated hose will stretch from the bottom to the top. Therefore, it is better to measure everything accurately in advance and run all the pipes through the wall.
Purchasing materials and preparing the necessary tools
During the installation process you will definitely need:
- adjustable wrench;
- FUM tape;
- screwdrivers of different sizes;
- screwdriver;
- mixer;
- siphon;
- plastic corrugated hoses.
If you purchased the furniture unassembled, you will have to first assemble it using a screwdriver. The attached furniture assembly instructions will help you with this. During this procedure, make sure that each part is firmly connected to the other. Because after you install the sink on it, it will no longer be possible to tighten the screws any more.
Installing a vanity unit with a sink
Having gone through the previous stages and successfully prepared all the necessary items and tools, you can begin the process of installing furniture with a sink:
- Turn off the water supply. Connect the faucet with hoses and secure the faucet to the sink. The best type of mixer for a cabinet is a modern single-lever model.
- Use FUM tape (fluoroplastic sealing material) to seal the connecting parts.
- Install a siphon on the drain hole.
- Attach the sink to the surface of the cabinet.
- Move the assembled furniture to the installation site. Do not install the sink cabinet close to the wall, as lack of ventilation may cause mold growth. If you need to attach it to the wall, do so using special bolts. But before that, do the calculations and make notes.
- Move the cabinet away from the installation site and drill at the marked points on the wall. Insert the dowels there, return the cabinet back and secure it with bolts.
- Connect the sewer pipe and the water supply system. This completes the installation process.
In the process of installing furniture with a washbasin, difficulties sometimes arise. For example, if the sewer hose prevents the furniture from fitting tightly to the wall, then it will be necessary to saw off part of the shelf, bottom or wall of the cabinet. To do this, use a hacksaw or jigsaw. Or, for example, there are no holes in the sink for bolts to install it on the wall. In this case, you can glue it with silicone glue.
Sink testing
After completing the assembly and installation of the cabinet with washbasin, check the functionality of the entire structure. First, check the reliability and stability of the cabinet, then turn on the water and check that there are no leaks anywhere. If everything works properly, then you can safely hand over the work or enjoy the new furniture.
Instructions for installing a wall-hung sink
Marking
Installation begins with markings. To make it more convenient to mark the locations of future holes, ask one of your family members to hold the sink to estimate its location.
When marking, you should not rush - redoing it later will be much more difficult than hanging the sink correctly right away.
Therefore, use a tape measure and a hydraulic level. Use them to mark the places where you need to drill holes for the mounting studs.
Drilling holes
Drill holes carefully, holding the hammer drill or hammer in one position. If the drill “walks” from side to side when drilling, the hole will come out uneven with broken edges. Therefore, efforts should be made to prevent this from happening.
After the tiles are drilled, the drill should be changed to a carbide drill and holes should be made to the required depth.
Remove debris from the holes and insert dowels into which you should screw the mounting pins included with the sink, which will hold it in place after installation.
Sink installation
The sink is placed on mounting studs screwed into dowels, after which nuts are screwed onto the studs, securely fixing it to the wall.
A gasket made of elastic rubber or polymer material and a metal washer must be placed under each nut:
The nuts are tightened alternately - a few turns on one, then a few turns on the other. This will allow the resulting forces to be more evenly distributed in the sink body, without leading to its destruction.
Mixer installation
If you purchased a sink with a hole for a faucet, installation should be done quite carefully. A flexible liner is connected to the mixer:
After this, the mixer is inserted into the hole in the sink and securely pressed through the gasket with a fixing nut.
Connecting a wall-hung sink to the water supply
After the sink is securely fixed and the mixer is installed on it, you can begin connecting it to water and sewerage.
To connect to the water supply, use a flexible liner, the connection of which does not require any plumbing skills from you. On one side of the flexible hose there is a union nut with a rubber gasket inside, and on the other side there is a threaded part that is screwed into the mixer. One side of the liner is screwed to the branch pipe of the water pipe, and the other side to the corresponding branch pipe of the mixer.
Connection to sewerage
Connecting to the sewer will require a free hole in the sewer outlet pipe, which may be above the floor or embedded in the wall. If you are making a replacement, then you don’t have to look for a hole - just insert the outlet pipe in the same place where the dismantled sink was connected.
The siphon inlet pipe is screwed into the outlet hole:
To prevent unpleasant odors from leaking into the room from the point where the outlet pipe is connected to the sewer, the connection point must be sealed with a rubber ring, which can be lubricated with soap during installation to make connection of the outlet easier.
If the sink is equipped with an overflow hole, the overflow tube should also be connected to the outlet.
In the video below you can watch all the stages of installing a wall-hung sink:
As you can see, installing a wall-hung sink does not present any particular difficulties and you can easily perform all the necessary operations yourself.
Where to place
Taking into account the fact that in any bathroom, be it a new apartment or an existing home, there are connections for sewer and water pipes for hot and cold water, it is recommended to install a sink with a cabinet either in the place of the previous one (during renovation) or not far from the water supply (in a new apartment).
In any case, first you need to carefully measure the room, taking into account the further planned location of all other pieces of furniture and possible household appliances, and also, depending on the type of cabinet being installed, pay attention to the material of the supporting structure and the finishing of the floor and walls
When installing a hanging cabinet, it should be taken into account that the greatest load falls on the mounting points with the wall due to its large weight (taking into account what is being filled). Thus, it is advisable to install hanging cabinets under the sink only on durable finishing materials, such as ceramic tiles on a concrete or brick base. Otherwise, at any moment the entire structure may fall under its own weight, which will lead to costly repairs in the future.
Floor cabinets are not recommended to be installed on a soft bathroom floor, as over time, damage caused by its weight will be inevitable.
A cabinet with a lower plinth should not be placed on heated floors, in order to avoid heating the structural parts and their further deformation.
It is necessary to correctly connect the pipes coming out of the wall with the installed cabinet, since they should not come into contact with the internal elements of the furniture, namely, with the end surfaces of the existing shelves, which is achieved by preliminary measuring the distance from the coupling connections of the supplied pipes to the floor covering. For proper installation of the cabinet under the sink, the supply pipe must be level above the middle shelf of the cabinet.
Sewer drainage should be combined in the same way. If the sewer drain is located in the floor, a hole is made in the lower part of the cabinet through which the drain hose will connect the sink siphon and the sewer.
Sources
- https://bezsantexnika.ru/ustanovka/rakoviny-s-tumboj.html
- https://serviceyard.net/stroitelstvo-i-remont/ustanovka-rakovinyi-s-tumboy-v-vannoy.html
- https://vezuvdom.ru/articles/ustanovka-rakoviny-s-tumboy-v-vannoy/
- https://seberemont.ru/kak-ustanovit-umyvalnik-s-tumboj/
- https://krasivaya-vannaya.ru/santehnika/249-ustanovka-rakoviny-s-tumboj.html
- https://www.stroy-podskazka.ru/vannaya/rakoviny/s-tumboj-ustanovka/
Preparation is the key to success!
In order for a hand-made cabinet to be functional and comfortable, it is important to think through everything down to the smallest detail. First, you need to decide what the bedside table is for. Will it serve more as a decorative decoration, or is it more needed as a functional cabinet in which you can store household chemicals and other necessary supplies without any problems? Perhaps you just need to hide the pipes? When creating a drawing or diagram, keep these important points in mind.
- The design of the cabinet should fit harmoniously into the overall interior of the bath. If the bathroom is made in light blue tones, smooth lines are observed, then the decision to make a bright orange cabinet, and even a corner one, would be absurd! Pay special attention to the shape, size and design of the vanity cabinet.
- As for the choice of material, we have already talked about this above. Separately, it is worth mentioning the fittings. It must also meet certain parameters. For example, with increased moisture, its coating should not be damaged, otherwise very soon the shiny fittings will resemble gray and nondescript asphalt. The ideal option is chrome plated metal.
In general, everything completely depends on your taste and preferences.
Assembly with preliminary preparation
First, the figured cut and processing are performed. To do this, you need to take a jigsaw with a saw to cut wood and chipboard. Now place the drop-in sink on the back of the countertop.
It is best to cut from the reverse side as well. In this case, all chips will remain inside. If it is more convenient for you to do the opposite, then you can use a file with reverse sharpening. Before cutting, you should retreat 16 mm from the front edge for the drawer.
One of the difficult moments is cutting out the false panel for a shaped sink. Therefore, it is worth reminding again to carry out all your actions carefully and think through them in advance.
When making a cabinet, it is recommended to treat all cut areas with silicone sealant. At the same time, you shouldn’t feel sorry for him.
In each case, the assembly of the drawers, bottom and side parts is carried out according to the same principle. To confirm, it is necessary to drill through holes in the plane of the sidewalls, the diameter of which should be eight millimeters. The trim of the base, side and bottom is drilled with a 5 mm drill. The hole depth should be 60 mm. It is necessary to retreat up to 50 mm from the edges. The tabletop and false panel are attached using furniture corners with 4×16 self-tapping screws. If we talk about confirmations, then choose standard ones, 5x70 mm in size. To secure the facades, it is necessary to install hinges. For this, holes are drilled. Measure 140 mm from the top, 60 mm from the bottom, and 22 mm from the end of the door. For the hole, it is recommended to use a special loop cutter with a diameter of 35 mm. In the end, all that remains is to install the legs on the bottom of the structure. They are also secured with self-tapping screws.
All that remains is to fit the cabinet under the sink.